“Can you bring dessert? But please, no oven. It’s 97 degrees.” That was the text I got from my sister last July, and honestly, I felt her pain. My kitchen was already a sauna, and the last thing I wanted to do was turn on the oven and melt into a puddle on the floor.
I stared into my pantry, sweating just a little bit. I had graham crackers, a bag of marshmallows, some chocolate bars leftover from a camping trip, and a carton of heavy cream. A classic s’mores craving was hitting hard, but the thought of a campfire (or even a broiler) made me want to cry. That’s when it hit me—why not just layer them all together and let the fridge do the work?
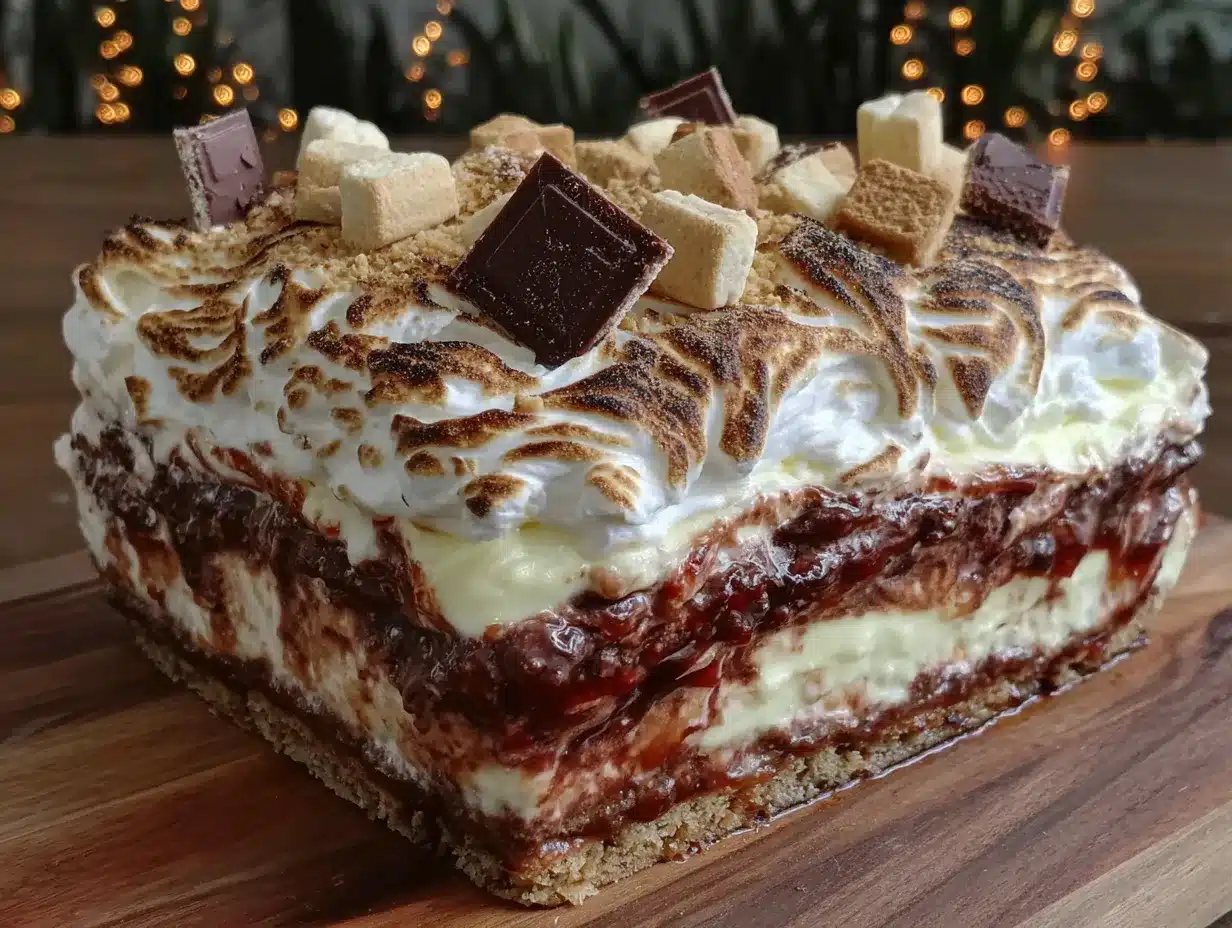
This Easy No-Bake S’mores Icebox Cake was born out of pure desperation and a serious lack of air conditioning. It’s the kind of recipe that feels like a happy accident. You know, the one where you just start stacking things and hope for the best? Well, this was the best. That first bite was cold, creamy, crunchy, and tasted exactly like a campfire memory—without the smoke smell or the melted marshmallow stuck to your fingers. It was a total game-changer for summer desserts.
This isn’t just a cake; it’s a solution to a very real, very hot problem. It’s the dessert you make when you want to impress without breaking a sweat. Trust me on this one.
Why You’ll Love This Recipe
Let’s be real for a second. There are a million dessert recipes out there, but this one is different. It’s not just another version of a s’mores treat—it’s the easiest, most foolproof way to get that classic campfire flavor without any of the work. Here’s why this one sticks.
- No Oven Required: This is the ultimate hot-weather dessert. When it’s too hot to even think about baking, this icebox cake is your new best friend. It comes together in about 20 minutes, and then the fridge does all the heavy lifting.
- Simple, Pantry-Friendly Ingredients: You probably already have everything you need. Graham crackers, chocolate, marshmallows, and cream. No fancy grocery store trips or obscure ingredients required. It’s the definition of simple.
- Perfect for Summer Gatherings: Whether it’s a 4th of July BBQ, a backyard potluck, or a simple family dinner, this cake is a guaranteed crowd-pleaser. It’s a showstopper that looks way more complicated than it actually is. I’ve brought it to countless summer parties, and it always disappears first.
- Unbelievably Delicious Texture: The magic of an icebox cake is the transformation. The graham crackers soften into a tender, cake-like layer, while the creamy filling stays rich and cold. It’s pure comfort food, reimagined for the summer.
- Totally Customizable: This recipe is a perfect base for your own creativity. Swap the chocolate, add a layer of peanut butter, or throw in some fresh berries. It’s impossible to mess up.
This isn’t just a dessert—it’s an experience. It’s the kind of thing that makes you close your eyes after the first bite and just… sigh. It’s nostalgic, it’s refreshing, and it’s exactly what a hot summer day needs.
What Ingredients You Will Need
This recipe uses simple, wholesome ingredients that work together to create something truly special. The beauty of this Easy No-Bake S’mores Icebox Cake is that it relies on pantry staples to deliver that bold, campfire flavor without any fuss. Here’s what you’ll need to grab.
For the Creamy Filling
- 2 cups heavy whipping cream (cold, for best volume)
- 1/2 cup powdered sugar (adds sweetness and stabilizes the cream)
- 1 teaspoon vanilla extract (pure vanilla adds the best flavor)
- 1/2 cup marshmallow fluff (this is my secret for that authentic s’mores taste and a super stable filling)
For the Layers
- 1 box (14.4 oz) graham crackers (you’ll need about 3 full sleeves; I prefer Honey Maid for their consistent texture)
- 2 cups semi-sweet chocolate chips (or chopped chocolate bars; I use Ghirardelli for a rich, smooth melt)
- 1/2 cup heavy cream (to make the ganache)
- 1 cup mini marshmallows (for garnish and that final campfire touch)
- 1/2 cup chocolate shavings or a chocolate bar for shaving (optional, but it makes it look fancy)
Ingredient Tips & Substitutions: For the filling, make sure your cream is very cold. If you can’t find marshmallow fluff, you can use an additional 1/2 cup of powdered sugar, but the fluff really gives it that signature s’mores flavor. If you’re looking for a dairy-free option, you can use a full-fat coconut cream that has been chilled overnight, but the texture will be slightly different. For the chocolate, a good quality chocolate bar is always better than chocolate chips for the ganache, as it melts more smoothly. I’ve also used a mix of milk and dark chocolate for a more complex flavor profile.
Equipment Needed
The best part about this recipe? You don’t need any fancy equipment. Here’s the short list of tools that will make the process a breeze.
- 9×13-inch baking dish or serving dish: This is the perfect size for a standard box of graham crackers. A glass dish is nice so you can see the layers.
- Electric hand mixer or stand mixer: You’ll need this to whip the cream to stiff peaks. A whisk and some serious arm strength will also work, but I don’t recommend it on a hot day.
- Medium microwave-safe bowl: For making the chocolate ganache. I’ve used a double boiler, but the microwave is so much faster and easier.
- Spatula: A rubber spatula is essential for folding the marshmallow fluff into the cream and spreading the layers evenly.
- Sharp knife or bench scraper: For cutting the cake into clean slices. A hot knife works wonders.
If you don’t have a 9×13 dish, you can use a square 8×8 dish and just break the graham crackers to fit. I’ve even made this in a loaf pan for a smaller, more intimate dessert. For the mixer, any hand mixer will do the job—you don’t need a professional-grade stand mixer for this.
Preparation Method
Alright, let’s get to the fun part. This step-by-step guide will walk you through making the most incredible, no-fuss icebox cake. Take your time, and don’t worry about being perfect—it’s going to look amazing no matter what.
- Make the Chocolate Ganache (5 minutes): Place the 2 cups of semi-sweet chocolate chips in a medium microwave-safe bowl. Heat the 1/2 cup of heavy cream in the microwave for about 45 seconds, until it’s just steaming. Pour the hot cream over the chocolate chips. Let it sit for 2 minutes, then stir slowly until the chocolate is completely melted and smooth. Set it aside to cool slightly while you make the filling.
- Whip the Cream Filling (5 minutes): In a large bowl, pour the 2 cups of cold heavy whipping cream. Using your hand mixer, beat the cream on medium speed until it starts to thicken. Add the 1/2 cup of powdered sugar and the 1 teaspoon of vanilla extract. Continue beating until soft peaks form. The cream should be thick and fluffy but not quite stiff.
- Add the Marshmallow Fluff (2 minutes): Gently fold the 1/2 cup of marshmallow fluff into the whipped cream using your rubber spatula. Fold until it is fully combined and there are no white streaks. This creates a super stable, sweet, and creamy filling that tastes just like a toasted marshmallow. Be gentle—you don’t want to deflate the cream.
- Start Layering (5 minutes): Spread a very thin layer of the cream mixture on the bottom of your 9×13-inch dish. This helps the graham crackers stick. Place a single layer of graham crackers over the cream, breaking them to fit as needed. You want them to cover the bottom completely.
- Build the Cake (10 minutes): Spread about 1/3 of the remaining cream mixture evenly over the graham crackers. Drizzle about 1/3 of the slightly cooled chocolate ganache over the cream. Repeat the layers: graham crackers, cream, ganache. You should have three layers of graham crackers and three layers of cream and ganache. End with a final layer of graham crackers.
- Top with Ganache and Marshmallows (5 minutes): Pour the remaining chocolate ganache over the top layer of graham crackers. Use your spatula to spread it evenly, letting it drip down the sides a little for that rustic look. Sprinkle the 1 cup of mini marshmallows over the top. If you want a slightly toasted look, you can use a kitchen torch to lightly brown the marshmallows, but this is totally optional.
- Chill (At least 6 hours, preferably overnight): This is the most important step. Cover the dish with plastic wrap and place it in the refrigerator. The cake needs at least 6 hours to set, but overnight is best. This allows the graham crackers to soften and absorb the cream, transforming into a tender, cake-like texture. The wait is so worth it.
- Serve (5 minutes): Once the cake is fully chilled and set, remove it from the fridge. If you want, you can top it with some chocolate shavings. Use a sharp knife to cut clean squares. For the neatest slices, wipe the knife clean between each cut. Serve cold and watch it disappear.
Pro Tip: If your ganache seems too thick to drizzle, just microwave it for 10-second intervals, stirring in between, until it’s a pourable consistency. If your cream isn’t whipping up, make sure your bowl and beaters are very cold—I sometimes pop them in the freezer for 10 minutes before I start.
Cooking Tips & Techniques
I’ve made this Easy No-Bake S’mores Icebox Cake more times than I can count, and I’ve learned a few things along the way. Here are my best tips to make sure yours turns out perfect every single time.
- Don’t Over-Whip the Cream: This is the number one mistake. You want the cream to be thick and hold its shape, but if you whip it too long, it will turn into butter. Stop as soon as you have stiff peaks that stand up on their own. A little bit of wobble is fine.
- Let the Ganache Cool: If you pour hot ganache directly onto the cream, it will melt it and make everything runny. Let it cool for 10-15 minutes until it’s warm to the touch but not hot. It should still be pourable.
- Use a Sharp Knife for Clean Slices: The cake is very soft and creamy. For the best presentation, use a long, sharp knife and wipe it clean with a damp paper towel between each cut. This prevents the layers from smearing together.
- Patience is Key: I know it’s hard to wait, but the chilling time is non-negotiable. The first time I made this, I tried to cut into it after only 4 hours, and it was a complete mess. The graham crackers were still crunchy, and the layers just slid apart. Giving it a full 8 hours (or overnight) allows the magic to happen.
- Make it Ahead: This is the perfect make-ahead dessert. You can assemble the entire cake a day or two in advance and keep it covered in the fridge. The flavors actually get better as they meld together. It’s a lifesaver for parties.
Variations & Adaptations
One of the best things about this recipe is how easy it is to change up. Don’t be afraid to make it your own. Here are a few of my favorite variations that I’ve tried over the years.
- Peanut Butter S’mores: This is my husband’s favorite. Before adding the cream layer, spread a thin layer of creamy peanut butter on each graham cracker. The salty, nutty flavor pairs perfectly with the chocolate and marshmallow.
- Berry S’mores: For a fresh, summery twist, add a layer of sliced fresh strawberries or raspberries between the cream and ganache. The tartness of the berries cuts through the richness of the dessert beautifully. This is especially good for a 4th of July party, similar to my Fresh Red, White, and Blue Fruit Pizza.
- Mint Chocolate S’mores: Swap the vanilla extract for peppermint extract in the cream filling. Top the cake with crushed-up peppermint candies or a few Andes mints for a refreshing chocolate-mint combo.
- Gluten-Free Option: Simply use your favorite gluten-free graham crackers. The recipe works exactly the same way! I’ve used several different brands, and they all soften up perfectly in the fridge.
- Extra Chocolatey: If you’re a true chocoholic, use chocolate graham crackers instead of honey ones. You can also add a layer of chocolate pudding mix (prepared) on top of the cream for an even richer dessert.
Serving & Storage Suggestions
This cake is best served cold, right out of the fridge. The contrast between the cold, creamy filling and the soft, tender graham crackers is pure perfection. Here’s how to serve and store it.
Serving: Cut the cake into squares and serve it on a chilled plate. It’s fantastic on its own, but you can also serve it with a dollop of extra whipped cream or a scoop of vanilla ice cream for an extra-indulgent treat. A drizzle of extra chocolate sauce never hurts either. For a fun presentation, you can even serve it in individual cups or mason jars. This dessert is a natural fit for any summer BBQ, and it pairs wonderfully with the smoky flavors from the grill, like the BBQ Pulled Pork Sliders.
Storage: Store any leftovers covered tightly in the refrigerator. The cake will stay fresh for up to 4-5 days. Honestly, it’s even better on day 2 and 3, as the flavors have more time to meld together. The texture remains perfectly soft and creamy.
Freezing: You can also freeze this cake! Once it’s fully set, wrap the entire dish (or individual slices) tightly in plastic wrap, then in a layer of aluminum foil. It will keep in the freezer for up to 2 months. When you’re ready to serve, thaw it in the refrigerator overnight. The texture will be slightly denser, but still incredibly delicious.
Nutritional Information & Benefits
Let’s be honest, this is a treat, and it’s meant to be enjoyed. But here’s a quick look at what you’re getting in each serving. Please note that these are estimates and can vary based on specific brands and ingredients used.
Estimated Nutritional Values (per serving, based on 12 servings):
- Calories: ~450
- Fat: 28g
- Carbohydrates: 52g
- Protein: 5g
- Sugar: 38g
Dietary Considerations: This recipe contains dairy and gluten. For a gluten-free version, simply use gluten-free graham crackers. For a dairy-free version, you can try using a full-fat coconut cream (chilled) for the whipped topping and a dairy-free chocolate for the ganache. The texture will be different, but the flavor will still be amazing.
A Note on Wellness: I’m a firm believer in balance. This dessert is about joy, celebration, and making memories. It’s the kind of thing you make for a special occasion or a hot summer night when you just need something comforting. Enjoy it with the people you love, and don’t worry about the numbers. Life is too short for bad desserts.
Conclusion
This Easy No-Bake S’mores Icebox Cake is more than just a recipe—it’s a summer survival tool. It’s the answer to the “what’s for dessert?” question on the hottest days of the year. It’s simple, it’s stunning, and it tastes like pure nostalgia.
I love this recipe because it brings people together. It’s the kind of dessert that makes everyone at the table smile, from the kids to the grandparents. It’s forgiving, it’s flexible, and it’s absolutely foolproof. Whether you keep it classic or try one of my variations, I promise you’re going to love it.
Now I want to hear from you! Have you ever made an icebox cake before? What’s your favorite way to enjoy s’mores? Drop a comment below and let me know. And if you make this recipe, please share a photo and tag me—I love seeing your creations! If you’re looking for another quick and easy no-bake dessert, you have to try my Easy No-Bake Firecracker Cheesecake Bars. Happy no-baking!
Frequently Asked Questions (FAQs)
Can I use store-bought whipped topping instead of making my own?
Yes, you can! If you’re short on time, you can use a 16-ounce tub of Cool Whip or another frozen whipped topping. Just make sure it’s completely thawed before you fold in the marshmallow fluff. The texture will be slightly lighter, but it will still work perfectly.
My ganache is too thick. How can I fix it?
No worries at all! This happens sometimes. Simply microwave the ganache in 10-second increments, stirring well after each one, until it becomes a smooth, pourable consistency. You can also add a tablespoon of warm cream and stir it in to thin it out.
Can I make this recipe in a different size dish?
Absolutely. You can use an 8×8 square dish for a taller, thicker cake, or even a loaf pan for a smaller version. Just adjust the number of layers and break your graham crackers to fit the pan. The chilling time will remain the same.
How long does this cake need to chill?
I recommend at least 6 hours, but overnight is truly best. This gives the graham crackers enough time to absorb the moisture from the cream and soften into that perfect, tender cake-like texture. Cutting into it too early will result in a crunchy, layered mess.
Can I add other toppings besides marshmallows?
Yes, the sky’s the limit! Crushed graham crackers, chocolate shavings, chopped nuts, fresh berries, a drizzle of caramel sauce, or even some flaky sea salt are all fantastic options. Make it your own and have fun with it.
Pin This Recipe!
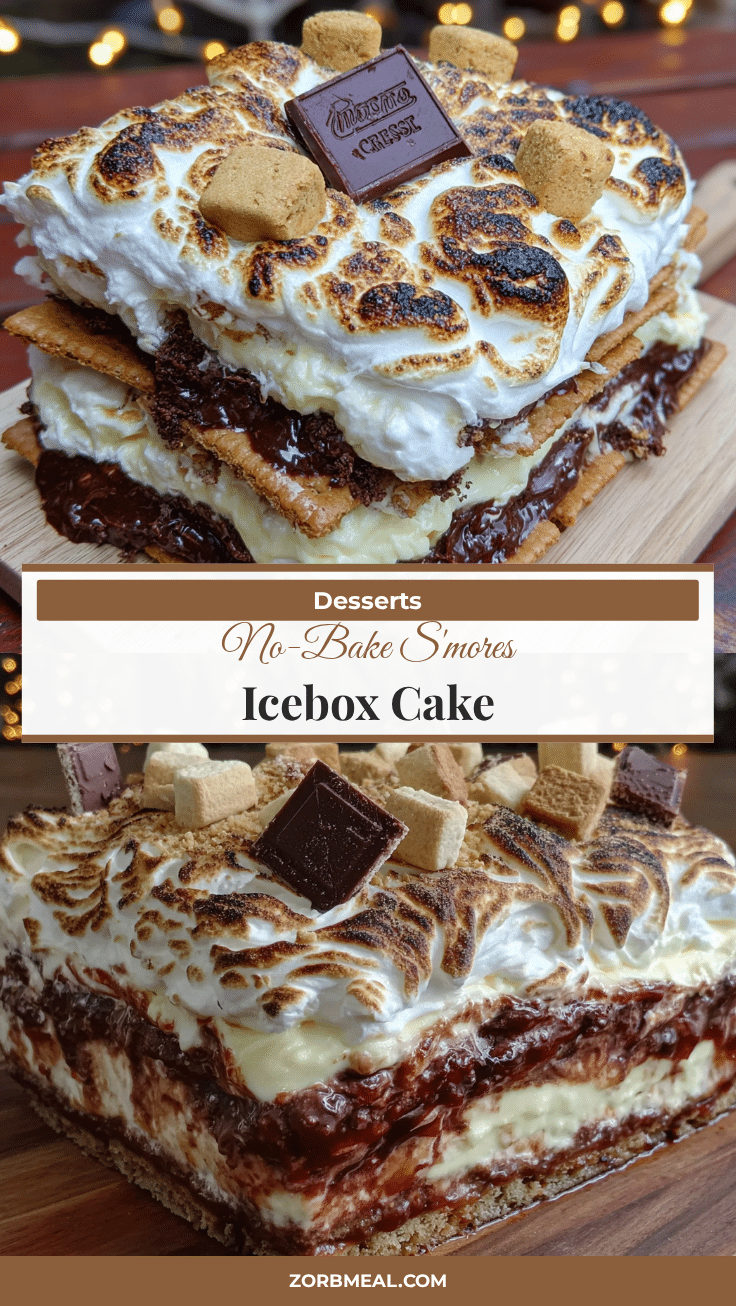
Easy No-Bake Smores Icebox Cake: Best Summer Dessert
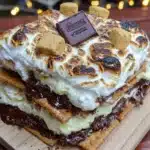
This Easy No-Bake S’mores Icebox Cake is a perfect summer dessert that requires no oven. Layers of graham crackers, creamy marshmallow filling, and rich chocolate ganache create a cold, creamy, and crunchy treat that tastes just like a campfire memory without the heat.
- Prep Time: 20 minutes
- Cook Time: 0 minutes
- Total Time: 6 hours 20 minutes (includes chilling)
- Yield: 12 servings 1x
- Category: Dessert
- Cuisine: American
Ingredients
- 2 cups heavy whipping cream (cold)
- 1/2 cup powdered sugar
- 1 teaspoon vanilla extract
- 1/2 cup marshmallow fluff
- 1 box (14.4 oz) graham crackers (about 3 full sleeves)
- 2 cups semi-sweet chocolate chips
- 1/2 cup heavy cream (for ganache)
- 1 cup mini marshmallows
- 1/2 cup chocolate shavings or a chocolate bar for shaving (optional)
Instructions
- Make the Chocolate Ganache: Place 2 cups semi-sweet chocolate chips in a medium microwave-safe bowl. Heat 1/2 cup heavy cream in the microwave for about 45 seconds until steaming. Pour hot cream over chocolate chips. Let sit for 2 minutes, then stir until smooth. Set aside to cool slightly.
- Whip the Cream Filling: In a large bowl, beat 2 cups cold heavy whipping cream on medium speed until it starts to thicken. Add 1/2 cup powdered sugar and 1 teaspoon vanilla extract. Continue beating until soft peaks form.
- Add the Marshmallow Fluff: Gently fold 1/2 cup marshmallow fluff into the whipped cream using a rubber spatula until fully combined and no white streaks remain.
- Start Layering: Spread a very thin layer of the cream mixture on the bottom of a 9×13-inch dish. Place a single layer of graham crackers over the cream, breaking to fit as needed.
- Build the Cake: Spread about 1/3 of the remaining cream mixture evenly over the graham crackers. Drizzle about 1/3 of the slightly cooled chocolate ganache over the cream. Repeat layers: graham crackers, cream, ganache, ending with a final layer of graham crackers (three layers total).
- Top with Ganache and Marshmallows: Pour remaining chocolate ganache over the top layer of graham crackers and spread evenly. Sprinkle 1 cup mini marshmallows over the top. Optionally, use a kitchen torch to lightly brown the marshmallows.
- Chill: Cover the dish with plastic wrap and refrigerate for at least 6 hours, preferably overnight, until the graham crackers soften and the cake is set.
- Serve: Remove from fridge, top with chocolate shavings if desired. Use a sharp knife to cut clean squares, wiping the knife clean between cuts. Serve cold.
Notes
For best results, chill overnight. If ganache is too thick, microwave in 10-second intervals until pourable. For clean slices, wipe knife between cuts. Can be made ahead and stored in fridge for up to 4-5 days. Freezes well for up to 2 months.
Nutrition
- Serving Size: 1 square
- Calories: 450
- Sugar: 38
- Sodium: 200
- Fat: 28
- Saturated Fat: 16
- Carbohydrates: 52
- Fiber: 2
- Protein: 5
Keywords: no-bake, icebox cake, s'mores, summer dessert, easy dessert, no oven, graham crackers, chocolate, marshmallow