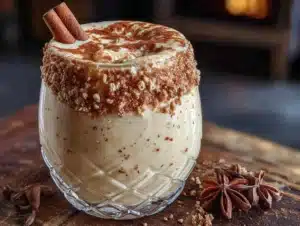
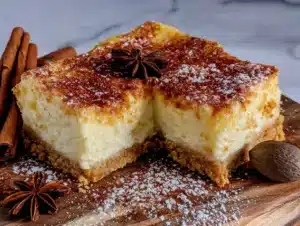
Maria wasn’t trying to impress anyone. I’d stopped by her place to borrow a cake pan—mine had mysteriously vanished after Thanksgiving—and the smell hit me before I even got through the doorway. It was warm and spicy, like nutmeg and vanilla had gotten married and were throwing a party in her kitchen. She was pulling a baking dish out of the oven, completely nonchalant, like she’d just boiled water or something equally mundane.
“Oh, those are just eggnog cheesecake bars,” she said, waving her hand. “Leftover eggnog from the party last night. Had to use it up.”
Let me tell you, “just” was doing a lot of heavy lifting in that sentence. I stood there, cake pan forgotten, watching her slice into these gorgeous layers—a buttery crust, a creamy filling that looked like it had been whipped by angels, and the faintest dusting of nutmeg on top. She handed me one on a paper towel, still warm, and I took a bite. Honestly, I think I made a sound that would have been embarrassing in public. The texture was ridiculous—smooth and rich, but not heavy. The eggnog flavor was there, but subtle, like it was whispering instead of shouting. And that crust? It had this slight saltiness that made everything else pop.
“You okay?” she asked, because I was just standing there, chewing, with this look on my face like I’d discovered fire.
I mumbled something about needing that recipe, and she laughed. “It’s nothing. I just threw it together.”
That’s the thing about the best recipes, isn’t it? They come from people who don’t realize they’re doing something special. Maria wasn’t a food blogger or a chef. She was just a mom who had leftover eggnog and a craving for something sweet. But that casual, no-big-deal attitude is exactly what makes these eggnog cheesecake bars so perfect for holiday hosting. They look impressive—like you spent hours fussing—but they’re secretly simple. The kind of dessert you can make while your guests are mingling, or even the night before, and nobody will ever know you didn’t break a sweat.
I’ve made these eggnog cheesecake bars at least a dozen times since that day. For Christmas dinner, for cookie swaps, for that moment when someone drops by unexpectedly and you need to look like you have your life together. And every single time, I think of Maria, standing in her kitchen in her slippers, making something extraordinary like it was nothing. Maybe you’ve had that moment too—where a recipe finds you when you least expect it, and suddenly it becomes yours.
Why You’ll Love This Recipe
Let’s be honest—holiday hosting comes with enough stress. You don’t need a dessert that requires a culinary degree and a therapy session. These eggnog cheesecake bars are the answer to your December prayers. Here’s why they’ll become your go-to:
- Make-Ahead Magic : These bars actually get better after a night in the fridge. The flavors meld together, the texture firms up perfectly, and you get to cross “dessert” off your list a full day before your guests arrive. That’s a win in my book.
- Simple Ingredients : No hunting down obscure spices or specialty items. You probably have most of this in your pantry right now. The eggnog does the heavy lifting for flavor, so you don’t need a dozen different ingredients.
- Perfect for Parties : These bars slice cleanly, travel well, and don’t require plates or forks if you cut them small enough. They’re basically the perfect potluck dessert—no melting, no crumbling, no drama.
- Crowd-Pleaser : I’ve served these to kids who claim they hate eggnog, to adults who are “not really dessert people,” and to my uncle who only eats pie. They all disappeared. Every single one.
- Unbelievably Delicious : The combination of the buttery shortbread crust, the creamy eggnog cheesecake layer, and that subtle hint of nutmeg and cinnamon is pure comfort. It’s like a hug in bar form.
What makes these different from every other eggnog dessert out there? It’s the texture, honestly. Most eggnog cheesecake bars I’ve tried are either too dense or too custard-like. These hit that sweet spot—creamy but firm, rich but not heavy. The secret is using room-temperature ingredients and not overbaking. Trust me, I learned that the hard way after one batch turned into eggnog scrambled eggs. We don’t talk about that batch.
These eggnog cheesecake bars are the kind of dessert that makes people close their eyes after the first bite. It’s comfort food reimagined—familiar enough to feel nostalgic, but special enough to feel like an occasion. Perfect for impressing your holiday crowd without spending your whole day in the kitchen.
What Ingredients You Will Need
This recipe uses simple, wholesome ingredients to deliver that rich, holiday flavor without any fuss. Most of these are pantry staples, especially if you’ve already stocked up for the season. Let’s break down what you’ll need and why each ingredient matters.
For the Crust
- 1 ½ cups graham cracker crumbs (about 12 full sheets) — You can use store-bought crumbs, but I prefer crushing my own. It gives you a better texture and you can control the consistency. Look for crumbs that are fine but not powdery.
- ¼ cup granulated sugar — Just enough to sweeten the crust without making it candy-like.
- 6 tablespoons unsalted butter, melted — Use real butter here, not margarine. It makes a difference in flavor and helps the crust hold together. I recommend Land O’Lakes or Kerrygold for the best taste.
- Pinch of salt — Don’t skip this. It balances the sweetness and makes the crust taste more buttery.
For the Cheesecake Filling
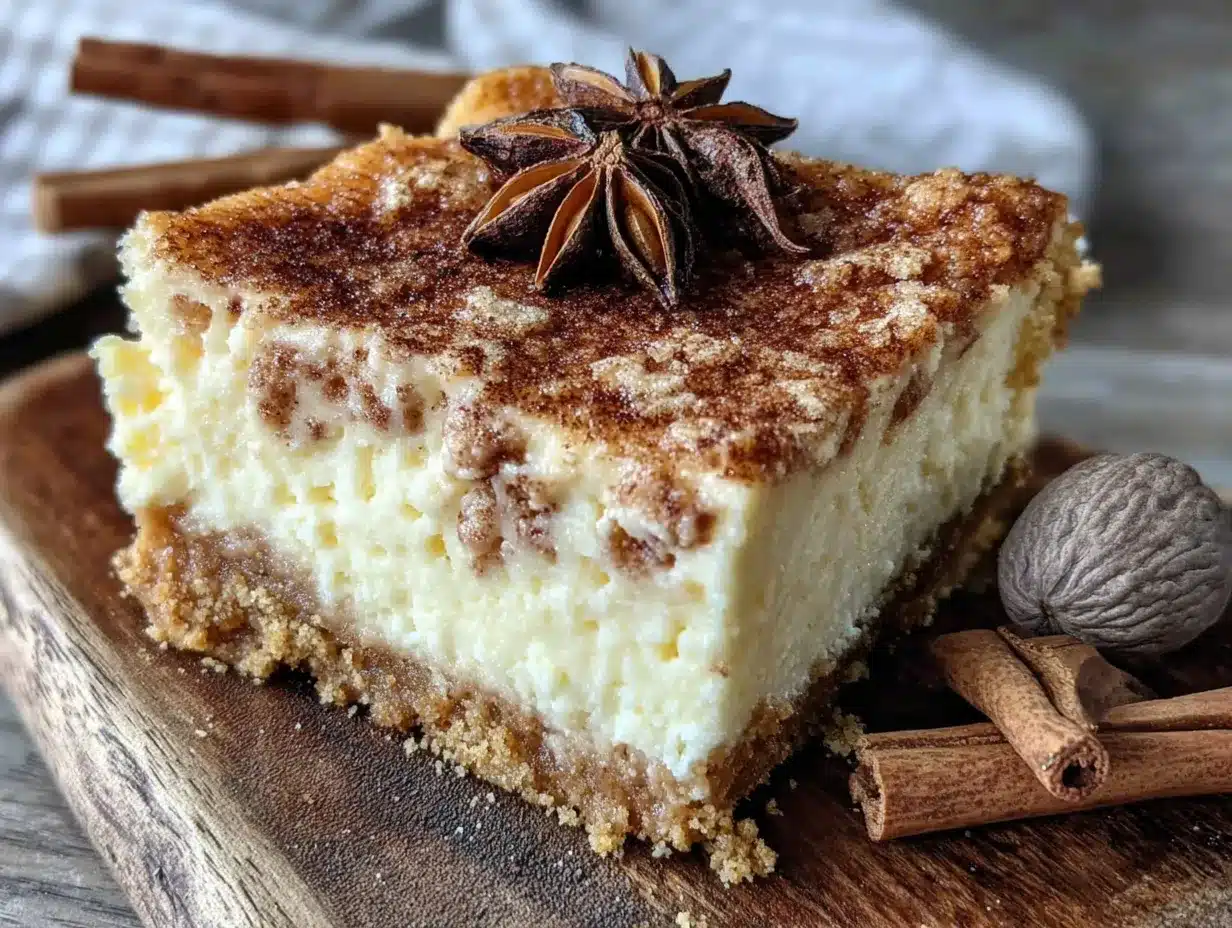
- 16 ounces cream cheese, softened — This is non-negotiable. The cream cheese needs to be at room temperature, or you’ll end up with lumps. I always take mine out of the fridge at least an hour before I start. Philadelphia cream cheese is my go-to for consistent results.
- ½ cup granulated sugar — Adds sweetness without overpowering the eggnog flavor.
- 2 large eggs, room temperature — Cold eggs can seize up the batter. Leave them on the counter with the cream cheese.
- 1 cup eggnog — The star of the show. Use full-fat eggnog for the creamiest texture. I’ve tried this with low-fat eggnog, and it works, but the texture is noticeably thinner. For the best results, go with the real stuff. I recommend Hood or Southern Comfort brands.
- 1 teaspoon vanilla extract — Pure vanilla, not imitation. It adds warmth and depth.
- 1 tablespoon all-purpose flour — This helps stabilize the cheesecake and prevents cracking. It’s a little trick I learned from a pastry chef friend.
- ½ teaspoon ground nutmeg — Freshly grated if you have it. Pre-ground works too, but fresh nutmeg has a more aromatic, less dusty flavor.
- ½ teaspoon ground cinnamon — Adds that classic holiday warmth. Ceylon cinnamon is milder and sweeter, while Cassia is more intense. Either works.
For the Topping (Optional but Recommended)
- ½ cup heavy cream — For whipping into a fluffy topping. If you’re short on time, store-bought whipped cream works too.
- 1 tablespoon powdered sugar — Just enough to sweeten the cream.
- Extra nutmeg for dusting — Because presentation matters, and that little sprinkle of nutmeg on top screams “holiday.”
Substitution Guidance : If you need a gluten-free option, use gluten-free graham crackers or crushed gluten-free cookies for the crust. For a dairy-free version, use vegan cream cheese and a dairy-free eggnog substitute—though I’ll warn you, the texture won’t be quite as rich. If you’re out of nutmeg, pumpkin pie spice works in a pinch, but reduce the cinnamon slightly to balance the flavors.
Ingredient Selection Tip : When choosing eggnog, look for one that’s thick and creamy, not watery. The thicker the eggnog, the richer your cheesecake bars will be. And if you’re feeling fancy, you can even use homemade eggnog—just make sure it’s well-chilled before you add it to the batter.
Equipment Needed
You don’t need a professional bakery setup for these eggnog cheesecake bars. Here’s what you’ll need:
- 9×9-inch baking pan — This is the perfect size for getting nice, thick bars. If you only have an 8×8, that works too—your bars will just be slightly taller and may need a few extra minutes of baking time.
- Electric mixer — A hand mixer or stand mixer works. I’ve made these with a whisk before (don’t recommend it—my arm was sore for days), so the mixer is a real time-saver.
- Mixing bowls — You’ll need at least two: one for the crust and one for the filling.
- Parchment paper — This is your best friend for easy removal. Leave some overhang on the sides so you can lift the whole block of bars out cleanly.
- Measuring cups and spoons — Precision matters in baking, even for a forgiving recipe like this one.
- Rubber spatula — For scraping every last bit of that creamy filling into the pan. Waste not, want not.
- Sharp knife — For clean slices. A chef’s knife works better than a butter knife here.
- Cooling rack — Essential for letting the bars cool evenly before you refrigerate them.
Budget-Friendly Options : If you don’t have a 9×9 pan, a disposable aluminum pan from the grocery store works perfectly. And if you’re mixing by hand, just make sure your cream cheese is really soft—like, leave-it-out-for-two-hours soft.
Personal Note : I once tried to make these with a cheap hand mixer that had seen better days. The motor literally burned out halfway through mixing the cream cheese. Learn from my mistakes—invest in a decent mixer, or at least have a backup whisk ready.
Preparation Method
Alright, let’s get to the good part. I’ve tested this method multiple times to make sure it’s foolproof, even if you’re multitasking while wrapping presents or answering the door for delivery drivers.
- Preheat and Prep : Preheat your oven to 325°F (163°C). Line your 9×9-inch baking pan with parchment paper, leaving about 2 inches of overhang on two opposite sides. This will be your “handle” for lifting the bars out later. Lightly spray the parchment with non-stick spray, just to be safe.
- Make the Crust : In a medium bowl, combine the graham cracker crumbs, ¼ cup sugar, and a pinch of salt. Pour in the melted butter and stir with a fork until the mixture looks like wet sand and holds together when you squeeze it. Press this mixture firmly into the bottom of your prepared pan. I use the bottom of a measuring cup to get it even and compact. Bake for 10 minutes, then set aside to cool slightly while you make the filling.
- Beat the Cream Cheese : In a large bowl, beat the softened cream cheese with an electric mixer on medium speed until it’s smooth and creamy—about 2 minutes. Scrape down the sides of the bowl with a rubber spatula. This step is crucial. If you don’t get the cream cheese smooth now, you’ll have lumps later.
- Add Sugar and Eggs : Add the ½ cup sugar and beat until combined, about 1 minute. Add the eggs one at a time, beating on low speed after each addition until just incorporated. Don’t overmix here—you don’t want to incorporate too much air, which can cause cracking.
- Add the Eggnog and Flavorings : Pour in the eggnog, vanilla extract, flour, nutmeg, and cinnamon. Beat on low speed until everything is combined and smooth. The batter will be thinner than a traditional cheesecake batter—that’s normal. It should look silky and pale with a faint golden hue.
- Pour and Bake : Pour the filling over the pre-baked crust. Gently spread it into an even layer with your spatula. Tap the pan on the counter a few times to release any air bubbles. Bake for 35-40 minutes, or until the edges are set and the center is still slightly jiggly—like Jell-O, not like liquid. The top should look dull, not shiny. If the center wobbles like a wave pool, give it another 5 minutes.
- Cool Gradually : Turn off the oven and crack the door open. Let the cheesecake bars sit in the oven for 30 minutes. This gradual cooling helps prevent cracks. Then remove the pan from the oven and let it cool completely on a wire rack, about 1 hour.
- Chill : Once cool, cover the pan with plastic wrap and refrigerate for at least 4 hours, but overnight is better. I know the wait is torture, but this step is non-negotiable for clean slices and the best texture. The flavors really develop during this time.
- Slice and Serve : When you’re ready to serve, lift the bars out of the pan using the parchment overhang. Use a sharp knife to slice into squares—I usually go for 16 bars, but you can do 9 bigger ones if you’re feeling generous. For clean cuts, wipe the knife clean between each slice.
- Add Topping : If you’re using the whipped cream topping, whip the heavy cream and powdered sugar together until soft peaks form. Dollop or pipe onto each bar, then dust with a little extra nutmeg. This step is optional but highly recommended if you’re serving guests—it makes the presentation look like you bought them from a bakery.
Sensory Cue : When the bars are done baking, the kitchen will smell like Christmas morning—warm spices, vanilla, and something cozy. The edges of the cheesecake should be set and slightly pulling away from the pan, while the center should have a gentle wobble. If you’re unsure, give the pan a gentle shake. You want the center to move like a wave, not a puddle.
Cooking Tips & Techniques
I’ve made these eggnog cheesecake bars more times than I can count, and I’ve definitely learned a few things the hard way. Here are my best tips to make sure yours turn out perfect every time.
Room Temperature Is Your Friend : This is the most important tip I can give you. Cold cream cheese leads to lumpy batter, and cold eggs can cause the mixture to curdle. Set everything out on the counter at least an hour before you start. If you’re in a rush, you can soften cream cheese in the microwave in 10-second bursts, but be careful—you want it soft, not melted.
Don’t Overmix : Once you add the eggs, beat on low speed and stop as soon as everything is combined. Overmixing incorporates too much air, which can cause the cheesecake to puff up and then crack as it cools. We’re going for dense and creamy, not airy and soufflé-like.
The Jiggle Test : I ruined my first batch of these because I thought they weren’t done. I kept baking until the center was completely firm, and they ended up dry and cracked. The secret is to pull them out when the center is still slightly jiggly—about the size of a silver dollar in the middle. It will firm up as it cools.
Water Bath Alternative : Traditional cheesecakes often use a water bath to prevent cracking. I don’t use one for these bars because the crust can get soggy. Instead, I use the gradual cooling method (step 7) and it works beautifully. If you’re nervous about cracking, you can place a shallow pan of hot water on the oven rack below the cheesecake while it bakes—the steam helps keep the surface moist.
Multitasking Strategy : While the crust is baking, get your cream cheese softening and measure out your ingredients. While the cheesecake is baking, clean up your workspace and make the whipped cream topping. By the time the bars are cooling, your kitchen will be spotless—a Christmas miracle in itself.
My Biggest Failure : I once tried to rush the cooling process by putting the warm cheesecake bars directly in the fridge. The temperature shock caused a massive crack right down the middle. It still tasted amazing, but it looked like a map of the Grand Canyon. Learn from my impatience—let them cool gradually.
Variations & Adaptations
One of the best things about this recipe is how adaptable it is. Here are some variations I’ve tried and loved.
Boozy Eggnog Cheesecake Bars : For an adults-only version, replace 2 tablespoons of the eggnog with dark rum or bourbon. The alcohol adds warmth and depth without being overpowering. Just don’t add too much—the texture can get weird if you go overboard.
Gingerbread Crust : Swap the graham cracker crumbs for crushed gingerbread cookies or gingersnaps. The spicy-sweet flavor pairs beautifully with the eggnog filling. I tried this last Christmas and my sister-in-law demanded the recipe on the spot.
Gluten-Free Version : Use gluten-free graham crackers or crushed gluten-free vanilla cookies for the crust. The filling is naturally gluten-free as long as you use a gluten-free flour blend (or just omit the tablespoon of flour—it helps with stability but isn’t strictly necessary).
Chocolate Drizzle : Melt ½ cup of semi-sweet chocolate chips with 1 teaspoon of coconut oil and drizzle it over the chilled bars. The chocolate and eggnog combination is surprisingly good—like a chocolate eggnog latte in dessert form.
Pumpkin Spice Twist : Replace the eggnog with pumpkin puree and add an extra teaspoon of pumpkin pie spice. The texture will be slightly denser, but the flavor is perfect for fall gatherings. I made this version for a Friendsgiving and it was gone in 10 minutes.
Mini Version : Use a mini muffin tin lined with paper liners for bite-sized cheesecake bars. Reduce the baking time to 15-18 minutes. These are perfect for holiday cookie platters or party buffets where guests want to graze.
Dairy-Free Adaptation : Use vegan cream cheese and a dairy-free eggnog substitute. I’ve tried this with oat milk-based eggnog and it worked surprisingly well. The texture is slightly less creamy, but the flavor is still there. Just make sure your vegan cream cheese is the block style, not the spreadable kind—it has a better consistency for baking.
Serving & Storage Suggestions
How to Serve : These eggnog cheesecake bars are best served cold, straight from the fridge. The texture is firm and creamy, and the flavors are more pronounced when they’re chilled. If you’ve added the whipped cream topping, add it just before serving—it will deflate and get weepy if it sits too long.
Presentation Tips : For a beautiful holiday presentation, arrange the bars on a white platter or a wooden board. Dust them with a light sprinkle of nutmeg and cinnamon, and add a few fresh cranberries and a sprig of rosemary for a pop of color. If you’re feeling extra fancy, drizzle a little caramel sauce over the top.
What to Serve Alongside : These bars pair beautifully with a cup of hot coffee, spiced tea, or a glass of cold milk. For a holiday brunch, serve them alongside a fruit salad or a cheese board. They also make a great addition to a dessert table with cookies, brownies, and other bars.
Storage Instructions : Store the cheesecake bars in an airtight container in the refrigerator for up to 5 days. If you’ve added whipped cream, the bars are best eaten within 2 days. For longer storage, freeze the bars (without the whipped cream topping) for up to 3 months.
How to Freeze : Slice the bars and place them on a baking sheet lined with parchment paper. Freeze until solid, about 2 hours, then transfer the frozen bars to a freezer-safe container or zip-top bag, placing parchment paper between layers. To thaw, transfer the bars to the refrigerator overnight, or let them sit at room temperature for about 30 minutes.
Reheating Tips : These bars are meant to be served cold, so no reheating is necessary. However, if you prefer a slightly softer texture, let them sit at room temperature for 10-15 minutes before serving. The crust will soften slightly, and the filling will become more luscious.
Flavor Development : Here’s a little secret—these bars actually taste better on day two. The spices meld with the cream cheese, and the texture becomes even creamier. So don’t feel bad if you make them a day ahead. Your guests will never know, and you’ll have one less thing to worry about on the day of your party.
Nutritional Information & Benefits
Let’s be real—these are a treat, not a health food. But here’s the nutritional breakdown so you can plan accordingly.
Estimated Nutritional Values (per bar, based on 16 servings) :
- Calories: 285
- Total Fat: 19g
- Saturated Fat: 11g
- Cholesterol: 85mg
- Sodium: 210mg
- Total Carbohydrates: 24g
- Dietary Fiber: 0.5g
- Sugars: 17g
- Protein: 5g
Health Benefits of Key Ingredients : Eggnog contains eggs and milk, which provide protein and calcium. Nutmeg and cinnamon are both rich in antioxidants and have anti-inflammatory properties. And cream cheese, while high in fat, contains vitamin A and calcium. So there are some redeeming qualities—just don’t tell yourself you’re eating a salad.
Dietary Considerations : This recipe contains dairy, eggs, and gluten (from the graham crackers). It can be adapted to be gluten-free (see variations) but is not suitable for vegan or dairy-free diets without significant modifications. If you’re serving guests with allergies, consider making a separate batch with the appropriate substitutions.
My Wellness Perspective : I believe in balance. These eggnog cheesecake bars are a holiday indulgence, and that’s okay. Enjoy them in moderation, savor every bite, and don’t feel guilty. Life is too short to skip dessert, especially during the holidays. Pair them with a healthy meal and a walk around the neighborhood to look at Christmas lights, and you’ve got yourself a perfectly balanced day.
Conclusion
These eggnog cheesecake bars have become my secret weapon for holiday hosting. They’re the dessert that makes people think you spent hours in the kitchen, when really, you just threw a few ingredients together and let the oven do the work. The buttery crust, the creamy, spiced filling, and that little dusting of nutmeg on top—it’s everything you love about the holidays in one perfect bite.
What I love most about this recipe is how forgiving it is. You can make it ahead, freeze it, adapt it to your taste, and it still turns out beautiful every time. It’s the kind of recipe that makes you look like a rockstar host without the stress. And honestly, isn’t that what we all want during the holiday season?
I’d love to hear how these turn out for you. Did you try any variations? Did your guests gobble them up? Drop a comment below and let me know—I read every single one, and I’m always looking for new ideas to try. And if you’re feeling generous, share this recipe with a friend who needs a little holiday baking inspiration. After all, the best recipes are the ones we pass along.
Happy baking, friends. May your kitchen smell like nutmeg and your holiday table be full of joy.
Frequently Asked Questions
Can I use low-fat or light eggnog for this recipe?
You can, but the texture won’t be as rich and creamy. Full-fat eggnog gives the cheesecake bars that luscious, indulgent texture that makes them so special. If you do use light eggnog, reduce the baking time by a few minutes and keep an eye on the center.
How do I know when the cheesecake bars are done baking?
The edges should be set and slightly pulling away from the pan, while the center should still have a gentle jiggle—like Jell-O, not like liquid. If the center wobbles like a wave pool, give it another 5 minutes. The top should look dull, not shiny. Trust the jiggle test!
Why did my cheesecake bars crack on top?
Cracking usually happens from overbaking or sudden temperature changes. Make sure you pull the bars out when the center is still slightly jiggly, and let them cool gradually in the oven with the door cracked open. Also, make sure your cream cheese and eggs are at room temperature before you start.
Can I make these eggnog cheesecake bars without a mixer?
Technically yes, but your arm will get a serious workout. The cream cheese needs to be very soft (leave it out for 2 hours), and you’ll need a strong whisk and some patience. I’ve done it once, and I don’t recommend it for a large batch. A hand mixer is a worthwhile investment for this recipe.
How far in advance can I make these bars?
You can make them up to 3 days ahead and store them in the refrigerator. They actually taste better on day two as the flavors meld together. You can also freeze them for up to 3 months—just wrap them tightly and thaw overnight in the fridge before serving.
Pin This Recipe!
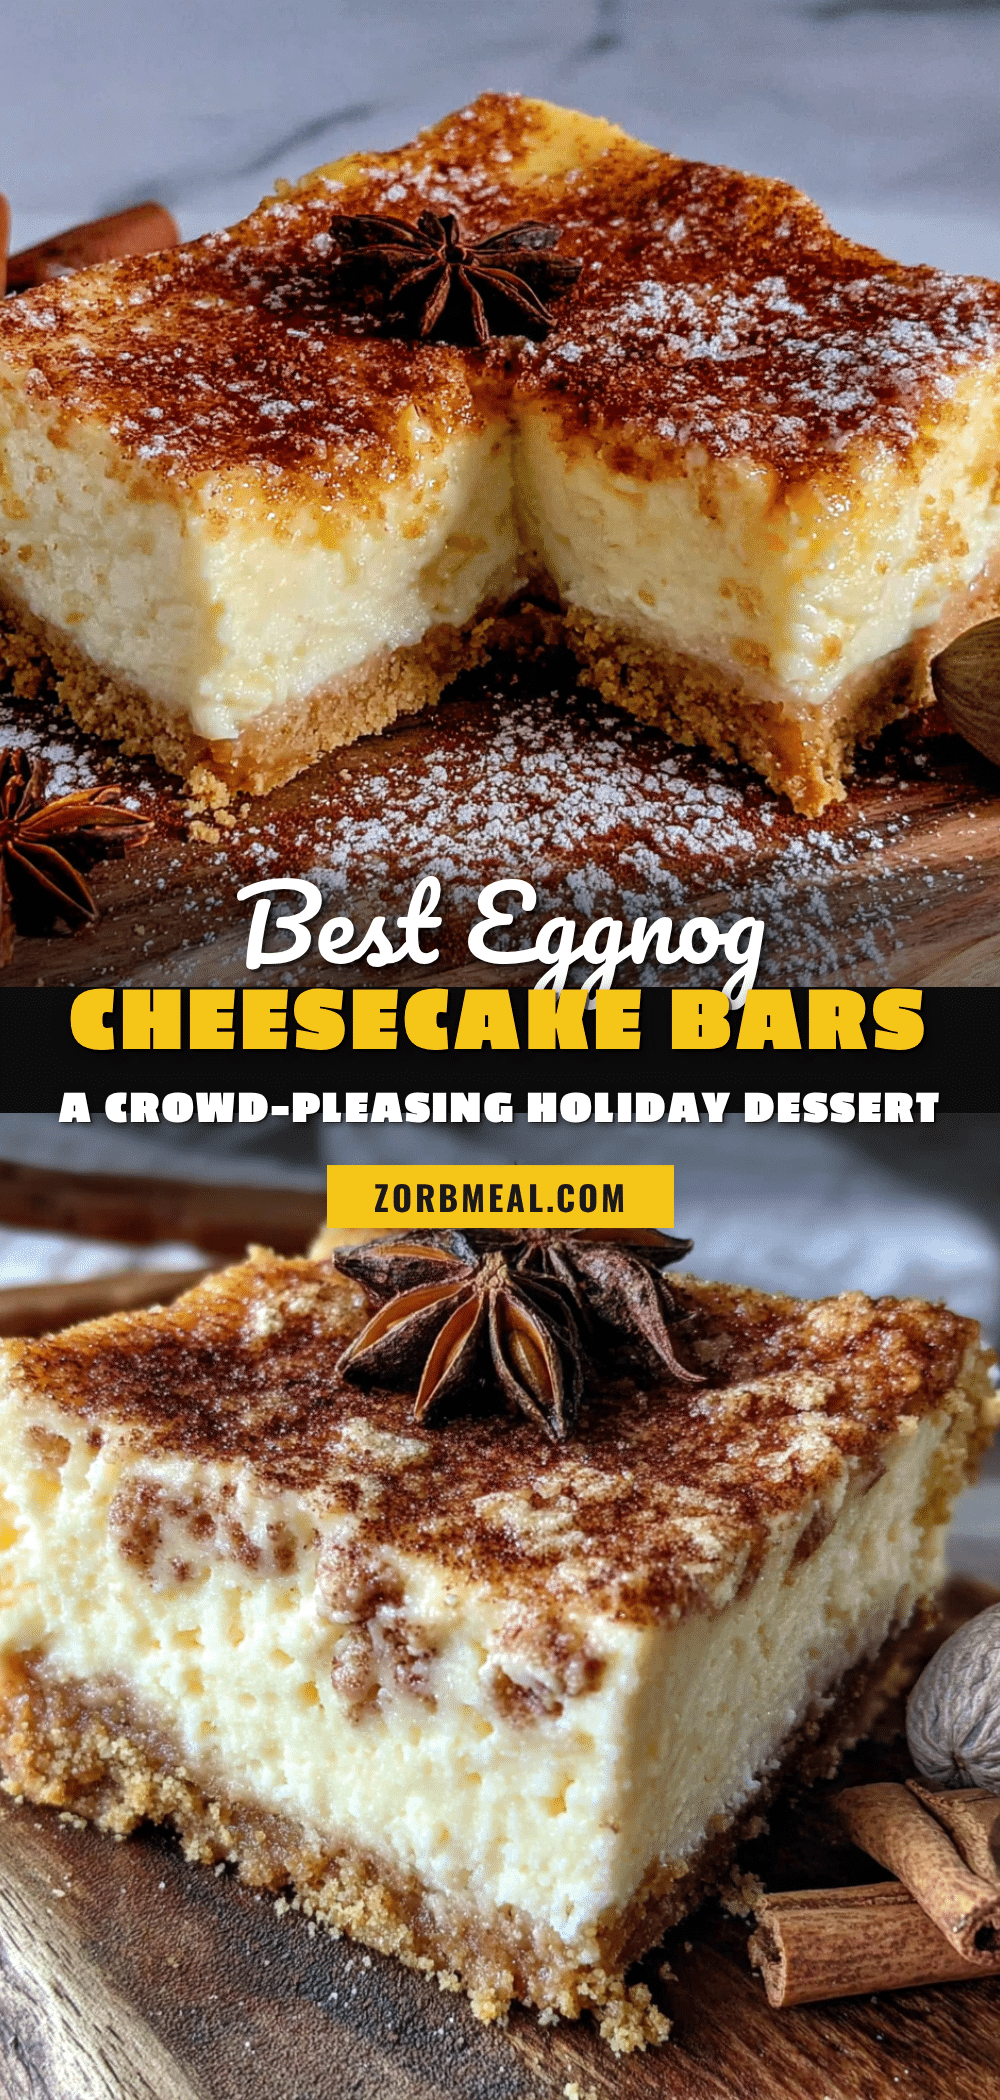
Best Eggnog Cheesecake Bars Easy Holiday Dessert Recipe
These eggnog cheesecake bars feature a buttery graham cracker crust, a creamy eggnog-infused cheesecake filling, and a dusting of nutmeg. They’re make-ahead friendly, perfect for holiday parties, and surprisingly simple to prepare.
- Prep Time: 20 minutes
- Cook Time: 40 minutes
- Total Time: 5 hours (includes cooling and chilling)
- Yield: 16 servings 1x
- Category: Dessert
- Cuisine: American
Ingredients
- 1 ½ cups graham cracker crumbs (about 12 full sheets)
- ¼ cup granulated sugar
- 6 tablespoons unsalted butter, melted
- Pinch of salt
- 16 ounces cream cheese, softened
- ½ cup granulated sugar
- 2 large eggs, room temperature
- 1 cup eggnog (full-fat recommended)
- 1 teaspoon vanilla extract
- 1 tablespoon all-purpose flour
- ½ teaspoon ground nutmeg
- ½ teaspoon ground cinnamon
- ½ cup heavy cream (for topping, optional)
- 1 tablespoon powdered sugar (for topping, optional)
- Extra nutmeg for dusting (for topping, optional)
Instructions
- Preheat oven to 325°F (163°C). Line a 9×9-inch baking pan with parchment paper, leaving 2 inches overhang on two opposite sides. Lightly spray with non-stick spray.
- In a medium bowl, combine graham cracker crumbs, ¼ cup sugar, and a pinch of salt. Pour in melted butter and stir with a fork until mixture resembles wet sand. Press firmly into the bottom of the prepared pan using the bottom of a measuring cup. Bake for 10 minutes, then set aside to cool slightly.
- In a large bowl, beat softened cream cheese with an electric mixer on medium speed until smooth and creamy, about 2 minutes. Scrape down sides of bowl.
- Add ½ cup sugar and beat until combined, about 1 minute. Add eggs one at a time, beating on low speed after each addition until just incorporated. Do not overmix.
- Pour in eggnog, vanilla extract, flour, nutmeg, and cinnamon. Beat on low speed until combined and smooth. Batter will be thinner than traditional cheesecake batter.
- Pour filling over pre-baked crust. Spread into an even layer. Tap pan on counter a few times to release air bubbles. Bake for 35-40 minutes, until edges are set and center is still slightly jiggly (like Jell-O). Top should look dull, not shiny.
- Turn off oven and crack the door open. Let cheesecake bars sit in oven for 30 minutes for gradual cooling. Then remove pan from oven and cool completely on a wire rack, about 1 hour.
- Cover pan with plastic wrap and refrigerate for at least 4 hours, preferably overnight.
- When ready to serve, lift bars out of pan using parchment overhang. Use a sharp knife to slice into squares (16 bars recommended). Wipe knife clean between slices.
- If using whipped cream topping, whip heavy cream and powdered sugar together until soft peaks form. Dollop or pipe onto each bar, then dust with extra nutmeg.
Notes
Room temperature ingredients are crucial for a smooth batter. Do not overbake; the center should still jiggle slightly when done. Gradual cooling helps prevent cracks. These bars taste even better on day two. For gluten-free, use gluten-free graham crackers. For a boozy version, replace 2 tablespoons eggnog with dark rum or bourbon.
Nutrition
- Serving Size: 1 bar
- Calories: 285
- Sugar: 17
- Sodium: 210
- Fat: 19
- Saturated Fat: 11
- Carbohydrates: 24
- Fiber: 0.5
- Protein: 5
Keywords: eggnog cheesecake bars, holiday dessert, easy cheesecake bars, Christmas dessert, eggnog dessert, cheesecake bars, holiday baking