I want a Halloween cookie that actually looks like Halloween—not just a sugar cookie with orange sprinkles slapped on top. And honestly, I want chocolate. Deep, dark, fudgy chocolate that cracks open like a little black cat stretching in the sun. That’s how these Black Cat Chocolate Crinkle Cookies were born in my kitchen last October, right when I realized I had cocoa powder, powdered sugar, and a weirdly strong urge to make something that felt spooky without being complicated.
The first batch came out looking more like sad little coal lumps than cats. But the second batch? Those cookies had attitude. They cracked perfectly, the powdered sugar settled into those crevices like moonlight on fur, and I knew I was onto something. These cookies aren’t just for kids or parties—they’re for anyone who wants a moment of pure, chocolatey satisfaction with a side of seasonal fun.
So if you’re tired of the same old Halloween treats and want something that actually delivers on flavor (not just looks), these Black Cat Chocolate Crinkle Cookies are your answer. They’re rich, they’re easy, and they’re honestly the best thing I’ve baked all spooky season.
Why You’ll Love This Recipe
Let me tell you why these cookies have become my non-negotiable Halloween bake. I’ve tested this recipe six times—yes, six—to get the texture just right, and I’m not even sorry about the extra cocoa I went through.
- Quick & Easy: From mixing bowl to cooling rack in under 30 minutes. Perfect for last-minute Halloween parties or when the craving hits at 9 PM.
- Simple Ingredients: You probably have everything in your pantry right now. No weird extracts, no specialty flours, no trips to three different stores.
- Perfect for Halloween: These cookies are the star of any spooky spread. They look impressive without requiring piping bags or food coloring.
- Crowd-Pleaser: Kids love the cat shape, adults love the deep chocolate flavor. Everyone wins.
- Unbelievably Delicious: The texture is soft and fudgy on the inside with that signature crinkly, crackly top. It’s the kind of cookie that makes you close your eyes after the first bite.
What makes these different from every other chocolate crinkle cookie recipe out there? It’s the technique. I figured out that chilling the dough for exactly 45 minutes (not 30, not 60) gives you that perfect crackle without the cookies spreading into flat puddles. And the cocoa powder? I use a mix of natural and Dutch-process for a deeper, more complex chocolate flavor that lingers.
This isn’t just another version of a Halloween cookie. This is the version you’ll come back to year after year. It’s comfort food with a spooky twist—faster, more reliable, and so much more satisfying than anything from a box.
What Ingredients You Will Need
This recipe uses simple, everyday ingredients to create something truly special. Each component plays a role in achieving that perfect texture and flavor—no shortcuts, no fuss.
- All-purpose flour (2 cups / 250g) – Provides structure without making the cookies tough. Spoon and level for accuracy.
- Unsweetened cocoa powder (1/2 cup / 50g) – I recommend a 50/50 blend of natural and Dutch-process cocoa for the deepest flavor. Ghirardelli works great.
- Granulated sugar (1 cup / 200g) – Adds sweetness and helps create that crinkly top.
- Light brown sugar (1/4 cup / 50g, packed) – Adds moisture and a hint of molasses depth. Don’t skip this—it makes a difference.
- Unsalted butter (1/2 cup / 113g, softened) – Use room temperature butter for proper creaming. Cold butter won’t incorporate correctly.
- Large eggs (2, room temperature) – Room temperature eggs emulsify better into the batter, giving you a smoother dough.
- Vanilla extract (2 teaspoons) – Pure vanilla extract adds warmth that complements the chocolate. Avoid imitation if you can.
- Baking powder (1 teaspoon) – Helps the cookies rise and crackle properly.
- Salt (1/2 teaspoon) – Balances the sweetness and enhances the chocolate flavor. Use fine sea salt for even distribution.
- Powdered sugar (1/2 cup / 60g, for rolling) – This creates the signature white crackled coating. Sift it first to avoid clumps.
Ingredient Tips: For the cocoa, I’ve tested this with Hershey’s natural cocoa and it works fine, but the Dutch-process adds a smoother, more sophisticated chocolate flavor. If you only have natural cocoa, add an extra 1/4 teaspoon of baking powder to help with the rise. For a dairy-free version, use vegan butter sticks—not margarine—and ensure your powdered sugar is vegan-friendly.
Equipment Needed
You don’t need a fancy kitchen to make these cookies, but having the right tools makes the process smoother. Here’s what you’ll need:
- Large mixing bowls (2) – One for dry ingredients, one for wet. Glass or stainless steel works best.
- Electric hand mixer or stand mixer – A hand mixer is fine, but a stand mixer with the paddle attachment makes creaming butter and sugar effortless.
- Rubber spatula – For scraping down the bowl and folding in dry ingredients.
- Measuring cups and spoons – Accurate measurements are key for baking. Use the spoon-and-level method for flour.
- Baking sheets (2) – Light-colored aluminum sheets give the most even browning. Dark sheets can over-brown the bottoms.
- Parchment paper or silicone baking mats – Prevents sticking and ensures even baking. Silpat mats are my go-to.
- Cooling rack – Wire racks allow air circulation so cookies cool evenly without soggy bottoms.
- Small bowl for powdered sugar – For rolling the dough balls. A shallow bowl works best.
- Cookie scoop (1.5 tablespoon size) – Ensures uniform cookies that bake evenly. A #40 scoop is perfect.
- Plastic wrap – For chilling the dough. Reusable beeswax wraps work too.
If you don’t have a cookie scoop, use two spoons to portion the dough. And if you’re using dark baking sheets, reduce the oven temperature by 25°F to prevent burning.
Preparation Method
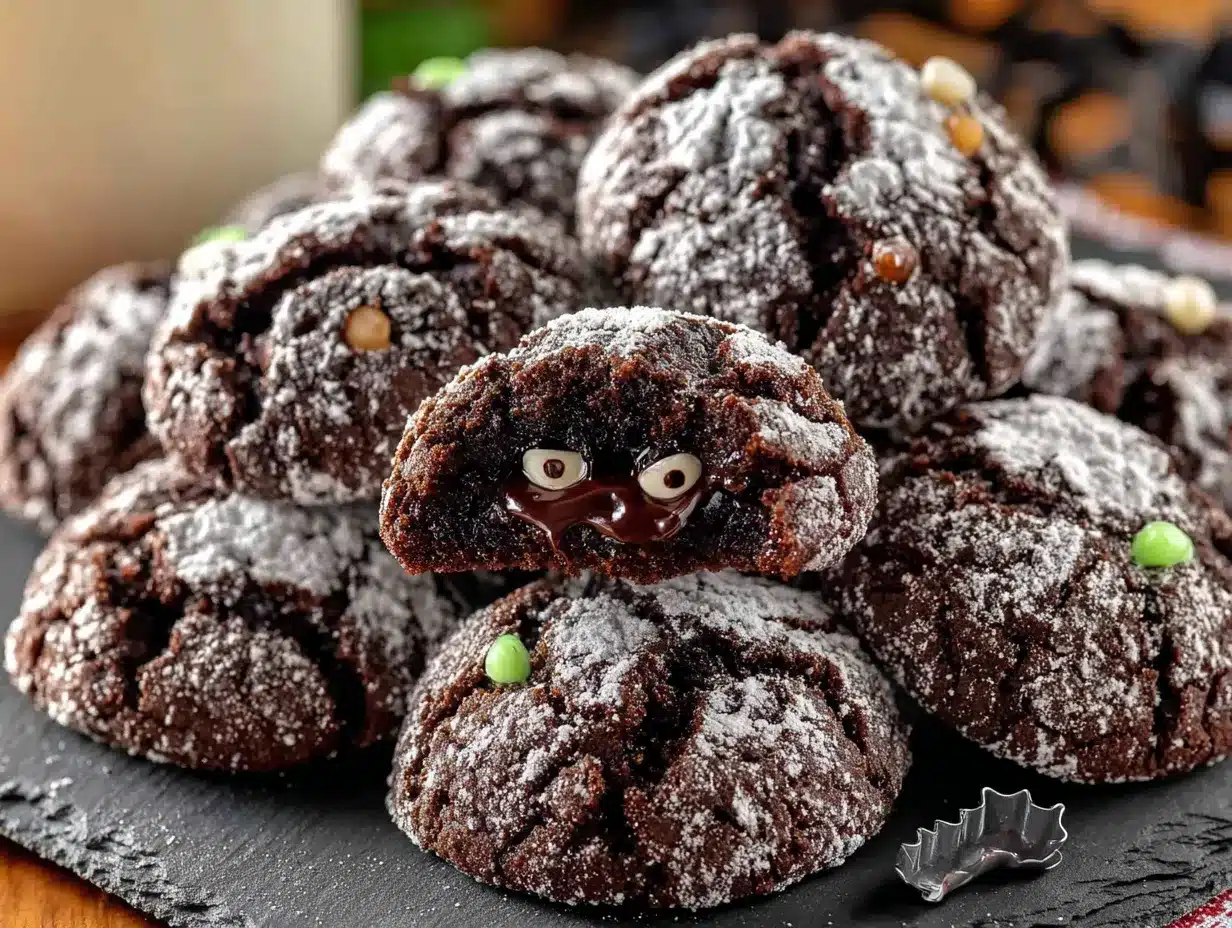
Alright, let’s get baking. I’ve broken this down into clear steps with all the little details I wish someone had told me the first time I made these.
- Preheat and prep: Preheat your oven to 350°F (175°C). Line two baking sheets with parchment paper or silicone mats. This is non-negotiable—these cookies are sticky.
- Mix dry ingredients: In a medium bowl, whisk together 2 cups (250g) all-purpose flour, 1/2 cup (50g) cocoa powder, 1 teaspoon baking powder, and 1/2 teaspoon salt. Whisk for about 20 seconds to aerate and combine evenly. Set aside.
- Cream butter and sugars: In a large bowl, beat 1/2 cup (113g) softened unsalted butter with 1 cup (200g) granulated sugar and 1/4 cup (50g) packed light brown sugar until light and fluffy—about 3 minutes with an electric mixer on medium speed. Scrape down the bowl halfway through. The mixture should look pale and slightly increased in volume.
- Add eggs and vanilla: Add 2 room-temperature eggs one at a time, beating well after each addition. Add 2 teaspoons vanilla extract and beat until combined. The mixture might look slightly curdled—that’s okay, it will come together when you add the dry ingredients.
- Combine wet and dry: Gradually add the dry ingredients to the wet mixture, mixing on low speed until just combined. Do not overmix—stop as soon as you no longer see streaks of flour. Overmixing develops gluten and makes cookies tough.
- Chill the dough: Cover the bowl with plastic wrap and refrigerate for exactly 45 minutes. This is crucial. Chilling firms up the butter so the cookies don’t spread too much, and it allows the flavors to meld. Don’t skip this step, and don’t rush it.
- Shape and coat: Place 1/2 cup (60g) powdered sugar in a small bowl. Using a 1.5-tablespoon cookie scoop, portion the dough and roll into balls. Roll each ball generously in the powdered sugar until fully coated. The thicker the coating, the better the crackle.
- Bake: Place the coated dough balls on the prepared baking sheets, spacing them 2 inches apart. Bake for 10-12 minutes. The cookies should look puffed and cracked on top but still slightly soft in the center. They will continue to set as they cool.
- Cool: Let the cookies rest on the baking sheet for 5 minutes—this is important for them to firm up. Then transfer to a wire rack to cool completely. The crackles will become more pronounced as they cool.
Pro tip: For the best cat-like shape, after rolling the dough into balls, gently pinch one side to create a slight point (like a cat’s ear) before rolling in powdered sugar. It’s a small touch that makes a big visual difference.
Cooking Tips & Techniques
I’ve made every mistake in the book so you don’t have to. Here’s what I’ve learned the hard way:
The powdered sugar trick: Roll the dough balls twice in powdered sugar. First coat, let them sit for 30 seconds, then roll again. This double-coating creates those dramatic white cracks against the dark chocolate. I learned this after my first batch came out looking like sad gray marbles.
Don’t overbake: The cookies might look underdone when you pull them out—that’s exactly what you want. They’ll continue baking on the hot sheet for those 5 minutes. Overbaked crinkle cookies lose their signature soft, fudgy center and become cakey and dry.
Chill is non-negotiable: I once tried to skip the chilling step because I was impatient. The cookies spread into flat, ugly disks with barely any crackle. Trust me on this—45 minutes in the fridge makes all the difference.
Room temperature matters: Cold eggs will seize the butter and give you a lumpy dough. Cold butter won’t cream properly. Set your eggs and butter out 30 minutes before you start baking. Set a timer—I’ve forgotten and ended up with sad, uneven dough more times than I’d like to admit.
Baking sheet rotation: Halfway through baking, rotate your sheets front to back and swap racks. Ovens have hot spots, and this ensures even baking. Your cookies will thank you.
Variations & Adaptations
One of the best things about this recipe is how adaptable it is. Here are some variations I’ve tried and loved:
Gluten-Free Version: Substitute the all-purpose flour with a 1:1 gluten-free baking flour blend (I use King Arthur Measure for Measure). Add 1/4 teaspoon xanthan gum if your blend doesn’t already include it. The texture is slightly more tender but just as delicious.
Spicy Mexican Chocolate: Add 1/2 teaspoon cinnamon and 1/8 teaspoon cayenne pepper to the dry ingredients. The warmth of the spices pairs beautifully with the deep chocolate flavor. It’s subtle but adds a grown-up twist that’s perfect for Halloween parties.
Peppermint Crunch: Add 1/2 teaspoon peppermint extract along with the vanilla, and fold in 1/4 cup crushed candy canes or peppermint candies. The cool mint against the rich chocolate is a classic combination that feels festive for fall.
White Chocolate Drizzle: After the cookies have cooled completely, melt 1/2 cup white chocolate chips with 1 teaspoon coconut oil and drizzle over the top. The white against the dark cookies looks like spiderwebs—perfect for Halloween.
Vegan Option: Use vegan butter sticks (like Earth Balance), replace each egg with a flax egg (1 tablespoon ground flaxseed + 3 tablespoons water, let sit for 5 minutes), and ensure your powdered sugar is vegan. The texture is slightly denser but still delicious.
Serving & Storage Suggestions
These cookies are best served at room temperature—the texture is soft, fudgy, and perfectly chewy. Arrange them on a platter with some creamy buffalo chicken dip for a sweet-and-savory Halloween spread that will impress everyone.
Storage: Store the cookies in an airtight container at room temperature for up to 5 days. Place a slice of bread in the container to keep them soft—the cookies will absorb moisture from the bread. Change the bread slice every other day.
Freezing: These cookies freeze beautifully. Place cooled cookies in a single layer in a freezer-safe container, separating layers with parchment paper. Freeze for up to 3 months. Thaw at room temperature for 30 minutes before serving. You can also freeze the unbaked dough balls—just place them on a baking sheet, freeze until solid, then transfer to a freezer bag. Bake straight from frozen, adding 2-3 minutes to the baking time.
Reheating: For that just-baked warmth, microwave a cookie for 10-15 seconds. Or pop them in a 300°F oven for 5 minutes. The crackles become even more pronounced after reheating.
Flavor development: These cookies actually taste better the next day. The flavors meld and deepen overnight, and the texture becomes even more fudgy. If you can resist eating them all, let them sit overnight in an airtight container for the best experience.
Nutritional Information & Benefits
Per serving (1 cookie, based on 24 cookies): Calories: 145, Total Fat: 6g, Saturated Fat: 3.5g, Cholesterol: 25mg, Sodium: 85mg, Total Carbohydrates: 22g, Dietary Fiber: 1g, Sugars: 14g, Protein: 2g.
These cookies are a treat, not a health food, but they do offer some surprising benefits. The cocoa powder is rich in antioxidants called flavonoids, which can help reduce inflammation and support heart health. Dark chocolate in moderation has been linked to improved mood and cognitive function—perfect for a little Halloween night pick-me-up.
Dietary considerations: This recipe contains gluten, dairy, and eggs. For gluten-free, dairy-free, or vegan options, see the variations section above. The cookies are nut-free as written, making them safe for school parties and nut-free households.
I believe in balance—enjoying treats like these as part of a varied diet. One or two cookies with a glass of milk or a cup of coffee is the perfect way to indulge without overdoing it.
Conclusion
These Black Cat Chocolate Crinkle Cookies have become my signature Halloween bake, and I think they’re about to become yours too. They’re everything you want in a Halloween cookie—spooky, delicious, and surprisingly easy to make. The deep chocolate flavor, the satisfying crackle, the cute cat shape—it all comes together in a cookie that feels special without requiring hours in the kitchen.
I love how versatile this recipe is. You can keep it classic or dress it up with any of the variations I’ve shared. The base recipe is foolproof, and the results are consistently impressive. Honestly, the hardest part is waiting for the dough to chill.
I’d love to hear how your cookies turn out! Drop a comment below and let me know if you tried any variations, or tag me in your photos on social media. Did your cookies crackle perfectly? Did the kids love them? Share your Halloween baking adventures—I read every comment and I’m always inspired by what you create.
Happy Halloween, and happy baking! These cookies are proof that the best treats are the ones made with a little love and a lot of chocolate.
Frequently Asked Questions
Why didn’t my cookies crackle?
The most common reason is not enough powdered sugar coating. Roll the dough balls generously, and consider a double-coating. Another reason could be overmixing the dough—this develops gluten and prevents the cookies from spreading and cracking properly. Also, make sure your baking powder is fresh (less than 6 months old).
Can I make the dough ahead of time?
Absolutely! You can prepare the dough up to 3 days in advance and keep it covered in the refrigerator. Let it sit at room temperature for 10-15 minutes before scooping and rolling, as the dough will be very firm. You can also freeze the dough balls for up to 3 months.
How do I get the cat shape to show?
After rolling the dough into a ball, gently pinch one side to create a slight point (like a cat’s ear) before rolling in powdered sugar. When the cookie bakes, that point will remain visible. You can also use a small knife to gently score two small triangles on top before baking for more defined ears.
Can I use a different type of cocoa powder?
Yes, but the results will vary. Natural cocoa creates a more intense, slightly acidic chocolate flavor and a lighter color. Dutch-process cocoa gives a smoother, more mellow flavor and darker color. I recommend a 50/50 blend for the best of both worlds. If using only natural cocoa, add an extra 1/4 teaspoon of baking powder.
How do I store these cookies for a Halloween party?
Store them in an airtight container at room temperature for up to 5 days. To keep them soft, add a slice of bread to the container. For a party, arrange them on a platter with other Halloween treats like creamy loaded baked potato salad for a sweet-and-savory spread. Just keep them away from heat sources—the powdered sugar coating can become sticky in humidity.
Pin This Recipe!

Best Black Cat Chocolate Crinkle Cookies: Easy Halloween Recipe

Deep, dark, fudgy chocolate crinkle cookies that crack open like a little black cat stretching in the sun. These spooky yet simple cookies are perfect for Halloween, with a soft interior and signature crinkly top.
- Prep Time: 15 minutes
- Cook Time: 12 minutes
- Total Time: 1 hour 12 minutes (includes 45 minutes chilling)
- Yield: 24 cookies 1x
- Category: Dessert
- Cuisine: American
Ingredients
- 2 cups (250g) all-purpose flour
- 1/2 cup (50g) unsweetened cocoa powder (50/50 blend of natural and Dutch-process recommended)
- 1 teaspoon baking powder
- 1/2 teaspoon fine sea salt
- 1/2 cup (113g) unsalted butter, softened
- 1 cup (200g) granulated sugar
- 1/4 cup (50g) light brown sugar, packed
- 2 large eggs, room temperature
- 2 teaspoons pure vanilla extract
- 1/2 cup (60g) powdered sugar, for rolling
Instructions
- Preheat oven to 350°F (175°C). Line two baking sheets with parchment paper or silicone mats.
- In a medium bowl, whisk together flour, cocoa powder, baking powder, and salt for about 20 seconds. Set aside.
- In a large bowl, beat softened butter, granulated sugar, and brown sugar until light and fluffy, about 3 minutes with an electric mixer on medium speed. Scrape down the bowl halfway through.
- Add eggs one at a time, beating well after each addition. Add vanilla extract and beat until combined.
- Gradually add dry ingredients to wet mixture, mixing on low speed until just combined. Do not overmix.
- Cover the bowl with plastic wrap and refrigerate for exactly 45 minutes.
- Place powdered sugar in a small bowl. Using a 1.5-tablespoon cookie scoop, portion the dough and roll into balls. Roll each ball generously in powdered sugar until fully coated.
- Place coated dough balls on prepared baking sheets, spacing them 2 inches apart. Bake for 10-12 minutes, until puffed and cracked but still soft in the center.
- Let cookies rest on baking sheet for 5 minutes, then transfer to a wire rack to cool completely.
Notes
For best crackle, roll dough balls twice in powdered sugar. Chilling dough for exactly 45 minutes is crucial to prevent spreading. For cat-like shape, gently pinch one side of dough ball before rolling in powdered sugar. Cookies taste even better the next day.
Nutrition
- Serving Size: 1 cookie
- Calories: 145
- Sugar: 14
- Sodium: 85
- Fat: 6
- Saturated Fat: 3.5
- Carbohydrates: 22
- Fiber: 1
- Protein: 2
Keywords: Halloween cookies, chocolate crinkle cookies, black cat cookies, easy Halloween recipe, fudgy chocolate cookies, spooky treats