The first time I made Halloween popcorn balls, I was trying to keep three kids from climbing the walls while a pot of marshmallow goo bubbled on the stove. My neighbor across the hall, a grandmother from the Philippines named Lita, watched me through her open door as I chased a toddler with a sticky spoon. She didn’t say anything at first. Then she walked over with a small bag of candy eyes and a little shrug. “For the faces,” she said. “Kids like things with faces.”
That was the moment my Halloween popcorn balls went from a sticky mess to something my kids actually remembered. Lita wasn’t a professional baker or a chef. She was just someone who knew that food is better when it has a little personality. I took her advice and added those googly eyes to my batch, and honestly, the kids went completely quiet for a solid fifteen minutes. That never happens. I mean, never. So I kept making them, tweaking the recipe each year until it became our go-to Halloween tradition.
These Kid-Approved Halloween Popcorn Balls with Candy Eyes are exactly what they sound like—crunchy, sweet, and a little bit silly. They come together fast, use ingredients you probably already have, and they let the kids help without creating a total disaster zone. Maybe you’ve been there, standing in a kitchen covered in melted marshmallow, wondering why you thought this was a good idea. I have. But with this recipe, the mess is manageable and the payoff is huge. The candy eyes make them look like little monsters, which is basically the whole point of Halloween, right?
What I love most about this recipe is that it’s not precious. It’s not fancy. It’s the kind of thing you make on a Tuesday night in October because the kids are bouncing off the walls and you need a win. The popcorn balls are sturdy enough to hold their shape, soft enough to bite into without breaking a tooth, and sweet enough to feel like a treat without being over the top. I’ve made them every year since that first sticky attempt, and they never get old. Honestly, I think Lita would approve.
Why You’ll Love This Recipe
These aren’t your average popcorn balls. I’ve tested this recipe more times than I can count, and every batch comes out exactly right—crunchy on the outside, chewy on the inside, and absolutely covered in candy eyes. My kids have been my official taste testers for three Halloweens running, and they’ve never complained once. That’s a pretty solid track record if you ask me.
- Quick & Easy: You can go from pantry to plate in under 20 minutes. No complicated steps, no fancy equipment. Just a pot, a bowl, and a little patience.
- Simple Ingredients: You probably already have popcorn, marshmallows, and butter in your kitchen. The candy eyes are easy to find at any grocery store or online, and they’re cheap.
- Perfect for Halloween Parties: These are the star of any school party, neighborhood gathering, or family movie night. Kids go crazy for them, and adults sneak them too—I’ve caught my husband hiding a few in his coat pocket.
- Crowd-Pleaser: I’ve never met a kid who didn’t love these. They’re sweet, crunchy, and fun to look at. Even picky eaters who usually turn up their noses at homemade treats will grab one.
- Unbelievably Delicious: The combination of salty popcorn, sweet marshmallow, and buttery coating is pure comfort food. The candy eyes add a little crunch and a lot of personality.
What makes this recipe different from the rest? It’s the ratio. I spent a few batches figuring out exactly how much marshmallow to use so the popcorn balls hold together without turning into a sticky brick. Too much marshmallow and they’re impossible to chew. Too little and they fall apart. This version is just right—sturdy enough to hold their shape, soft enough to eat without a struggle. Plus, the candy eyes make them look like little monsters, which is basically the whole point of Halloween, right?
This recipe isn’t just good—it’s the kind that makes you close your eyes after the first bite. It’s comfort food reimagined: faster, simpler, but with the same soul-soothing satisfaction. Perfect for impressing guests without stress, or turning a regular October evening into something memorable.
What Ingredients You Will Need
This recipe uses simple, everyday ingredients to create something that feels special. You don’t need a trip to a specialty store or a long list of obscure items. Most of these are pantry staples, and the candy eyes are easy to find in the baking aisle or online.
- Popcorn: 8 cups of popped popcorn (about 1/2 cup unpopped kernels). I prefer air-popped or lightly salted microwave popcorn. Avoid heavily buttered varieties—they can make the marshmallow coating slide off. If you’re using microwave popcorn, look for a plain or lightly salted option.
- Marshmallows: 1 standard bag (10 ounces) of mini marshmallows. Mini marshmallows melt faster and more evenly than large ones. I recommend Jet-Puffed for consistent results, but any brand works. (Use vegan marshmallows if needed—they melt a little differently, so stir a bit longer.)
- Unsalted Butter: 4 tablespoons (1/2 stick). Unsalted butter gives you control over the salt level. If you only have salted butter, reduce the added salt by a pinch. (I’ve used both, and honestly, it’s hard to mess this up.)
- Vanilla Extract: 1 teaspoon. Pure vanilla extract adds warmth and depth. Imitation vanilla works in a pinch, but the flavor won’t be as rich. (I once forgot the vanilla entirely, and the popcorn balls were still good—just a little flat.)
- Salt: A pinch of flaky sea salt or kosher salt. This balances the sweetness and makes the popcorn flavor pop. Don’t skip it—even a tiny amount makes a difference.
- Candy Eyes: 1/2 cup (about 50-60 pieces). You can find these in the baking aisle at most grocery stores, or online. They come in different sizes—I like the medium ones for popcorn balls. (Pro tip: Buy extra because some will get eaten before they make it into the bowl.)
- Optional Add-Ins: 1/4 cup of candy corn, 1/4 cup of sprinkles, or a handful of mini chocolate chips. These are totally optional, but they add color and crunch. My kids love when I throw in a few candy corns—they look like little teeth.
Ingredient Selection Tips: For the best texture, use popcorn that’s at least a day old. Freshly popped popcorn is too fluffy and can absorb the marshmallow coating unevenly. If you’re using microwave popcorn, check the label for added butter or oil—plain or lightly salted is best. For the candy eyes, look for the kind that are hard and round, not the soft gummy kind. Hard candy eyes hold their shape better and don’t get sticky.
Substitution Guidance: If you’re avoiding dairy, use plant-based butter and vegan marshmallows. The texture will be slightly different—vegan marshmallows take a little longer to melt—but the result is still delicious. For a gluten-free version, this recipe is naturally gluten-free as long as your popcorn and marshmallows are certified gluten-free. Double-check the labels if you’re serving someone with celiac disease.
Equipment Needed
You don’t need much to make these Halloween popcorn balls. Most of these tools are probably already in your kitchen. If you’re missing something, I’ve included budget-friendly alternatives.
- Large Pot: A 4- to 6-quart pot works best for melting the marshmallow mixture. Nonstick is ideal because it makes cleanup easier. If you don’t have nonstick, just butter the pot well before you start.
- Large Mixing Bowl: You’ll need a big bowl to combine the popcorn and marshmallow mixture. Metal or glass works fine. Plastic can work, but it might get a little greasy from the butter. (I’ve used a salad bowl before—it’s not pretty, but it gets the job done.)
- Spatula or Wooden Spoon: A silicone spatula is great for stirring the marshmallow mixture and folding it into the popcorn. Wooden spoons work too, but they can be harder to clean. (I learned the hard way that melted marshmallow sticks to everything, so a silicone spatula is worth the investment.)
- Parchment Paper or Wax Paper: You’ll line your baking sheet or counter with this to prevent the popcorn balls from sticking. Parchment paper is better because it’s nonstick and heat-resistant. Wax paper can work if you’re careful, but it might stick a little.
- Baking Sheet or Tray: A standard half-sheet pan is perfect for holding the popcorn balls as they cool. If you don’t have one, a large cutting board or even a clean counter works—just make sure it’s covered with parchment paper.
- Butter or Cooking Spray: You’ll need to grease your hands (or use disposable gloves) to shape the popcorn balls. Butter works great, but cooking spray is easier and less messy. (I use a combination: butter on my hands and a little spray on the parchment paper.)
- Optional: Disposable Gloves: These are a game-changer. They keep the sticky marshmallow off your hands and make shaping the popcorn balls much easier. You can find them at any grocery store or online. (I honestly don’t make these without gloves anymore—it’s just not worth the cleanup.)
Budget-Friendly Tip: If you don’t have a large pot, use a Dutch oven or a deep skillet. If you don’t have a silicone spatula, a wooden spoon works—just soak it in hot water right after use to make cleanup easier. And if you don’t have parchment paper, you can use aluminum foil lightly sprayed with cooking spray. It’s not perfect, but it’ll do the job.
Preparation Method
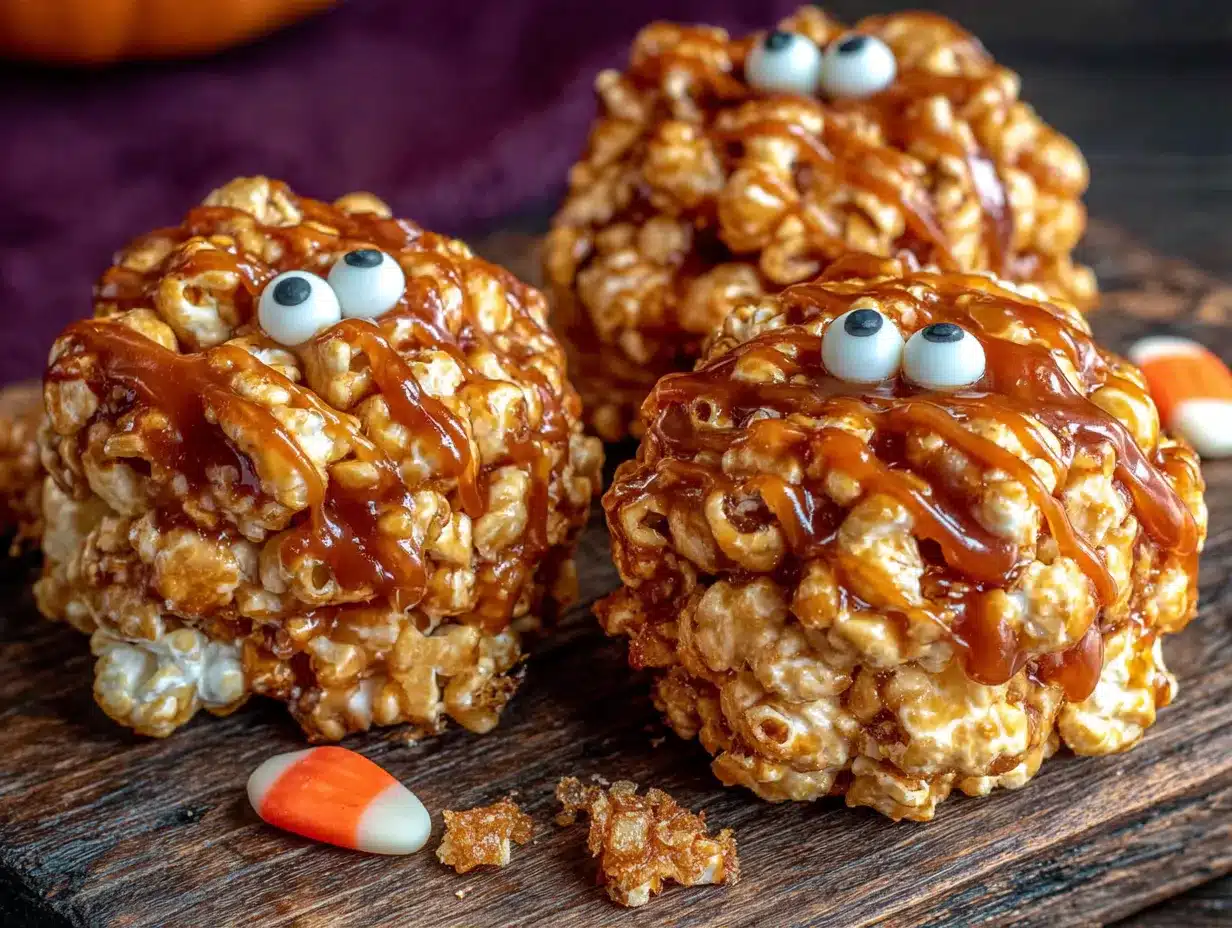
Let’s get to the fun part. This recipe moves fast once you start, so I recommend having everything measured and ready to go before you turn on the stove. Trust me—you don’t want to be hunting for candy eyes while marshmallow is burning on the stove. I’ve been there, and it’s not pretty.
- Pop the popcorn. Start by popping 8 cups of popcorn. If you’re using an air popper, this takes about 3 minutes. If you’re using microwave popcorn, follow the package instructions. Spread the popped popcorn on a large baking sheet and pick out any unpopped kernels. (I always miss a few, and my kids have learned to chew carefully. It’s a life skill.) Set the popcorn aside to cool slightly while you prepare the marshmallow mixture.
- Prepare your workspace. Line a large baking sheet or clean counter with parchment paper. Lightly spray the paper with cooking spray or rub it with a little butter. This will prevent the popcorn balls from sticking. If you’re using disposable gloves, put them on now and grease them with a little butter or cooking spray. (I’ve skipped this step before, and let me tell you—peeling marshmallow off your fingers is not a good time.)
- Melt the butter. In a large pot over medium heat, melt 4 tablespoons of unsalted butter. Stir it occasionally with a silicone spatula or wooden spoon. Once the butter is fully melted, add a pinch of salt and 1 teaspoon of vanilla extract. Stir to combine. The smell at this point is amazing—buttery, warm, and a little sweet.
- Add the marshmallows. Pour the entire bag of mini marshmallows (10 ounces) into the pot. Stir constantly as the marshmallows melt. This takes about 3-4 minutes. Don’t walk away—marshmallows can go from melted to burnt in seconds. You want the mixture to be smooth, glossy, and completely free of lumps. (If you see any lumps, keep stirring. They’ll eventually melt.)
- Combine with popcorn. Pour the melted marshmallow mixture over the popcorn in your large mixing bowl. Use a spatula to gently fold everything together. Work quickly—the mixture starts to set as it cools. Make sure every piece of popcorn is coated. It’s okay if some clumps form—that’s actually a good thing. (I usually end up with a few stray pieces of popcorn that escaped the coating. I just eat them. Waste not, want not.)
- Add the candy eyes. Sprinkle 1/2 cup of candy eyes over the popcorn mixture. Fold them in gently so they’re evenly distributed. You want every popcorn ball to have at least a few eyes staring back at you. (My kids love finding the ones with the most eyes—they call them the “monster balls.”)
- Shape the popcorn balls. Using greased hands or disposable gloves, scoop up a handful of the popcorn mixture (about 1/2 cup) and press it firmly into a ball shape. Don’t squeeze too hard—you want the ball to hold together without being rock solid. Place each ball on the prepared parchment paper. Repeat until all the mixture is used. You should get about 12-14 popcorn balls, depending on size. (I always make a few smaller ones for little hands.)
- Let them set. Allow the popcorn balls to cool and set for at least 15 minutes at room temperature. They’ll firm up as they cool. If you’re in a hurry, you can pop them in the fridge for 10 minutes. Just don’t leave them in there too long, or they might get a little too hard. (I once forgot them in the fridge overnight, and they were basically edible rocks. Still tasty, but not ideal.)
- Serve and enjoy. Once the popcorn balls are set, they’re ready to eat. Arrange them on a platter and watch them disappear. Store any leftovers in an airtight container at room temperature for up to 3 days. (Ha! Leftovers. That’s a good one.)
Cooking Tips & Techniques
I’ve made these Halloween popcorn balls more times than I can count, and I’ve learned a few things along the way. Some of these tips came from happy accidents, and others came from full-on disasters. Either way, they’ll make your life easier.
Work quickly but stay calm. The marshmallow mixture starts to set as soon as it cools, so you need to move fast once you combine it with the popcorn. But don’t panic—you have about 5 minutes before things get too stiff. If the mixture starts to harden before you’re done shaping, pop the pot back on low heat for 30 seconds to loosen it up. (I’ve done this more times than I care to admit, and it works every time.)
Don’t overmix. When you’re folding the marshmallow mixture into the popcorn, be gentle. Overmixing can break the popcorn into small pieces, which makes the popcorn balls less satisfying to bite into. You want some texture—those little clumps of popcorn are part of the charm. (My first batch was basically popcorn dust because I stirred too enthusiastically. Learn from my mistake.)
Grease everything. Marshmallow sticks to everything—your hands, your spatula, your counter, your soul. Grease your hands (or wear gloves), grease the parchment paper, and grease your spatula. A little butter or cooking spray goes a long way. (I once forgot to grease my hands and spent 20 minutes peeling marshmallow off my fingers. Not my finest moment.)
Test one before shaping all of them. Before you shape all the popcorn balls, make one test ball. If it falls apart, add a little more marshmallow mixture to the bowl. If it’s too sticky, let the mixture cool for another minute before shaping. (This is a pro tip I learned from my grandma, who made popcorn balls for every holiday. She never skipped the test ball.)
Use fresh marshmallows. Old marshmallows can be dry and harder to melt. If your marshmallows are more than a few months old, consider buying a fresh bag. The texture difference is noticeable. (I learned this the hard way when I tried to use a bag that had been sitting in my pantry for a year. The popcorn balls were lumpy and weird.)
Keep the kids involved but safe. This recipe is great for kids, but the melted marshmallow is hot—like, seriously hot. Let younger children handle the candy eyes and the shaping (once the mixture has cooled slightly). Older kids can help with stirring under supervision. (My 7-year-old loves adding the candy eyes. She takes her job very seriously.)
Variations & Adaptations
One of the best things about this recipe is how easy it is to customize. You can change the flavor, the color, or the texture with just a few tweaks. Here are some of my favorite variations.
Spooky Spider Version: Instead of candy eyes, use black licorice strings for spider legs. Press 4 pieces of licorice into each popcorn ball before they set, then add a candy eye in the center. They look like little spiders, and kids absolutely lose their minds over them. (I made these for a Halloween party once, and they were the first thing to disappear.)
Chocolate Lover’s Twist: Add 1/4 cup of mini chocolate chips to the popcorn mixture along with the candy eyes. The chocolate melts slightly from the warmth of the marshmallow, creating little pockets of gooey goodness. You can also drizzle melted white or dark chocolate over the finished popcorn balls for a more polished look. (My husband requests this version every year. He’s a chocolate fiend.)
Gluten-Free and Dairy-Free Option: This recipe is naturally gluten-free if you use certified gluten-free popcorn and marshmallows. For a dairy-free version, swap the butter for plant-based butter and use vegan marshmallows. The texture will be slightly different—vegan marshmallows take a little longer to melt—but the result is still delicious. (I’ve made this for friends with dietary restrictions, and they always appreciate having a treat they can actually eat.)
Colorful Monster Balls: Add a few drops of food coloring to the marshmallow mixture before combining it with the popcorn. Green, purple, or orange food coloring turns the popcorn balls into colorful monsters. Just be careful not to add too much—a little goes a long way. (I once added too much green food coloring, and the popcorn balls looked like something from a sci-fi movie. My kids thought it was hilarious.)
Crunchy Add-In Version: Mix in 1/4 cup of crushed pretzels or broken peanut butter cups along with the candy eyes. The salty crunch from the pretzels balances the sweetness of the marshmallow, and the peanut butter cups add a creamy texture. (This is my personal favorite variation. The salty-sweet combo is irresistible.)
Serving & Storage Suggestions
These Halloween popcorn balls are best served at room temperature, right after they’ve set. The texture is perfect—firm enough to hold their shape, but soft enough to bite into without a struggle. Arrange them on a platter or in a large bowl for a party, or wrap them individually in plastic wrap for lunchbox treats or party favors.
Presentation Ideas: For a Halloween party, arrange the popcorn balls on a black or orange platter. Add a few extra candy eyes scattered around for a fun, spooky effect. If you’re feeling fancy, you can drizzle melted white chocolate over the top and sprinkle with orange or black sprinkles. (I did this for a school party once, and the teachers asked for the recipe.)
Complementary Dishes: These popcorn balls pair well with other Halloween treats like caramel apples, pumpkin cupcakes, or a warm mug of apple cider. They’re also great alongside a bowl of chili or a hearty soup—the sweetness balances the savory flavors. (We always have popcorn balls with our Halloween chili. It’s become a tradition.)
Storage Instructions: Store any leftover popcorn balls in an airtight container at room temperature for up to 3 days. Do not refrigerate them—the cold can make them hard and chewy. If you need to store them longer, you can freeze them for up to 1 month. Wrap each popcorn ball individually in plastic wrap, then place them in a freezer-safe bag. To thaw, leave them at room temperature for about 30 minutes. (I’ve frozen these before, and they’re just as good after thawing. The texture is slightly softer, but still delicious.)
Reheating Tips: If your popcorn balls have hardened slightly, you can soften them by microwaving one for 5-10 seconds. Don’t overdo it—they’ll get too soft and fall apart. Alternatively, you can let them sit at room temperature for an hour to soften naturally. (I’ve definitely microwaved a few in a pinch, and they were fine. Just keep an eye on them.)
Flavor Development: These popcorn balls are best the day they’re made, but they’re still good the next day. The marshmallow coating will soften slightly over time, making them a little chewier. If you like a firmer texture, eat them within the first few hours. (I personally prefer them on day two—the flavors meld together, and the texture is more cohesive.)
Nutritional Information & Benefits
Let’s be real—these are a treat, not a health food. But that doesn’t mean they’re totally without merit. Here’s a rough breakdown of the nutritional information for one popcorn ball (based on 12 servings).
- Calories: Approximately 180-200 per popcorn ball
- Fat: 8 grams (mostly from butter)
- Carbohydrates: 28 grams
- Protein: 2 grams
- Fiber: 1 gram
- Sugar: 18 grams
Health Benefits: Popcorn is a whole grain, which means it contains fiber and antioxidants. The butter provides a small amount of vitamin A, and the vanilla extract adds a touch of flavor without any significant nutritional impact. The candy eyes are mostly sugar, but they’re used in small amounts. (I tell myself that the whole grain popcorn cancels out the marshmallow. It doesn’t, but it makes me feel better.)
Dietary Considerations: This recipe is naturally gluten-free if you use certified gluten-free popcorn and marshmallows. It’s also nut-free, which makes it a safe option for school parties and events where allergies are a concern. If you’re watching your sugar intake, you can reduce the amount of marshmallows slightly, but the texture will be affected. (I’ve tried a low-sugar version, and honestly, it’s just not the same. Sometimes you have to embrace the sweetness.)
Allergen Information: This recipe contains dairy (butter) and may contain traces of gluten depending on the brands you use. The candy eyes are typically made from sugar and cornstarch, but check the label if you’re concerned about specific allergens. (I always check the candy eyes because some brands use gelatin or other additives.)
Personal Wellness Perspective: I believe in balance—enjoying treats like these in moderation is part of a healthy relationship with food. These popcorn balls are a once-a-year tradition in our house, and that makes them special. They’re not an everyday snack, and that’s okay. (My kids know that Halloween treats are a sometimes food, and they appreciate them more because of it.)
Conclusion
These Kid-Approved Halloween Popcorn Balls with Candy Eyes are everything you want in a Halloween treat—fun, fast, and genuinely delicious. They come together in under 20 minutes, use simple ingredients, and let the kids help without turning your kitchen into a disaster zone. Plus, the candy eyes make them look like little monsters, which is basically the whole point of Halloween.
I hope you’ll give this recipe a try and make it your own. Add your favorite candy, change up the colors, or experiment with different shapes. The beauty of this recipe is that it’s forgiving—you can’t really mess it up. And even if you do, it’ll still taste good. (Trust me, I’ve made plenty of mistakes, and they’ve all been delicious.)
Personally, I love this recipe because it reminds me of Lita, my neighbor who taught me that food is better when it has a little personality. Every time I make these popcorn balls, I think of her standing in her doorway with that small bag of candy eyes, and I smile. That’s what cooking is about, right? The moments and the people that make the food mean something.
So go ahead—make a batch (or two) of these Halloween popcorn balls. Share them with your family, your friends, your neighbors. And if you come up with a fun variation, I’d love to hear about it. Drop a comment below or tag me in your photos. Happy Halloween, and happy snacking!
Frequently Asked Questions
Can I use microwave popcorn for this recipe?
Yes, you can use microwave popcorn. Just look for a plain or lightly salted variety. Heavily buttered popcorn can make the marshmallow coating slide off, so avoid those if possible. If all you have is buttered popcorn, it’ll still work—just expect a slightly greasier result.
How do I keep the popcorn balls from falling apart?
Make sure your marshmallow mixture is fully melted and smooth before combining it with the popcorn. Press the popcorn balls firmly when shaping them, but don’t squeeze too hard. If they’re still falling apart, add a little more marshmallow mixture to the bowl and stir gently.
Can I make these ahead of time?
Yes, you can make them up to 3 days in advance. Store them in an airtight container at room temperature. Do not refrigerate them—the cold can make them hard and chewy. If you need to store them longer, you can freeze them for up to 1 month.
Are these safe for kids with nut allergies?
This recipe is naturally nut-free, which makes it a great option for school parties and events. Just double-check the labels on your popcorn, marshmallows, and candy eyes to make sure they’re processed in a nut-free facility if you’re serving someone with a severe allergy.
Can I use homemade popcorn instead of store-bought?
Absolutely. In fact, homemade popcorn often works better because you can control the salt and butter levels. Just make sure the popcorn is at least a day old—freshly popped popcorn is too fluffy and can absorb the marshmallow coating unevenly.
Pin This Recipe!
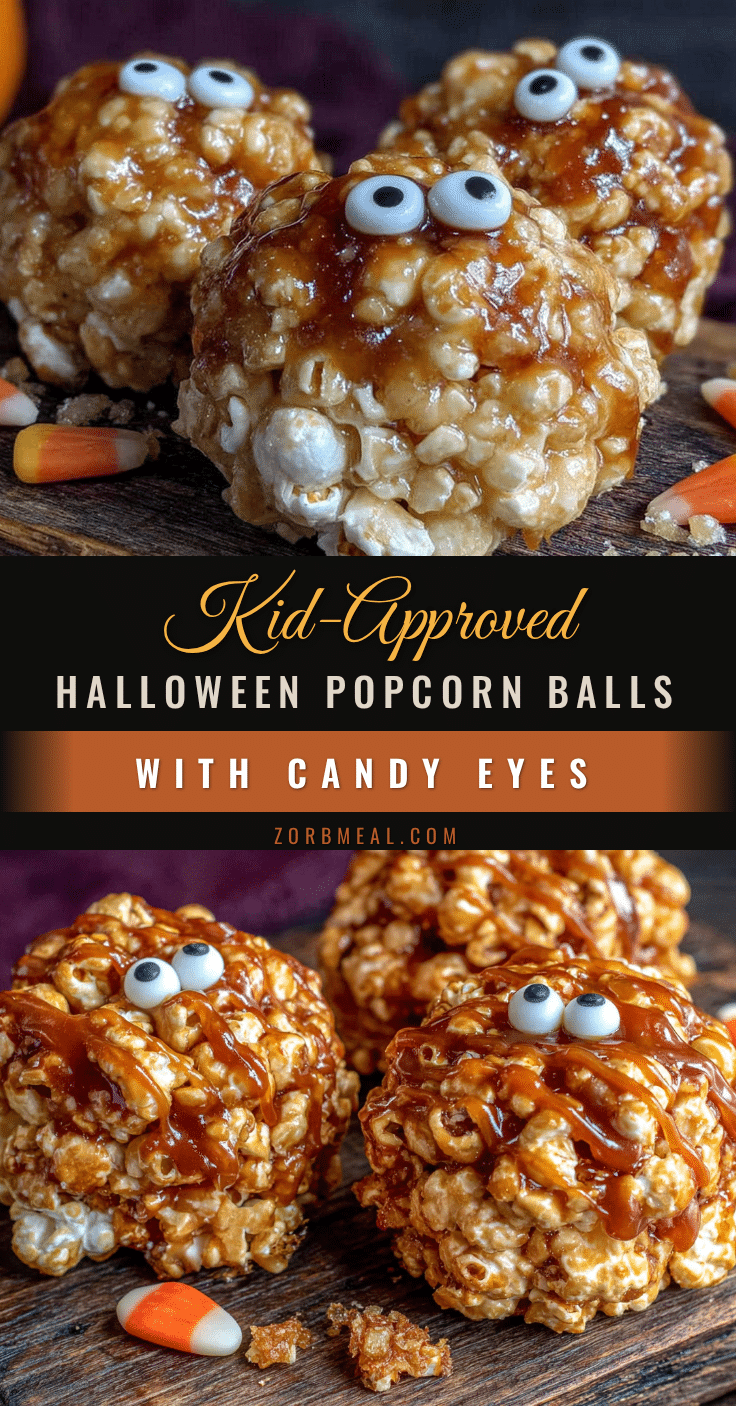
Kid-Approved Halloween Popcorn Balls with Candy Eyes
Crunchy, sweet, and a little bit silly, these Halloween popcorn balls are a quick and easy treat that kids love. Made with simple ingredients and decorated with candy eyes, they’re perfect for Halloween parties and family movie nights.
- Prep Time: 10 minutes
- Cook Time: 10 minutes
- Total Time: 20 minutes
- Yield: 12-14 servings 1x
- Category: Dessert
- Cuisine: American
Ingredients
- 8 cups popped popcorn (about 1/2 cup unpopped kernels)
- 1 standard bag (10 ounces) mini marshmallows
- 4 tablespoons unsalted butter
- 1 teaspoon vanilla extract
- A pinch of flaky sea salt or kosher salt
- 1/2 cup candy eyes (about 50–60 pieces)
- Optional: 1/4 cup candy corn, 1/4 cup sprinkles, or a handful of mini chocolate chips
Instructions
- Pop the popcorn. Spread on a large baking sheet and pick out any unpopped kernels. Set aside to cool slightly.
- Line a large baking sheet or clean counter with parchment paper. Lightly spray with cooking spray or rub with butter.
- In a large pot over medium heat, melt 4 tablespoons unsalted butter. Add a pinch of salt and 1 teaspoon vanilla extract. Stir to combine.
- Pour the entire bag of mini marshmallows into the pot. Stir constantly until smooth and glossy, about 3-4 minutes.
- Pour the melted marshmallow mixture over the popcorn in a large mixing bowl. Gently fold until every piece is coated.
- Sprinkle 1/2 cup candy eyes over the popcorn mixture and fold gently to distribute evenly.
- Using greased hands or disposable gloves, scoop up about 1/2 cup of the mixture and press firmly into a ball shape. Place on prepared parchment paper. Repeat with remaining mixture (makes 12-14 popcorn balls).
- Let the popcorn balls cool and set at room temperature for at least 15 minutes.
- Serve and enjoy. Store leftovers in an airtight container at room temperature for up to 3 days.
Notes
Work quickly once marshmallow mixture is combined with popcorn as it sets fast. If mixture hardens, reheat on low for 30 seconds. Grease hands or wear gloves to prevent sticking. Use fresh marshmallows for best melting. Popcorn that is at least a day old works best for even coating.
Nutrition
- Serving Size: 1 popcorn ball
- Calories: 190
- Sugar: 18
- Sodium: 80
- Fat: 8
- Saturated Fat: 4
- Carbohydrates: 28
- Fiber: 1
- Protein: 2
Keywords: Halloween popcorn balls, candy eyes, kid-friendly, easy Halloween treat, popcorn balls recipe


