This was supposed to be a simple batch of snickerdoodles. I had the butter softening, the cinnamon ready, and I was feeling pretty good about myself for getting a jump on the afternoon baking. Then I grabbed the wrong carton from the fridge. Instead of milk, I poured about a third of a cup of apple cider into the mixing bowl before I even realized what I was doing. I just stood there for a second, staring at the pale, spicy liquid swirling into the butter and sugar, thinking, “Well, I’ve done it now.” The kids were already asking when the cookies would be done, and I had a sticky, cider-laced dough that I was sure was going to be a total flop. I almost tossed it and started over, but honestly, I had already washed the mixer bowl. So I just added a bit more flour, rolled the dough in cinnamon sugar, and shoved them in the oven, fully expecting a flat, weird-tasting mess.
What came out of the oven was nothing like the plan—and way, way better. The kitchen smelled like a fall candle had exploded, but in the best way. The cookies were puffy, soft, and had this gentle, fruity tang that the regular snickerdoodles never had. My youngest took one bite, looked at me with those suspicious eyes kids get, and then grabbed three more off the cooling rack. That was the moment I knew I had stumbled onto something good. Maybe you’ve been there, where a mistake in the kitchen turns into a new family favorite. It’s a pretty great feeling, let me tell you. I’ve made these cookies at least a dozen times since that Tuesday afternoon, tweaking the flour and the chilling time until they were just right. Now, I wouldn’t dare make them any other way.
Why You’ll Love This Recipe
As a mom who has tested countless cookie recipes on a very picky panel of taste-testers, I can tell you this one is a winner. It hits that sweet spot between a classic sugar cookie and a soft, snickerdoodle-style bake, but with a real apple cider flavor that isn’t too strong for the kids.
- Kid-Approved and Picky-Eater Friendly: The apple cider flavor is subtle and sweet, not sour or “healthy” tasting. My kids have no idea it’s in there—they just know the cookies are soft, chewy, and covered in cinnamon sugar.
- Simple Pantry Ingredients: No need to buy apple butter, apple pie filling, or anything fancy. You just need regular apple cider, flour, butter, and sugar. These are the kind of ingredients you probably already have on hand for a rainy day.
- Perfect for Fall Baking on a Budget: A gallon of apple cider is cheap, and you only need a cup for this recipe. It’s a great way to use up that last bit of cider from the pumpkin patch trip without letting it go sour in the fridge.
- Soft and Chewy Texture: These cookies stay soft for days. They don’t get hard or crumbly, which means they pack perfectly in lunchboxes or for an after-school snack.
- Quick and Easy: From start to finish, you’re looking at about 25 minutes of active time. The dough needs a short chill, but the actual hands-on work is fast and easy enough for little helpers.
What makes this recipe different from other apple cider cookies I’ve tried is the texture. A lot of recipes use apple cider that hasn’t been reduced, which makes the cookies cakey or flat. I figured out the right balance of flour and chilling time to keep them chewy and thick. It’s not just another version of a fall cookie—it’s the one that actually works for a busy family.
What Ingredients You Will Need
This recipe uses simple, wholesome ingredients to deliver that cozy apple cider flavor without any fuss. Most of these are pantry staples, but a few notes on selection will help you get the best results.
- Unsalted Butter (1 cup / 226 grams), softened: I always use unsalted so I can control the salt level. Let it sit out for about 30 minutes until it’s soft but not melty.
- Granulated Sugar (1 cup / 200 grams): Regular white sugar gives the cookies their structure and sweetness.
- Light Brown Sugar (1/2 cup / 100 grams), packed: This adds a bit of moisture and a deeper, caramel-like flavor that pairs beautifully with the apple cider. (I recommend Domino or C&H for consistent results.)
- Large Egg (1): Room temperature is best—just take it out of the fridge with the butter.
- Apple Cider (1/2 cup / 120 ml): Look for fresh, refrigerated apple cider, not the shelf-stable juice. The flavor is much more concentrated and authentic. I like the unfiltered kind from the local orchard.
- Vanilla Extract (1 teaspoon): Pure vanilla extract is worth the splurge here, but imitation works fine in a pinch.
- All-Purpose Flour (2 1/4 cups / 280 grams): Spoon and level your flour—don’t scoop straight from the bag, or you’ll end up with dry cookies.
- Baking Soda (1 teaspoon): Helps the cookies spread just the right amount.
- Ground Cinnamon (1 teaspoon): For the dough itself, to reinforce the cider flavor.
- Salt (1/2 teaspoon): Balances the sweetness and enhances the apple flavor.
- For the Cinnamon Sugar Coating:
- Granulated Sugar (1/4 cup / 50 grams): For rolling the dough balls.
- Ground Cinnamon (1 tablespoon): Mix with the sugar for that classic snickerdoodle-style crust.
Substitution Guidance: If you’re out of brown sugar, you can use all granulated sugar, but the cookies will be slightly less chewy. For a dairy-free option, you can swap the butter with a high-quality vegan butter stick (like Earth Balance), but avoid the tub-style spreads. I haven’t tested this with gluten-free flour, but a 1:1 baking blend should work—just expect a slightly different texture.
Equipment Needed
You don’t need a fancy bakery setup for these cookies. Here’s what you’ll need to get the job done.
- Electric Mixer (Stand or Handheld): A hand mixer works perfectly fine. I actually prefer it because it’s easier to scrape the bowl. Just make sure your beaters are clean and dry.
- Mixing Bowls: One large bowl for the dough and a small shallow bowl for the cinnamon sugar.
- Baking Sheets (2): Light-colored, rimmed baking sheets are best. Dark sheets can cause the bottoms to brown too quickly.
- Parchment Paper or Silicone Baking Mats: Absolutely essential for preventing sticking and ensuring even baking. I’ve used both, and silicone mats are my go-to for cookies.
- Cookie Scoop (about 1.5 tablespoons): This ensures uniform cookies that bake evenly. A spoon works too, but the scoop is faster and neater.
- Wire Cooling Rack: Lets the cookies cool completely without getting soggy on the bottom.
- Plastic Wrap: For chilling the dough. You can also use a reusable bowl cover.
Budget-Friendly Tip: If you don’t have a cookie scoop, just use two spoons—one to scoop and one to scrape the dough onto the pan. It takes a little longer, but it works just as well.
Preparation Method
Let’s get baking! This method is straightforward, but a few little tricks make all the difference.
- Cream the Butter and Sugars (5 minutes): In your large mixing bowl, beat the softened unsalted butter, granulated sugar, and packed light brown sugar together on medium speed until light and fluffy. Scrape down the sides of the bowl halfway through. You want it to look pale and airy—this is where the texture starts.
- Add the Wet Ingredients: Beat in the large egg, the apple cider, and the vanilla extract until just combined. Don’t overmix here. The batter might look a little curdled or separated—that’s totally normal because of the cold cider hitting the butter. Don’t panic!
- Whisk the Dry Ingredients: In a separate bowl, whisk together the all-purpose flour, baking soda, ground cinnamon, and salt. This ensures the leavening and spices are evenly distributed.
- Combine Wet and Dry: Gradually add the dry ingredients to the wet mixture, mixing on low speed just until no streaks of flour remain. Stop the mixer and scrape the bottom of the bowl with a spatula to make sure everything is incorporated. The dough will be soft and slightly sticky—that’s what you want.
- Chill the Dough (At least 1 hour): This is a non-negotiable step. Cover the bowl with plastic wrap and refrigerate for at least 1 hour, or up to 24 hours. Chilling firms up the butter and lets the flour absorb the cider, which prevents the cookies from spreading into thin, flat discs. I know it’s hard to wait, but trust me on this one.
- Preheat and Prep: When you’re ready to bake, preheat your oven to 350°F (175°C). Line your baking sheets with parchment paper or silicone mats.
- Make the Cinnamon Sugar Coating: In a small shallow bowl, whisk together the 1/4 cup of granulated sugar and 1 tablespoon of ground cinnamon until well combined.
- Scoop and Roll: Using your cookie scoop (or a spoon), scoop out rounded tablespoons of the chilled dough. Roll each ball between your palms to make it smooth, then roll it generously in the cinnamon sugar mixture. Place the coated dough balls about 2 inches apart on the prepared baking sheets. I usually fit about 12 per sheet.
- Bake (10-12 minutes): Bake one sheet at a time in the center of the oven. The cookies are done when the edges are set and lightly golden, but the centers still look soft and slightly puffy. They will continue to set as they cool. For a chewier cookie, pull them out at the 10-minute mark.
- Cool on the Pan (5 minutes): Let the cookies rest on the baking sheet for 5 minutes. This is crucial—they are very fragile right out of the oven. After 5 minutes, transfer them to a wire cooling rack to cool completely. The bottoms will firm up perfectly.
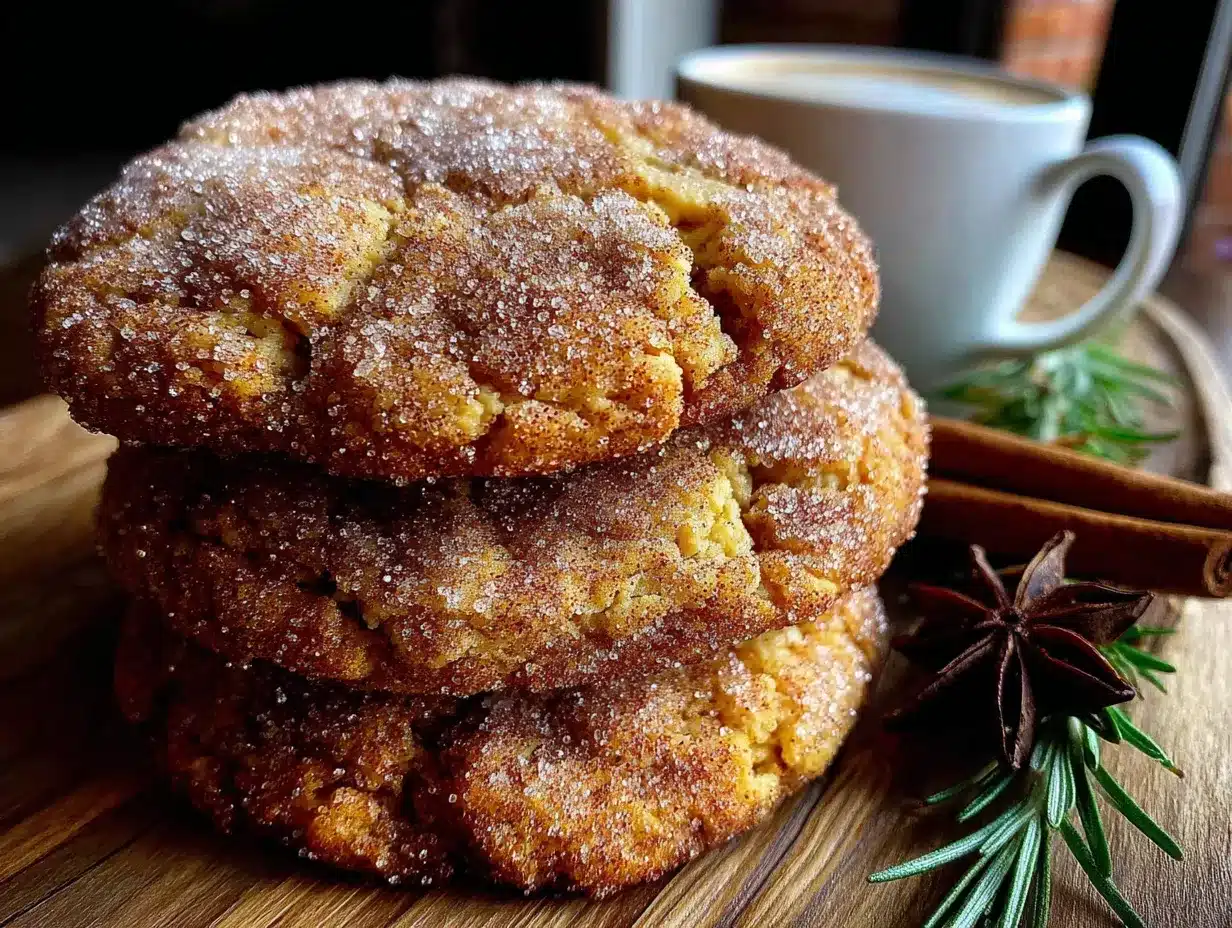
Sensory Cue: When you pull the cookies out, the kitchen should smell like a warm apple orchard. The tops will be crackled from the cinnamon sugar, and the edges will be a deep golden brown. If the cookies look pale all over, give them one more minute.
Cooking Tips & Techniques
I’ve made these cookies more times than I can count, and I’ve definitely made my share of mistakes. Here’s what I’ve learned so you don’t have to repeat my errors.
- Don’t Skip the Chill: The first time I made these, I was in a hurry and only chilled the dough for 20 minutes. The cookies spread into thin, crispy discs that were still tasty, but nothing like the chewy puffs I wanted. The full hour is essential for that thick, bakery-style texture.
- Measure Your Flour Correctly: The biggest mistake home bakers make is using a measuring cup to scoop flour directly from the bag. This packs the flour and adds too much, making cookies dry. Instead, fluff the flour with a spoon, then spoon it into your measuring cup and level it off with a knife. It makes a huge difference.
- Room Temperature Ingredients Matter: Cold butter won’t cream properly, and cold egg can seize the batter. Take them out of the fridge 30 minutes before you start. If you forget, you can microwave the butter for 5-10 seconds (don’t melt it!) and place the egg in a bowl of warm water for 5 minutes.
- Bake One Sheet at a Time: I know it’s tempting to put both sheets in the oven at once to save time, but the heat circulation gets uneven. The top sheet will brown too fast, and the bottom sheet won’t set properly. It’s worth the extra few minutes to bake them in batches.
- Use Parchment or Silicone: Greasing the baking sheet can cause the cookies to spread too much. Parchment paper or a silicone mat gives them the perfect amount of grip and makes cleanup a breeze.
Variations & Adaptations
This base recipe is pretty forgiving, so feel free to make it your own. Here are a few ways I’ve adapted it for different tastes and needs.
- Dairy-Free Version: Swap the unsalted butter for a high-quality vegan butter stick (like Miyoko’s or Earth Balance). Make sure it’s softened. The cookies will be slightly less rich, but still chewy and delicious.
- Add Some Texture: Fold in 1/2 cup of chopped pecans or walnuts (toasted, if you have time) along with the dry ingredients. The crunch is a nice contrast to the soft cookie. My husband loves this version.
- Apple Cider Glaze: For an extra layer of flavor, whisk together 1 cup of powdered sugar with 2-3 tablespoons of apple cider until smooth. Drizzle it over the cooled cookies. It makes them look fancy for a bake sale or holiday party.
- Spice It Up: Add 1/4 teaspoon of ground nutmeg or ginger to the dough along with the cinnamon. It gives the cookies a more complex, chai-like flavor.
- Gluten-Free Option: I’ve tested this with a 1:1 gluten-free baking flour (like Bob’s Red Mill), and it works well. The cookies will be a bit more delicate, so handle them gently when transferring to the cooling rack. Chilling the dough for 2 hours helps them hold their shape.
Serving & Storage Suggestions
These cookies are best enjoyed warm, but they’re still fantastic at room temperature. Here’s how to serve and store them.
Serving: I like to serve these cookies with a cold glass of milk for the kids or a warm mug of spiced tea for myself. They’re also perfect for dunking—the soft, chewy texture holds up well. For a fun presentation, stack them on a rustic wooden board or a simple white plate. A light dusting of extra cinnamon sugar on top makes them look irresistible.
Storage: Store the cookies in an airtight container at room temperature for up to 5 days. To keep them extra soft, add a slice of bread to the container—the cookies will absorb the moisture from the bread and stay chewy. I’ve done this trick for years, and it works like a charm.
Freezing: You can freeze the baked cookies for up to 3 months. Place them in a single layer in a freezer-safe bag or container, separating layers with parchment paper. To thaw, just let them sit at room temperature for about 15 minutes. You can also freeze the unbaked dough balls. Roll them in the cinnamon sugar, place them on a baking sheet, and freeze until solid. Then transfer them to a freezer bag. When you’re ready to bake, just add 2-3 minutes to the baking time—no need to thaw.
Reheating: For that fresh-from-the-oven experience, pop a cookie in the microwave for about 10 seconds. It softens the texture and brings back the warm cinnamon aroma. If you’re reheating a batch, place them on a baking sheet in a 300°F (150°C) oven for 5 minutes.
Nutritional Information & Benefits
Let’s be real—these are cookies, not health food. But there are a few bright spots worth mentioning.
Estimated Nutritional Values (per cookie, based on 24 cookies):
| Nutrient | Amount |
|---|---|
| Calories | 145 |
| Total Fat | 7g |
| Saturated Fat | 4g |
| Carbohydrates | 20g |
| Sugar | 13g |
| Protein | 2g |
Health Benefits: Apple cider is a good source of antioxidants and vitamin C, though most of it is lost during baking, it still adds a nice natural fruitiness. The cinnamon in the coating has anti-inflammatory properties and can help regulate blood sugar levels. Plus, using real butter provides vitamin A and healthy fats. If you’re watching your sugar intake, you can reduce the sugar in the dough by 1/4 cup without affecting the texture too much.
Dietary Considerations: This recipe contains gluten, dairy, and eggs. For a gluten-free version, see the variations section. These cookies are not low-carb or keto-friendly due to the sugar and flour content.
Conclusion
These Kid-Approved Chewy Apple Cider Cookies with Cinnamon Sugar are proof that the best recipes often come from happy accidents. They’re soft, chewy, and packed with that cozy fall flavor without being too complicated or expensive. Whether you’re baking for a school event, a weekend treat, or just because it’s Tuesday, these cookies deliver every single time.
I love that I can make these with my kids on a rainy afternoon without stressing about fancy techniques or hard-to-find ingredients. They get to roll the dough balls in the cinnamon sugar, and I get to enjoy a quiet moment with a cup of coffee and a warm cookie. It’s a win-win.
Now I’d love to hear from you! Have you tried making these cookies? Did you add your own twist? Drop a comment below and let me know how they turned out. And if you have a picky eater at home, I’d especially love to hear if these passed the test. Happy baking, friends!
Frequently Asked Questions
Can I use apple juice instead of apple cider?
You can, but the flavor will be much milder and the cookies will be slightly sweeter. Apple cider has a richer, more concentrated apple taste that really makes these cookies special. If you only have juice, I’d recommend simmering it on the stove for 10-15 minutes to reduce it and concentrate the flavor before using it.
Why did my cookies spread too much?
This usually happens for one of three reasons: the dough wasn’t chilled long enough, the butter was too soft or melted, or the flour was under-measured. Make sure you chill the dough for at least 1 hour, use softened (not melted) butter, and spoon and level your flour properly.
Can I make the dough ahead of time?
Absolutely! The dough can be refrigerated for up to 24 hours before baking. In fact, the flavors meld together even more as it sits. You can also freeze the dough balls for up to 3 months—just bake them straight from the freezer, adding a couple of extra minutes to the bake time.
How do I get the cookies to be extra chewy?
For the chewiest texture, use a mix of granulated and brown sugar, as written in the recipe. Brown sugar contains molasses, which adds moisture. Also, be careful not to overbake—pull the cookies out when the edges are set but the centers still look soft. They will firm up as they cool.
Can I add frosting or a glaze to these cookies?
Yes! A simple apple cider glaze (powdered sugar mixed with apple cider) is delicious and easy. Drizzle it over the cooled cookies for an extra touch of sweetness. You can also add a cream cheese frosting for a richer treat, but keep in mind that will change the texture and sweetness level significantly.
Pin This Recipe!

Homemade Apple Cider Cookies: Easy Chewy Cinnamon Sugar

Soft, chewy apple cider cookies coated in cinnamon sugar. A happy accident turned family favorite, these cookies are perfect for fall baking and are kid-approved.
- Prep Time: 25 minutes
- Cook Time: 12 minutes
- Total Time: 1 hour 37 minutes (includes 1 hour chilling)
- Yield: 24 cookies 1x
- Category: Dessert
- Cuisine: American
Ingredients
- 1 cup (226 g) unsalted butter, softened
- 1 cup (200 g) granulated sugar
- 1/2 cup (100 g) light brown sugar, packed
- 1 large egg, room temperature
- 1/2 cup (120 ml) apple cider
- 1 teaspoon vanilla extract
- 2 1/4 cups (280 g) all-purpose flour
- 1 teaspoon baking soda
- 1 teaspoon ground cinnamon
- 1/2 teaspoon salt
- For the Cinnamon Sugar Coating:
- 1/4 cup (50 g) granulated sugar
- 1 tablespoon ground cinnamon
Instructions
- Cream the butter and sugars: In a large mixing bowl, beat the softened unsalted butter, granulated sugar, and packed light brown sugar together on medium speed until light and fluffy, about 5 minutes. Scrape down the sides of the bowl halfway through.
- Add the wet ingredients: Beat in the large egg, apple cider, and vanilla extract until just combined. The batter may look slightly curdled—this is normal.
- Whisk the dry ingredients: In a separate bowl, whisk together the all-purpose flour, baking soda, ground cinnamon, and salt.
- Combine wet and dry: Gradually add the dry ingredients to the wet mixture, mixing on low speed just until no streaks of flour remain. Scrape the bottom of the bowl with a spatula to ensure everything is incorporated. The dough will be soft and slightly sticky.
- Chill the dough: Cover the bowl with plastic wrap and refrigerate for at least 1 hour, or up to 24 hours.
- Preheat and prep: When ready to bake, preheat oven to 350°F (175°C). Line baking sheets with parchment paper or silicone baking mats.
- Make the cinnamon sugar coating: In a small shallow bowl, whisk together 1/4 cup granulated sugar and 1 tablespoon ground cinnamon.
- Scoop and roll: Using a cookie scoop (about 1.5 tablespoons), scoop rounded tablespoons of chilled dough. Roll each ball between your palms to smooth, then roll generously in the cinnamon sugar mixture. Place coated dough balls about 2 inches apart on prepared baking sheets.
- Bake: Bake one sheet at a time in the center of the oven for 10-12 minutes. Cookies are done when edges are set and lightly golden, but centers still look soft and slightly puffy.
- Cool on the pan: Let cookies rest on the baking sheet for 5 minutes, then transfer to a wire cooling rack to cool completely.
Notes
Chilling the dough is non-negotiable for thick, chewy cookies. For extra softness, store cookies with a slice of bread in an airtight container. To freeze, place baked cookies in a single layer in a freezer-safe bag for up to 3 months, or freeze unbaked dough balls and bake directly from frozen, adding 2-3 minutes to bake time.
Nutrition
- Serving Size: 1 cookie
- Calories: 145
- Sugar: 13
- Sodium: 95
- Fat: 7
- Saturated Fat: 4
- Carbohydrates: 20
- Protein: 2
Keywords: apple cider cookies, chewy cookies, cinnamon sugar cookies, fall baking, kid-friendly cookies, easy cookie recipe


