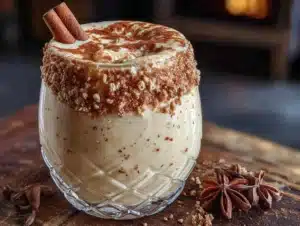
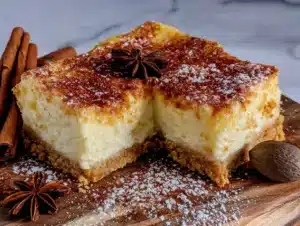
My sister-in-law, Jenna, had claimed to hate apple desserts for years. “Too mushy,” she’d say with a little shudder, pushing away a perfectly good apple crisp at a family gathering. “The texture is just… wrong.” We all just shrugged. It was her thing, you know? The one food hill she was willing to die on. For seven years, every Thanksgiving, every fall get-together, she’d politely pass on the apple pie, the apple crisp, the apple cobbler. We stopped even offering.
Then last October, I made this Easy Overnight Apple Cinnamon Dump Cake. Honestly, I made it on a whim. I had a bag of apples that were about to turn, a box of cake mix in the pantry, and a desperate need for a dessert that didn’t require me to actually *bake* anything complicated. I dumped it all in a dish, stuck it in the fridge, and went to bed, figuring it would be a decent breakfast treat for the kids.
The next morning, I pulled the pan out to bake it for our weekly Sunday dinner. The smell was unreal—like a cinnamon-scented hug filling the whole house. I set it on the counter to cool, and that’s when I saw Jenna. She was standing by the stove, holding a fork, with a guilty look on her face. She had a crumb on her lip. “Okay,” she said, not even looking sorry. “This is different. This is… good.” I didn’t say a word. I just handed her a plate. Maybe you’ve been there—watching someone you love take back every bad thing they’ve ever said about a dish. It’s a quiet victory, and honestly, it’s the reason I keep this recipe in my back pocket. It’s just that good.
Why You’ll Love This Recipe
This isn’t just another apple dessert. This is the one that changes minds. It’s the kind of recipe that makes you look like a hero in the kitchen without actually having to do much work. Let’s break down why it’s going to become your new go-to.
- Quick & Easy: This is a true dump-and-go recipe. You spend about 10 minutes prepping it the night before, and then you just slide it into the oven the next day. It’s perfect for busy weeknights when you want a homemade dessert without the stress.
- Simple Ingredients: You probably have most of these in your pantry right now. A box of yellow cake mix, some butter, a few apples, and a handful of pantry spices. No fancy trips to the specialty grocery store required.
- Perfect for Family Meals: This cake is a total crowd-pleaser. The kids go crazy for the sweet, tender apples and the soft, cakelike topping. The adults love the warm cinnamon flavor. It disappears fast, I promise you.
- Unbelievably Delicious: The magic happens overnight. The apples soak up all the cinnamon and sugar, getting incredibly soft and jammy. The cake mix on top bakes into this golden, slightly crisp crust that gives way to a tender, almost pudding-like cake underneath. It’s next-level comfort food.
- Kid-Approved & Mom-Approved: It’s sweet enough to feel like a real treat, but it uses real fruit, so you don’t have to feel guilty about serving it. It’s also fantastic the next day for breakfast—if there are any leftovers!
What makes this recipe different from the rest? It’s the overnight rest. That time in the fridge isn’t just for convenience—it’s a secret technique. It allows the apple juices to mingle with the dry cake mix, creating a syrupy, caramel-like sauce that bakes into the most incredible texture. You won’t get that from a recipe you bake right away. This is the best version, hands down.
What Ingredients You Will Need
This recipe uses simple, wholesome ingredients to deliver a big, satisfying flavor. It’s all about letting the apples and cinnamon shine. Here’s what you’ll need to grab.
- For the Apple Base:
- 6-7 medium apples (about 3 lbs), peeled, cored, and sliced (I like a mix of Granny Smith and Honeycrisp for a balance of tart and sweet)
- 1/2 cup granulated sugar (adds sweetness and helps create the syrup)
- 1/4 cup packed light brown sugar (adds a deep, molasses-like richness)
- 2 teaspoons ground cinnamon (the star of the show—use a good quality one like McCormick or Simply Organic)
- 1/2 teaspoon ground nutmeg (freshly grated is best, but pre-ground works too)
- 1/4 teaspoon salt (balances the sweetness and enhances the apple flavor)
- 1 tablespoon lemon juice (keeps the apples from browning and brightens the flavor)
- For the Cake Topping:
- 1 box (15.25 oz) yellow or white cake mix (I prefer Duncan Hines or Betty Crocker for a reliable texture; a gluten-free box mix works perfectly too)
- 1/2 cup unsalted butter, melted and slightly cooled (adds richness and helps the cake mix brown)
- 1/2 cup water (helps hydrate the cake mix)
- Optional for Serving:
- Vanilla ice cream or whipped cream (highly recommended!)
- A drizzle of caramel sauce
Ingredient Tips: For the best texture, use a firmer apple like Granny Smith, Fuji, or Braeburn. Softer apples like McIntosh can turn into applesauce, which is fine, but you’ll get a different final texture. If you only have salted butter on hand, just reduce the added salt in the apple mixture to a pinch. For a dairy-free version, use a plant-based butter stick and a dairy-free cake mix. It works like a charm!
Equipment Needed
You don’t need a lot of fancy tools for this one, which is part of its charm. Here’s what you’ll need.
- A 9×13-inch Baking Dish: A glass or ceramic dish works best for even heat distribution. I use my trusty Pyrex dish for this.
- A Good Chef’s Knife and Cutting Board: For peeling and slicing the apples. A Y-peeler is also a lifesaver for this task.
- A Large Mixing Bowl: To toss the apples with the sugar and spices.
- A Small Bowl or Liquid Measuring Cup: For melting the butter.
- A Wooden Spoon or Spatula: For stirring the apples.
- Aluminum Foil: To cover the dish while it bakes for the first part, and to cover it in the fridge.
Budget-Friendly Tip: Don’t have a 9×13? You can use a 9×9 square pan or even a 10-inch cast iron skillet. Just keep an eye on the baking time, as it may change slightly. I once forgot my baking dish at a friend’s house and used a disposable aluminum pan—it worked perfectly fine!
Preparation Method
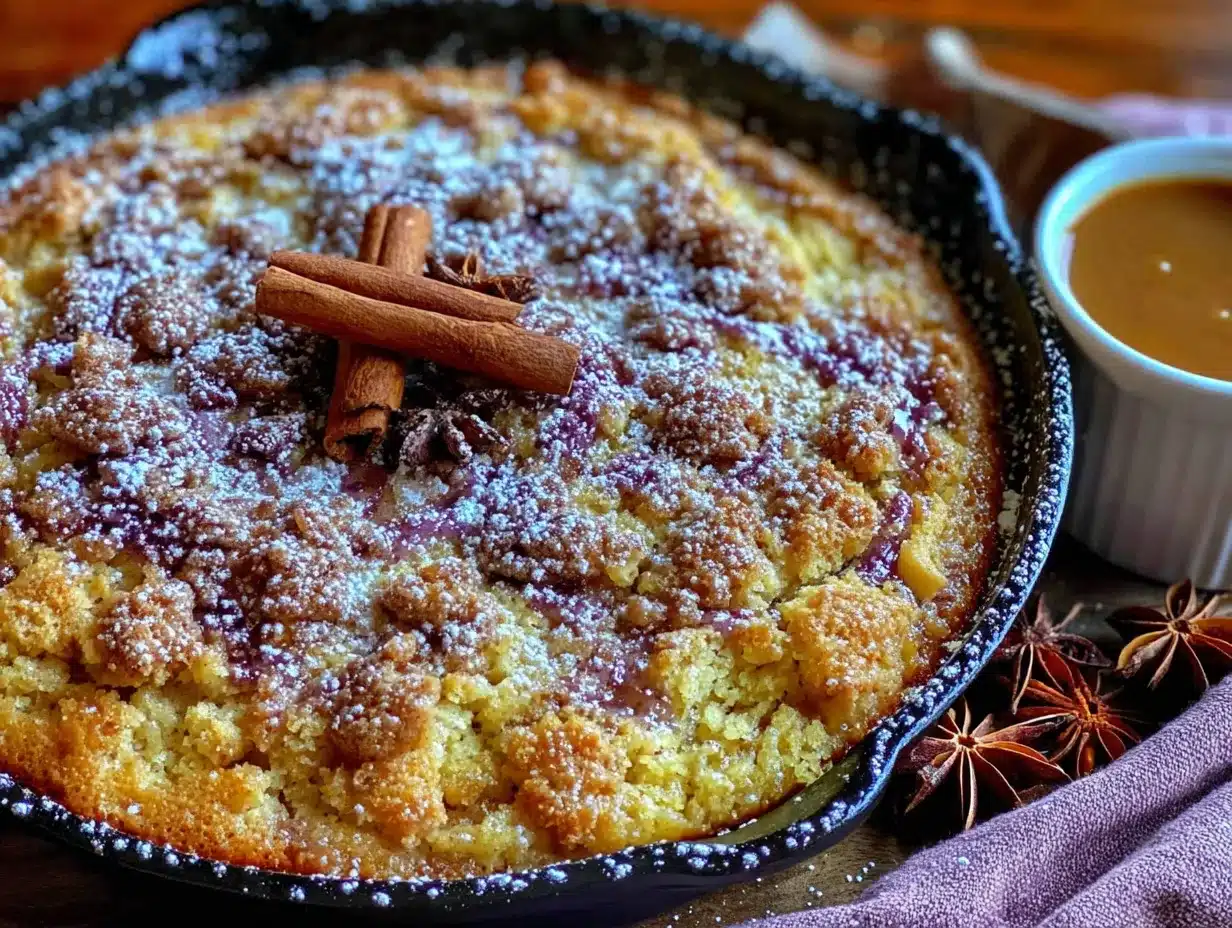
This is the easiest part. I mean it. You’re basically going to dump things in a dish and walk away. Let’s get started.
- Prepare the Apples (10 minutes): Peel, core, and slice your apples into roughly 1/4-inch thick slices. You don’t have to be perfect here, but try to keep them uniform so they cook evenly. Toss the sliced apples in a large bowl with the granulated sugar, brown sugar, cinnamon, nutmeg, salt, and lemon juice. Make sure every slice is well coated. Set aside for about 5 minutes while the apples start to release their juices.
- Layer the Apples: Spread the apple mixture evenly in the bottom of your ungreased 9×13-inch baking dish. Don’t worry about packing them down too much—just spread them out in a single-ish layer. It’s okay if they overlap a little.
- Add the Cake Mix: Sprinkle the entire box of dry cake mix evenly over the apples. Don’t stir it! You want a nice, even layer covering all the fruit. This is a “dump cake,” after all—we’re trusting the process here.
- Add the Butter and Water: In a small bowl, whisk together the melted butter and the water. Drizzle this mixture as evenly as you can over the top of the dry cake mix. Don’t stir it! Just let the liquid soak in. It will look a little lumpy and odd, and that’s totally fine.
- Overnight Rest (The Secret Step!): Cover the baking dish tightly with aluminum foil. Place it in the refrigerator for at least 8 hours, or up to 24 hours. This is the most important step. During this time, the apples will macerate, creating a beautiful, flavorful syrup. The dry cake mix will absorb that syrup and the butter-water mixture, turning into a soft, pudding-like batter. It’s pure magic.
- Bake the Cake: The next day, when you’re ready to bake, preheat your oven to 350°F (175°C). Take the dish out of the fridge and let it sit on the counter while the oven heats up, about 15 minutes. Remove the foil and place the dish in the oven. Bake for 40-45 minutes, or until the top is a deep golden brown and the apples are bubbling up around the edges. The center should be set and not jiggly. If the top is browning too quickly, tent it loosely with foil for the last 10 minutes.
- Cool and Serve: Let the cake cool on a wire rack for at least 15-20 minutes before serving. This allows the filling to set up a little so it’s not too soupy. Serve it warm, scooped into bowls, with a big scoop of vanilla ice cream on top. The contrast of the warm, soft cake and the cold, creamy ice cream is unbeatable.
Pro-Tip: The cake will look a little liquidy when you take it out of the oven. Don’t panic! As it cools, the liquid will thicken into that wonderful, syrupy sauce. If you serve it piping hot, it will be runnier, but still delicious. For a firmer set, let it cool for a full 30 minutes.
Cooking Tips & Techniques
I’ve made this cake more times than I can count, and I’ve learned a few things along the way. Here are my best tips to make sure yours turns out perfect every single time.
- Don’t Skip the Overnight Rest: I know it’s tempting to just bake it right away, but trust me on this one. The overnight rest is what makes this recipe special. It lets the flavors meld and creates that incredible, gooey texture. If you bake it immediately, the cake mix will be dry and the apples won’t be as tender. It’s a completely different—and inferior—dessert.
- Use Cold Butter for Drizzling: Okay, the recipe says melted butter, and that’s fine. But I’ve found that using very cold, thinly sliced butter pats placed all over the top of the cake mix works even better. It creates little pockets of buttery goodness and helps the top get extra crispy. Give it a try next time!
- The “Jiggle” Test: When you take the cake out of the oven, the center might have a slight jiggle to it, like a cheesecake. That’s okay. It will continue to set as it cools. If the center is sloshing around like a liquid, give it another 5-10 minutes in the oven.
- Watch the Topping: Every oven is different. Yours might run a little hot. If you see the top of the cake getting too dark after about 30 minutes, just lay a piece of foil loosely over the top. It will protect it while the inside finishes baking.
- My Biggest Failure: The first time I made this, I forgot to add the water. I just dumped the cake mix and butter on top of the apples and baked it. It came out like a dry, crumbly mess on top with watery apples underneath. It was a total disaster. The water is crucial for hydrating the cake mix, so don’t skip it!
Variations & Adaptations
This recipe is a fantastic canvas for your own ideas. Here are a few ways I’ve played around with it.
- Spiced Pear Version: Swap the apples for firm, ripe pears (like Bosc or Anjou). Use the same amount and follow the recipe exactly. Pears have a lovely, delicate sweetness that pairs beautifully with the cinnamon. I made this for a fall brunch and it was a huge hit.
- Berry Apple Mix: Add 1 cup of fresh or frozen (no need to thaw) blueberries or raspberries to the apple mixture. The berries will burst and create beautiful purple and red swirls throughout the cake. It’s a great way to use up leftover berries.
- Gluten-Free & Dairy-Free: This is incredibly easy to adapt. Use a gluten-free yellow cake mix (King Arthur Flour makes a great one). For the butter, use a high-quality plant-based butter stick (like Miyoko’s or Earth Balance). The texture comes out just as soft and delicious. I’ve served this to friends with dietary restrictions and they couldn’t tell the difference.
- Crunchy Topping: Before baking, sprinkle 1/2 cup of chopped pecans or walnuts over the top of the cake mix. They’ll toast up in the oven and add a wonderful crunch that contrasts with the soft cake. It’s a great way to add a little texture.
- Caramel Apple Dump Cake: After you spread the apples in the dish, drizzle 1/2 cup of store-bought or homemade caramel sauce over them before adding the cake mix. It takes the whole thing to a new level of decadence. I did this for a birthday party and it was gone in minutes.
Serving & Storage Suggestions
This cake is incredibly versatile. Here’s how to serve it and store it for maximum enjoyment.
Serving: This cake is best served warm, straight from the oven. The aroma alone will have everyone gathering in the kitchen. Scoop it into bowls or onto plates. A generous scoop of vanilla bean ice cream is the classic pairing, but a dollop of freshly whipped cream or a drizzle of heavy cream is also fantastic. For a special touch, add a sprinkle of extra cinnamon or a pinch of flaky sea salt on top. It’s also surprisingly good cold the next day for breakfast—I won’t tell anyone if you don’t!
Storage: Leftovers should be covered tightly with plastic wrap or aluminum foil and stored in the refrigerator. It will keep well for up to 4 days. The flavors actually continue to meld and deepen, so it might taste even better the next day.
Reheating: The best way to reheat individual portions is in the microwave for about 30-45 seconds. For a larger portion, you can reheat the whole dish in a 300°F (150°C) oven for 10-15 minutes, or until warmed through. If the cake seems a little dry after reheating, add a tiny splash of milk or cream to the top before warming it up.
Freezing: This cake freezes beautifully. Let it cool completely, then wrap the entire dish (or individual portions) tightly in a layer of plastic wrap, followed by a layer of aluminum foil. Freeze for up to 3 months. To thaw, place it in the refrigerator overnight. Reheat in the oven or microwave as directed above.
Nutritional Information & Benefits
While this is definitely a dessert to be enjoyed, it does have a few redeeming qualities. Here’s a quick look at what you’re getting.
Estimated Nutritional Values (per serving, about 1/12 of the cake):
- Calories: 380
- Fat: 14g
- Carbohydrates: 62g
- Fiber: 4g
- Sugar: 42g
- Protein: 3g
Health Benefits: The star ingredient here is the apple. Apples are packed with fiber, which is great for digestion, and vitamin C, which supports your immune system. They also contain antioxidants called flavonoids, which are linked to heart health. Using a mix of apples gives you a broader range of nutrients. Plus, by making it at home, you control the quality of the ingredients—no artificial preservatives or high-fructose corn syrup here.
Dietary Considerations: This recipe is naturally nut-free (unless you add the pecan variation) and can easily be made gluten-free and dairy-free with simple substitutions, as mentioned in the variations section. It is not low-carb or keto-friendly due to the cake mix and sugar.
My Take: Look, this is a treat. It’s not health food. But I feel a lot better serving my family a warm, homemade dessert made with real apples and simple ingredients than I do handing them a package of processed snacks. It’s comfort food that you can feel good about sharing.
Conclusion
This Easy Overnight Apple Cinnamon Dump Cake is more than just a recipe—it’s a solution. It’s for those nights when you want to give your family something special but you’re too tired to put in a lot of effort. It’s for the mornings when you want the house to smell like a bakery without having to wake up at dawn. It’s for proving that sometimes, the simplest things are the most extraordinary.
I love this recipe because it reminds me that you don’t have to be a pastry chef to create something truly memorable. You just need a few good ingredients, a little bit of patience (okay, a lot of patience for that overnight rest!), and the willingness to trust the process. The first time you pull that golden, bubbling dish out of the oven and hear your family say “Wow,” you’ll know exactly what I mean.
Now I want to hear from you! Have you ever tried an overnight dump cake before? What’s your favorite apple variety to use? Drop a comment below and let me know how this recipe turned out for you. And if you have a picky eater like my sister-in-law, I’d love to hear if this one changed their mind too. Happy baking, friends!
Frequently Asked Questions
Can I use a different cake mix flavor?
Absolutely! A spice cake mix is a fantastic choice and adds even more warm, fall flavor. A white cake mix or even a butter pecan cake mix would also work beautifully. Just avoid chocolate, as it will overpower the delicate apple and cinnamon flavor.
Do I have to peel the apples?
I highly recommend peeling the apples for the best texture. The peels can become tough and chewy after baking, which isn’t very pleasant in a soft, tender dump cake. If you’re in a huge rush, you can leave them on, but the texture will be noticeably different.
Can I make this in a slow cooker?
Yes, you can! Prepare the apple mixture and cake mix exactly as directed in a greased slow cooker. Cook on low for 3-4 hours or on high for 1.5-2 hours, until the apples are tender and the topping is set. You’ll want to place a clean kitchen towel under the lid to catch the condensation so it doesn’t drip onto the cake and make it soggy.
Why is my dump cake soupy?
This usually happens for one of two reasons. First, you might have used very juicy apples that released a lot of water. Second, the cake might not have baked long enough. Make sure you bake it until the center is set and the edges are bubbling. Letting it cool for at least 15-20 minutes after baking also helps the liquid thicken into a syrup.
Can I use a sugar-free cake mix?
You can, but keep in mind that the texture and sweetness will be different. Sugar-free cake mixes often use different sweeteners that can affect how the cake browns and sets. If you try it, I’d recommend using a brand you’ve had good luck with before and keeping a close eye on it as it bakes.
Pin This Recipe!
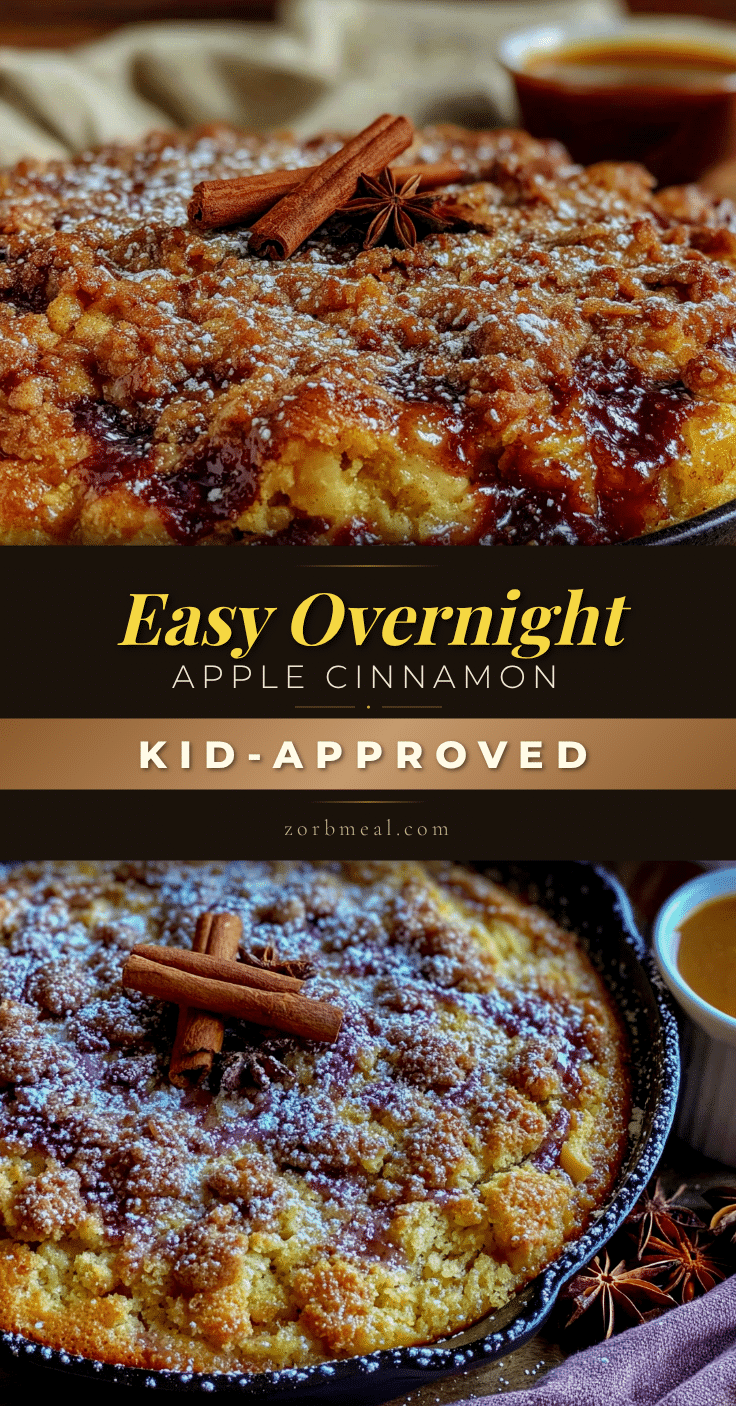
Easy Overnight Apple Cinnamon Dump Cake – Best Kid-Approved Dessert

This Easy Overnight Apple Cinnamon Dump Cake is a simple, dump-and-go dessert that changes minds. With tender, spiced apples and a golden, cake-like topping, it’s a crowd-pleaser that requires just 10 minutes of prep and an overnight rest for incredible flavor.
- Prep Time: 10 minutes
- Cook Time: 40-45 minutes
- Total Time: 8 hours 50 minutes (includes overnight rest)
- Yield: 12 servings 1x
- Category: Dessert
- Cuisine: American
Ingredients
- 6–7 medium apples (about 3 lbs), peeled, cored, and sliced (mix of Granny Smith and Honeycrisp recommended)
- 1/2 cup granulated sugar
- 1/4 cup packed light brown sugar
- 2 teaspoons ground cinnamon
- 1/2 teaspoon ground nutmeg
- 1/4 teaspoon salt
- 1 tablespoon lemon juice
- 1 box (15.25 oz) yellow or white cake mix (Duncan Hines or Betty Crocker recommended)
- 1/2 cup unsalted butter, melted and slightly cooled
- 1/2 cup water
- Vanilla ice cream or whipped cream (optional, for serving)
- Caramel sauce (optional, for serving)
Instructions
- Peel, core, and slice apples into 1/4-inch thick slices. Toss in a large bowl with granulated sugar, brown sugar, cinnamon, nutmeg, salt, and lemon juice until well coated. Let sit for 5 minutes.
- Spread the apple mixture evenly in the bottom of an ungreased 9×13-inch baking dish.
- Sprinkle the entire box of dry cake mix evenly over the apples. Do not stir.
- In a small bowl, whisk together melted butter and water. Drizzle evenly over the dry cake mix. Do not stir.
- Cover the dish tightly with aluminum foil and refrigerate for at least 8 hours, up to 24 hours.
- When ready to bake, preheat oven to 350°F (175°C). Remove dish from fridge and let sit on counter for 15 minutes.
- Remove foil and bake for 40-45 minutes, until top is deep golden brown and apples are bubbling around edges. Center should be set and not jiggly. If browning too quickly, tent with foil for last 10 minutes.
- Let cool on a wire rack for at least 15-20 minutes before serving. Serve warm with vanilla ice cream or whipped cream.
Notes
The overnight rest is crucial for flavor and texture. For a firmer set, let cool for 30 minutes. If using salted butter, reduce added salt to a pinch. For dairy-free, use plant-based butter and dairy-free cake mix. For gluten-free, use a gluten-free yellow cake mix.
Nutrition
- Serving Size: 1/12 of cake
- Calories: 380
- Sugar: 42
- Sodium: 320
- Fat: 14
- Saturated Fat: 8
- Carbohydrates: 62
- Fiber: 4
- Protein: 3
Keywords: apple cinnamon dump cake, overnight dump cake, easy apple dessert, kid-approved dessert, dump cake recipe