My sister-in-law Jenna did not trust energy bites. She called them “glorified granola bars for people who gave up on real food.” Every time I mentioned making a batch, she’d give me that look—the one that said she was being polite but absolutely not interested. So when she showed up at my door last Tuesday with a container of these Easy No-Bake Peanut Butter Oat Energy Bites, I almost dropped my coffee. She looked a little embarrassed, a little desperate, and said, “I need you to tell me these are okay.”
Turns out, her toddler had decided that breakfast was optional and lunch was negotiable, and she needed something—anything—that he would actually eat. A friend from her mom’s group had handed her a recipe scribbled on a napkin. She made them at 11 PM, out of sheer exhaustion. And here’s the thing—she didn’t just want my approval. She wanted me to tell her she hadn’t lost her mind.
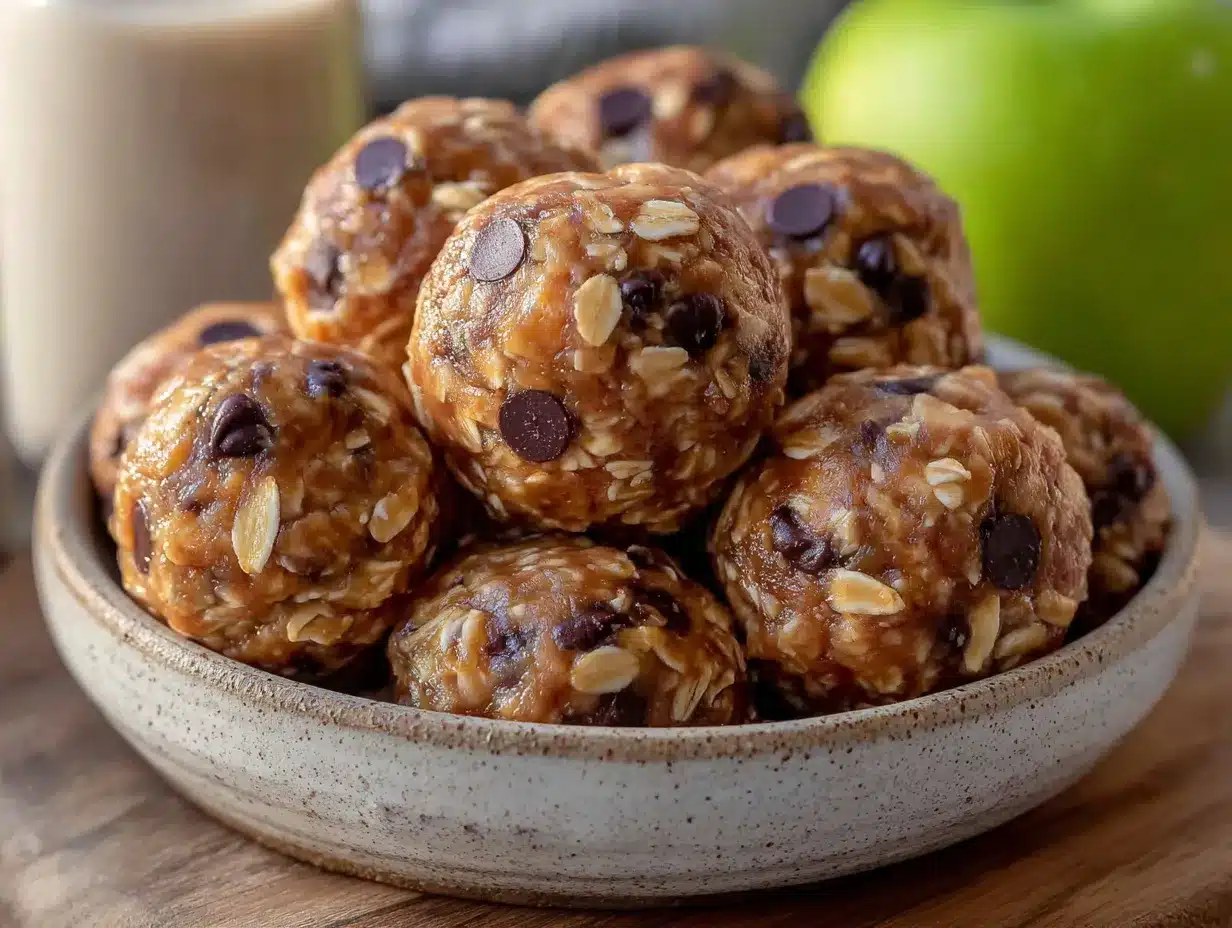
I popped one in my mouth. It was soft, chewy, and had that perfect hit of salt from the peanut butter cutting through the sweetness. No weird aftertaste. No dry, crumbly texture that falls apart after one bite. Just a simple, honest snack that tasted like something you’d actually want to eat. I told her she hadn’t lost her mind. I also told her she’d accidentally made the best batch of Easy No-Bake Peanut Butter Oat Energy Bites I’d ever had.
She laughed. Then she asked for the recipe back because she’d already lost the napkin. That’s the kind of recipe this is—the one you make when you’re too tired to think, and it still turns out perfect. No oven, no fuss, no fancy ingredients. Just five minutes and a bowl.
Why You’ll Love This Recipe
Let me be straight with you—I’ve made a lot of snack recipes over the years. Some were winners. Some were… well, let’s just say the compost pile ate well. These Easy No-Bake Peanut Butter Oat Energy Bites are the ones I keep coming back to, and here’s why they’re different.
- Ready in 5 Minutes: No oven, no stovetop, no complicated steps. Mix, roll, eat. That’s it. Perfect for those days when you need a snack right now.
- Pantry-Friendly Ingredients: You probably have everything you need already. Oats, peanut butter, honey, and a few mix-ins. No special trips to the store required.
- Kid-Approved and Parent-Approved: Jenna’s toddler went from refusing food to asking for “brown balls” by name. I’m not saying it’s magic, but I’m also not not saying it.
- Naturally Sweetened: Just a touch of honey or maple syrup keeps these from being overly sugary. They taste like a treat but feel like a sensible choice.
- Endlessly Customizable: Add chocolate chips, coconut, dried fruit, or seeds. This recipe is a template, not a rulebook.
- Travel-Friendly: Toss a few in your bag for hiking, road trips, or just surviving a long afternoon at work. No refrigeration needed for a day or two.
What makes this my version different? I tested the ratios about six times before landing on the perfect texture—not too sticky, not too dry. And I swapped in a little trick I picked up from making creamy classic deviled eggs: a pinch of salt makes everything taste more like itself. Sounds simple, but it makes these bites taste fuller and more satisfying.
Honestly, this is the kind of recipe that makes you feel like you’ve got your life together—even on the days you definitely don’t. And that’s worth something.
What Ingredients You Will Need
This recipe keeps things simple. You don’t need a dozen obscure ingredients or a trip to a specialty store. Just good, honest pantry staples that come together to make something genuinely tasty.
- Rolled Oats (1 ½ cups / 135g): Use old-fashioned rolled oats, not instant or steel-cut. Rolled oats give the right chewy texture and hold together better. Quick oats can work in a pinch, but the bites will be softer and less structured.
- Creamy Peanut Butter (½ cup / 130g): Natural peanut butter works great, but stir it well first to incorporate the oil. If you use the processed kind (like Jif or Skippy), your bites will be a little sweeter and firmer. Both work—just adjust the honey slightly if needed. I personally prefer a no-stir natural peanut butter for consistent results.
- Honey (⅓ cup / 110g): This is your binder and sweetener. Maple syrup works beautifully for a vegan option, though the texture will be slightly softer. Agave nectar is fine too, but reduce it to ¼ cup since it’s sweeter.
- Ground Flaxseed (2 tablespoons / 14g): This is my secret ingredient for binding and a little nutritional boost. It also helps the bites hold their shape without getting greasy. If you don’t have flax, chia seeds work—just expect a slightly different texture.
- Mini Chocolate Chips (⅓ cup / 60g): Optional but highly recommended. The little pockets of melted chocolate make these feel like dessert. Use dark chocolate chips for a less sweet option, or leave them out entirely for a cleaner snack.
- Vanilla Extract (1 teaspoon): Pure vanilla extract adds warmth and rounds out the flavors. Don’t skip it—it makes a bigger difference than you’d think.
- Salt (¼ teaspoon): This is non-negotiable. Salt balances the sweetness and makes the peanut butter taste more peanut-buttery. If you’re using salted peanut butter, reduce this to a tiny pinch or skip it.
- Optional Mix-Ins: Unsweetened shredded coconut (¼ cup), dried cranberries or raisins (¼ cup), chopped nuts (¼ cup), or hemp seeds (2 tablespoons).
I like to use Bob’s Red Mill rolled oats for their consistent texture and flavor. For peanut butter, I’ve had great luck with Kirkland’s organic creamy peanut butter—it’s smooth, not too oily, and mixes in beautifully without needing extra stirring.
Equipment Needed
You don’t need a fancy kitchen for this recipe. Honestly, I’ve made these in a hotel room with a plastic bowl and a fork. But here’s what makes life easier:
- Large Mixing Bowl: Any medium-to-large bowl works. I use a ceramic one because it doesn’t slide around on the counter.
- Wooden Spoon or Sturdy Spatula: The mixture gets thick and sticky, so a flimsy spoon won’t cut it. A silicone spatula is my go-to for scraping every last bit.
- Measuring Cups and Spoons: Standard set is fine. For the peanut butter, spray your measuring cup with a little non-stick spray first—it slides right out.
- Baking Sheet or Plate: To hold the rolled bites while they firm up. Line it with parchment paper for easy cleanup.
- Cookie Scoop (optional): A 1-tablespoon scoop makes perfectly uniform bites. If you don’t have one, just use your hands—they’ll be slightly different sizes, and that’s charming.
- Airtight Container: For storing your finished bites. A glass container with a tight lid works best.
Tip: If your hands get too sticky while rolling, lightly wet your fingers with cold water. It helps the mixture release without making everything soggy.
Preparation Method
- Mix the dry ingredients. In your large mixing bowl, combine the rolled oats, ground flaxseed, and salt. Stir them together with your spoon or spatula until everything is evenly distributed. This takes about 30 seconds. Don’t skip this step—it ensures the salt and flax are spread throughout, not clustered in one bite.
- Add the wet ingredients. Spoon in the peanut butter, drizzle in the honey, and add the vanilla extract. At first, it will look like a sticky mess that won’t possibly come together. That’s normal. Keep stirring. The oats will start absorbing the moisture, and the mixture will transform from “sad paste” to “thick, cohesive dough” in about a minute.
- Fold in the mix-ins. Add the mini chocolate chips (and any other optional mix-ins you’re using). Fold them in gently until they’re evenly distributed. If you stir too aggressively, the chocolate chips might start melting from the heat of your hands—not the end of the world, but you want distinct chips in the final bites.
- Chill the mixture (optional but recommended). Pop the bowl in the refrigerator for 10-15 minutes. This firms up the peanut butter and makes the mixture much easier to handle. If you’re in a rush, you can skip this step, but your bites will be stickier and less uniform. I always do this—it’s worth the extra few minutes.
- Roll into bites. Scoop out about 1 tablespoon of the mixture. Roll it between your palms gently but firmly. You want a smooth, round ball that holds its shape without cracking. If it cracks, the mixture is too dry—add a tiny splash of honey or a teaspoon of peanut butter. If it’s too sticky to roll, wet your hands slightly or chill the mixture longer.
- Place on prepared tray. Set each rolled bite on your parchment-lined baking sheet or plate. Leave a little space between them so they don’t stick together. You should get about 18-20 bites, depending on how generously you scoop.
- Final chill. Refrigerate the bites for at least 20-30 minutes before serving. This allows them to set fully. If you can’t wait (and I’ve been there), they’re still delicious right away—just a little softer.
- Store and enjoy. Transfer the bites to an airtight container. Keep them in the refrigerator for up to two weeks, or at room temperature for up to three days. They also freeze beautifully—more on that later.
Visual cue: The finished dough should look like a thick, slightly sticky cookie dough. When you press it between your fingers, it should hold together without crumbling. If it feels too dry, add a teaspoon of honey or peanut butter. If it feels too wet, add a tablespoon of oats.
Cooking Tips & Techniques
I’ve made these Easy No-Bake Peanut Butter Oat Energy Bites at least two dozen times, and I’ve learned a few things the hard way. Here’s what I wish someone had told me:
- Don’t overmix. Once the oats are fully incorporated, stop. Overmixing can break down the oats and make the texture mushy instead of pleasantly chewy.
- Use room-temperature peanut butter. Cold peanut butter straight from the fridge is stiff and won’t mix evenly. Let it sit out for 15 minutes first, or microwave it for 10 seconds to soften it.
- Toast the oats for extra flavor. Spread the oats on a baking sheet and toast them at 350°F for 8-10 minutes, stirring halfway through. Let them cool completely before using. This adds a nutty, toasty depth that takes these bites to another level. I do this when I’m feeling fancy.
- Wet hands are your friend. Seriously. Keep a small bowl of cold water nearby while rolling. Dip your fingertips, shake off the excess, and roll. The mixture won’t stick to your hands, and you’ll get smoother, prettier bites.
- Taste test the dough. Before rolling everything, grab a tiny pinch and taste it. Is it sweet enough? Salty enough? Adjust before you commit. This is how I discovered that a pinch more salt makes everything pop.
- Let them rest overnight if you can. The flavors meld and deepen after a few hours in the fridge. They’re good on day one, but they’re amazing on day two.
One mistake I made early on: I used natural peanut butter without stirring it first. The oil had separated, and I just scooped from the top. My bites were dry, crumbly, and sad. Stir your peanut butter well—it makes a difference.
Variations & Adaptations
This recipe is forgiving. Change it up based on what you have or what you’re craving. Here are some tried-and-true variations:
- Vegan Version: Swap the honey for maple syrup or agave nectar. Use dairy-free chocolate chips. Everything else is already plant-based. The texture will be slightly softer, so chill them a little longer before rolling.
- Nut-Free Option: Replace peanut butter with sunflower seed butter (like SunButter) or tahini. Note that sunflower seed butter can react with baking soda if used in baked goods, but since we’re not baking, it works perfectly here. The flavor will be different but delicious.
- Protein-Packed Bites: Add 1 scoop of vanilla or chocolate protein powder. Reduce the oats by 2 tablespoons to keep the texture balanced. You might need an extra tablespoon of honey to offset the dryness of the protein powder.
- Cookie Dough Inspired: Increase the mini chocolate chips to ½ cup and add 2 tablespoons of brown sugar. These taste dangerously close to raw cookie dough—in the best way.
- Berry Blast: Swap the chocolate chips for dried cranberries or chopped dried cherries. Add 2 tablespoons of freeze-dried strawberry powder for a fruity punch.
- Spiced Chai: Add ½ teaspoon of cinnamon, ¼ teaspoon of ginger, and a pinch of cardamom. These taste like a cozy fall afternoon in snack form.
- No-Chocolate Version: Omit the chocolate chips and add ¼ cup of unsweetened shredded coconut and ¼ cup of chopped almonds. Great for a lower-sugar option.
I once made a batch with leftover fresh watermelon feta mint salad on my mind and added a pinch of lime zest to the mixture. Sounds weird, but that tiny bit of citrus brightened the whole thing. Experiment—you might surprise yourself.
Serving & Storage Suggestions
These bites are best served cold or at room temperature. Straight from the fridge, they’re firm and chewy. At room temperature, they soften slightly and the chocolate chips get a little melty. Both are excellent.
Serving ideas:
- Pack a few in a lunchbox for a midday energy boost.
- Serve them on a platter alongside fresh fruit for a casual gathering.
- Pair them with a glass of cold milk or a cup of coffee for an afternoon pick-me-up.
- Crumble one over yogurt or oatmeal for extra texture and flavor.
- Bring them on a hike or road trip—they travel beautifully.
Storage instructions:
- Refrigerator: Store in an airtight container for up to 2 weeks. They actually improve after a day or two as the flavors meld.
- Room Temperature: Keep in a cool, dry place for up to 3 days. If your kitchen is warm, stick with the fridge.
- Freezer: Place the bites in a single layer on a baking sheet and freeze for 1 hour. Transfer to a freezer-safe bag or container. They’ll keep for up to 3 months. Thaw in the fridge overnight or at room temperature for 15-20 minutes.
Reheating note: You don’t need to reheat these, but if you want a softer texture, microwave one for 5-7 seconds. Don’t go longer—the chocolate chips will turn into a puddle.
One thing I love: the flavors deepen over time. The honey and peanut butter marry together, the oats soften just a touch, and every bite tastes more balanced. They’re good on day one, but they’re honestly better on day three.
Nutritional Information & Benefits
These Easy No-Bake Peanut Butter Oat Energy Bites are more than just tasty—they bring some real nutritional value to the table. Here’s the approximate breakdown per bite (based on 20 bites):
| Nutrient | Amount Per Bite |
|---|---|
| Calories | 110-130 |
| Protein | 4g |
| Carbohydrates | 14g |
| Fiber | 2g |
| Fat | 6g |
| Sugar | 7g |
Health highlights:
- Oats are packed with soluble fiber, which supports heart health and keeps you feeling full longer.
- Peanut butter provides healthy fats and plant-based protein. It’s also rich in vitamin E and magnesium.
- Flaxseed is a great source of omega-3 fatty acids and lignans, which have antioxidant properties.
- Honey offers natural sweetness with trace amounts of vitamins and minerals.
Dietary considerations: This recipe is naturally gluten-free if you use certified gluten-free oats. It’s also dairy-free (check your chocolate chips) and can be made vegan with a simple swap. It contains peanuts—if you need a nut-free option, use sunflower seed butter as mentioned above.
I like these as a pre-workout snack or a mid-afternoon pick-me-up. They give you steady energy without the crash you get from processed snacks. Plus, they actually taste good—which is the whole point.
Conclusion
Look, I know energy bites have become a bit of a cliché in the health food world. But there’s a reason they’ve stuck around—they actually work. These Easy No-Bake Peanut Butter Oat Energy Bites are the real deal. They take five minutes to make, use ingredients you already have, and taste like a treat you actually look forward to eating.
What I love most about this recipe is how forgiving it is. You can swap ingredients, adjust the sweetness, add whatever mix-ins you have on hand, and it still turns out great. It’s not a fussy recipe. It’s the kind of recipe you make on a Tuesday night when you need something in your lunch for tomorrow and you’re too tired to bake.
Jenna still makes these every week. Her toddler calls them “cookie balls” and eats them for breakfast. She says they saved her sanity. I say they’re just really good snacks. But honestly? Maybe both are true.
I’d love to hear how yours turn out. Did you add something unexpected? Did you make a variation that blew your mind? Drop a comment below and tell me about it. And if you’re looking for another easy snack idea, try my creamy whipped feta dip with hot honey—it’s another one that comes together in minutes and disappears fast.
Happy rolling, friends. You’ve got this.
Frequently Asked Questions
Can I use quick oats instead of rolled oats?
Yes, but the texture will be softer and less chewy. Quick oats are more finely chopped, so they absorb moisture faster and break down more. The bites will still taste good, but they won’t have that satisfying chew that rolled oats provide. If you only have quick oats, reduce the honey by 1 tablespoon to compensate for the faster absorption.
Why are my energy bites too dry?
This usually happens if your peanut butter is too thick or if you measured the oats generously. Try adding 1-2 tablespoons of honey or a splash of milk (dairy or plant-based) and mixing again. If they’re still dry after rolling, let them sit in the fridge for 30 minutes—sometimes the moisture redistributes and fixes the texture.
How long do these energy bites last at room temperature?
They’ll keep at room temperature for about 3 days in a cool, dry place. If your kitchen is warm or humid, stick with the refrigerator for longer storage. For best texture and flavor, I always recommend refrigerating them—they last up to 2 weeks and actually taste better after a day or two.
Can I freeze these energy bites?
Absolutely. Freeze them in a single layer on a baking sheet for about an hour, then transfer to a freezer-safe bag or container. They’ll keep for up to 3 months. Thaw them in the refrigerator overnight or at room temperature for 15-20 minutes. They’re great to grab straight from the freezer for a quick snack on hot days.
Are these energy bites healthy for kids?
Yes, they make a great snack for kids. They’re packed with fiber, protein, and healthy fats, and they’re naturally sweetened with honey instead of refined sugar. Just be mindful of the chocolate chips if you’re watching sugar intake—you can reduce them or leave them out. Always check for choking hazards with very young children, especially if you add nuts or seeds.
Pin This Recipe!

Easy No-Bake Peanut Butter Oat Energy Bites

These 5-minute no-bake energy bites are soft, chewy, and made with simple pantry ingredients like oats, peanut butter, and honey. Perfect for a quick snack that kids and adults love.
- Prep Time: 5 minutes
- Cook Time: 0 minutes
- Total Time: 5 minutes
- Yield: 18-20 bites 1x
- Category: Snack
- Cuisine: American
Ingredients
- 1 ½ cups rolled oats (135g)
- ½ cup creamy peanut butter (130g)
- ⅓ cup honey (110g)
- 2 tablespoons ground flaxseed (14g)
- ⅓ cup mini chocolate chips (60g)
- 1 teaspoon vanilla extract
- ¼ teaspoon salt
- Optional: ¼ cup unsweetened shredded coconut, ¼ cup dried cranberries or raisins, ¼ cup chopped nuts, 2 tablespoons hemp seeds
Instructions
- In a large mixing bowl, combine rolled oats, ground flaxseed, and salt. Stir until evenly distributed.
- Add peanut butter, honey, and vanilla extract. Stir until a thick, cohesive dough forms (about 1 minute).
- Fold in mini chocolate chips and any optional mix-ins gently.
- Chill the mixture in the refrigerator for 10-15 minutes (optional but recommended for easier handling).
- Scoop about 1 tablespoon of mixture and roll into smooth balls. If too sticky, wet hands slightly; if too dry, add a splash of honey or peanut butter.
- Place rolled bites on a parchment-lined baking sheet or plate.
- Refrigerate for at least 20-30 minutes to set before serving.
- Store in an airtight container in the refrigerator for up to 2 weeks, at room temperature for up to 3 days, or freeze for up to 3 months.
Notes
For best texture, use room-temperature peanut butter and stir well. Wet hands with cold water to prevent sticking while rolling. Let bites rest overnight for deeper flavor. To toast oats for extra nuttiness, spread on a baking sheet and bake at 350°F for 8-10 minutes, then cool completely before using.
Nutrition
- Serving Size: 1 bite
- Calories: 120
- Sugar: 7
- Sodium: 75
- Fat: 6
- Saturated Fat: 1.5
- Carbohydrates: 14
- Fiber: 2
- Protein: 4
Keywords: energy bites, no-bake, peanut butter, oats, healthy snack, kid-friendly, 5-minute recipe