My neighbor, a guy named Leo who can barely boil water, asked why I couldn’t just skip the crust and pour the pumpkin filling straight into a buttered dish. I started to explain why that wouldn’t work—the whole point of a bar is the structure, the contrast between the crumbly base and the silky filling. Then I stopped. Honestly, I had no good reason. I was just repeating what I’d always done. So I tried it his way. Leo’s crustless pumpkin pie bar was a structural mess, but it tasted exactly the same. That got me thinking about what actually matters in a recipe, and what’s just habit.
Three weeks later, standing in my kitchen with a stick of butter sizzling in a pan, I had my real breakthrough. The nutty, toasty smell of brown butter hit me, and I thought—this is what pumpkin pie has been missing. That deep, almost caramelized richness. And sage? Well, that was a happy accident. I grabbed a few leaves from the plant on my windowsill, tossed them in the foaming butter, and watched them crisp up. The smell was unbelievable—like Thanksgiving dinner and a cozy cabin all at once. I knew I was onto something.
So here we are. These Brown Butter Sage Pumpkin Pie Bars are the result of a neighbor’s dumb question and a moment of pure kitchen curiosity. They’ve got a buttery shortbread crust, a silky pumpkin filling swirled with brown butter and sage, and a topping that’ll make you close your eyes. Maybe you’ve been there—stuck in your ways, convinced a recipe has to be a certain way, only to discover that breaking the rules tastes better. That’s this recipe. It’s the one I keep making, and the one everyone asks me to bring to every fall gathering.
Why You’ll Love This Recipe
Let me tell you, I’ve tested this recipe more times than I can count. I’ve made it for my family, for potlucks, for a friend’s birthday party where someone accidentally dropped the whole thing on the floor (we salvaged what we could, and it was still amazing). Each time, I learn something new. These bars are the result of all that trial and error—a recipe I’m genuinely proud of.
- Quick & Easy: The bars come together in about an hour, with just 20 minutes of active prep. Perfect for a weeknight baking session or a last-minute dessert for unexpected guests.
- Simple Ingredients: You probably have most of these in your pantry right now. No fancy extracts or hard-to-find spices. Just good, honest ingredients that work together beautifully.
- Perfect for Fall Gatherings: These bars are the star of any Thanksgiving table, Friendsgiving potluck, or cozy weekend treat. They travel well, slice cleanly, and disappear fast.
- Crowd-Pleaser: I’ve served these to kids, grandparents, and picky eaters. Everyone loves them. The brown butter and sage add a sophisticated touch without being weird or intimidating.
- Unbelievably Delicious: The combination of nutty brown butter, earthy sage, and classic pumpkin pie spices is pure magic. The texture is perfect—firm enough to hold its shape, but creamy and luscious on the inside.
What makes these bars different from every other pumpkin dessert? It’s that brown butter and sage. It’s not just a gimmick—it genuinely transforms the flavor. The brown butter adds a toasty, caramel-like depth that makes the pumpkin filling taste richer and more complex. The sage cuts through the sweetness with a savory, herbal note that keeps you coming back for another bite. It’s comfort food reimagined—familiar but surprising, cozy but exciting. Perfect for impressing guests without stress, or turning a simple fall evening into something memorable.
What Ingredients You Will Need
This recipe uses simple, wholesome ingredients to deliver bold flavor and satisfying texture without the fuss. Most are pantry staples, but a few key players make all the difference.
For the Crust
- All-purpose flour, 1 ½ cups (180g) – Provides structure. I prefer King Arthur Flour for consistent results.
- Unsalted butter, cold and cubed, ½ cup (113g, 1 stick) – The foundation of a flaky, tender crust. Keep it cold!
- Powdered sugar, ¼ cup (30g) – Adds sweetness and a melt-in-your-mouth texture. Granulated sugar works, but powdered is better.
- Salt, ¼ teaspoon – Balances the sweetness and enhances the butter flavor.
For the Brown Butter Sage Pumpkin Filling
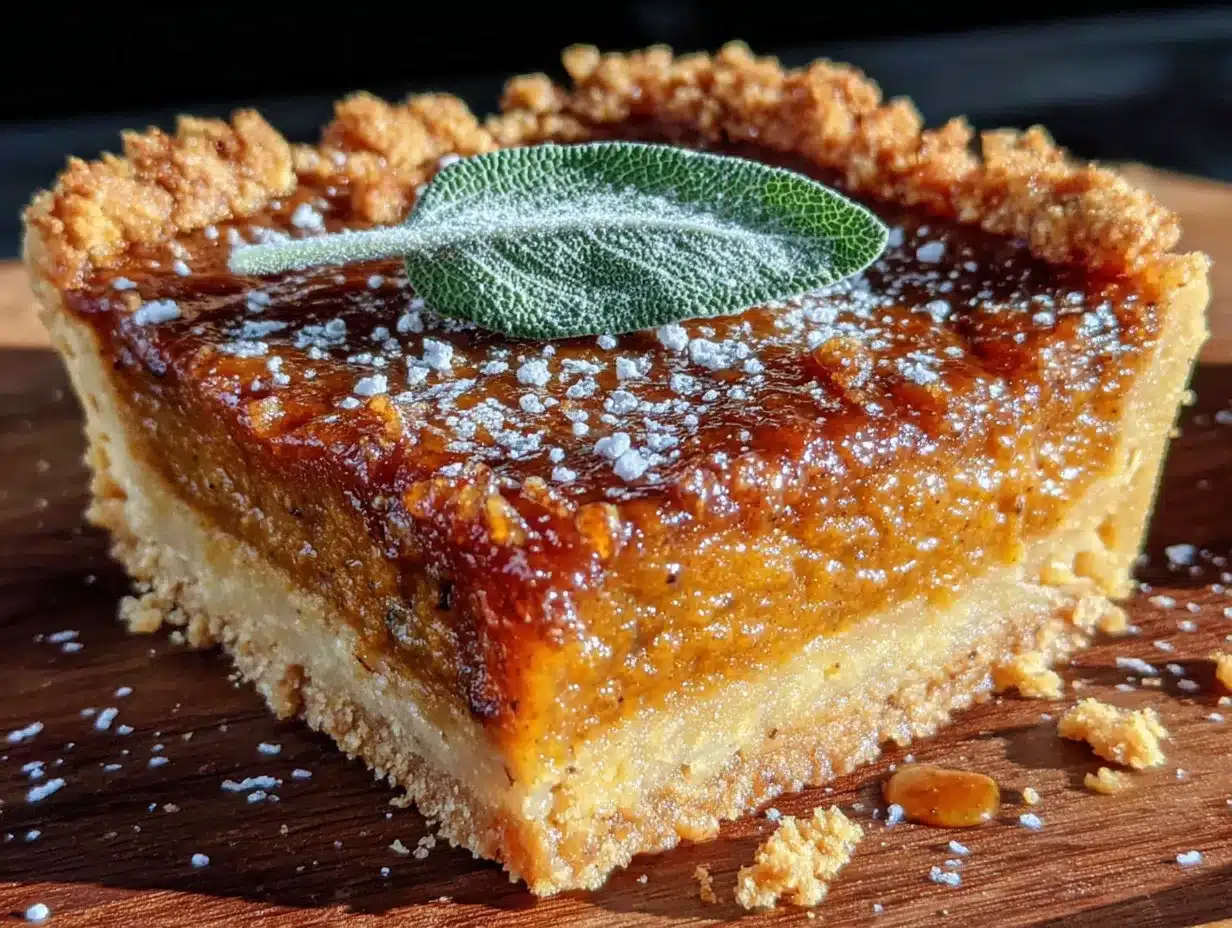
- Unsalted butter, ½ cup (113g, 1 stick) – We’ll brown this to create that nutty, magical flavor.
- Fresh sage leaves, 10-12 leaves – Adds an earthy, aromatic note. Dried sage won’t give the same texture or flavor.
- Pumpkin puree, 1 can (15 oz, or 425g) – Not pumpkin pie filling! Make sure it’s 100% pure pumpkin. I like Libby’s.
- Large eggs, 2 – Binds the filling and adds richness. Room temperature is best.
- Granulated sugar, ¾ cup (150g) – Sweetens the filling perfectly.
- Brown sugar, packed, ¼ cup (50g) – Adds moisture and a deeper, molasses-like sweetness.
- Heavy cream, ½ cup (120ml) – Makes the filling incredibly creamy and luscious. Half-and-half works in a pinch.
- Pumpkin pie spice, 2 teaspoons – A blend of cinnamon, nutmeg, ginger, and cloves. You can make your own if you prefer.
- Vanilla extract, 1 teaspoon – Enhances all the other flavors.
- Salt, ¼ teaspoon – Don’t skip it! It balances the sweetness and makes the flavors pop.
For the Topping (Optional but Recommended)
- Whipped cream – Homemade or store-bought. A dollop on each bar is perfection.
- Extra fried sage leaves – For garnish. They look beautiful and add a crispy, savory crunch.
- Caramel sauce – A drizzle takes these bars over the top. (use dairy-free milk if needed)
Equipment Needed
You don’t need a fancy kitchen to make these bars, but a few key tools will make the process smoother. Here’s what you’ll need:
- 9×9-inch baking pan – This is the perfect size for these bars. An 8×8 pan will work, but the bars will be thicker and may need a few extra minutes of baking time. A metal pan gives the crispiest crust, but glass or ceramic work fine too.
- Parchment paper – Lining the pan with parchment paper with overhanging edges makes lifting the bars out a breeze. Trust me, you don’t want to fight with stuck bars.
- Food processor or pastry cutter – For making the crust. A food processor is quick and easy, but a pastry cutter and a bowl work just as well—it’s a good arm workout!
- Medium saucepan – For browning the butter. A light-colored pan is best so you can see the butter change color.
- Large mixing bowls – One for the crust ingredients, one for the filling.
- Whisk – For combining the filling ingredients smoothly.
- Spatula – For scraping every last bit of brown butter and filling into the pan. A rubber spatula is your best friend here.
- Cooling rack – Allows air to circulate around the pan, preventing a soggy bottom.
I’ve made these bars with a cheap food processor from a discount store and a fancy one—the results were identical. Don’t stress about having the perfect tools. A bowl, a whisk, and a pan are really all you need.
Preparation Method
Alright, let’s get baking! Follow these steps carefully, and you’ll have a pan of the most incredible pumpkin bars. I’ve included all my little tips and tricks along the way.
- Preheat and Prep: Preheat your oven to 350°F (175°C). Line your 9×9-inch baking pan with parchment paper, leaving about 2 inches of overhang on two opposite sides. This creates “handles” for lifting the bars out later. Lightly grease the parchment and the exposed sides of the pan with butter or non-stick spray.
- Make the Crust: In a food processor, combine the flour, powdered sugar, and salt. Pulse a few times to mix. Add the cold, cubed butter. Pulse until the mixture looks like coarse meal with pea-sized butter pieces. Don’t over-process! You want those butter chunks for a flaky crust. If using a pastry cutter, cut the butter into the dry ingredients until you get the same texture. Dump the mixture into your prepared pan and press it firmly and evenly into the bottom. I use the bottom of a flat measuring cup to get it really even. Bake for 18-20 minutes, until the edges are just starting to turn golden. Set aside to cool slightly while you make the filling.
- Brown the Butter and Sage: In your medium saucepan, melt the butter over medium heat. Once melted, add the fresh sage leaves. Continue cooking, swirling the pan occasionally. The butter will start to foam and sputter. Watch it carefully! After about 4-5 minutes, the foam will subside, and you’ll see golden-brown specks forming at the bottom of the pan. The butter will smell nutty and toasty. The sage leaves will become crisp and dark. Immediately remove the pan from the heat. Use a slotted spoon to transfer the crispy sage leaves to a paper towel-lined plate—they’re your garnish! Pour the brown butter into a heat-safe bowl to stop the cooking process. Let it cool for a few minutes.
- Make the Filling: In a large bowl, whisk together the pumpkin puree, eggs, granulated sugar, and brown sugar until smooth. Add the heavy cream, pumpkin pie spice, vanilla extract, and salt. Whisk until fully combined and silky. Now, slowly drizzle in the cooled brown butter while whisking constantly. This emulsifies the butter into the filling, making it extra creamy. Give it one final whisk to make sure everything is incorporated.
- Assemble and Bake: Pour the pumpkin filling over the pre-baked crust. Gently tilt the pan to spread it evenly. Bake for 35-40 minutes. The edges should be set, and the center should be slightly jiggly—like Jell-O. It will continue to set as it cools. Don’t overbake! Overbaking leads to a cracked, dry filling. Let the bars cool completely in the pan on a wire rack. This takes about 2 hours. Then, for the cleanest slices, refrigerate for at least 2 hours, or overnight. The chilling step is crucial—it makes the bars firm enough to cut perfectly.
- Slice and Serve: Once fully chilled, use the parchment paper handles to lift the entire block of bars out of the pan. Place it on a cutting board. Use a sharp knife to cut into 16 squares (4×4). For extra clean cuts, wipe the knife clean between each slice. Top each bar with a dollop of whipped cream, a crispy sage leaf, and a drizzle of caramel sauce if you’re feeling fancy. Serve cold or at room temperature.
Cooking Tips & Techniques
I’ve made every mistake in the book with these bars, so you don’t have to. Here are my hard-earned tips for perfect results every time.
Don’t walk away from browning butter. I can’t stress this enough. Brown butter goes from perfect to burnt in about 30 seconds. The first time I made this recipe, I got distracted by a phone call and ended up with black butter that smelled like a campfire. Not good. Stay at the stove, watch the color, and trust your nose. When it smells nutty and looks like liquid gold, it’s done.
Use room temperature ingredients. I know, I know, it’s an extra step. But cold eggs and cold cream will seize up your brown butter and make the filling lumpy. Take them out of the fridge 30 minutes before you start baking. Your future self will thank you.
The jiggle test is your friend. Don’t rely solely on baking times. Every oven is different. When you think the bars might be done, give the pan a gentle shake. The edges should be set and firm, but the center should wobble slightly. If the whole thing is still liquidy, give it more time. If it’s completely firm, you might have overbaked it. That jiggle is the sweet spot.
Chill before slicing. I learned this the hard way when I tried to cut warm bars and ended up with a pumpkin-flavored mess. The filling needs time to fully set. Refrigerating for at least 2 hours (or overnight) makes a world of difference. The bars slice cleanly, hold their shape, and taste even better cold.
Toast your spices. For an even deeper flavor, toast your pumpkin pie spice in a dry pan over low heat for 30 seconds before adding it to the filling. It wakes up the oils and makes the spices taste more vibrant. It’s a tiny step that makes a big difference.
Variations & Adaptations
This recipe is a great starting point, but don’t be afraid to make it your own. Here are some ways I’ve adapted it over the years.
- Gluten-Free Version: Use a 1:1 gluten-free flour blend (like Bob’s Red Mill) in the crust. The texture will be slightly more crumbly, but just as delicious. Make sure your pumpkin puree is certified gluten-free if needed.
- Dairy-Free Version: Substitute the butter in the crust with a high-quality vegan butter (like Miyoko’s). For the filling, use a vegan butter for browning and replace the heavy cream with full-fat coconut cream. The flavor will be a bit different, but still amazing.
- Pecan Praline Topping: After pouring the filling into the crust, sprinkle ½ cup of chopped pecans and 2 tablespoons of brown sugar over the top. The nuts will toast and caramelize as the bars bake, adding a wonderful crunch.
- Spice It Up: Add ¼ teaspoon of black pepper or a pinch of cayenne pepper to the filling. The heat contrasts beautifully with the sweet pumpkin and brown butter. It’s a grown-up twist that always surprises people.
- Maple Pumpkin Bars: Replace the granulated sugar with pure maple syrup. Reduce the heavy cream by 2 tablespoons to account for the extra liquid. The maple flavor pairs perfectly with the brown butter and sage.
Serving & Storage Suggestions
These bars are versatile and can be served in many ways. Here’s how I like to do it.
Serving: I prefer these bars served cold, straight from the fridge. The filling is firm and creamy, and the crust stays perfectly crisp. If you prefer them at room temperature, let them sit out for about 15 minutes before serving. A dollop of lightly sweetened whipped cream is non-negotiable in my house. It adds a light, airy contrast to the dense bars. For a real showstopper, drizzle with warm caramel sauce and sprinkle with flaky sea salt.
Storage: Store leftover bars in an airtight container in the refrigerator for up to 5 days. Place a sheet of parchment paper between layers to prevent sticking. The flavors actually meld and deepen over time, so day-old bars are even better!
Freezing: These bars freeze beautifully. Wrap the entire block (or individual slices) tightly in plastic wrap, then in a layer of aluminum foil. Freeze for up to 3 months. To thaw, transfer to the refrigerator overnight. I love having a stash in the freezer for unexpected guests or a sudden craving.
Reheating: I honestly prefer these bars cold, but if you want a warm dessert, pop an individual bar in the microwave for 15-20 seconds. The filling will become soft and luscious, almost like a warm pudding. Top with ice cream for an extra-treat.
Nutritional Information & Benefits
Let’s be real—these are a dessert, not a health food. But they do have some redeeming qualities! Here’s a rough estimate per bar (based on 16 servings):
- Calories: ~280
- Fat: 18g
- Carbohydrates: 28g
- Fiber: 2g
- Sugar: 16g
- Protein: 4g
The Good Stuff: Pumpkin is packed with vitamin A (great for your eyes and immune system) and fiber. The brown butter and cream add calcium and healthy fats that help you feel satisfied. Sage has anti-inflammatory properties and adds a unique flavor without extra sugar or salt. So while these bars are definitely a treat, they’re not completely empty calories. I feel good about serving them to my family because they’re made with real, whole ingredients.
Dietary Considerations: This recipe contains gluten, dairy, and eggs. See the variations section for gluten-free and dairy-free adaptations. It is nut-free as written (unless you add the pecan topping).
Conclusion
These Brown Butter Sage Pumpkin Pie Bars are more than just a dessert—they’re a little piece of fall perfection. They’ve got the buttery crust you crave, the creamy pumpkin filling you expect, and that unexpected brown butter and sage twist that makes them unforgettable. They’re the bars I bring to every potluck, the ones my friends text me about in September asking when I’m making them again. They’re the bars that made Leo, my crust-questioning neighbor, ask for the recipe.
I really hope you try these. Don’t be intimidated by the brown butter—it’s easier than you think, and the payoff is huge. And please, don’t be afraid to make them your own. Swap the spices, add a topping, or even try that crustless version Leo suggested. Cooking is about playing around and finding what you love. If you make these bars, I’d love to hear about it. Leave a comment below, tag me in your photos, or tell me about your own kitchen accident that turned into a happy discovery. Happy baking, friends!
Frequently Asked Questions
Can I use canned pumpkin pie filling instead of pumpkin puree?
No, I wouldn’t recommend it. Pumpkin pie filling is already sweetened and spiced, so it will throw off the balance of this recipe. Stick with 100% pure pumpkin puree for the best results. You can control the sweetness and spice levels yourself.
My brown butter burned. What did I do wrong?
It happens to the best of us! Brown butter goes from perfect to burnt very quickly. The most common mistake is walking away from the pan. Stay close, watch for the golden specks, and remove it from the heat the second you smell that nutty aroma. If it does burn, just start over. It’s a cheap ingredient to replace.
Can I make these bars ahead of time?
Absolutely! In fact, I recommend it. These bars need to chill for at least 2 hours anyway, so making them a day ahead is perfect. They’ll taste even better as the flavors meld together. Just store them covered in the refrigerator until you’re ready to serve.
Why did my crust turn out soggy?
A soggy crust is usually caused by not pre-baking it long enough, or by pouring the filling in while the crust is still hot. Make sure your crust is fully baked and has cooled for at least 10 minutes before adding the filling. Also, make sure your pumpkin puree isn’t too watery—if it looks thin, you can blot it with a paper towel.
Can I leave out the sage?
Sure, you can. The bars will still be delicious—just classic brown butter pumpkin bars. But I really encourage you to try the sage at least once. It’s not overpowering. It adds a subtle, savory note that makes the pumpkin and brown butter taste even better. It’s the secret ingredient that makes these bars special.
PrintEasy Brown Butter Sage Pumpkin Pie Bars (Best Fall Dessert)
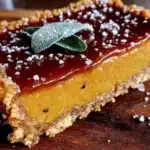
These Brown Butter Sage Pumpkin Pie Bars feature a buttery shortbread crust, a silky pumpkin filling swirled with nutty brown butter and crispy sage, and a topping that’ll make you close your eyes. They’re the perfect fall dessert for gatherings or a cozy weekend treat.
- Prep Time: 20 minutes
- Cook Time: 35-40 minutes
- Total Time: 1 hour (plus 2 hours cooling and 2 hours chilling)
- Yield: 16 bars 1x
- Category: Dessert
- Cuisine: American
Ingredients
- 1 ½ cups (180g) all-purpose flour
- ½ cup (113g, 1 stick) unsalted butter, cold and cubed
- ¼ cup (30g) powdered sugar
- ¼ teaspoon salt
- ½ cup (113g, 1 stick) unsalted butter
- 10–12 fresh sage leaves
- 1 can (15 oz, 425g) pumpkin puree (100% pure pumpkin)
- 2 large eggs, room temperature
- ¾ cup (150g) granulated sugar
- ¼ cup (50g) packed brown sugar
- ½ cup (120ml) heavy cream
- 2 teaspoons pumpkin pie spice
- 1 teaspoon vanilla extract
- ¼ teaspoon salt
- Whipped cream (for serving, optional)
- Extra fried sage leaves (for garnish, optional)
- Caramel sauce (for drizzling, optional)
Instructions
- Preheat oven to 350°F (175°C). Line a 9×9-inch baking pan with parchment paper, leaving 2 inches overhang on two opposite sides. Lightly grease parchment and exposed pan sides with butter or non-stick spray.
- Make the crust: In a food processor, combine flour, powdered sugar, and salt. Pulse to mix. Add cold cubed butter and pulse until mixture resembles coarse meal with pea-sized butter pieces. Do not over-process. Press mixture firmly and evenly into prepared pan. Bake for 18-20 minutes until edges just start to turn golden. Set aside to cool slightly.
- Brown the butter and sage: In a medium saucepan, melt butter over medium heat. Add fresh sage leaves. Cook, swirling occasionally, until butter foams and subsides, about 4-5 minutes, and golden-brown specks appear. Butter will smell nutty. Remove from heat. Use a slotted spoon to transfer crispy sage leaves to a paper towel-lined plate. Pour brown butter into a heat-safe bowl to cool for a few minutes.
- Make the filling: In a large bowl, whisk together pumpkin puree, eggs, granulated sugar, and brown sugar until smooth. Add heavy cream, pumpkin pie spice, vanilla extract, and salt. Whisk until fully combined. Slowly drizzle in cooled brown butter while whisking constantly until emulsified.
- Assemble and bake: Pour pumpkin filling over pre-baked crust. Gently tilt pan to spread evenly. Bake for 35-40 minutes until edges are set and center is slightly jiggly (like Jell-O). Do not overbake. Cool completely in pan on a wire rack (about 2 hours). Then refrigerate for at least 2 hours or overnight for clean slicing.
- Slice and serve: Use parchment handles to lift bars out of pan. Place on cutting board. Cut into 16 squares (4×4) with a sharp knife, wiping clean between slices. Top each bar with whipped cream, a crispy sage leaf, and caramel sauce if desired. Serve cold or at room temperature.
Notes
Don’t walk away from browning butter; it burns quickly. Use room temperature ingredients to prevent lumpy filling. The jiggle test is key: edges set, center slightly jiggly. Chill before slicing for clean cuts. Toast spices for deeper flavor. For gluten-free, use 1:1 gluten-free flour blend. For dairy-free, use vegan butter and coconut cream. Store in refrigerator up to 5 days or freeze up to 3 months.
Nutrition
- Serving Size: 1 bar
- Calories: 280
- Sugar: 16
- Sodium: 180
- Fat: 18
- Saturated Fat: 11
- Carbohydrates: 28
- Fiber: 2
- Protein: 4
Keywords: pumpkin pie bars, brown butter, sage, fall dessert, Thanksgiving, pumpkin bars, easy dessert