It was 11:47 PM on a drizzly Thursday in November, and I had a very specific, almost aggressive craving for warm apples and buttery streusel. I didn’t have enough apples for a full nine-by-thirteen pan of apple crisp, and honestly, I didn’t want a mountain of leftovers sitting in my fridge for a week. I had two lonely Honeycrisp apples sitting in the fruit bowl, a half-empty bag of brown sugar, and the stubborn idea that I could make a proper, satisfying dessert for just the two of us without turning on the oven for an hour. Let me tell you, there’s something about the quiet of a late night that makes you willing to try weird things. I mean, who measures streusel topping by feel at midnight? Turns out, I do.
That night, I skipped the fancy ramekins and grabbed a small cast iron skillet I’d picked up at a garage sale for three bucks. I figured, worst case scenario, I’d have a slightly mushy, overly sweet pile of disappointment. But something clicked. The apples softened in a pool of their own juices, the topping got this incredible, craggy crunch, and the whole thing was ready in about thirty minutes. It was so much better than the giant, half-eaten pans I used to make. Maybe you’ve been there, staring at a recipe designed for a crowd when you only need to feed two. This is that recipe — the one that finally made sense for a quiet night in.
This budget-friendly, small-batch apple crisp for two is the result of that impulsive, late-night experiment. It’s not a compromise; it’s a revelation. It’s the kind of dessert that feels special without the waste, the cost, or the effort of a full-sized production. I keep making it because it proves you don’t need a lot of ingredients or a lot of time to create something genuinely cozy.
Why You’ll Love This Recipe
This isn’t just another apple crisp recipe. I’ve tested this small-batch version more times than I can count, tweaking the apple-to-topping ratio until it was just right. It’s built for real life, not a photo shoot. Here’s why it works so well for home cooks who want a smart, satisfying dessert:
- Budget-Friendly & No Waste: It uses just two apples and pantry staples. No buying a giant bag of apples you’ll never finish or making a dessert that ends up in the trash. This is practical cooking at its best.
- Quick & Easy: From start to finish, you’re looking at about 30 minutes. It’s perfect for a weeknight craving or a last-minute dessert when company drops by.
- Simple Ingredients: You probably have everything you need in your kitchen right now. Brown sugar, oats, flour, butter, and a couple of apples. No fancy extracts or hard-to-find spices.
- Perfect for Two: It’s the ideal size for a date night, a small family, or just treating yourself. No leftovers to feel guilty about or forget in the back of the fridge.
- Crowd-Pleaser: The combination of tender, spiced apples and a crunchy, buttery oat topping is pure comfort. It’s the kind of dessert that makes people close their eyes after the first bite.
What makes this recipe different from the dozens of others out there is the technique. I use a slightly higher ratio of topping to apples, which gives you that perfect crunchy bite in every spoonful. It’s comfort food reimagined — faster, smaller, and perfectly portioned, but with the same soul-soothing satisfaction as the full-sized version. It’s the kind of dessert that makes you feel like you’ve got it all figured out.
What Ingredients You Will Need
This recipe uses simple, wholesome ingredients to deliver bold flavor and a satisfying texture without the fuss. Most of these are pantry staples, and the few fresh items are easy to find and budget-friendly.
- For the Apple Filling:
- 2 medium apples (about 300g or 10.5 oz total), peeled, cored, and sliced (I recommend a firm, tart-sweet variety like Honeycrisp, Granny Smith, or Braeburn — they hold their shape well during baking)
- 2 tablespoons (25g) granulated sugar (adds sweetness and helps create a light syrup)
- 1 tablespoon (8g) all-purpose flour (helps thicken the juices so the filling isn’t watery)
- 1/2 teaspoon ground cinnamon (the essential warm spice)
- 1/8 teaspoon ground nutmeg (freshly grated is best, but pre-ground works fine)
- 1 teaspoon lemon juice (balances the sweetness and prevents the apples from browning)
- For the Crisp Topping:
- 1/4 cup (30g) old-fashioned rolled oats (don’t use instant oats — they get mushy; old-fashioned oats give the best texture)
- 1/4 cup (31g) all-purpose flour
- 1/4 cup (50g) packed light brown sugar (this is key for that deep, caramel-like flavor; dark brown sugar works too for a richer taste)
- 1/4 teaspoon ground cinnamon
- Pinch of salt (don’t skip this — it balances the sweetness and enhances all the flavors)
- 3 tablespoons (42g) unsalted butter, cold and cut into small cubes (the butter must be cold to create a crumbly, not greasy, topping)
Ingredient Selection Tips: I personally prefer using Honeycrisp apples for this recipe. They’re sweet enough that you can reduce the sugar a bit if you like, and they soften beautifully without turning into applesauce. For the oats, I always use Quaker Old Fashioned Oats — they’re reliable and give the perfect crunch. If you’re out of brown sugar, you can make your own by mixing 1/4 cup of granulated sugar with 1 teaspoon of molasses. It works like a charm.
Equipment Needed
You don’t need a lot of fancy gear for this one. Here’s what you’ll need to pull it off:
- Small baking dish or skillet: A 6-inch cast iron skillet is my go-to. It heats evenly and looks great on the table. Alternatively, use a 5×7-inch baking dish, two small ramekins, or a 1-quart baking dish. The key is that the dish is just big enough to hold the apples in a single layer.
- Mixing bowls: One medium bowl for the apples and one small bowl for the topping.
- Sharp knife and cutting board: For peeling and slicing the apples.
- Measuring cups and spoons: For accuracy, though I often eyeball the topping ingredients now.
- Pastry cutter or fork: To cut the cold butter into the dry ingredients. You can also use your fingertips, but work quickly so the butter stays cold.
- Spatula or spoon: For mixing.
Budget-Friendly Options: If you don’t have a small cast iron skillet, don’t worry. A small ceramic baking dish from the dollar store works perfectly. You can even use a small pie plate. The most important thing is that the dish is oven-safe and the right size.
Preparation Method
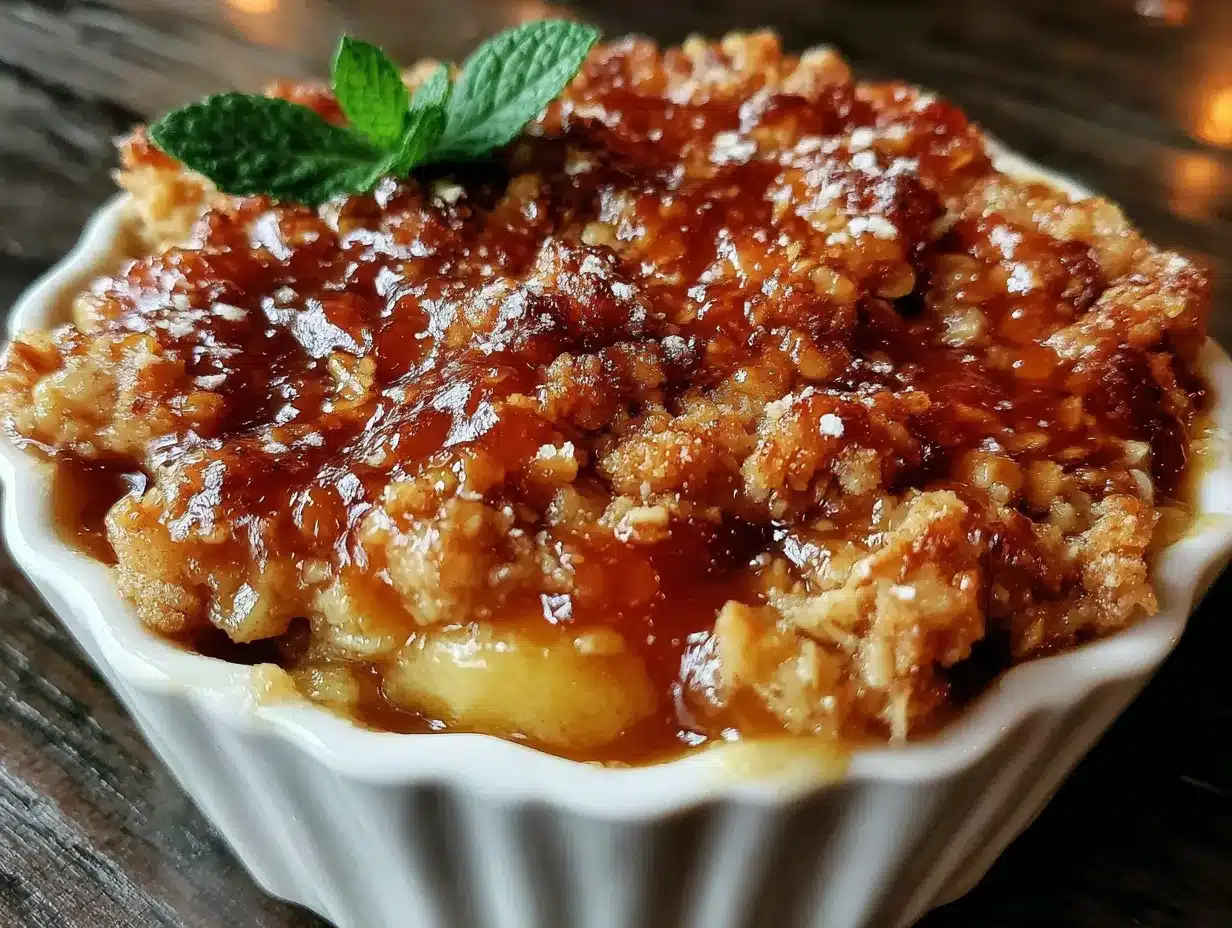
Let’s get to the good part. Follow these steps, and you’ll have a warm, bubbling apple crisp in about 30 minutes.
- Preheat your oven to 375°F (190°C). While it’s heating, prepare your apples. Peel, core, and slice them into roughly 1/4-inch thick slices. You want them uniform so they cook evenly. I usually get about 2 cups of sliced apples from two medium apples.
- Make the apple filling. In a medium bowl, combine the sliced apples, granulated sugar, 1 tablespoon of flour, cinnamon, nutmeg, and lemon juice. Toss everything together with a spatula until the apples are evenly coated. Let this sit while you make the topping — this gives the apples time to release a little juice, which will create a nice syrup as they bake.
- Make the crisp topping. In a small bowl, whisk together the rolled oats, 1/4 cup of flour, brown sugar, cinnamon, and salt. Add the cold, cubed butter. Using a pastry cutter, a fork, or your fingertips, work the butter into the dry ingredients until the mixture looks like coarse crumbs with some pea-sized butter pieces remaining. Don’t overwork it — those little bits of butter are what create the flaky, crunchy texture. It should look a bit shaggy and uneven.
- Assemble the crisp. Transfer the apple mixture to your prepared baking dish or skillet. Spread it into an even layer. Sprinkle the topping evenly over the apples. Don’t press it down — let it sit loosely on top so it can get nice and crispy.
- Bake. Place the dish on a baking sheet to catch any potential overflow (though this recipe is pretty tidy). Bake for 20-25 minutes, or until the topping is golden brown and the apple filling is bubbly around the edges. The apples should be tender when pierced with a fork. If the topping is browning too quickly, tent the dish loosely with aluminum foil for the last 5 minutes.
- Cool slightly before serving. Let the crisp sit for at least 5 minutes after you take it out of the oven. This allows the filling to set up a bit so it’s not too runny. It will still be warm and delicious.
Sensory Cues: When it’s done, your kitchen will smell like a fall candle, but better. The topping should be a deep golden brown and feel firm to the touch. You’ll see the apple juices bubbling up around the edges, thick and syrupy. The apples should offer a little resistance when poked with a fork but not be mushy.
Cooking Tips & Techniques
I’ve made this recipe dozens of times, and I’ve learned a few things the hard way. Here are my best tips for getting it right every time.
- Don’t skip the lemon juice. I once forgot it in a rush, and the crisp was cloyingly sweet. That little bit of acid brightens the whole dish and keeps the apples from turning brown.
- Cold butter is non-negotiable. If your butter is even slightly soft, the topping will turn into a paste instead of crumbs. I’ve made that mistake, and the result was a dense, greasy blanket instead of a crispy streusel. Pop your butter in the freezer for 10 minutes before you start if you’re in a warm kitchen.
- Slice apples evenly. Thicker slices will be undercooked while thinner ones turn to mush. Aim for that 1/4-inch thickness. I’m not perfect at it, but close enough works fine.
- Let it rest. I know it’s hard to wait, but the crisp needs those 5 minutes to set. If you dig in right away, the filling will be soupy and the topping might slide off. Patience pays off here.
- Multitasking strategy: While the oven preheats, prep the apples. While the apples sit in the sugar mixture, make the topping. By the time you’re done, the oven is ready, and you can pop it in. That’s efficiency, folks.
Variations & Adaptations
This recipe is a great base for experimentation. Here are a few ways to change it up based on what you have or what you’re craving.
- Dietary Adaptation — Gluten-Free: Substitute the all-purpose flour in both the filling and the topping with a 1:1 gluten-free baking flour blend. Bob’s Red Mill works great. The texture is slightly more delicate, but the flavor is spot on.
- Seasonal Variation — Berry Apple Crisp: Swap one of the apples for a cup of fresh or frozen berries (blueberries, raspberries, or blackberries). Reduce the sugar in the filling by 1 tablespoon since berries are often tarter. It’s a great way to use up summer fruit.
- Flavor Twist — Maple Pecan Crisp: Replace the brown sugar in the topping with 3 tablespoons of maple syrup and add 1/4 cup of chopped pecans. Reduce the butter to 2 tablespoons since the syrup adds moisture. The maple and pecan combination is incredible with the apples.
- Method Change — Air Fryer: Assemble the crisp in a small, air fryer-safe dish. Cook at 350°F (175°C) for 12-15 minutes, checking halfway through. The topping gets extra crispy in the air fryer. It’s a game-changer for hot summer days.
- Personal Variation: I once added a tablespoon of bourbon to the apple filling on a whim. It added this warm, smoky depth that was absolutely fantastic. I highly recommend it if you have a bottle open.
Serving & Storage Suggestions
This apple crisp is best served warm, straight from the oven. Here’s how to make it a meal.
- Serving Temperature: Warm is the only way to go. The contrast between the hot, gooey apples and a cold topping is pure magic.
- Presentation: Serve it right in the skillet or baking dish — it looks rustic and charming. If you want to be fancy, scoop it into small bowls.
- What to Serve With It: A scoop of vanilla ice cream is the classic pairing. The cold creaminess against the warm, spiced apples is unbeatable. A dollop of whipped cream or a drizzle of heavy cream works beautifully too. For a less decadent option, try a spoonful of plain Greek yogurt.
- Storage: Cover any leftovers tightly with foil or plastic wrap and store them in the refrigerator for up to 3 days. The topping will soften, but the flavor will still be great.
- Reheating: The best way to reheat is in a 350°F (175°C) oven for about 10 minutes. This helps re-crisp the topping. You can use the microwave in a pinch, but the topping won’t be as crunchy. I usually just eat it cold from the fridge — it’s like apple crisp overnight oats!
- Flavor Development: Honestly, the flavors meld together even more after a day in the fridge. It’s not as pretty, but it’s still delicious.
Nutritional Information & Benefits
This recipe makes two generous servings. The following values are estimates and will vary based on the specific ingredients you use.
- Estimated Nutritional Values (per serving):
- Calories: ~320
- Fat: 12g
- Saturated Fat: 7g
- Carbohydrates: 55g
- Fiber: 5g
- Sugar: 35g
- Protein: 3g
- Health Benefits: Apples are a great source of fiber and vitamin C. Oats provide soluble fiber, which is good for heart health. While this is a dessert, it’s made with whole ingredients and no artificial additives.
- Dietary Considerations: This recipe can be made gluten-free with a simple flour swap. It is vegetarian. To make it vegan, use a plant-based butter substitute (like Earth Balance) and ensure your sugar is vegan-friendly.
- Potential Allergens: Contains wheat (gluten) and dairy (butter).
- Personal Note: I love that this dessert feels indulgent but isn’t loaded with processed ingredients. It’s a treat I feel good about sharing with my family.
Conclusion
This budget-friendly, small-batch apple crisp for two is proof that you don’t need a full-sized recipe to get a full-sized dose of comfort. It’s quick, uses simple ingredients, and delivers that warm, spiced, crunchy-sweet experience we all crave. I love how it turns a quiet Tuesday night into something a little special without any fuss or waste.
I hope you give this recipe a try and make it your own. Swap in your favorite apples, add a handful of nuts, or serve it with whatever ice cream you have in the freezer. The beauty of this crisp is how forgiving and adaptable it is. When you make it, I’d love to hear how it turned out. Drop a comment below and let me know what variations you tried, or share a photo of your cozy creation. Happy baking, and remember — sometimes the best recipes come from a late-night whim and a couple of lonely apples.
Frequently Asked Questions
Can I use a different type of apple?
Absolutely. Firm, tart-sweet apples like Honeycrisp, Granny Smith, Braeburn, or Pink Lady work best. Softer apples like Red Delicious will break down too much and become mushy.
Can I make this ahead of time?
You can assemble the crisp (without baking) and store it in the refrigerator for up to 24 hours. Add a few extra minutes to the baking time since you’ll be starting from cold.
Can I double this recipe?
Yes! Simply double all the ingredients and use an 8×8-inch baking dish. You may need to add 5-10 minutes to the baking time.
My topping turned out more like a paste. What went wrong?
Your butter was likely too warm. Make sure the butter is very cold when you cut it into the dry ingredients. If your kitchen is hot, chill the flour mixture and butter cubes for 10 minutes before mixing.
Can I freeze leftover apple crisp?
Yes, you can freeze the baked and cooled crisp for up to 3 months. Wrap it tightly in plastic wrap and then foil. Thaw in the refrigerator overnight and reheat in a 350°F oven until warmed through.
Pin This Recipe!

Budget Cozy Apple Crisp for Two – Easy Small Batch Dessert

A quick, budget-friendly apple crisp for two made with simple pantry staples. Perfect for a cozy night in, this small-batch dessert delivers warm, spiced apples and a crunchy oat topping in about 30 minutes.
- Prep Time: 10 minutes
- Cook Time: 25 minutes
- Total Time: 35 minutes
- Yield: 2 servings 1x
- Category: Dessert
- Cuisine: American
Ingredients
- 2 medium apples (about 300g or 10.5 oz total), peeled, cored, and sliced (Honeycrisp, Granny Smith, or Braeburn recommended)
- 2 tablespoons (25g) granulated sugar
- 1 tablespoon (8g) all-purpose flour
- 1/2 teaspoon ground cinnamon
- 1/8 teaspoon ground nutmeg
- 1 teaspoon lemon juice
- 1/4 cup (30g) old-fashioned rolled oats
- 1/4 cup (31g) all-purpose flour
- 1/4 cup (50g) packed light brown sugar
- 1/4 teaspoon ground cinnamon
- Pinch of salt
- 3 tablespoons (42g) unsalted butter, cold and cut into small cubes
Instructions
- Preheat your oven to 375°F (190°C).
- Peel, core, and slice the apples into roughly 1/4-inch thick slices.
- In a medium bowl, combine the sliced apples, granulated sugar, 1 tablespoon of flour, cinnamon, nutmeg, and lemon juice. Toss until evenly coated. Let sit while making the topping.
- In a small bowl, whisk together the rolled oats, 1/4 cup of flour, brown sugar, cinnamon, and salt.
- Add the cold, cubed butter. Using a pastry cutter, fork, or fingertips, work the butter into the dry ingredients until the mixture looks like coarse crumbs with some pea-sized butter pieces remaining.
- Transfer the apple mixture to a small baking dish or 6-inch cast iron skillet. Spread into an even layer.
- Sprinkle the topping evenly over the apples. Do not press it down.
- Place the dish on a baking sheet and bake for 20-25 minutes, or until the topping is golden brown and the apple filling is bubbly around the edges.
- Let the crisp cool for at least 5 minutes before serving.
Notes
For best results, use cold butter and slice apples evenly. Let the crisp rest for 5 minutes after baking to allow the filling to set. The topping can be made gluten-free by using a 1:1 gluten-free flour blend.
Nutrition
- Serving Size: 1/2 of the crisp
- Calories: 320
- Sugar: 35
- Fat: 12
- Saturated Fat: 7
- Carbohydrates: 55
- Fiber: 5
- Protein: 3
Keywords: apple crisp, small batch, for two, easy dessert, budget dessert, fall dessert, apple dessert


