The PTA bake sale was in six hours and I’d completely forgotten. I mean, I’d signed up for it weeks ago, but between work and the kids and honestly just trying to keep my head above water, it had slipped my mind completely. Everyone else would be bringing those elaborate, multi-day creations—the kind that look like they belong on the cover of a food magazine. I had a half-empty bag of all-purpose flour, a stick of butter that was still a little cold, and a vague memory of a sugar cookie recipe I’d scribbled on a napkin last Thanksgiving.
I stood in my kitchen, staring at my pantry like it might magically produce something impressive. Let me tell you, it didn’t. But then my eyes landed on the turkey-shaped cookie cutter I’d bought on a whim last year. I’d never even used it. The thing was still in its packaging, for crying out loud. So I figured, why not? I mean, what did I have to lose? My pride, probably. But I was already running on adrenaline and coffee, so I went for it.
I whipped up a batch of my go-to sugar cookie dough—the one I’ve been tweaking for years to make it just a little bit better for you without sacrificing that buttery, melt-in-your-mouth texture. I used whole wheat pastry flour for a bit of fiber, cut the sugar by a third, and swapped in some coconut oil for half the butter. It felt like a gamble, honestly. But I was in too deep to turn back. I rolled out the dough, cut out a dozen slightly wonky turkeys, and baked them until the edges were just barely golden. Then came the royal icing—a simple, foolproof recipe I’d learned from a pastry chef friend years ago. I colored it, bagged it, and started piping. It wasn’t perfect. Some feathers were lopsided. A few beaks looked more like angry triangles. But I was out of time, so I packed them up and ran.
The bake sale was chaos. Tables piled high with cupcakes that had perfect buttercream rosettes, pies with intricate lattice crusts, and cookies that looked like they’d been decorated by a professional. I put my little turkey cookies on the table, already mentally preparing my excuse. But then something funny happened. A mom walked by, stopped, and picked one up. She smiled. Then another person came. And another. By the end of the first hour, my cookies were gone. Completely. People kept coming back, asking if there were more. One woman told me they were the only thing her picky kid would eat. Another said they reminded her of baking with her grandmother—simple, honest, and full of love. I stood there, a little stunned, with an empty platter and a strange feeling in my chest. It wasn’t about winning. It was about realizing that sometimes the things we throw together in a panic are the things that actually matter. That’s why I keep making these turkey cookies. They remind me that you don’t need perfection to make something good.
Why You’ll Love This Recipe
These wholesome turkey sugar cookies aren’t just another holiday treat—they’re the kind of cookie that makes you feel good about what you’re eating, even when you’re on your third one. I’ve spent years testing and tweaking this recipe to find the perfect balance between indulgence and nutrition, and let me tell you, this is it. They’re soft, buttery, and just sweet enough, with a royal icing that sets up beautifully without being rock hard.
- Quick & Easy: From start to finish, you’re looking at about 45 minutes of active time. The dough comes together in one bowl, and the icing is ready in under five minutes. Perfect for those last-minute bake sale panics or a rainy afternoon activity with the kids.
- Simple Ingredients: No weird, hard-to-find stuff here. You probably have most of these in your pantry right now. Whole wheat pastry flour, a touch of coconut oil, and just enough sugar to keep it sweet without overdoing it.
- Perfect for Thanksgiving: Whether you’re hosting the big dinner or just want a fun activity for the kids, these cookies are a hit. They’re cute enough for the dessert table but simple enough for a casual afternoon snack.
- Crowd-Pleaser: I’ve brought these to parties, school events, and family gatherings, and they always disappear fast. Even the pickiest eaters love them. There’s something about the turkey shape that just makes people smile.
- Unbelievably Delicious: Honestly, I was skeptical at first too. Could a healthier sugar cookie really taste this good? The answer is yes. The texture is soft and tender, the flavor is rich and buttery, and the royal icing adds just the right amount of sweetness and crunch.
What makes this recipe different from the rest? It’s the technique. By using a combination of whole wheat pastry flour and all-purpose flour, you get a cookie that’s sturdy enough for decorating but still has that melt-in-your-mouth quality. The coconut oil adds a subtle richness without making the cookies greasy, and the reduced sugar means the royal icing can shine without being cloying. This isn’t just another version of a sugar cookie—it’s the version I’ve perfected over years of trial and error, the one that makes people say, “Wait, these are actually good for me?”
This recipe is for those moments when you want something that feels like a treat but doesn’t leave you feeling sluggish. It’s comfort food reimagined—healthier, faster, but with the same soul-soothing satisfaction. Perfect for impressing guests without stress, or turning a simple Thanksgiving activity into something memorable.
What Ingredients You Will Need
This recipe uses simple, wholesome ingredients to deliver bold flavor and satisfying texture without the fuss. Most of these are pantry staples, and I’ve included a few notes on substitutions if you need them.
For the Sugar Cookies
- 1 cup unsalted butter, softened (I use Kerrygold for its rich flavor, but any good-quality butter works. For a dairy-free option, use a plant-based butter stick.)
- 1/2 cup coconut oil, softened (Make sure it’s not melted—just soft enough to cream with the butter. Adds moisture and a subtle richness.)
- 1 cup granulated sugar (I’ve tested this with coconut sugar too, and it works, but the cookies will be darker and slightly less sweet.)
- 1 large egg, room temperature (Cold eggs can make the dough seize up, so let it sit out for 20 minutes first.)
- 1 teaspoon vanilla extract (Pure vanilla extract makes a difference here. Save the imitation stuff for other recipes.)
- 2 1/2 cups whole wheat pastry flour (This is my secret ingredient. It adds fiber and a tender crumb without the dense texture of regular whole wheat flour. You can substitute all-purpose flour if that’s all you have.)
- 1/2 cup all-purpose flour (The combination gives the cookies structure while keeping them soft.)
- 1 teaspoon baking powder (Make sure it’s not expired—fresh baking powder is key for a good rise.)
- 1/2 teaspoon salt (I prefer fine sea salt for even distribution.)
For the Royal Icing
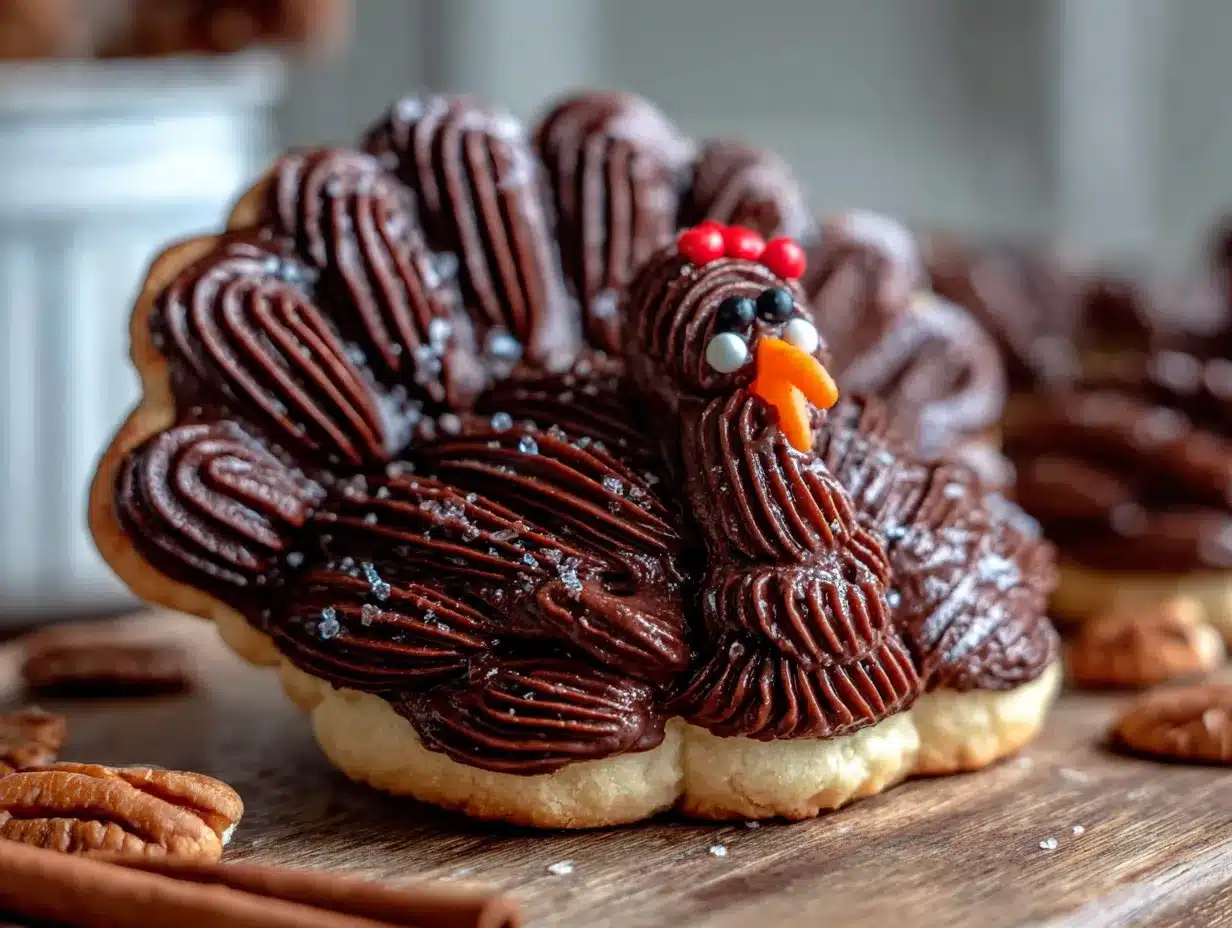
- 2 cups powdered sugar, sifted (Sifting is non-negotiable here. Lumps will ruin the smooth texture.)
- 2 tablespoons meringue powder (This stabilizes the icing and gives it that professional finish. You can substitute with 2 large egg whites if you prefer, but meringue powder is more consistent.)
- 3-4 tablespoons water, room temperature (Add slowly—you want a thick but flowable consistency.)
- 1/2 teaspoon vanilla extract (Optional, but it adds a nice depth of flavor.)
- Food coloring (I recommend gel food coloring for vibrant colors without thinning the icing. For these turkey cookies, you’ll need orange, red, yellow, and brown.)
For Decorating
- Turkey-shaped cookie cutter (I found mine at a craft store for a few dollars. Any size works, but adjust baking time if it’s very large or small.)
- Piping bags or zip-top bags (If you don’t have piping bags, a small zip-top bag with the corner snipped off works perfectly.)
- Small round piping tips (I use Wilton #2 and #3 tips for detail work.)
- Edible glitter or sprinkles (Optional, but they add a fun festive touch.)
Equipment Needed
You don’t need a fancy kitchen to make these cookies, but having the right tools makes everything easier. Here’s what I use:
- Stand mixer or hand mixer: Creaming the butter and sugar by hand is possible, but it takes forever. A mixer saves time and gives you a lighter texture.
- Large mixing bowls: I prefer glass or stainless steel—they’re easier to clean and don’t hold onto odors.
- Rolling pin: A standard rolling pin works, but I love my adjustable rolling pin with thickness rings. It ensures even cookies every time.
- Parchment paper: Line your baking sheets for easy cleanup and to prevent sticking.
- Baking sheets: Heavy-duty ones distribute heat more evenly. I use Nordic Ware.
- Cooling rack: Essential for letting cookies cool completely before icing. If you ice warm cookies, the icing will melt and slide right off.
- Piping bags and tips: A set of small round tips is all you need for detailed decorating. Wilton #2 and #3 are my go-to.
- Small bowls or cups: For dividing and coloring the icing.
- Toothpicks: Great for popping air bubbles in the icing and fixing small mistakes.
If you don’t have a turkey-shaped cookie cutter, you can use any fall-themed shape—leaves, pumpkins, or even a simple round cookie decorated to look like a turkey. I’ve done that before, and it still works great. Just make sure to adjust the baking time if the shape is much larger or smaller.
Preparation Method
- Make the cookie dough: In a large mixing bowl, cream together the softened butter, coconut oil, and granulated sugar until light and fluffy. This takes about 3-4 minutes with a stand mixer on medium speed. You want the mixture to look pale and airy. Scrape down the sides of the bowl once or twice.
- Add the wet ingredients: Beat in the egg and vanilla extract until fully combined. The mixture might look a little curdled at this point—don’t worry, that’s normal. It will come together once you add the dry ingredients.
- Mix the dry ingredients: In a separate bowl, whisk together the whole wheat pastry flour, all-purpose flour, baking powder, and salt. This ensures the baking powder is evenly distributed.
- Combine wet and dry: Gradually add the dry ingredients to the wet mixture, mixing on low speed until just combined. Be careful not to overmix—overworking the dough will make the cookies tough. Stop as soon as you don’t see any more streaks of flour.
- Chill the dough: Divide the dough in half, flatten each half into a disc, wrap in plastic wrap, and refrigerate for at least 1 hour. This step is crucial. Chilled dough is much easier to roll out and holds its shape better during baking. If you’re in a hurry, you can pop it in the freezer for 20 minutes, but don’t skip this step entirely.
- Preheat and prepare: When you’re ready to bake, preheat your oven to 350°F (175°C). Line two baking sheets with parchment paper.
- Roll out the dough: On a lightly floured surface, roll out one disc of dough to about 1/4-inch thickness. I like to use my adjustable rolling pin set to 1/4 inch for consistency. If the dough starts to stick, dust the surface with a little more flour.
- Cut out the shapes: Use your turkey-shaped cookie cutter to cut out as many cookies as possible. Press straight down and lift up without twisting—twisting can distort the shape. Transfer the cutouts to the prepared baking sheets, spacing them about 2 inches apart.
- Bake: Bake for 8-10 minutes, or until the edges are just barely golden. The centers should still look slightly soft. Every oven is different, so start checking at the 8-minute mark. Overbaked cookies will be dry and hard.
- Cool completely: Let the cookies cool on the baking sheet for 5 minutes, then transfer them to a cooling rack to cool completely. This is important—if you try to ice them while they’re still warm, the icing will melt and slide right off.
- Make the royal icing: In a medium bowl, combine the sifted powdered sugar and meringue powder. Add 3 tablespoons of water and the vanilla extract, then beat on low speed until smooth. Add the remaining tablespoon of water if needed to achieve a thick but flowable consistency. The icing should hold a ribbon trail for a few seconds when you lift the beaters.
- Color the icing: Divide the icing into small bowls. Add gel food coloring to each: orange for the beak, red for the wattle, yellow for the feathers, and brown for the body. Stir until the color is even. If the icing thickens after adding color, add a few drops of water to thin it back out.
- Decorate the cookies: Transfer each color of icing to a piping bag fitted with a small round tip. Start with the brown icing to outline and fill the turkey’s body. Use the orange icing for the beak, red for the wattle, and yellow for the feathers. Let the base colors dry for about 15 minutes before adding any additional details.
- Add details: Once the base colors are set, you can add eyes, feather lines, or other details using the same colors or a darker shade. I like to use a toothpick to create small swirls or patterns in the icing.
- Let the icing set: Allow the decorated cookies to sit at room temperature for at least 2 hours, or until the icing is completely hard to the touch. This can take longer in humid weather.
Cooking Tips & Techniques
I’ve made these cookies more times than I can count, and I’ve learned a few things along the way. Here are my best tips for success:
- Don’t skip the chill time: I know it’s tempting to rush, but chilled dough is non-negotiable for clean, sharp cookie shapes. If the dough gets too soft while you’re rolling, just pop it back in the fridge for 10 minutes.
- Use a light hand with flour: Too much flour on your rolling surface can make the cookies dry. Use just enough to prevent sticking, and brush off any excess before baking.
- Check your baking powder: If your cookies don’t spread or rise properly, it might be because your baking powder is old. Test it by dropping a teaspoon into hot water—if it fizzes, it’s still good.
- Room temperature ingredients matter: Cold butter and eggs won’t cream together properly, which can lead to dense cookies. Let them sit out for 20-30 minutes before you start.
- Royal icing consistency is key: For outlining, you want the icing to be thick enough to hold its shape. For flooding (filling in larger areas), thin it out with a few drops of water until it spreads slowly when you pipe it. It should be like thick honey.
- Fix mistakes quickly: If you mess up a line, use a toothpick to gently scrape away the icing before it dries. You can also use a damp cotton swab to clean up edges.
- Humidity is your enemy: Royal icing doesn’t set well in humid weather. If you’re decorating on a rainy day, expect it to take longer to dry. You can speed things up by placing the cookies in front of a fan.
I once forgot to chill my dough and ended up with cookies that looked more like blobs than turkeys. It was a mess, honestly. But I learned my lesson, and now I always set a timer to remind myself to chill the dough. Learn from my mistakes—it’s worth the extra time.
Variations & Adaptations
One of the best things about this recipe is how adaptable it is. Here are a few ways to make it your own:
- Gluten-Free Version: Substitute the whole wheat pastry flour and all-purpose flour with a good gluten-free flour blend. I’ve had great results with King Arthur Measure for Measure. Add 1/2 teaspoon of xanthan gum if your blend doesn’t already include it.
- Vegan Option: Use a plant-based butter stick and replace the egg with a flax egg (1 tablespoon ground flaxseed mixed with 3 tablespoons water, let sit for 5 minutes). For the royal icing, use aquafaba (the liquid from a can of chickpeas) instead of meringue powder. Whip it until frothy before adding the powdered sugar.
- Seasonal Shapes: Don’t limit these cookies to Thanksgiving! Use the same recipe with different cookie cutters for Christmas, Easter, or birthday parties. The royal icing can be colored to match any theme.
- Flavor Twists: Add 1 teaspoon of cinnamon or pumpkin pie spice to the dough for a warm, autumnal flavor. You can also replace the vanilla extract with almond extract for a nutty twist.
- Different Icing Styles: If royal icing isn’t your thing, try a simple glaze made from powdered sugar and milk. It won’t be as crisp, but it’s faster and easier. Or skip the icing altogether and sprinkle the cookies with coarse sugar before baking.
I once made a batch with orange zest in the dough, and it was incredible. The citrus flavor paired perfectly with the sweet royal icing. It’s become my go-to variation for fall.
Serving & Storage Suggestions
These cookies are best served at room temperature, with the royal icing fully set. They make a beautiful addition to any Thanksgiving dessert table, and they’re perfect for packaging up as gifts or party favors.
For storage, place the decorated cookies in an airtight container, separating layers with parchment paper. They’ll stay fresh for up to 5 days at room temperature. If you need to store them longer, you can freeze the undecorated cookies for up to 3 months. Just bake, cool, and freeze them in a single layer on a baking sheet, then transfer to a freezer-safe bag. When you’re ready to decorate, thaw them at room temperature and ice as directed.
If you’re making these ahead of time for a party, I recommend baking the cookies a day or two in advance and decorating them the morning of the event. The flavors actually improve after a day or two—the cookies become even softer and more tender.
These cookies pair beautifully with a warm cup of apple cider or a spiced chai latte. For a dessert spread, serve them alongside pumpkin pie, pecan tarts, or a simple vanilla panna cotta.
Nutritional Information & Benefits
I’m not a nutritionist, but I’ve done my best to estimate the values based on the ingredients I use. Per cookie (assuming 24 cookies per batch):
- Calories: 165
- Fat: 9g (6g saturated)
- Carbohydrates: 21g (12g sugar)
- Fiber: 2g
- Protein: 2g
The whole wheat pastry flour adds fiber and nutrients compared to regular all-purpose flour, and the coconut oil provides healthy fats that are easier for your body to metabolize. By reducing the sugar in the cookie dough, you’re getting a treat that satisfies your sweet tooth without spiking your blood sugar as dramatically.
These cookies are suitable for vegetarian diets. For vegan and gluten-free options, see the variations section above. They contain dairy, eggs, and gluten in their standard form, so keep that in mind if you’re serving guests with allergies.
Conclusion
These wholesome turkey sugar cookies are more than just a holiday treat—they’re a reminder that you don’t need perfection to create something wonderful. Whether you’re rushing to a bake sale like I was, or just looking for a fun afternoon activity with the kids, this recipe delivers every time. The cookies are soft, buttery, and just sweet enough, and the royal icing adds a beautiful, professional finish that’s surprisingly easy to achieve.
I hope you give this recipe a try and make it your own. Add your favorite spices, experiment with different shapes, or get creative with the decorating. The best part about baking is that there’s always room for your personal touch.
If you make these cookies, I’d love to hear about it! Leave a comment below and let me know how they turned out. Share your photos on social media and tag me—I love seeing your creations. And if you have any questions, don’t hesitate to ask. Happy baking, my friend!
FAQs
Can I use all-purpose flour instead of whole wheat pastry flour?
Yes, you can substitute all-purpose flour for the whole wheat pastry flour. The cookies will be slightly less tender and won’t have the same fiber content, but they’ll still taste great. Use 3 cups of all-purpose flour total and omit the whole wheat pastry flour.
How long does royal icing take to dry?
Royal icing typically takes 2-4 hours to dry completely, depending on the humidity and thickness of the icing. In humid weather, it can take longer. To speed things up, place the cookies in front of a fan or in a dry, airy spot.
Can I freeze the decorated cookies?
It’s best to freeze undecorated cookies. Royal icing can become sticky or crack when thawed. Bake and cool the cookies, then freeze them in an airtight container for up to 3 months. Thaw at room temperature before decorating.
My dough is too sticky to roll out. What should I do?
If your dough is too sticky, it probably needs more chilling time. Pop it back in the refrigerator for 30 minutes. You can also dust your rolling surface and rolling pin with a little extra flour. If the dough is still sticky after chilling, you may have added too much liquid—try adding a tablespoon of flour at a time until it comes together.
Can I make these cookies without a stand mixer?
Absolutely! You can cream the butter and sugar by hand with a wooden spoon, but it will take some elbow grease. A hand mixer works well too. Just make sure to cream until the mixture is light and fluffy, which might take a few extra minutes by hand.
Pin This Recipe!
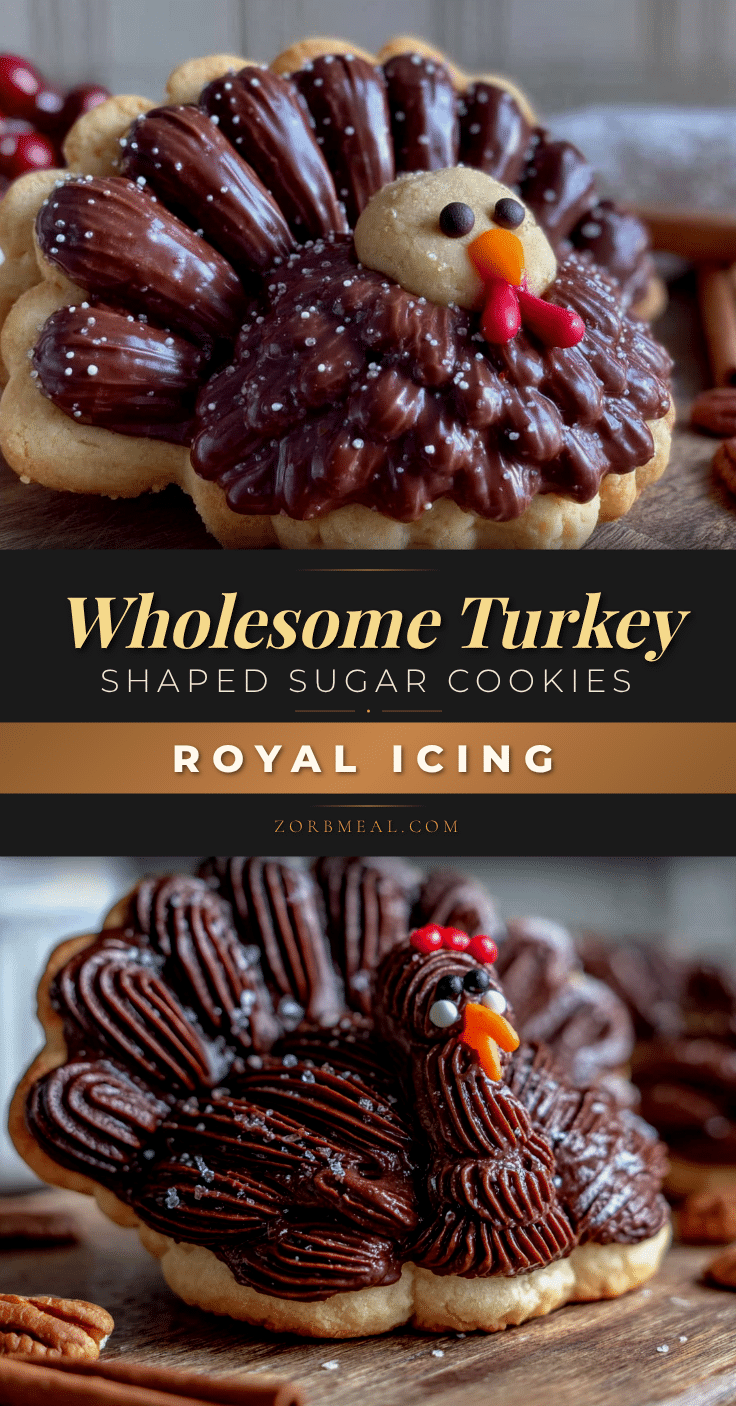
Wholesome Turkey Sugar Cookies with Easy Royal Icing

These wholesome turkey sugar cookies are soft, buttery, and just sweet enough, with a royal icing that sets up beautifully. Perfect for Thanksgiving bake sales or a fun activity with the kids, they use simple, wholesome ingredients for a treat that feels good to eat.
- Prep Time: 45 minutes
- Cook Time: 10 minutes
- Total Time: 2 hours 55 minutes (including chilling and icing setting time)
- Yield: 24 servings 1x
- Category: Dessert
- Cuisine: American
Ingredients
- 1 cup unsalted butter, softened
- 1/2 cup coconut oil, softened
- 1 cup granulated sugar
- 1 large egg, room temperature
- 1 teaspoon vanilla extract
- 2 1/2 cups whole wheat pastry flour
- 1/2 cup all-purpose flour
- 1 teaspoon baking powder
- 1/2 teaspoon salt
- 2 cups powdered sugar, sifted
- 2 tablespoons meringue powder
- 3–4 tablespoons water, room temperature
- 1/2 teaspoon vanilla extract (optional)
- Food coloring (orange, red, yellow, brown)
- Turkey-shaped cookie cutter
- Piping bags or zip-top bags
- Small round piping tips (Wilton #2 and #3)
- Edible glitter or sprinkles (optional)
Instructions
- Make the cookie dough: In a large mixing bowl, cream together the softened butter, coconut oil, and granulated sugar until light and fluffy, about 3-4 minutes with a stand mixer on medium speed. Scrape down the sides of the bowl once or twice.
- Add the wet ingredients: Beat in the egg and vanilla extract until fully combined. The mixture might look a little curdled—this is normal.
- Mix the dry ingredients: In a separate bowl, whisk together the whole wheat pastry flour, all-purpose flour, baking powder, and salt.
- Combine wet and dry: Gradually add the dry ingredients to the wet mixture, mixing on low speed until just combined. Do not overmix.
- Chill the dough: Divide the dough in half, flatten each half into a disc, wrap in plastic wrap, and refrigerate for at least 1 hour (or freeze for 20 minutes if in a hurry).
- Preheat and prepare: Preheat oven to 350°F (175°C). Line two baking sheets with parchment paper.
- Roll out the dough: On a lightly floured surface, roll out one disc of dough to about 1/4-inch thickness.
- Cut out the shapes: Use a turkey-shaped cookie cutter to cut out cookies. Press straight down and lift up without twisting. Transfer to prepared baking sheets, spacing about 2 inches apart.
- Bake: Bake for 8-10 minutes, or until edges are just barely golden. Centers should still look slightly soft.
- Cool completely: Let cookies cool on baking sheet for 5 minutes, then transfer to a cooling rack to cool completely.
- Make the royal icing: In a medium bowl, combine sifted powdered sugar and meringue powder. Add 3 tablespoons water and vanilla extract, beat on low speed until smooth. Add remaining water if needed to achieve a thick but flowable consistency.
- Color the icing: Divide icing into small bowls. Add gel food coloring: orange for beak, red for wattle, yellow for feathers, brown for body. Stir until even.
- Decorate the cookies: Transfer each color to a piping bag fitted with a small round tip. Outline and fill turkey body with brown, beak with orange, wattle with red, feathers with yellow. Let base colors dry for about 15 minutes.
- Add details: Add eyes, feather lines, or other details using toothpicks or same colors.
- Let the icing set: Allow decorated cookies to sit at room temperature for at least 2 hours, or until icing is completely hard.
Notes
Don’t skip chilling the dough—it’s crucial for clean shapes. Use room temperature ingredients for best results. Royal icing consistency is key: thicker for outlining, thinner for flooding. Humidity can affect drying time; use a fan to speed it up. Cookies stay fresh for up to 5 days in an airtight container. Undecorated cookies can be frozen for up to 3 months.
Nutrition
- Serving Size: 1 cookie
- Calories: 165
- Sugar: 12
- Sodium: 75
- Fat: 9
- Saturated Fat: 6
- Carbohydrates: 21
- Fiber: 2
- Protein: 2
Keywords: turkey cookies, sugar cookies, royal icing, Thanksgiving cookies, healthy sugar cookies, whole wheat cookies, bake sale cookies


