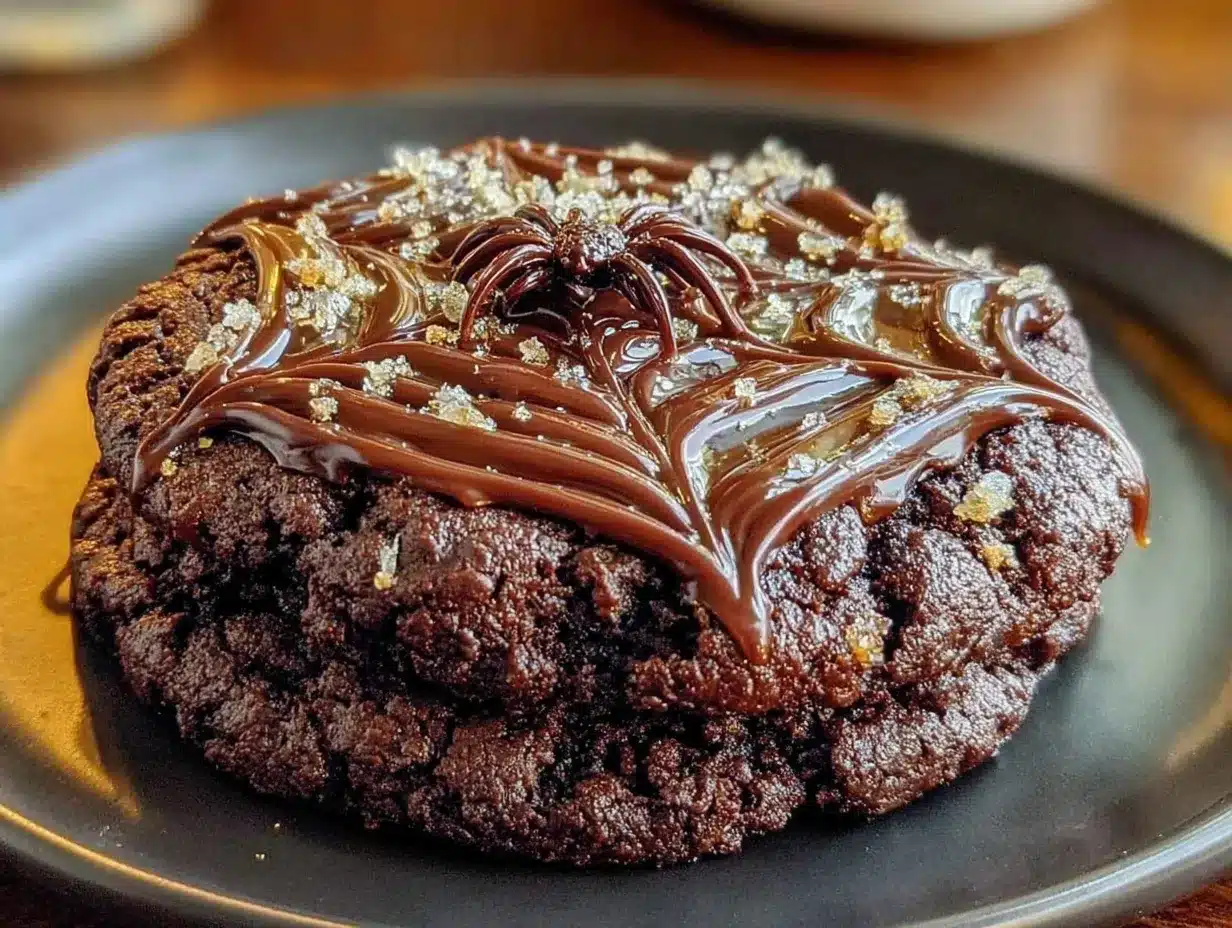
It was 10:47 PM on a random Tuesday in October, and I had a very specific, almost irrational craving for something chocolatey, a little spooky, and immediately gratifying. I didn’t have any fancy cookie cutters, nor the energy to make a complicated layer cake, but I had a batch of my go-to sugar cookie dough chilling in the fridge and a half-empty bag of dark chocolate chips. The idea just sort of arrived, fully formed, like a weird little gift from my tired brain. I grabbed a piping bag (okay, a zip-top bag with the corner snipped off) and started making webs. Honestly, it was one of those moments where you just trust the process, even if the process involves a slightly wobbly spider web drawn in melted chocolate. Maybe you’ve been there—that late-night kitchen creativity that feels a little unhinged but ends up being genius. This is how the Quick Spider Web Cookies with Easy Chocolate Ganache were born, and I keep making them because they are the perfect last-minute Halloween treat that looks way more impressive than the effort they require.
Why You’ll Love This Recipe
Let’s be real for a second. Halloween baking can be a total circus. You see these elaborate cookies online that take three days and a degree in pastry arts. This recipe is the exact opposite of that. It’s the weeknight hero of spooky treats, and here is why it works so hard for you.
- Quick & Easy: From start to finish, you are looking at about 30 minutes of active work. The hardest part is waiting for the ganache to set, and honestly, that’s just an excuse to clean up the kitchen.
- Simple Ingredients: You likely have everything for the cookies and the ganache in your pantry right now. No hunting down black food coloring or weird candy melts.
- Perfect for Last-Minute Plans: Got a classroom party tomorrow? Neighbors dropping by? This is your recipe. It turns a basic sugar cookie into a showstopper with zero stress.
- Crowd-Pleaser: Kids go wild for the spider web design, and adults appreciate that it tastes like a classic, buttery cookie with a rich chocolate finish. It’s a win-win.
- Foolproof Ganache: This isn’t a finicky chocolate sauce. It’s a two-ingredient, stir-it-together ganache that sets up perfectly glossy every single time. No tempering, no double-boiler anxiety.
What makes this different from every other Halloween cookie out there is the technique. Instead of piping intricate webs over a whole cookie, you create a simple base of ganache and then drag a toothpick through it. It’s almost meditative, and it looks incredible. I mean, who knew a toothpick could be such a powerful tool? This recipe isn’t just good—it’s the kind that makes you feel like a kitchen rockstar with almost zero effort.
What Ingredients You Will Need
This recipe relies on a handful of pantry staples to deliver that perfect combination of buttery cookie and rich chocolate. The magic is in the simplicity.
For the Sugar Cookies
- 2 ½ cups (315g) all-purpose flour (spooned and leveled)
- 1 cup (226g) unsalted butter, softened (I prefer Land O’Lakes for consistent results)
- 1 cup (200g) granulated sugar
- 1 large egg, room temperature
- 1 teaspoon vanilla extract
- ½ teaspoon baking powder
- ¼ teaspoon salt
For the Easy Chocolate Ganache
- 1 cup (175g) semi-sweet or dark chocolate chips (I use Ghirardelli 60% cacao for a deep flavor)
- ½ cup (120ml) heavy cream (use full-fat for the best texture)
- Optional: 1 tablespoon unsalted butter (for extra shine)
- Optional: White chocolate chips for the spider webs (or use a simple royal icing)
Ingredient Selection Tips: For the cookies, make sure your butter is truly softened—you want it to give slightly when you press it, not be melty. For the ganache, the quality of your chocolate matters. A cheaper chocolate bar might not melt as smoothly. Trust me on this one. If you are dairy-free, you can use a good quality vegan butter and full-fat coconut cream in place of the heavy cream, but the texture will be slightly different.
Equipment Needed
- Electric mixer (hand or stand mixer works fine; I’ve used both)
- Mixing bowls (one large, one medium)
- Baking sheet (I prefer a light-colored one for even baking)
- Parchment paper or silicone baking mat
- Round cookie cutter (2.5 to 3 inches; a glass works in a pinch)
- Small microwave-safe bowl (for the ganache)
- Offset spatula or butter knife
- Toothpick or wooden skewer (for the web design)
- Piping bag or zip-top bag (for the white chocolate)
Budget-Friendly Options: Don’t have a cookie cutter? The rim of a drinking glass works perfectly. No piping bag? A sturdy zip-top bag with a tiny corner snipped off is your best friend. I’ve been there, and it works like a charm.
Preparation Method
- Make the Cookie Dough: In a large bowl, cream together the softened butter and granulated sugar until light and fluffy, about 2-3 minutes. Scrape down the sides of the bowl. Add the egg and vanilla extract, beating until well combined.
- Combine Dry Ingredients: In a separate bowl, whisk together the flour, baking powder, and salt. Gradually add this to the wet mixture, mixing on low speed until just combined. Do not overmix—stop as soon as you don’t see any dry streaks of flour. The dough should be soft but not sticky.
- Chill the Dough: Flatten the dough into a disc, wrap it in plastic wrap, and refrigerate for at least 30 minutes. This step is non-negotiable for clean cuts. If you skip it, your cookies will spread into sad little puddles.
- Preheat and Prep: Preheat your oven to 350°F (175°C). Line your baking sheets with parchment paper or a silicone mat.
- Cut and Bake: On a lightly floured surface, roll the chilled dough to about ¼-inch thickness. Use your round cutter to cut out cookies. Place them about 2 inches apart on the prepared baking sheets. Bake for 8-10 minutes, or until the edges are just barely golden. The centers should look set but not browned. Let them cool on the baking sheet for 5 minutes, then transfer to a wire rack to cool completely.
- Make the Ganache: While the cookies are cooling, place the chocolate chips in a small heatproof bowl. Heat the heavy cream in a small saucepan over medium heat until it just begins to simmer—do not let it boil. Pour the hot cream over the chocolate chips and let it sit for 2-3 minutes. Stir gently until the mixture is smooth and glossy. If you want extra shine, stir in the optional tablespoon of butter.
- Glaze the Cookies: Once the cookies are completely cool, spoon a small amount of ganache onto the center of each cookie. Use the back of the spoon or an offset spatula to gently spread it almost to the edges, leaving a small border of cookie visible.
- Create the Web: While the ganache is still wet, melt a small amount of white chocolate chips in the microwave (30-second bursts, stirring in between). Transfer to your piping bag or zip-top bag. Pipe a small circle in the center of the ganache, then pipe 3-4 concentric circles around it. Working quickly, use a toothpick to drag from the center outward through all the circles. Repeat this around the cookie to create the web effect. Wipe the toothpick clean between each drag for the cleanest lines.
- Set the Ganache: Let the cookies sit at room temperature for about 20-30 minutes, or until the ganache is firm to the touch. If you are in a rush, pop them in the refrigerator for 10 minutes.
Sensory Cues: When you cream the butter and sugar, it should look pale and feel light. When you pour the hot cream over the chocolate, you should see the chips start to melt immediately. The ganache should be thick enough to coat the back of a spoon but still pourable.
Cooking Tips & Techniques
Let me share the mistakes I made so you don’t have to. The first time I tried this, I got impatient and didn’t chill the dough. The cookies spread into giant, thin discs that were impossible to decorate. Lesson learned: cold dough is your friend.
- Don’t Overbake: These cookies are meant to be soft, not crunchy. Pull them out when the edges are just barely golden. They will continue to cook on the hot baking sheet.
- Work in Batches: If your kitchen is warm, work with half the dough at a time while keeping the rest in the fridge. Warm dough is sticky and hard to handle.
- Ganache Consistency: If your ganache is too thick to spread, add a teaspoon of warm cream and stir. If it’s too thin, let it sit for a few minutes to cool and thicken.
- Speed is Key: For the spider web design, you need to work while the ganache is still wet. If it starts to set before you finish the web, the lines won’t drag properly. Have your white chocolate ready to go.
- Clean Your Toothpick: This is the secret to a clean web. Drag, wipe, drag, wipe. It takes two seconds and makes a huge difference.
Variations & Adaptations
This recipe is incredibly flexible. Here are a few ways to make it your own.
- Gluten-Free Version: Substitute the all-purpose flour with a 1:1 gluten-free baking flour blend. I’ve used Bob’s Red Mill with great results. Do not skip the chilling time.
- Darker Chocolate: Use dark chocolate with 70% cacao for a less sweet, more sophisticated ganache. It pairs beautifully with the buttery cookie.
- Spider Decoration: Instead of a web, you can pipe a small spider on top of the set ganache using melted dark chocolate for the body and white chocolate for the eyes. It’s a cute alternative.
- Flavor Twist: Add ½ teaspoon of peppermint extract to the cookie dough for a holiday spin, or a pinch of cinnamon and cayenne for a Mexican hot chocolate vibe.
- Different Cookie Base: If you are really short on time, you can use store-bought shortbread cookies. Just skip the baking step and go straight to the ganache.
Serving & Storage Suggestions
These cookies are best served at room temperature, when the ganache is set but still has a slight give. They make a fantastic addition to a Halloween dessert table or a fun after-school treat. I love pairing them with a cold glass of milk or a warm mug of spiced apple cider.
Storage: Store the cookies in an airtight container at room temperature for up to 5 days. Place a sheet of parchment paper between layers to prevent the ganache from sticking. Do not refrigerate them unless your kitchen is very warm, as condensation can make the ganache look dull.
Freezing: You can freeze the baked, undecorated cookies for up to 3 months. Thaw them at room temperature, then make the ganache and decorate fresh. The ganache itself does not freeze well, so always make it fresh.
Nutritional Information & Benefits
While these are a treat, there are a few silver linings. The dark chocolate in the ganache is rich in antioxidants and can provide a small mood boost. The butter in the cookies contains fat-soluble vitamins, and the simple ingredients mean no artificial preservatives or weird additives.
| Nutrient | Per Cookie (approx.) |
|---|---|
| Calories | 180 |
| Fat | 10g |
| Carbohydrates | 22g |
| Protein | 2g |
| Sugar | 12g |
Dietary Considerations: This recipe contains gluten, dairy, and eggs. For a dairy-free version, use vegan butter and full-fat coconut cream. For an egg-free version, you can try a flax egg (1 tablespoon ground flaxseed mixed with 3 tablespoons water), but the texture will be slightly denser.
Conclusion
These Quick Spider Web Cookies with Easy Chocolate Ganache are the kind of recipe that makes you look like a Halloween hero without breaking a sweat. They are simple enough for a weeknight craving, yet impressive enough for a party. I love this recipe because it proves that you don’t need fancy tools or hours of time to create something beautiful and delicious. It’s just you, a toothpick, and a little bit of chocolatey magic.
I would love to see your spider web creations! Please leave a comment below and tell me how yours turned out, or share a photo on Pinterest with the hashtag #SpiderWebCookies. Did you try a fun variation? Let me know—I am always looking for new ideas. Happy baking, and don’t forget to save some for yourself before the kids get to them!
Frequently Asked Questions
Can I use a different type of chocolate for the ganache?
Absolutely. You can use milk chocolate, dark chocolate, or even white chocolate. Just keep in mind that milk and white chocolate are softer, so the ganache will be a bit less firm. You may need to refrigerate the cookies for a few extra minutes to help it set.
My ganache is too thick to spread. What did I do wrong?
This usually happens if the cream wasn’t hot enough to fully melt the chocolate, or if you let the ganache sit too long before using it. You can fix it by gently reheating it in the microwave in 10-second bursts, stirring well each time. Add a teaspoon of warm cream if it still seems thick.
Can I make the cookie dough ahead of time?
Yes! The dough can be refrigerated for up to 3 days. Just wrap it tightly in plastic wrap. You can also freeze the unbaked dough for up to 3 months. Thaw it in the refrigerator overnight before rolling and cutting.
Why did my cookies spread too much?
The most common reason is that the dough was not chilled enough. Make sure you chill it for at least 30 minutes, and if your kitchen is warm, pop the cut cookies back in the fridge for 10 minutes before baking. Also, check that your butter was softened, not melted.
Can I use royal icing instead of white chocolate for the webs?
Definitely. A thick royal icing works beautifully for the spider web design. Just make sure the ganache is completely set before piping the icing on top, or the colors might bleed. Royal icing will also dry harder than white chocolate, which some people prefer for stacking the cookies.
Pin This Recipe!

Quick Spider Web Cookies with Easy Ganache

These Quick Spider Web Cookies with Easy Chocolate Ganache are the perfect last-minute Halloween treat that looks way more impressive than the effort they require. A simple sugar cookie topped with glossy ganache and a toothpick-drawn spider web design.
- Prep Time: 30 minutes
- Cook Time: 10 minutes
- Total Time: 1 hour 10 minutes (includes chilling and setting time)
- Yield: 24 servings 1x
- Category: Dessert
- Cuisine: American
Ingredients
- 2 ½ cups (315g) all-purpose flour, spooned and leveled
- 1 cup (226g) unsalted butter, softened
- 1 cup (200g) granulated sugar
- 1 large egg, room temperature
- 1 teaspoon vanilla extract
- ½ teaspoon baking powder
- ¼ teaspoon salt
- 1 cup (175g) semi-sweet or dark chocolate chips
- ½ cup (120ml) heavy cream
- Optional: 1 tablespoon unsalted butter (for extra shine)
- Optional: White chocolate chips for the spider webs
Instructions
- Make the Cookie Dough: In a large bowl, cream together the softened butter and granulated sugar until light and fluffy, about 2-3 minutes. Scrape down the sides of the bowl. Add the egg and vanilla extract, beating until well combined.
- Combine Dry Ingredients: In a separate bowl, whisk together the flour, baking powder, and salt. Gradually add this to the wet mixture, mixing on low speed until just combined. Do not overmix—stop as soon as you don’t see any dry streaks of flour. The dough should be soft but not sticky.
- Chill the Dough: Flatten the dough into a disc, wrap it in plastic wrap, and refrigerate for at least 30 minutes. This step is non-negotiable for clean cuts.
- Preheat and Prep: Preheat your oven to 350°F (175°C). Line your baking sheets with parchment paper or a silicone mat.
- Cut and Bake: On a lightly floured surface, roll the chilled dough to about ¼-inch thickness. Use your round cutter to cut out cookies. Place them about 2 inches apart on the prepared baking sheets. Bake for 8-10 minutes, or until the edges are just barely golden. The centers should look set but not browned. Let them cool on the baking sheet for 5 minutes, then transfer to a wire rack to cool completely.
- Make the Ganache: While the cookies are cooling, place the chocolate chips in a small heatproof bowl. Heat the heavy cream in a small saucepan over medium heat until it just begins to simmer—do not let it boil. Pour the hot cream over the chocolate chips and let it sit for 2-3 minutes. Stir gently until the mixture is smooth and glossy. If you want extra shine, stir in the optional tablespoon of butter.
- Glaze the Cookies: Once the cookies are completely cool, spoon a small amount of ganache onto the center of each cookie. Use the back of the spoon or an offset spatula to gently spread it almost to the edges, leaving a small border of cookie visible.
- Create the Web: While the ganache is still wet, melt a small amount of white chocolate chips in the microwave (30-second bursts, stirring in between). Transfer to your piping bag or zip-top bag. Pipe a small circle in the center of the ganache, then pipe 3-4 concentric circles around it. Working quickly, use a toothpick to drag from the center outward through all the circles. Repeat this around the cookie to create the web effect. Wipe the toothpick clean between each drag for the cleanest lines…
- Set the Ganache: Let the cookies sit at room temperature for about 20-30 minutes, or until the ganache is firm to the touch. If you are in a rush, pop them in the refrigerator for 10 minutes.
Notes
Chill the dough for at least 30 minutes to prevent spreading. For the ganache, use high-quality chocolate for best results. Work quickly when creating the web design while the ganache is still wet. Clean the toothpick between each drag for clean lines. Store in an airtight container at room temperature for up to 5 days. Freeze undecorated cookies for up to 3 months.
Nutrition
- Serving Size: 1 cookie
- Calories: 180
- Sugar: 12
- Sodium: 85
- Fat: 10
- Saturated Fat: 6
- Carbohydrates: 22
- Fiber: 1
- Protein: 2
Keywords: Halloween cookies, spider web cookies, chocolate ganache cookies, easy Halloween treats, sugar cookies, quick dessert, spooky cookies


