My neighbor, Mrs. Gable, watched me fumbling with a piping bag of melted white chocolate on my front porch last October. I was trying—and failing—to make delicate ghost shapes on parchment paper, and the whole thing was sliding into a sticky, shapeless puddle. She didn’t say anything at first. She just shook her head with this knowing smile, walked back into her house, and came back five minutes later holding a baking sheet. On it were the most perfect little ghost shapes I had ever seen, all made from crispy rice cereal and marshmallow. She handed me the tray like it was nothing. “Takes ten minutes,” she said. “No piping bag needed.”
Honestly, I felt a little silly. Here I was, trying to be fancy with melted chocolate and parchment cones, and the answer was sitting right in my pantry. Rice Krispies. Marshmallows. Butter. That’s it. Mrs. Gable’s ghosts were sturdy, cute, and completely no-bake. She told me she’d been making them for her grandkids for over twenty years, and she’d never once turned on the oven. I mean, that’s the kind of recipe wisdom you can’t buy in a cookbook.
So I went back inside, dumped my failed chocolate experiment, and made a batch of her ghosts in under fifteen minutes. They were perfect. My kids decorated them before I could even snap a photo—sprinkles flying, candy eyes going everywhere. It was a glorious, sugary mess. And honestly, that’s exactly what Halloween baking should be. No stress, no complicated techniques, just a quick treat that comes together fast and makes everyone smile. That’s why I keep coming back to this recipe year after year.
Maybe you’ve been there too—staring at a Pinterest board full of elaborate Halloween desserts, feeling like you need a pastry degree just to make something cute for the school party. Let me tell you, this is the recipe that saves the day. It’s the one that makes you look like a kitchen hero without actually breaking a sweat.
Why You’ll Love This Recipe
Let’s be real for a second. Halloween is fun, but it’s also exhausting. Between costume searches, pumpkin carving, and class parties, who has time for complicated baking projects? That’s exactly why these Quick No-Bake Halloween Ghost Treats are about to become your new best friend. They check every single box for a busy weeknight or a last-minute school event.
- Quick & Easy: These come together in under 15 minutes. Seriously. From start to finish, you’ll have a whole platter of ghostly treats ready before your kids finish arguing about which candy they want to hand out.
- Simple Ingredients: You probably already have everything in your kitchen. Butter, marshmallows, crispy rice cereal, and some candy eyes. No special trips to a fancy baking supply store required.
- Perfect for Halloween: Whether it’s a classroom party, a trunk-or-treat event, or just a fun afternoon activity, these treats fit right in. They’re cute without being fussy.
- Crowd-Pleaser: I’ve brought these to three different Halloween gatherings now, and they disappear every single time. Kids love them, parents love them, and honestly, I’ve caught a few grandparents sneaking extras too.
- Unbelievably Delicious: That classic marshmallow-cereal combo is already a winner. But shaping them into little ghosts? It takes something simple and makes it genuinely fun to eat.
What makes this recipe different from all the other ghost treats out there? It’s the texture. Most no-bake ghost recipes use white chocolate or candy melts, which can be finicky and prone to seizing up. These treats stay perfectly chewy for days, and they don’t require any melting or tempering of chocolate. Just a saucepan, a spatula, and your hands. That’s it.
There’s something special about making food that brings out the kid in everyone. When I set these ghosts on the table at my niece’s Halloween party, even the adults let out a little “aww.” It’s comfort food reimagined—faster, simpler, but with the same soul-soothing satisfaction. Perfect for impressing guests without stress, or turning a simple evening into something memorable.
What Ingredients You Will Need
This recipe uses simple, pantry-friendly ingredients to deliver that classic marshmallow treat texture with a spooky twist. You don’t need anything fancy—just the basics that make this so quick and reliable.
- 3 tablespoons unsalted butter (adds richness and helps the marshmallows melt smoothly) – I use salted butter in a pinch, just skip the extra salt if you do.
- 1 package (10 oz) regular marshmallows (about 40 large marshmallows) – Mini marshmallows work too and melt faster. Just use about 4 cups.
- 6 cups crispy rice cereal (like Kellogg’s Rice Krispies) – Generic brands work fine here, just check the texture. Some store brands are a bit denser, so you might need an extra half cup.
- 1/2 teaspoon vanilla extract (optional, but it adds a lovely warmth) – Pure vanilla is best, but imitation works in a pinch.
- Candy eyes (about 24-30 pairs) – You can find these at most grocery stores near the baking aisle or online. I prefer the ones that come in a tube; they stick better.
- Optional decorations: Orange and black sprinkles, edible glitter, or mini candy corn for a little extra flair.
A quick note on marshmallows: I’ve tried this with both name-brand Jet-Puffed and store brands, and honestly, they all work. The key is to use fresh marshmallows. If they’re stale or hard, they won’t melt as smoothly and your treats might end up crumbly. Same goes for the cereal—check the expiration date. Stale cereal makes for sad ghosts.
For the butter, I really do recommend unsalted. It lets you control the salt level, and these treats don’t need much salt anyway. But if all you have is salted, just reduce or skip any added salt in the recipe. I’ve done it before and nobody complained.
If you’re looking for a dairy-free option, use vegan butter and vegan marshmallows. Dandies brand makes excellent vegan marshmallows that melt beautifully. The texture will be slightly different—a bit firmer—but still delicious.
One more thing: don’t skimp on the vanilla. I know it’s optional, but that little splash rounds out the sweetness and makes these taste more like a homemade treat rather than just sugary cereal. It’s a small step that makes a big difference.
Equipment Needed
You don’t need a fancy kitchen to make these ghosts. In fact, you probably already own everything required. That’s the beauty of a no-bake recipe.
- Large saucepan or pot (at least 4-quart capacity) – You need room to stir the marshmallows without them spilling over. I use a 5-quart Dutch oven.
- Wooden spoon or silicone spatula – Metal spoons can scratch non-stick pans. A good silicone spatula is worth its weight in gold here.
- Large mixing bowl (heat-safe) – For combining the cereal with the marshmallow mixture.
- Parchment paper or wax paper – Absolutely essential for shaping. The mixture is sticky, and parchment is your best friend.
- Butter or cooking spray – For greasing your hands and the spatula. Trust me on this one.
- Baking sheet or tray – To hold the ghosts while they set.
- Small bowl of water – Dipping your fingers in water helps prevent sticking when shaping. It’s a game-changer.
If you don’t have parchment paper, you can use a silicone baking mat or even a lightly greased cutting board. I’ve used both, and they work fine. Just make sure the surface is completely clean and dry before you start.
For the candy eyes, you don’t need any special tools. Just use your fingers to press them in gently. Tweezers can help if you want perfect placement, but honestly, slightly crooked eyes make the ghosts look cuter anyway.
Preparation Method
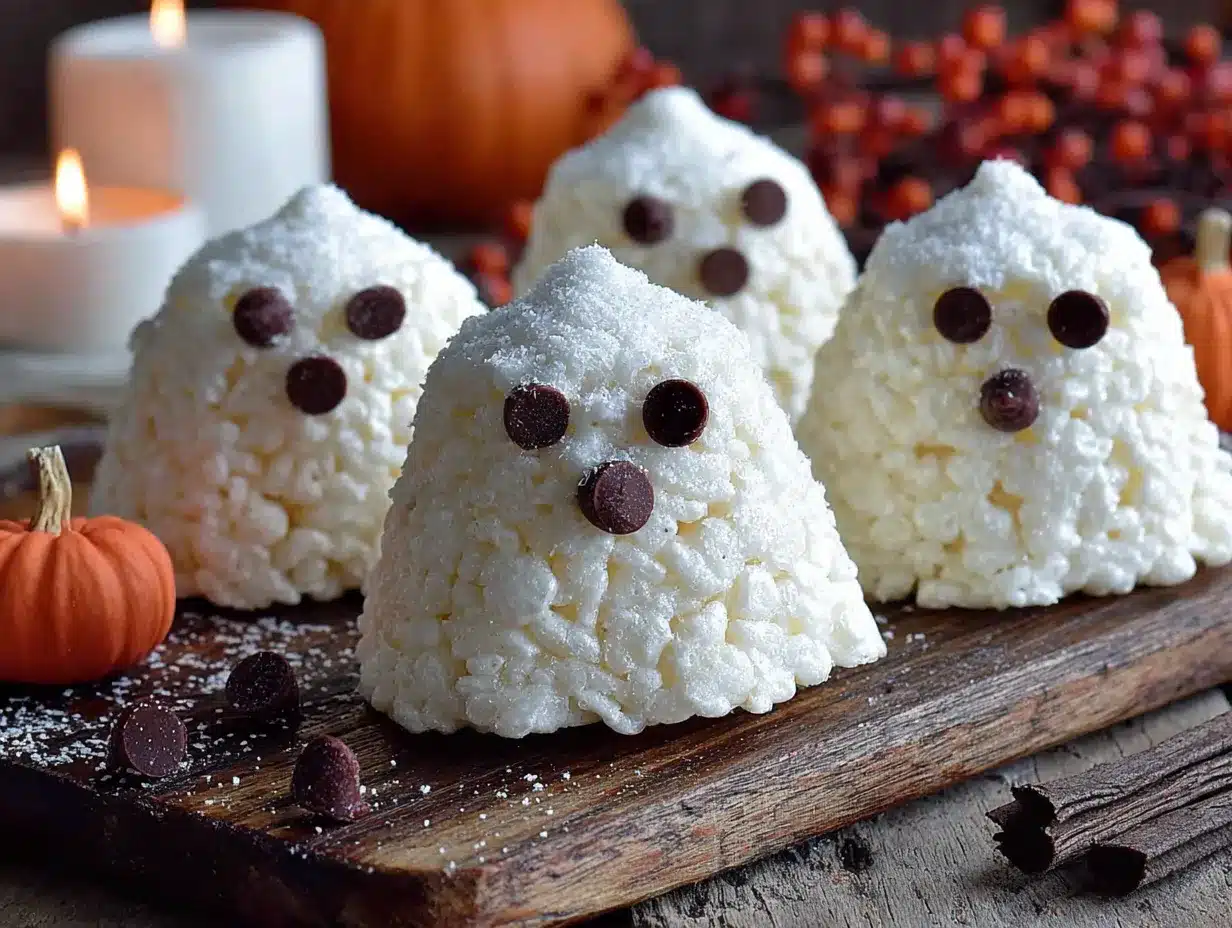
Alright, let’s make some ghosts! This whole process takes about 15 minutes from start to finish. Set a timer and let’s go.
- Prepare your workspace. Line a large baking sheet with parchment paper. Lightly grease the paper with a thin layer of butter or cooking spray. This prevents the ghosts from sticking later. Set it aside.
- Melt the butter. Place your large saucepan over medium-low heat. Add the 3 tablespoons of butter and let it melt slowly. Swirl the pan occasionally. Don’t rush this—if the butter burns, it will affect the flavor of the entire batch. I learned this the hard way my first time. Burnt butter ghosts are not cute.
- Add the marshmallows. Once the butter is fully melted, pour in the entire package of marshmallows. Stir constantly with your wooden spoon or silicone spatula. Keep the heat on medium-low. The marshmallows will start to puff up and then collapse into a smooth, gooey mixture. This takes about 3-4 minutes. Don’t walk away during this step—marshmallows can scorch quickly.
- Add the vanilla. Once the marshmallows are completely melted and smooth, remove the saucepan from the heat. Stir in the 1/2 teaspoon of vanilla extract. The mixture will smell amazing at this point. Give it a good stir to combine evenly.
- Combine with cereal. Pour the 6 cups of crispy rice cereal into a large heat-safe mixing bowl. Pour the hot marshmallow mixture over the cereal. Stir gently but thoroughly until all the cereal is coated. You want every piece to have that sticky, marshmallowy goodness. Work quickly here—the mixture starts to set as it cools.
- Let it cool slightly. Let the mixture sit in the bowl for about 2 minutes. It needs to be cool enough to handle but still warm and pliable. If it’s too hot, it will stick to your hands like crazy. If it’s too cold, it will be hard to shape.
- Grease your hands. Rub a little butter or cooking spray on your palms. This is non-negotiable. Without it, you’ll end up with a sticky mess that’s impossible to shape. Keep a small bowl of water nearby too—dipping your fingers in water works even better than butter for preventing stickiness.
- Shape the ghosts. Take about 1/4 cup of the mixture and roll it into a ball. Then, gently shape it into an oval or teardrop shape—wider at the bottom and slightly narrower at the top. Place it on the prepared baking sheet. Repeat with the remaining mixture. You should get about 12-15 ghosts, depending on size.
- Add the eyes. While the ghosts are still warm and slightly sticky, press two candy eyes into each one. Press gently but firmly so they stay put. If the mixture has cooled too much and the eyes won’t stick, dab a tiny bit of corn syrup or honey on the back of each eye before pressing it in.
- Let them set. Allow the ghosts to cool completely at room temperature. This takes about 15-20 minutes. They will firm up as they cool. Don’t rush this step by putting them in the fridge—condensation can make them sticky and ruin the texture.
- Decorate (optional). Once set, you can add extra decorations like sprinkles, edible glitter, or a drizzle of melted white chocolate. I like to add a little orange sprinkle “bow” on some of them for variety.
A few sensory cues to watch for: when the marshmallows are fully melted, the mixture will be smooth and glossy, with no visible lumps. When you stir in the cereal, you should hear a slight crackling sound—that’s the cereal absorbing the moisture. The finished ghosts should feel firm but slightly springy when you touch them.
Cooking Tips & Techniques
I’ve made these ghosts more times than I can count, and I’ve learned a few things along the way. Let me save you some trouble.
Don’t over-stir the cereal. Once the marshmallow mixture is combined with the cereal, stop stirring. Over-mixing breaks the cereal into tiny pieces and gives you dense, crumbly ghosts instead of light, airy ones. You want gentle folds, not aggressive mixing.
Work in batches if needed. If you’re making a double batch, don’t try to shape all the ghosts at once. The mixture will cool and harden as you work. Keep the unused portion in the warm saucepan (off the heat) with the lid on. It stays pliable longer that way.
Use a cookie scoop for uniform ghosts. If you want all your ghosts to be the same size, use a 1/4-cup cookie scoop or measuring cup. This is especially helpful if you’re making these for a classroom party where consistency matters.
Keep your hands damp. I mentioned this earlier, but it’s worth repeating. A small bowl of water next to your workspace is a lifesaver. Dip your fingers in the water before shaping each ghost. The moisture prevents the marshmallow mixture from sticking to your skin. Just shake off the excess water first—you don’t want soggy ghosts.
Add the eyes at the right time. The best time to add candy eyes is when the ghosts are still warm but not hot. If you add them too early, they’ll sink into the mixture. Too late, and they won’t stick at all. About 30 seconds after shaping is usually perfect.
Store them properly. These treats are best eaten within 2-3 days. Store them in an airtight container at room temperature. Don’t refrigerate them—the moisture in the fridge makes them sticky and ruins the texture. If you need to stack them, place a sheet of parchment paper between each layer.
My biggest failure with this recipe? I once tried to microwave the marshmallows instead of using the stovetop. The marshmallows puffed up and overflowed the bowl, creating a sticky disaster in my microwave. Stick to the stovetop method. It’s more controlled and gives you better results.
Variations & Adaptations
One of the best things about this recipe is how easy it is to customize. Here are some variations I’ve tried and loved.
Chocolate Ghosts: Add 1/4 cup of unsweetened cocoa powder to the cereal before pouring the marshmallow mixture over it. Stir well to combine. The chocolate flavor pairs beautifully with the marshmallow, and the dark color makes the white candy eyes really pop. My kids actually prefer these over the original.
Peanut Butter Ghosts: Stir in 1/4 cup of creamy peanut butter into the marshmallow mixture just before adding the cereal. The peanut butter adds a savory note that balances the sweetness. Use crunchy peanut butter for extra texture if you’re feeling adventurous.
Gluten-Free Option: This recipe is naturally gluten-free if you use certified gluten-free crispy rice cereal. Most major brands like Kellogg’s Rice Krispies are made with malt flavoring which contains gluten, so check the label. There are several gluten-free alternatives available now that work just as well.
Vegan Ghosts: Use vegan butter (like Earth Balance) and vegan marshmallows (Dandies brand works great). The texture will be slightly firmer, but the taste is still fantastic. I’ve made these for a vegan Halloween party and they were a hit.
Spooky Variations: Instead of ghosts, shape the mixture into pumpkins (round balls with a small green candy stem) or bats (flatten the mixture and cut out bat shapes with a cookie cutter). The same base recipe works for any Halloween shape you can imagine.
Flavor Twists: Add 1/2 teaspoon of almond extract instead of vanilla for a nutty flavor. Or try 1/4 teaspoon of peppermint extract for a cool, minty ghost. Just be careful with peppermint—it’s strong and a little goes a long way.
My personal favorite variation? I add a handful of mini chocolate chips to the mixture right before shaping. The little pockets of melted chocolate inside the ghost are absolutely divine. Just make sure the mixture isn’t too hot when you add the chips, or they’ll melt completely and you’ll lose that texture.
Serving & Storage Suggestions
These ghosts are best served at room temperature. Arrange them on a platter with some orange and black sprinkles scattered around for a festive look. I like to place them on a bed of shredded coconut (dyed green with food coloring) to look like a spooky graveyard.
For a Halloween party, set up a decorating station with different colored icing, sprinkles, and candy decorations. Let guests customize their own ghosts. It’s a fun activity that doubles as dessert.
These treats pair wonderfully with warm apple cider or a pumpkin spice latte for the adults. For kids, a glass of cold milk is the perfect companion. The sweetness of the marshmallow treats balances nicely with the tartness of apple cider or the richness of milk.
Storage: Store leftover ghosts in an airtight container at room temperature for up to 3 days. Place a sheet of parchment paper between layers to prevent sticking. Do not refrigerate—the moisture will make them sticky and unappealing.
Freezing: These ghosts freeze surprisingly well. Place them in a single layer on a baking sheet and freeze until solid (about 1 hour). Then transfer to a freezer-safe bag or container. They’ll keep for up to 2 months. Thaw at room temperature for about 30 minutes before serving. The texture will be slightly softer, but still delicious.
One thing I’ve noticed: these treats actually taste better the next day. The flavors meld together and the texture becomes perfectly chewy. So don’t stress if you need to make them a day ahead. They’ll be even better.
Nutritional Information & Benefits
Let’s be honest—these are a treat, not a health food. But that doesn’t mean they can’t fit into a balanced diet. Here’s the approximate nutritional breakdown per ghost (based on 12 servings):
- Calories: 180
- Total Fat: 6g
- Saturated Fat: 3.5g
- Carbohydrates: 32g
- Sugar: 18g
- Protein: 2g
- Sodium: 150mg
These values are estimates and will vary based on the specific brands and any variations you make. The peanut butter version, for example, will have more protein and healthy fats.
While these aren’t exactly a health food, the crispy rice cereal does provide some iron and B vitamins. The butter adds a small amount of vitamin A. And honestly, sometimes the mental health benefit of enjoying a fun, nostalgic treat is just as important as the nutritional content.
If you’re watching your sugar intake, you can reduce the marshmallows slightly (use about 3/4 of the package) and add a bit more cereal. The texture will be less gooey but still tasty. I’ve also seen versions using sugar-free marshmallows, though I haven’t tried them myself.
Potential allergens: These contain dairy (butter) and may contain gluten depending on the cereal brand. The candy eyes may contain soy or other allergens, so check the label if you have concerns.
Conclusion
These Quick No-Bake Halloween Ghost Treats are everything I want in a holiday recipe—fast, simple, and genuinely fun. They come together in under 15 minutes with ingredients you probably already have, and they look adorable on any Halloween table. No oven required, no fancy techniques, just a little bit of patience and a whole lot of marshmallow goodness.
What I love most about this recipe is how it brings people together. Every time I make these ghosts, someone asks for the recipe. They’re the kind of treat that sparks joy—whether you’re making them with your kids on a Tuesday evening or bringing them to a Halloween potluck. They’re proof that you don’t need to spend hours in the kitchen to create something special.
I’d love to hear how your ghosts turn out! Did you add any fun variations? Did your kids help with the decorating? Drop a comment below and share your spooky creations. And if you’re looking for more quick Halloween ideas, check out our spooky Halloween popcorn mix or these easy pumpkin cookie bars for more no-fuss holiday treats.
Happy Halloween, and happy snacking! Remember—the best treats are the ones made with love (and maybe a little bit of butter).
Frequently Asked Questions
Can I use mini marshmallows instead of regular ones?
Absolutely! Mini marshmallows actually melt faster and more evenly than large ones. Use about 4 cups of mini marshmallows in place of the 10-ounce bag. Just keep an eye on them as they melt—they can go from perfect to scorched very quickly.
How do I keep the mixture from sticking to my hands?
The trick is to keep your hands damp. Fill a small bowl with water and dip your fingers in it before shaping each ghost. Shake off the excess water, then shape away. The moisture creates a barrier between the sticky marshmallow mixture and your skin. Butter or cooking spray works too, but water is actually more effective.
Can I make these ahead of time for a party?
Yes! These ghosts actually taste better the next day. Make them up to 24 hours in advance and store them in an airtight container at room temperature. Add any delicate decorations (like sprinkles or edible glitter) just before serving to keep them looking fresh.
My ghosts turned out too hard. What went wrong?
This usually happens when the marshmallow mixture is overcooked or when too much cereal is used. Make sure you’re using exactly 6 cups of cereal and that you remove the saucepan from the heat as soon as the marshmallows are fully melted. Overcooking the marshmallows makes them set up too firmly once cooled.
Can I freeze these treats?
Yes, they freeze well! Place the ghosts in a single layer on a baking sheet and freeze until solid (about 1 hour). Then transfer to a freezer-safe bag or container. They’ll keep for up to 2 months. Thaw at room temperature for about 30 minutes before serving. The texture will be slightly softer but still delicious.
Pin This Recipe!
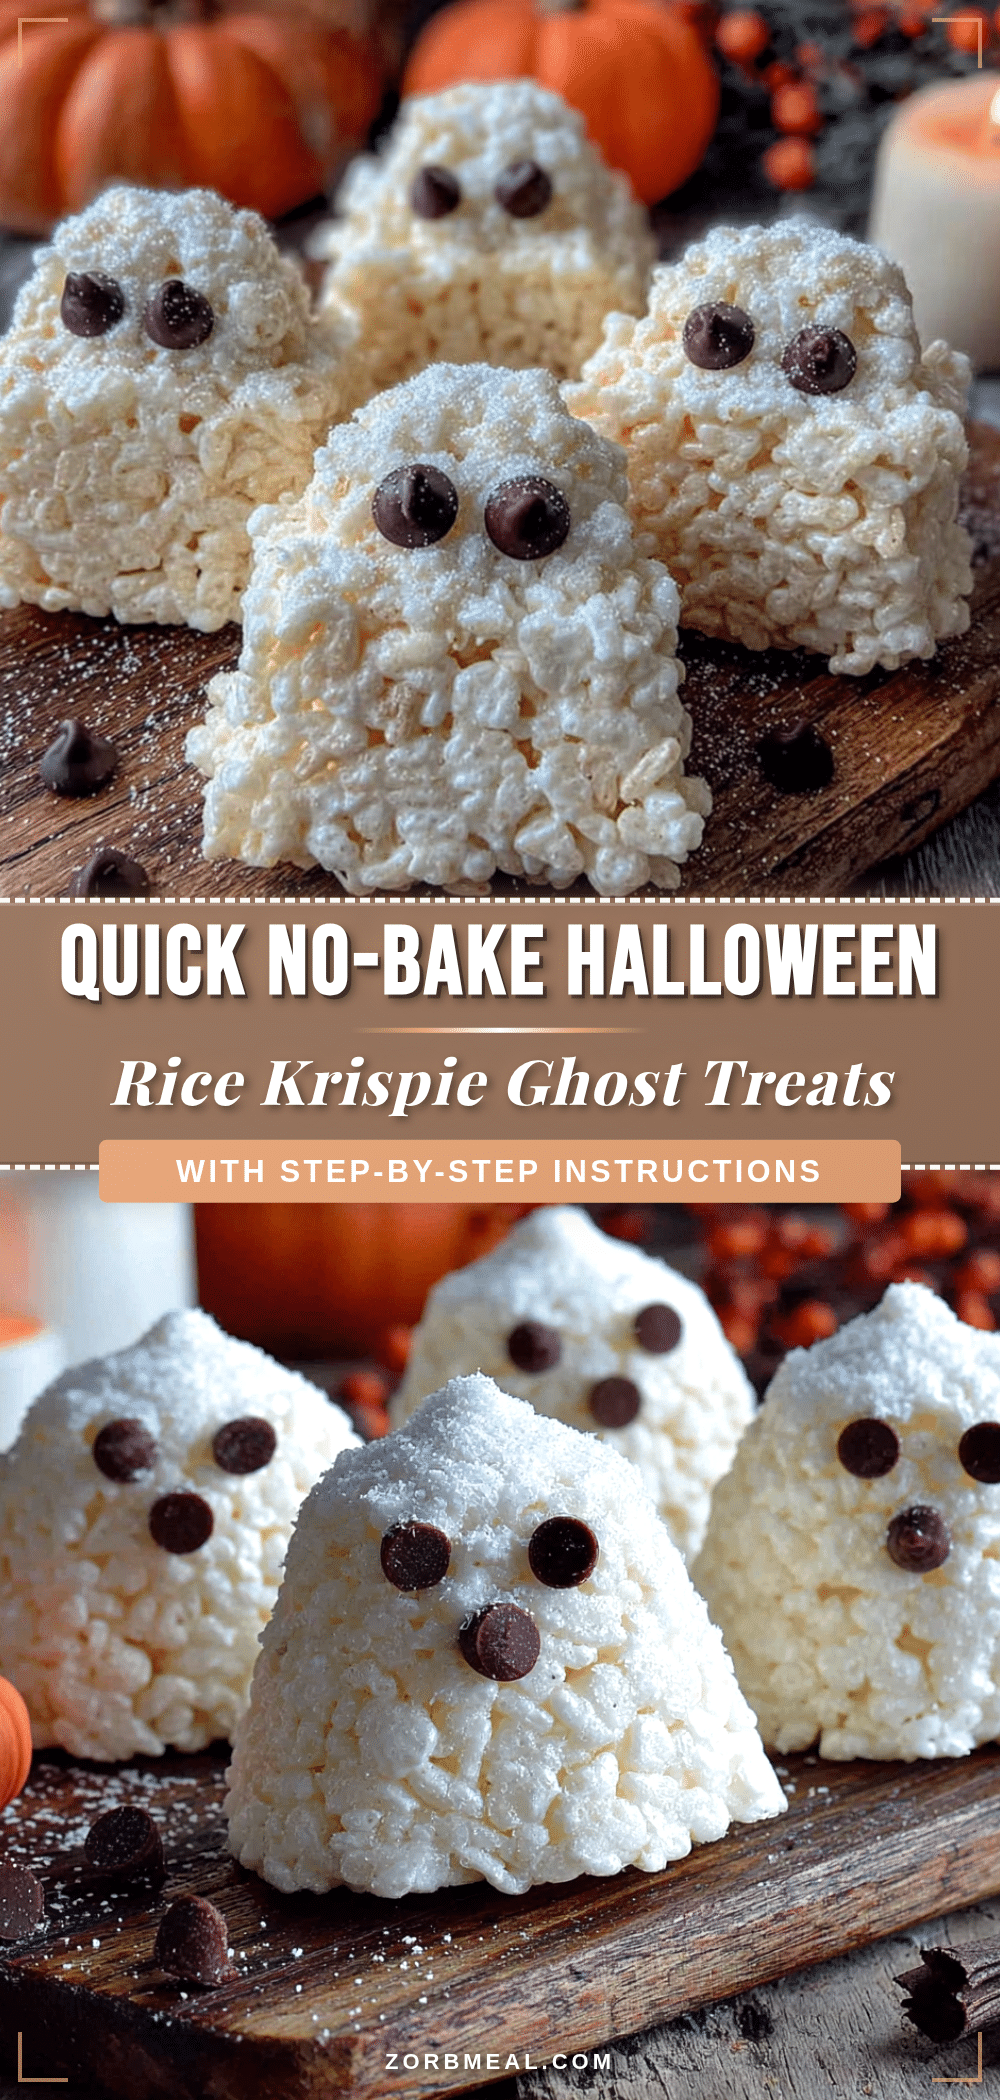
Quick No-Bake Halloween Ghost Treats
These quick and easy no-bake ghost treats are made with crispy rice cereal and marshmallows, perfect for Halloween parties or a fun activity with kids. They come together in under 15 minutes with simple pantry ingredients.
- Prep Time: 5 minutes
- Cook Time: 10 minutes
- Total Time: 15 minutes
- Yield: 12-15 servings 1x
- Category: Dessert
- Cuisine: American
Ingredients
- 3 tablespoons unsalted butter
- 1 package (10 oz) regular marshmallows (about 40 large marshmallows)
- 6 cups crispy rice cereal (like Kellogg’s Rice Krispies)
- 1/2 teaspoon vanilla extract (optional)
- Candy eyes (about 24-30 pairs)
- Optional decorations: orange and black sprinkles, edible glitter, or mini candy corn
Instructions
- Prepare your workspace. Line a large baking sheet with parchment paper. Lightly grease the paper with a thin layer of butter or cooking spray.
- Melt the butter. Place your large saucepan over medium-low heat. Add the 3 tablespoons of butter and let it melt slowly. Swirl the pan occasionally.
- Add the marshmallows. Once the butter is fully melted, pour in the entire package of marshmallows. Stir constantly with your wooden spoon or silicone spatula. Keep the heat on medium-low. The marshmallows will start to puff up and then collapse into a smooth, gooey mixture. This takes about 3-4 minutes.
- Add the vanilla. Once the marshmallows are completely melted and smooth, remove the saucepan from the heat. Stir in the 1/2 teaspoon of vanilla extract.
- Combine with cereal. Pour the 6 cups of crispy rice cereal into a large heat-safe mixing bowl. Pour the hot marshmallow mixture over the cereal. Stir gently but thoroughly until all the cereal is coated.
- Let it cool slightly. Let the mixture sit in the bowl for about 2 minutes. It needs to be cool enough to handle but still warm and pliable.
- Grease your hands. Rub a little butter or cooking spray on your palms. Keep a small bowl of water nearby too—dipping your fingers in water works even better than butter for preventing stickiness.
- Shape the ghosts. Take about 1/4 cup of the mixture and roll it into a ball. Then, gently shape it into an oval or teardrop shape—wider at the bottom and slightly narrower at the top. Place it on the prepared baking sheet. Repeat with the remaining mixture. You should get about 12-15 ghosts.
- Add the eyes. While the ghosts are still warm and slightly sticky, press two candy eyes into each one. Press gently but firmly so they stay put.
- Let them set. Allow the ghosts to cool completely at room temperature. This takes about 15-20 minutes.
- Decorate (optional). Once set, you can add extra decorations like sprinkles, edible glitter, or a drizzle of melted white chocolate.
Notes
Don’t over-stir the cereal to keep ghosts light and airy. Keep hands damp with water to prevent sticking. Add candy eyes about 30 seconds after shaping for best adhesion. Store in an airtight container at room temperature for up to 3 days. Do not refrigerate. Freeze for up to 2 months.
Nutrition
- Serving Size: 1 ghost
- Calories: 180
- Sugar: 18
- Sodium: 150
- Fat: 6
- Saturated Fat: 3.5
- Carbohydrates: 32
- Protein: 2
Keywords: Halloween, ghost treats, no-bake, rice krispie treats, marshmallow treats, quick dessert, kid-friendly


