The neighborhood potluck was in three hours and I’d completely forgotten. Everyone else would be bringing their signature dishes—slow-braised short ribs, homemade lasagnas, intricate casseroles that had probably been in development since Tuesday. I had chicken breasts thawing in the sink and a lemon that had seen better days. Let me tell you, the panic was real. I mean, I actually checked the pantry three times hoping something more impressive would materialize.
So I did what any reasonable person would do when backed into a culinary corner: I kept it simple. Lemon, garlic, a few pantry spices, and the hottest oven I could manage. No marinade overnight, no complicated techniques. Just chicken and hope. I slid the pan in, set a timer, and spent the next 25 minutes mentally preparing to be the person who brought the “fine” dish to the potluck.
Here’s the thing about this Quick Lemon Garlic Baked Chicken Breast recipe—it won. Not just “people ate it” won, but “people asked for the recipe” won. My neighbor Karen, who brings those legendary stuffed mushrooms every year, actually texted me the next day asking how I got the chicken so juicy. Maybe you’ve been there, showing up to something with a simple dish while everyone else went all out, only to have your humble offering steal the show. That’s this recipe. It’s the underdog that delivers every single time.
Why You’ll Love This Recipe
After testing this recipe at least a dozen times—once when I was so tired I forgot to set a timer and somehow it still worked—I can tell you exactly why it belongs in your weeknight rotation. This isn’t just another chicken recipe. It’s the one you’ll make when you’re exhausted, when the grocery budget is tight, and when you need dinner on the table in under 30 minutes.
- Quick & Easy: From fridge to table in about 30 minutes. No marinating required, minimal prep, and only one pan to wash.
- Simple Ingredients: You probably have everything already—chicken, lemon, garlic, olive oil, salt, pepper. No fancy grocery store trips needed.
- Perfect for Weeknights: This is the definition of a busy weeknight dinner. It comes together fast, cooks while you unload the dishwasher, and tastes like you spent way more effort than you did.
- Crowd-Pleaser: My picky-eating nephew actually asked for seconds. My mom, who claims she doesn’t like baked chicken, took the recipe home.
- Unbelievably Delicious: The secret is in the technique—baking at high heat locks in moisture while the lemon-garlic mixture creates this incredible, almost caramelized crust. It’s comfort food that feels a little fancy without any of the stress.
What makes this recipe different from the dozens of baked chicken recipes out there? It’s the timing and temperature. Most recipes dry out chicken because they cook it too low and too long. This one uses a hot oven and a specific timing trick that keeps the meat impossibly tender. Plus, the lemon and garlic aren’t just tossed on top—they’re worked into the chicken so every bite has that bright, savory flavor.
This recipe isn’t just good—it’s the kind that makes you close your eyes after the first bite. It’s weeknight cooking at its finest: faster, simpler, but with the same soul-soothing satisfaction as something that took hours.
What Ingredients You Will Need
This recipe uses simple, wholesome ingredients to deliver bold flavor and satisfying texture without any fuss. These are all pantry staples you can keep on hand for those nights when dinner needs to happen now.
- Boneless, skinless chicken breasts (4 pieces, about 6 ounces each) — Look for breasts that are similar in thickness so they cook evenly. If they’re huge, you can butterfly them or pound them to even thickness. I prefer organic chicken when I can find it on sale, but honestly, any good-quality chicken works here.
- Fresh lemons (2 medium) — You’ll use both the zest and the juice. The zest is where the real lemon flavor lives, so don’t skip it. Room temperature lemons yield more juice—pop them in the microwave for 10 seconds if they’re cold.
- Garlic cloves (4-5, minced) — Fresh garlic is non-negotiable here. The pre-minced stuff in jars won’t give you the same punch. I’ve tried both, and fresh garlic makes a noticeable difference in flavor intensity.
- Extra virgin olive oil (3 tablespoons) — Use a good-quality oil since it’s a primary flavor component. I like California Olive Ranch for everyday cooking.
- Dried oregano (1 teaspoon) — Adds an earthy, slightly peppery note that complements the lemon beautifully. You can substitute dried thyme or Italian seasoning if that’s what you have.
- Dried thyme (1/2 teaspoon) — Just a hint for depth. Fresh thyme would also work—use about 1 tablespoon of fresh leaves.
- Garlic powder (1/2 teaspoon) — This isn’t redundant with the fresh garlic. The powder adds a different, more mellow garlic note that rounds out the flavor.
- Salt (1 teaspoon, or to taste) — I use kosher salt for cooking. Diamond Crystal is my go-to because it’s less salty by volume, giving you more control.
- Black pepper (1/2 teaspoon, freshly ground) — Freshly ground makes a difference here. The pre-ground stuff is fine in a pinch, but fresh adds a subtle warmth.
- Chicken broth or white wine (1/4 cup) — This goes in the bottom of the pan to create steam and keep the chicken moist. Chicken broth is my default, but dry white wine like Pinot Grigio adds lovely acidity if you have an open bottle.
- Butter (1 tablespoon, optional) — Adding a small pat of butter on top of each breast before baking gives the chicken a richer flavor and helps with browning. Totally optional but highly recommended.
- Fresh parsley (for garnish, optional) — Adds a pop of color and freshness at the end. Flat-leaf parsley is best, but curly works too.
Equipment Needed
You don’t need a fancy kitchen to make this recipe work. Here’s what you’ll need:
- 9×13 baking dish or sheet pan — A glass or ceramic baking dish works great. I’ve also used a rimmed sheet pan lined with foil for even easier cleanup. My favorite is a ceramic dish because it distributes heat evenly.
- Microplane or fine grater — For zesting the lemons. A regular box grater works too, but a microplane is easier and gives you finer zest that melts into the oil better.
- Small bowl — For mixing the lemon-garlic oil mixture.
- Measuring spoons — For accuracy, though honestly, I often eyeball the spices now.
- Instant-read thermometer — This is the single most important tool for perfect chicken. A $10 thermometer will save you from dry, overcooked chicken forever. I use a ThermoPop and it’s been worth every penny.
- Tongs — For turning the chicken and transferring it to the baking dish.
- Cutting board and knife — For mincing garlic and chopping parsley.
If you don’t have a microplane, you can use a vegetable peeler to remove strips of lemon peel and mince them finely. It’s not quite the same, but it works. And if you don’t have an instant-read thermometer, you can cut into the thickest part of the chicken to check doneness—just know that you’ll lose some juices that way.
Preparation Method
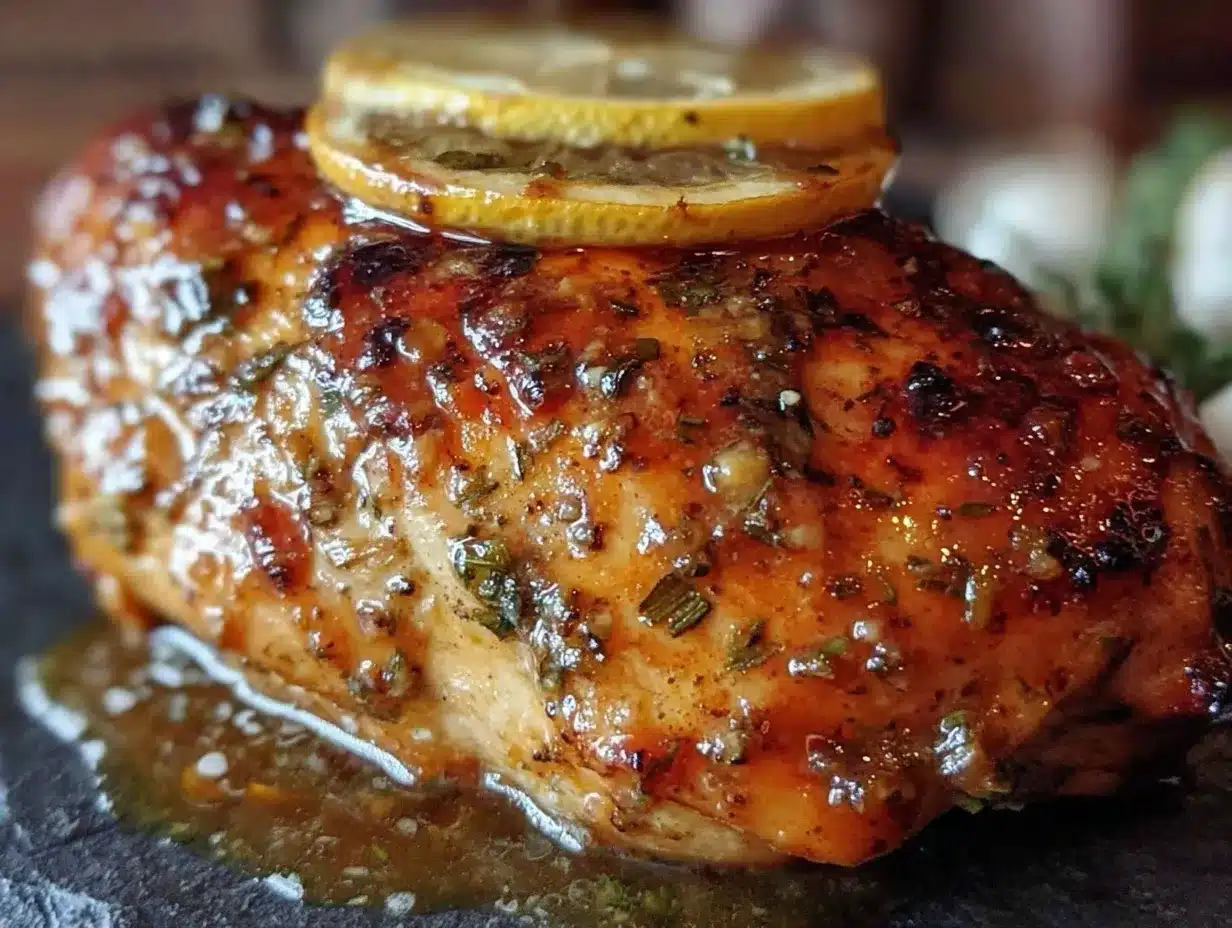
Let me walk you through this step by step. I’ve made this recipe so many times that I’ve got the timing down to a science. Trust me on the order of operations here—it saves time and dishes.
- Preheat your oven to 425°F (218°C). This high heat is crucial. Don’t be tempted to lower it. The hot oven sears the outside quickly, locking in moisture while the inside cooks through. While the oven heats, prep everything else.
- Pat the chicken breasts dry with paper towels. This is more important than you think. Wet chicken won’t brown properly, and it’ll steam instead of roast. Really get in there and dry them well. I usually go through three or four paper towels for four breasts.
- Season the chicken with salt and pepper. Sprinkle both sides generously. Don’t be shy—chicken needs more salt than you think. I use about 1 teaspoon of kosher salt total for four breasts. Let them sit while you make the lemon-garlic mixture.
- Zest both lemons into a small bowl. You want just the yellow part, not the white pith underneath, which is bitter. Stop zesting when you see white. Add the minced garlic, olive oil, oregano, thyme, and garlic powder to the bowl. Stir to combine.
- Juice one lemon into the bowl and stir again. Save the second lemon for later—you’ll use it for extra juice after baking if needed. The mixture should look like a loose paste. Give it a taste—it should be bright and punchy.
- Pour the 1/4 cup of chicken broth into your baking dish. Spread it around so it covers the bottom. This creates steam in the oven that keeps the chicken from drying out. I learned this trick from a restaurant chef friend, and it’s a game-changer.
- Place the seasoned chicken breasts in the baking dish. Leave a little space between each piece so they cook evenly. Don’t crowd them—if they’re touching, they’ll steam instead of roast.
- Spoon the lemon-garlic mixture over each breast. Use your hands or a brush to spread it evenly over the top and sides. Really massage it in. This is where the flavor happens, so don’t be delicate about it.
- If using butter, place a small pat on top of each breast. This step is optional but adds incredible richness and helps create that golden-brown crust. The butter melts into the lemon-garlic mixture and creates this beautiful pan sauce.
- Bake for 20-25 minutes. The exact time depends on the thickness of your chicken. At 20 minutes, start checking. The internal temperature should reach 165°F (74°C) in the thickest part. My chicken usually hits 165°F right at 22 minutes.
- Let the chicken rest for 5 minutes in the pan. This is non-negotiable. The juices need time to redistribute. If you cut into it immediately, all that moisture will run out onto the cutting board instead of staying in the meat. I set a timer because I’m impatient and would skip this step otherwise.
- Slice against the grain and serve. Spoon some of the pan juices over the top. Squeeze the remaining lemon half over everything for a final burst of brightness. Garnish with fresh parsley if you’re feeling fancy.
Pro tip: If your chicken breasts are uneven in thickness, pound the thicker end with a rolling pin or meat mallet until they’re uniform. This takes 30 seconds and prevents the dreaded “dry end, raw middle” situation.
Cooking Tips & Techniques
I’ve made every mistake possible with baked chicken, so you don’t have to. Here’s what I’ve learned the hard way:
Don’t skip the resting time. I know it’s tempting to dig in immediately, especially when you’re hungry after a long day. But that 5-minute rest is what separates juicy chicken from dry chicken. The internal temperature actually rises another 5-10 degrees during resting, so if you pull it at 160°F, it’ll reach 165°F while it sits.
Use a thermometer, not a timer. Chicken thickness varies so much that timing is unreliable. I’ve had thin breasts cook in 15 minutes and thick ones take 30. A $10 instant-read thermometer is the best investment you’ll make for your kitchen. Stick it in the thickest part of the breast, and when it reads 165°F, you’re done.
The pan sauce is the secret weapon. After you remove the chicken, there’s liquid left in the pan. Don’t pour it out! Spoon it over rice, quinoa, or crusty bread. It’s packed with lemon-garlic flavor and the rendered chicken juices. Sometimes I’ll add a splash more broth and a pat of butter to the pan while the chicken rests, stirring to create a quick sauce.
One mistake I still make: Forgetting to zest the lemons before juicing them. Zesting a lemon that’s already been cut in half is awkward and you’ll end up with zest on your fingers instead of in the bowl. Always zest first, then juice.
Timing strategy for busy nights: While the chicken bakes, I steam some broccoli or microwave a bag of frozen vegetables. I’ll also start some quick-cooking rice or quinoa. Everything finishes around the same time, and I’ve got a complete meal with minimal effort.
Variations & Adaptations
This recipe is incredibly flexible. Here are some ways I’ve adapted it over the years:
Herb variation: Swap the dried oregano and thyme for fresh herbs if you have them. Rosemary and thyme are particularly good with lemon and garlic. Use about 2 tablespoons of fresh herbs, chopped. I made this version for Easter brunch and it felt fancy without any extra work.
Creamy lemon sauce: After removing the chicken, add 1/4 cup of heavy cream to the pan juices and whisk over medium heat for 2 minutes. Pour this creamy lemon sauce over the chicken before serving. My husband requests this version constantly.
Spicy version: Add 1/2 teaspoon of red pepper flakes to the lemon-garlic mixture. The heat pairs beautifully with the bright lemon flavor. I tried this on a whim when I had a cold and wanted something with a kick—it’s been in regular rotation ever since.
Dairy-free option: Skip the butter and use all olive oil. The recipe works perfectly without dairy. I’ve made it for friends with dairy sensitivities and no one noticed the difference.
Sheet pan meal: Add chopped vegetables (broccoli, bell peppers, zucchini, or asparagus) to the pan around the chicken. Toss them with a little olive oil, salt, and pepper before baking. Everything cooks together and you’ve got a complete meal on one pan. Just be aware that vegetables may need a few extra minutes if they’re cut thick.
Different protein: This same lemon-garlic treatment works beautifully on chicken thighs, fish fillets, or pork chops. Adjust cooking times accordingly—thighs need about 25-30 minutes, fish needs 10-15 minutes depending on thickness, and pork chops need 15-20 minutes.
Serving & Storage Suggestions
This chicken is versatile enough to serve with almost anything. Here’s how I like to enjoy it:
Serving temperature: Serve hot, straight from the oven. The pan juices should be bubbling and the chicken should feel firm but give slightly when pressed. If it’s for a crowd, you can keep it warm in a 200°F oven for up to 30 minutes, covered loosely with foil.
What to serve with it: I love this with simple steamed rice or quinoa to soak up the pan juices. For low-carb options, try roasted vegetables or a big green salad with lemon vinaigrette. Mashed potatoes are also incredible—the lemon-garlic pan sauce doubles as a gravy. For a complete meal, add crusty bread to wipe the plate clean.
Storage: Store leftover chicken in an airtight container in the refrigerator for up to 4 days. The flavors actually deepen overnight, so leftovers are delicious cold on salads or sandwiches. I’ve been known to make extra just for lunch the next day.
Freezing: Cooked chicken freezes well for up to 3 months. Wrap each breast individually in plastic wrap, then place in a freezer bag. Thaw overnight in the refrigerator before reheating.
Reheating: The best way to reheat is in a 350°F oven for 10-15 minutes, covered with foil to prevent drying. You can also microwave it, but add a splash of chicken broth or water and cover with a damp paper towel to keep it moist. I’ve found that slicing the chicken before reheating helps it warm through more evenly.
How flavors develop: The lemon flavor mellows as the chicken sits, becoming more subtle and integrated. If you’re meal-prepping, I recommend adding a squeeze of fresh lemon juice after reheating to brighten it back up.
Nutritional Information & Benefits
Here’s the estimated nutritional breakdown per serving (one chicken breast with pan juices):
| Nutrient | Amount |
|---|---|
| Calories | 285 |
| Protein | 35g |
| Fat | 14g |
| Saturated Fat | 3.5g |
| Carbohydrates | 3g |
| Fiber | 0.5g |
| Sugar | 1g |
| Sodium | 520mg |
This recipe is naturally low-carb and gluten-free, making it suitable for keto, paleo, and Whole30 diets (skip the butter for Whole30). Chicken breast is an excellent source of lean protein, which supports muscle health and keeps you feeling full. Lemon provides vitamin C and antioxidants, while garlic offers anti-inflammatory benefits. Olive oil contributes heart-healthy monounsaturated fats. It’s a balanced, nutrient-dense meal that fits into most eating plans.
Dietary considerations: This recipe contains dairy if you use the optional butter. It’s naturally gluten-free, nut-free, and egg-free. For a lower-sodium version, reduce the added salt and use low-sodium chicken broth.
Conclusion
This Quick Lemon Garlic Baked Chicken Breast has become my go-to for those nights when I need dinner on the table fast but still want something that feels special. It’s the recipe I turn to when I’m tired, when I’m busy, and when I just want good food without the fuss. The fact that it came together in a moment of potluck panic and ended up being a crowd favorite still makes me smile.
I hope you’ll give this recipe a try, whether you’re cooking for a weeknight dinner, a busy family, or just yourself. Don’t be afraid to make it your own—add more garlic if you’re a garlic lover, throw in some red pepper flakes for heat, or pile on the fresh herbs. The beauty of this recipe is that it’s forgiving and flexible.
If you make this, I’d love to hear how it turned out. Drop a comment below and let me know what you served it with, what variations you tried, or just how good that first bite was. And if you’re looking for more quick weeknight dinners, check out my One-Pan Rosemary Chicken and Vegetables or my Garlic Butter Shrimp Skewers—they’re both perfect for busy nights.
Happy cooking, friends. You’ve got this dinner handled.
Frequently Asked Questions
Can I use chicken thighs instead of breasts?
Absolutely! Boneless, skinless chicken thighs work beautifully with this recipe. They’re actually more forgiving since they have a higher fat content and are harder to dry out. Bake them for 25-30 minutes at the same temperature. Bone-in thighs will need about 35-40 minutes.
How do I know when the chicken is fully cooked without a thermometer?
If you don’t have an instant-read thermometer, make a small cut into the thickest part of the breast. The meat should be white all the way through with no pink, and the juices should run clear. The chicken should also feel firm to the touch but not hard. However, I really recommend getting a thermometer—it takes the guesswork out completely.
Can I marinate the chicken overnight?
You can, but I wouldn’t recommend it with lemon juice. The acid in the lemon can start to “cook” the chicken (like ceviche) if left too long, resulting in a mealy texture. If you want to prep ahead, mix the oil, garlic, and dried herbs together and refrigerate. Add the lemon zest and juice just before baking. Alternatively, you can marinate for up to 2 hours without issues.
What’s the best way to reheat leftovers without drying them out?
The oven method is best: place the chicken in a baking dish with a splash of chicken broth, cover with foil, and reheat at 350°F for 10-15 minutes. The foil traps steam and prevents drying. If you’re in a hurry, the microwave works with a damp paper towel over the plate, but the texture won’t be quite as good.
Can I double this recipe for a crowd?
Yes, but don’t overcrowd the pan. Use two baking dishes if needed, or cook in batches. Overcrowding traps steam and prevents browning. If you’re making a large batch, you can also use a half-sheet pan—just make sure the chicken pieces have at least an inch of space between them. You don’t need to adjust the cooking time as long as the pieces aren’t overlapping.
Pin This Recipe!
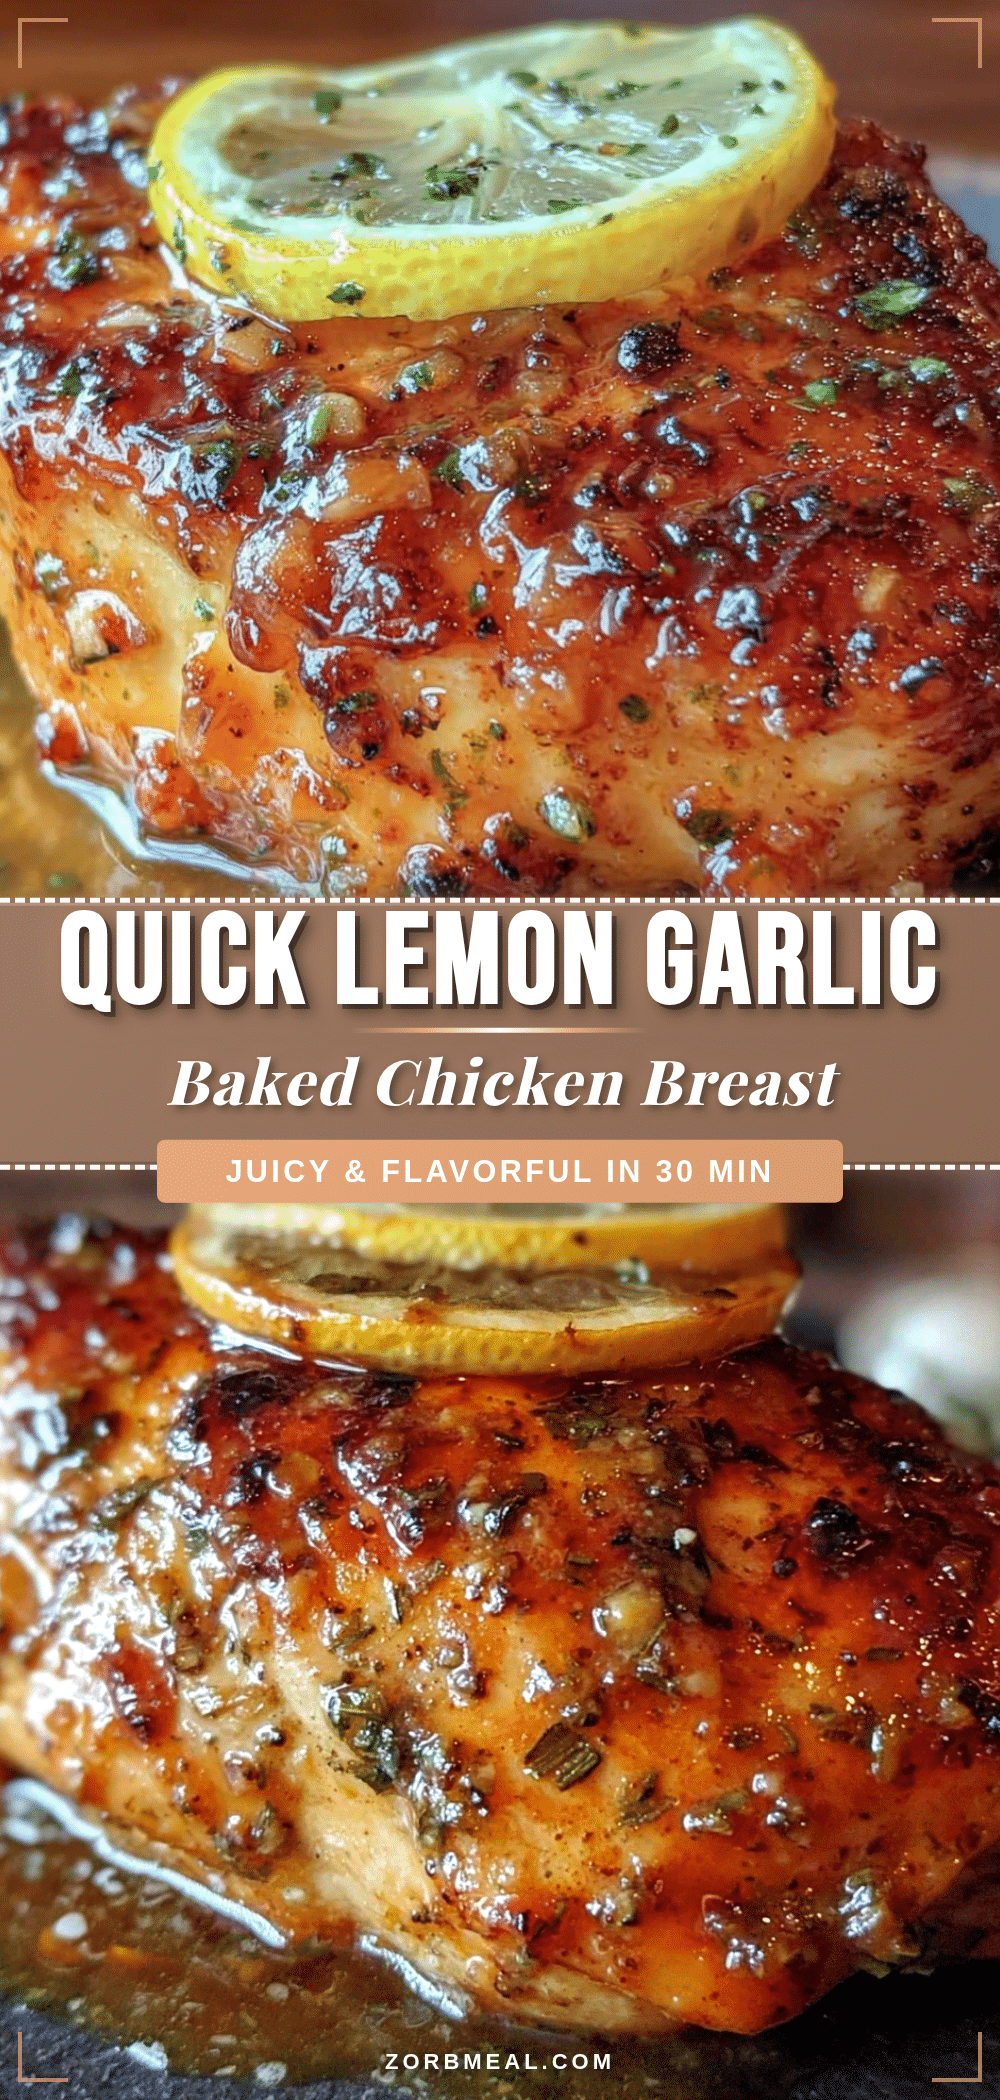
Quick Lemon Garlic Baked Chicken Breast: Best Easy Dinner
This Quick Lemon Garlic Baked Chicken Breast is a simple, juicy, and flavorful weeknight dinner that comes together in about 30 minutes with minimal prep and only one pan to wash. It’s the underdog recipe that delivers every single time, perfect for busy nights when you need dinner on the table fast.
- Prep Time: 10 minutes
- Cook Time: 20-25 minutes
- Total Time: 30-35 minutes
- Yield: 4 servings 1x
- Category: Main Course
- Cuisine: American
Ingredients
- 4 boneless, skinless chicken breasts (about 6 ounces each)
- 2 medium fresh lemons
- 4–5 garlic cloves, minced
- 3 tablespoons extra virgin olive oil
- 1 teaspoon dried oregano
- 1/2 teaspoon dried thyme
- 1/2 teaspoon garlic powder
- 1 teaspoon kosher salt (or to taste)
- 1/2 teaspoon freshly ground black pepper
- 1/4 cup chicken broth or dry white wine
- 1 tablespoon butter (optional)
- Fresh parsley for garnish (optional)
Instructions
- Preheat your oven to 425°F (218°C).
- Pat the chicken breasts dry with paper towels.
- Season the chicken with salt and pepper on both sides.
- Zest both lemons into a small bowl. Add minced garlic, olive oil, oregano, thyme, and garlic powder. Stir to combine.
- Juice one lemon into the bowl and stir again. Save the second lemon for later.
- Pour the 1/4 cup of chicken broth into your baking dish and spread it around.
- Place the seasoned chicken breasts in the baking dish, leaving space between each piece.
- Spoon the lemon-garlic mixture over each breast, spreading evenly over the top and sides.
- If using butter, place a small pat on top of each breast.
- Bake for 20-25 minutes, until the internal temperature reaches 165°F (74°C) in the thickest part.
- Let the chicken rest for 5 minutes in the pan.
- Slice against the grain and serve. Spoon pan juices over the top. Squeeze the remaining lemon half over everything. Garnish with fresh parsley if desired.
Notes
Don’t skip the resting time—it’s crucial for juicy chicken. Use a thermometer for perfect doneness. The pan sauce is a secret weapon; spoon it over rice or bread. For even cooking, pound thicker ends of chicken breasts to uniform thickness. If marinating, do not exceed 2 hours due to lemon acid. Reheat leftovers in a 350°F oven with a splash of broth, covered with foil.
Nutrition
- Serving Size: 1 chicken breast wit
- Calories: 285
- Sugar: 1
- Sodium: 520
- Fat: 14
- Saturated Fat: 3.5
- Carbohydrates: 3
- Fiber: 0.5
- Protein: 35
Keywords: lemon garlic chicken, baked chicken breast, quick chicken dinner, easy weeknight dinner, healthy chicken recipe, one-pan chicken, gluten-free chicken, low-carb chicken


