This was supposed to be a proper sit-down dinner party. I had the whole menu planned out—a slow-braised short rib, a fancy salad with shaved fennel, and a chocolate tart that I’d practiced twice already. Then Tuesday happened. My work meeting ran an hour over, my kid decided 5 PM was the perfect time for a meltdown, and I realized the short ribs needed three more hours I simply didn’t have. I stood in my kitchen, staring at the fridge full of cheese and cured meats I’d bought for a grazing board, and felt that familiar panic rise. You know that feeling when dinner is supposed to happen and it just… isn’t?
I grabbed the wrong thing first—a bag of baby carrots instead of the cucumber I was reaching for—and just stood there holding them. That’s when it hit me. I didn’t need to salvage the dinner party. I needed to salvage the evening. So I grabbed some small ramekins, started piling in prosciutto and cheddar cubes, and told my family we were having a “snack dinner.” Honestly, I said it with a shrug, not expecting much. What came out was nothing like the plan—and better. These quick individual charcuterie cups saved my Tuesday, and honestly, they’ve become our go-to for festive weeknights ever since. Maybe you’ve been there too—needing something that feels special but comes together in minutes. That’s exactly what this is.
Why You’ll Love This Recipe
Let me tell you why these individual charcuterie cups have completely changed how we do weeknight dinners. I’ve tested this idea at least a dozen times now—with different cheeses, different meats, different add-ins—and every single time, it works. Here’s what makes them so great:
- Ready in 10 Minutes: No cooking, no heating, no waiting. Just assemble and serve. Perfect for those nights when you’re running on empty.
- Simple Ingredients: You probably have most of this stuff already. Cheese, crackers, whatever meat is in the fridge. No fancy grocery trips needed.
- Perfect for Festive Weeknights: They feel like a treat without the effort. Great for movie nights, after a long day, or when you just want something different.
- Crowd-Pleaser: My kids actually eat cheese cubes without complaining when they’re in a little cup. Something about the individual portion makes it fun.
- Unbelievably Satisfying: The mix of salty, creamy, crunchy, and sweet hits every craving. It’s comfort food, but faster.
What makes this different from just throwing cheese on a plate? It’s the individual cups. Each person gets their own little assortment, which means no fighting over the last olive, and everyone gets exactly what they like. Plus, it looks way more intentional than a haphazard board. I’ve served these for actual parties too, and people love them. They’re like a little gift on a plate.
This recipe isn’t just good—it’s the kind that makes you close your eyes after the first bite of cheese and salami. It’s weeknight comfort reimagined: faster, easier, but with the same soul-soothing satisfaction. Perfect for impressing your family without stress, or turning a simple Tuesday into something memorable.
What Ingredients You Will Need
This recipe uses simple, mostly pantry-stable ingredients to deliver that perfect mix of flavors and textures. The beauty is in the combination, not the complexity. Here’s what you’ll need:
For the Charcuterie Cups (Base Ingredients)
- Cured Meat: 4-6 slices of salami, prosciutto, or pepperoni per cup. I prefer Genoa salami for its classic flavor, but use whatever you have. (Pro tip: fold the slices into little ruffles for texture.)
- Cheese: 2-3 cubes or slices of your favorite cheese per cup. Sharp cheddar, gouda, and brie are my go-to combo. (I recommend Tillamook cheddar for consistent quality.)
- Crackers: 4-5 small crackers per cup. Club crackers, water crackers, or even pretzel crisps work great. (Gluten-free? Use rice crackers.)
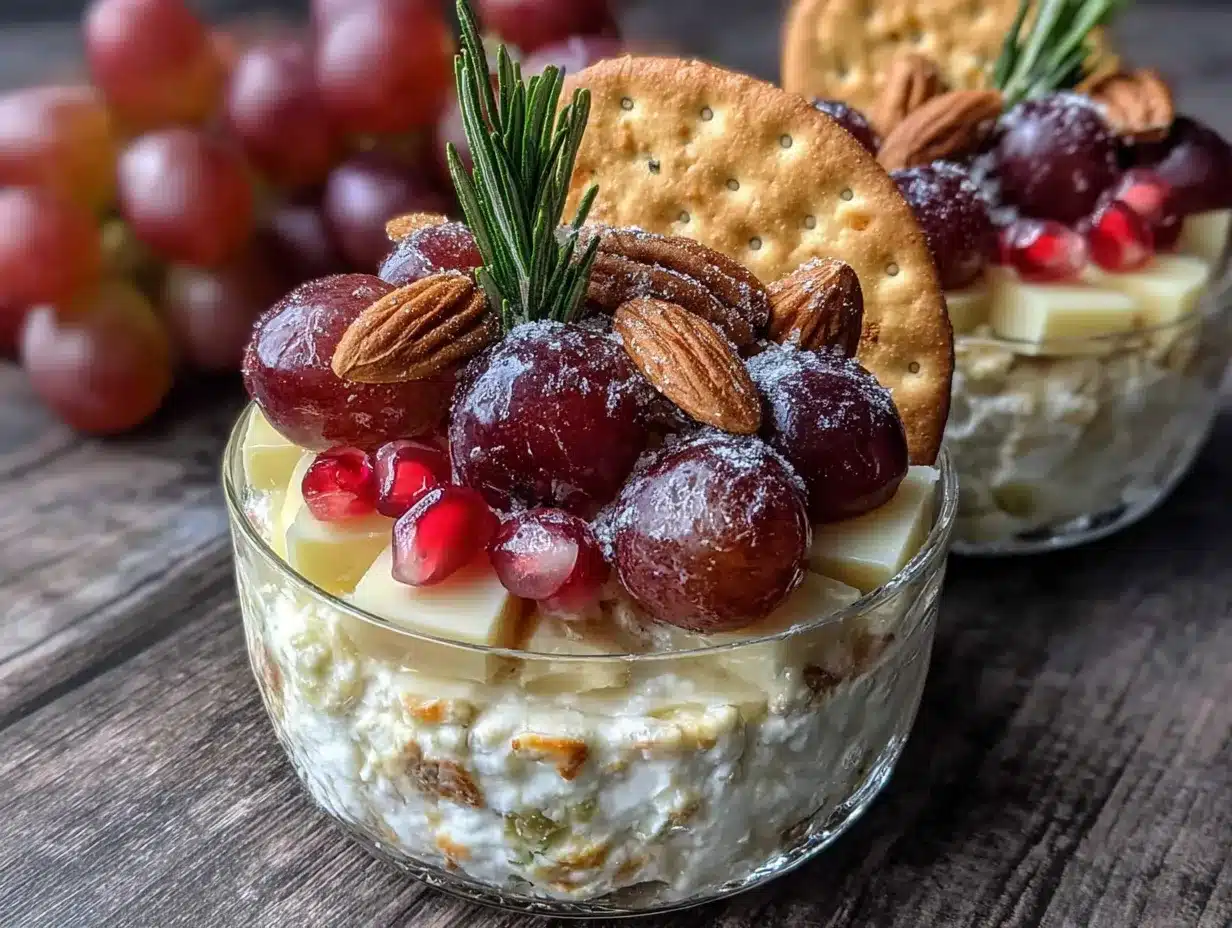
- Fresh Fruit: A handful of red grapes, halved if large, or 2-3 strawberry slices per cup. The sweetness balances the saltiness perfectly.
- Nuts: 1-2 tablespoons of almonds, walnuts, or pecans per cup. Toasted is best, but raw works fine.
- Olives: 2-3 pitted olives per cup. Kalamata or green olives both work. (Look for pitted to save time.)
Optional Add-Ins for Extra Festivity
- Dried Fruit: A few dried apricots, figs, or cranberries add a chewy sweetness.
- Dips: A small dollop of honey, mustard, or fig jam in the bottom of the cup adds a flavor pop.
- Fresh Herbs: A sprig of rosemary or thyme for garnish (looks fancy, takes 2 seconds).
- Chocolate: A square of dark chocolate for a sweet-salty finish. Trust me on this one.
For the best results, let your cheese sit out for 15 minutes before assembling. It tastes so much better at room temperature. If you’re making these ahead, keep the crackers separate until serving so they stay crunchy.
Equipment Needed
The equipment list for this is almost embarrassingly short. That’s the beauty of it.
- Small Cups or Ramekins: 4-6 ounce size is perfect. I use small glass bowls I got from a thrift store, but even paper cups work in a pinch. (Just make sure they’re food-safe.)
- Cutting Board: For cubing cheese and slicing fruit. Any board works.
- Cheese Knife or Sharp Paring Knife: A sharp knife makes clean cubes. Dull knives crush soft cheese.
- Small Serving Platter or Tray: Optional, but nice for presenting the cups. A wooden board or even a baking sheet lined with parchment works.
- Measuring Spoons or Small Scoop: For portioning nuts and dried fruit evenly.
Honestly, if you have a cup and a knife, you’re good. I’ve made these with just a butter knife and a coffee mug before. It wasn’t pretty, but it worked.
Preparation Method
Let me walk you through this step by step. It’s simple, but a little organization makes it even faster.
- Prep your ingredients (2 minutes): Take your cheese out of the fridge and let it sit while you set up. Cube the cheese into 1/2-inch pieces. Slice any larger fruit like strawberries. If you’re using prosciutto, tear it into rough strips—it looks more rustic that way.
- Set up your assembly line (1 minute): Arrange your ingredients in the order you’ll use them: cups first, then base ingredients (meat, cheese, crackers), then toppings (fruit, nuts, olives), then garnishes. This saves you from reaching across everything.
- Start with the heavy stuff (2 minutes): Place a few cheese cubes in the bottom of each cup. This creates a stable base. Don’t overcrowd—you want room for everything else. Aim for 2-3 cubes per cup.
- Add the meat (1 minute): Fold or roll your cured meat slices and tuck them in between the cheese cubes. For salami, I like to fold it in half, then half again to make a little triangle. For prosciutto, a loose ruffle looks beautiful. The meat should peek out from the sides.
- Tuck in the crackers (1 minute): Slide 3-4 crackers vertically into the cup, nestled between the cheese and meat. They should stick up slightly so they’re easy to grab. If you’re using larger crackers, break them in half.
- Add fresh elements (1 minute): Drop in your grapes, berries, or apple slices. These add color and freshness. Place them where they’re visible—on top or tucked between the other ingredients.
- Finish with nuts and olives (1 minute): Sprinkle a tablespoon of nuts over the top, and nestle 2-3 olives where you can see them. This is where the texture contrast really shines.
- Garnish and serve (1 minute): Add any optional garnishes—a drizzle of honey, a sprig of rosemary, or a square of chocolate. Serve immediately, or refrigerate for up to 2 hours (add crackers just before serving if making ahead).
A quick sensory check: your finished cup should look abundant, with different colors and textures visible. The cheese should be creamy-looking, the meat slightly shiny, the fruit bright. If it looks like a tiny treasure box, you’ve done it right.
Cooking Tips & Techniques
I’ve made these cups more times than I can count, and I’ve learned a few things the hard way. Here’s what I wish I’d known from the start:
Don’t overthink the cheese. I used to stress about getting the perfect cheese board selection. For individual cups, three cheeses max is plenty. One soft (brie), one hard (aged cheddar), and one medium (gouda) covers all the bases. I once tried to put five cheeses in one cup and it just looked messy.
Balance textures in every cup. The best cups have something creamy (brie), something crunchy (crackers or nuts), something chewy (dried fruit), and something briny (olives). If you’re missing one category, it’s still good, but the magic happens when you have all four. I learned this after making a cup with only soft cheese and grapes—it was a texture disaster.
Watch your portion sizes. It’s easy to overfill these cups. Aim for 3-4 bites of each component. Anything more and it becomes overwhelming, not satisfying. I’ve definitely made cups that were basically a cheese block with a cracker on top. Not the goal.
Prep ingredients ahead if you can. Cube the cheese and wash the fruit the night before. Then assembly takes 3 minutes flat. This is a game-changer for weeknights. I do this while my coffee is brewing in the morning.
If you’re serving these for a group, make a few extra. People always want seconds. I learned this the hard way at a holiday party where I made exactly enough and ran out in 10 minutes.
Variations & Adaptations
One of the best things about this recipe is how flexible it is. Here are some ways I’ve adapted it over the years:
Vegetarian Version: Skip the meat and add marinated artichoke hearts, roasted red peppers, or grilled halloumi cheese. The salty, savory elements still come through. I made this for a friend who’s vegetarian, and she said it was better than the original. (I’m still not sure how I feel about that.)
Gluten-Free Version: Use gluten-free crackers or swap them for cucumber rounds or bell pepper slices. The crunch is still there, just from vegetables. My sister-in-law does this and swears by it.
Sweet & Savory Version: Add a drizzle of honey over the cheese and a few dark chocolate chips on top. The combination of salty prosciutto, creamy brie, and sweet honey is honestly addictive. I discovered this on a whim when I was out of olives and desperate for something to fill the cup.
Breakfast Charcuterie Cups: Use breakfast sausage slices, cheddar cubes, apple slices, and mini pancakes or waffle pieces. I made these for a lazy Sunday morning and they were a huge hit with the kids.
Spicy Version: Use pepperoni or spicy salami, add pickled jalapeños, and include a small smear of spicy mustard. Perfect for when you want a kick. My husband requests this version constantly.
Serving & Storage Suggestions
These cups are best served at room temperature, so if you’ve refrigerated them, let them sit out for 10-15 minutes before serving. The cheese tastes so much better when it’s not cold and hard.
For presentation, arrange the cups on a large wooden board or a simple white platter. You can add small labels if you’re feeling fancy, but honestly, the colors speak for themselves. I like to scatter a few extra grapes and crackers around the platter for a more abundant look.
These pair beautifully with a crisp white wine like Sauvignon Blanc, a light red like Pinot Noir, or even a sparkling water with lemon. For a non-alcoholic option, try a ginger beer or a fruity iced tea.
Storage: If you have leftovers (unlikely, but possible), you can store the assembled cups in the refrigerator for up to 24 hours. However, the crackers will get soft, so it’s better to store components separately. Cheese and meat in one container, crackers in another, fruit in a third. Assemble fresh when you’re ready to eat.
I’ve found that the flavors actually meld together nicely after an hour or so in the fridge—the cheese absorbs a bit of the meat’s saltiness. But don’t push it past 24 hours. After that, things start to get sad.
Nutritional Information & Benefits
These cups are naturally high in protein from the cheese and meat, which makes them surprisingly satisfying. Here’s a rough estimate per cup (based on a standard serving):
- Calories: Approximately 350-450 per cup (varies based on ingredients)
- Protein: 18-22 grams
- Fat: 25-30 grams (mostly from cheese and nuts)
- Carbohydrates: 15-20 grams (from fruit and crackers)
- Fiber: 3-5 grams
The cheese provides calcium and protein, while nuts offer healthy fats and vitamin E. Grapes and berries add antioxidants and natural sweetness without refined sugar. This is one of those rare recipes that feels indulgent but actually has some nutritional merit.
If you’re watching your sodium, opt for low-sodium cheeses and unsalted nuts. You can also reduce the amount of cured meat or use turkey-based options. For a lower-fat version, use reduced-fat cheese and skip the nuts.
Potential allergens: dairy (cheese), gluten (crackers), tree nuts. Always check labels if serving guests with allergies.
Conclusion
These quick individual charcuterie cups have become my secret weapon for turning a chaotic weeknight into something that feels special. They’re proof that you don’t need hours in the kitchen or a complicated recipe to create a moment of joy. Sometimes the best meals come from the moments when everything goes wrong and you have to think on your feet.
I love this recipe because it’s forgiving. You can use whatever you have, swap things in and out, and it still works. It’s not about perfection—it’s about abundance and ease. So go ahead, raid your fridge, grab some little cups, and make yourself a snack dinner. You deserve it.
Have you tried these? I’d love to hear your favorite combinations! Drop a comment below and tell me what you put in your cups. And if you loved this idea, share it with a friend who needs a quick weeknight win.
Frequently Asked Questions
Can I make these charcuterie cups ahead of time?
Yes, you can assemble them up to 2 hours ahead. Just keep the crackers separate and add them right before serving. If you need to prep further in advance, cube the cheese and wash the fruit the night before, then assemble when you’re ready.
What if I don’t have small cups or ramekins?
No problem! You can use small mason jars, paper cups (just make sure they’re food-safe), or even a muffin tin. I’ve used a cleaned-out yogurt container in a pinch. The vessel doesn’t matter—the ingredients do.
Can I make these dairy-free?
Absolutely. Use dairy-free cheese alternatives (there are some great options now) or skip the cheese entirely and add extra nuts, olives, and marinated vegetables. The cups will still be delicious and satisfying.
How many cups should I make per person?
For a main dish, plan on 1-2 cups per person. For a snack or appetizer, 1 cup per person is usually enough. If you’re serving other dishes, adjust accordingly. I always make a couple extra because people tend to want more.
Can I use these for a party or gathering?
Yes! They’re perfect for parties. Make a variety of cups with different combinations so guests can try different flavors. They’re also great for portion control—each person gets their own cup, which means less grazing and more mingling. Just make sure to label any cups with allergens if needed.
Pin This Recipe!
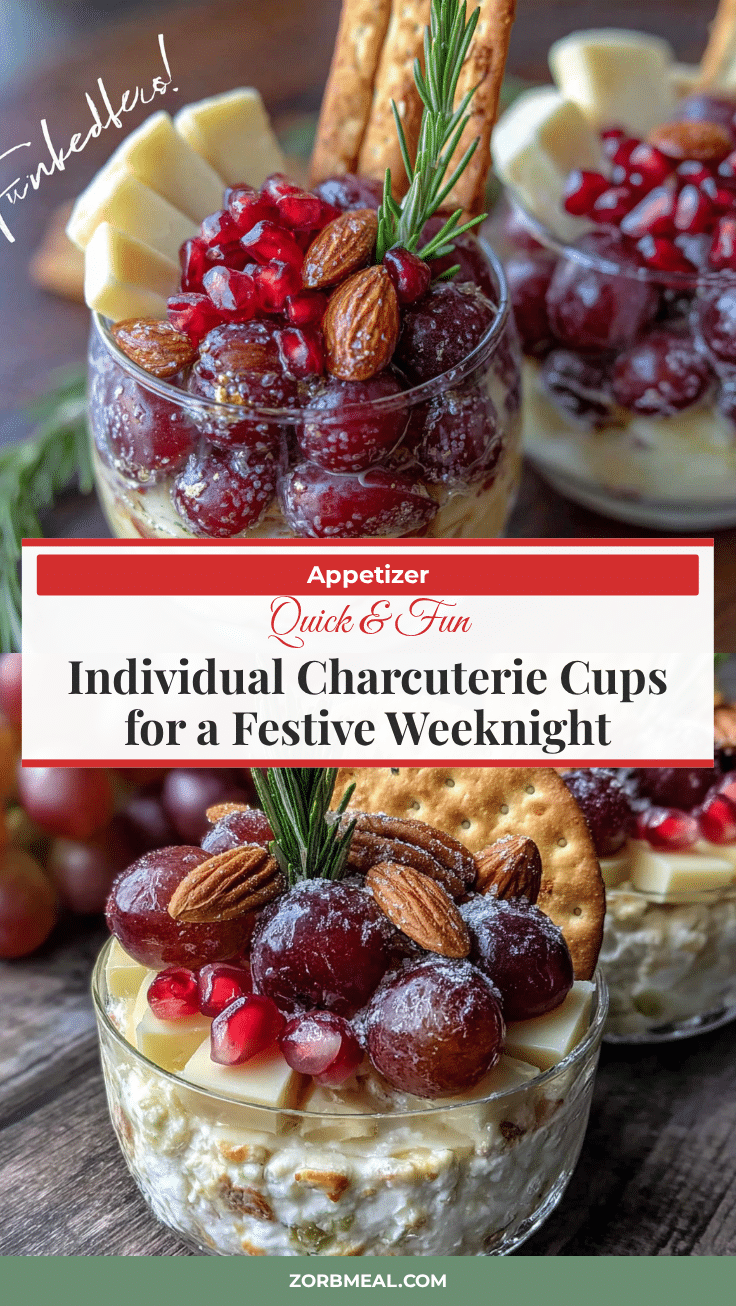
Quick Individual Charcuterie Cups: Easy Festive Weeknight Snack

These quick individual charcuterie cups are the perfect solution for a chaotic weeknight. Ready in 10 minutes with simple ingredients, they feel special and satisfying without any cooking or stress.
- Prep Time: 10 minutes
- Cook Time: 0 minutes
- Total Time: 10 minutes
- Yield: 4 servings 1x
- Category: Appetizer
- Cuisine: American
Ingredients
- 4–6 slices salami, prosciutto, or pepperoni per cup
- 2–3 cubes or slices sharp cheddar, gouda, and brie per cup
- 4–5 small crackers per cup (club crackers, water crackers, or pretzel crisps)
- A handful of red grapes, halved if large, or 2-3 strawberry slices per cup
- 1–2 tablespoons almonds, walnuts, or pecans per cup
- 2–3 pitted olives per cup (Kalamata or green)
- Optional: dried apricots, figs, or cranberries
- Optional: honey, mustard, or fig jam
- Optional: fresh rosemary or thyme for garnish
- Optional: a square of dark chocolate
Instructions
- Prep your ingredients: Take cheese out of fridge to sit. Cube cheese into 1/2-inch pieces. Slice larger fruit. Tear prosciutto into rough strips if using.
- Set up assembly line: Arrange cups first, then base ingredients (meat, cheese, crackers), then toppings (fruit, nuts, olives), then garnishes.
- Start with heavy stuff: Place 2-3 cheese cubes in bottom of each cup to create a stable base.
- Add meat: Fold or roll cured meat slices and tuck between cheese cubes. For salami, fold in half twice. For prosciutto, make a loose ruffle.
- Tuck in crackers: Slide 3-4 crackers vertically into cup, nestled between cheese and meat. They should stick up slightly.
- Add fresh elements: Drop in grapes, berries, or apple slices where visible.
- Finish with nuts and olives: Sprinkle 1 tablespoon nuts over top and nestle 2-3 olives where visible.
- Garnish and serve: Add optional garnishes like honey drizzle, rosemary sprig, or chocolate square. Serve immediately or refrigerate up to 2 hours (add crackers just before serving if making ahead).
Notes
Let cheese sit out for 15 minutes before assembling for best flavor. If making ahead, keep crackers separate until serving to maintain crunch. For a vegetarian version, skip meat and add marinated artichoke hearts, roasted red peppers, or grilled halloumi. For gluten-free, use gluten-free crackers or cucumber rounds. Store assembled cups in refrigerator up to 24 hours, but crackers will get soft.
Nutrition
- Serving Size: 1 cup
- Calories: 400
- Sugar: 8
- Sodium: 800
- Fat: 28
- Saturated Fat: 12
- Carbohydrates: 18
- Fiber: 4
- Protein: 20
Keywords: charcuterie cups, individual charcuterie, quick snack, weeknight dinner, no-cook appetizer, festive snack, cheese and meat cups


