“Hey, do you think I can make spider webs on brownies with just white chocolate?” My friend’s text popped up while I was elbow-deep in flour and cocoa powder. Honestly, I was skeptical at first. I mean, spider webs? On brownies? But Halloween was creeping closer, and I was scrambling for an easy, fun treat to bring to our neighborhood party. I figured, why not give it a shot? Little did I know this simple idea would turn into a mini obsession that week.
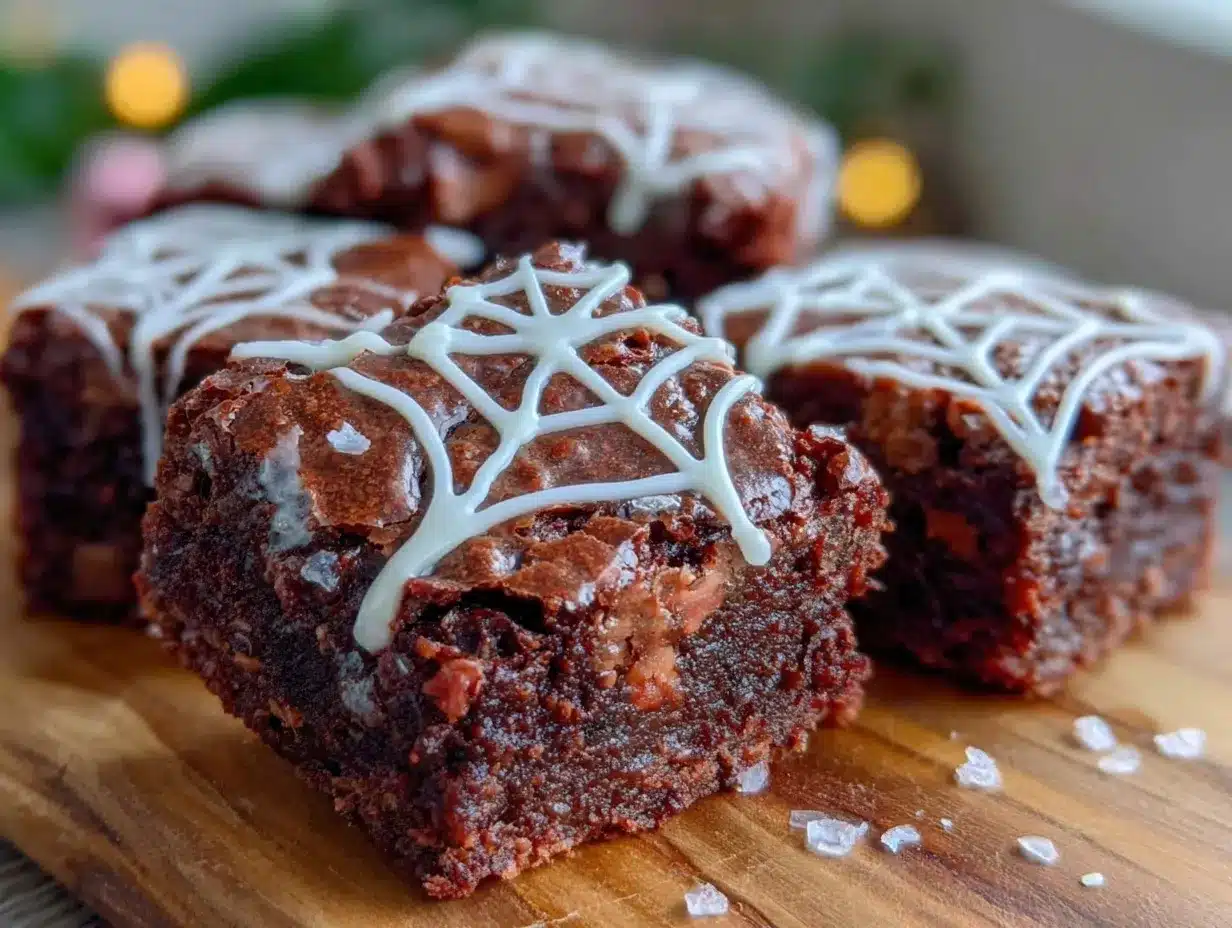
I remember the first batch was a bit of a mess—too thick white chocolate, spider webs that looked more like abstract art than creepy crawlies. But with a few tweaks and a lot of trial runs (and maybe a couple of sneaky bites), these spider web brownies became the star of the spooky spread. The fudgy base with that creamy white chocolate web? It’s the kind of thing that makes you pause mid-bite, smile, and just enjoy the moment.
What really stuck with me is how this recipe feels both playful and comforting—perfect for Halloween, but also a reminder of why I love baking in the first place. It’s not about perfection; it’s about sharing a little fun and sweetness that brings people together. So, whether you’re whipping these up for a last-minute party or just craving something festive, this recipe is ready to surprise you.
Why You’ll Love This Recipe
This spider web brownies recipe has become one of my go-to Halloween treats for good reasons. After testing countless brownie recipes and decorating styles, I can say it hits the sweet spot between spooky fun and delicious simplicity.
- Quick & Easy: Ready from start to finish in under 45 minutes, this recipe is perfect when time is tight but you still want a festive flair.
- Simple Ingredients: You probably already have everything in your pantry—no trips to specialty stores needed.
- Great for Halloween Parties: It’s a conversation starter and a crowd-pleaser, especially with kids who love the spider web design.
- Texture That Works: Rich, fudgy brownies combined with smooth, sweet white chocolate webs create a perfect contrast.
- Customizable: You can switch up the chocolate or even add a pinch of cinnamon for a subtle twist.
What sets this apart from other Halloween brownie recipes? The technique for drawing the spider web is straightforward but yields a striking effect. Plus, the white chocolate doesn’t overpower the deep cocoa notes of the brownies—it balances them beautifully. Honestly, after making these several times, I can say they’re one of the few festive desserts that still taste homemade and comforting rather than gimmicky.
What Ingredients You Will Need
This recipe uses simple, wholesome ingredients to deliver bold flavor and a satisfying texture without the fuss. Most are pantry staples, and the white chocolate drizzle is the secret that turns these brownies into a Halloween delight.
- For the Brownies:
- Unsalted butter – 1/2 cup (113 g), melted (adds richness and moisture)
- Granulated sugar – 1 cup (200 g)
- Large eggs – 2, room temperature (for structure and tenderness)
- Pure vanilla extract – 1 tsp
- All-purpose flour – 3/4 cup (95 g), sifted
- Unsweetened cocoa powder – 1/2 cup (50 g), preferably Dutch-processed for deeper flavor
- Salt – 1/4 tsp (balances sweetness)
- For the Spider Web Decoration:
- White chocolate chips or chunks – 1 cup (175 g), good quality (I recommend Ghirardelli for smooth melting)
- Heavy cream – 2 tbsp (30 ml), to create a smooth ganache-like consistency
- Optional: Black food gel or melted dark chocolate – for small spider accents or extra detail
If you want to make these gluten-free, swap all-purpose flour for almond or oat flour, but keep in mind the texture will be slightly different. For dairy-free versions, use coconut oil instead of butter and dairy-free white chocolate (though the web might be a bit less stable). In summer, I sometimes add a handful of fresh raspberries into the batter for a tart surprise that pairs beautifully with the white chocolate drizzle.
Equipment Needed
- 8×8 inch (20×20 cm) square baking pan – standard size works best for brownie thickness
- Mixing bowls – at least two; one for wet ingredients, one for dry
- Whisk and rubber spatula – for mixing and folding batter gently
- Microwave-safe bowl or double boiler – to melt white chocolate smoothly
- Piping bag or resealable plastic bag – for drawing the spider web with white chocolate (cut a tiny tip off the corner)
- Toothpick or skewer – to create the spider web design with precision
- Cooling rack – essential to let brownies cool evenly and prevent sogginess
If you don’t have a piping bag, a small plastic sandwich bag works just fine, and you can snip the corner to control the drizzle thickness. When melting white chocolate, patience is key—go slow and stir often to avoid burning. I learned this the hard way the first time and wasted a whole batch of chocolate!
Preparation Method
- Preheat and prep: Set your oven to 350°F (175°C). Line your 8×8 inch pan with parchment paper, leaving an overhang on the sides to lift the brownies out easily after baking.
- Mix wet ingredients: In a medium bowl, whisk the melted butter and granulated sugar until combined and glossy. Add the eggs one at a time, whisking well after each addition. Stir in the vanilla extract.
- Combine dry ingredients: In a separate bowl, sift together the flour, cocoa powder, and salt. This helps avoid lumps and ensures even flavor.
- Fold dry into wet: Gently fold the dry ingredients into the wet mixture using a rubber spatula. Don’t overmix—stop as soon as the flour streaks disappear. The batter should be thick but smooth.
- Pour and smooth: Transfer the batter into the prepared pan and spread evenly with your spatula. Tap the pan lightly on the counter to remove air bubbles.
- Bake: Bake for 20-25 minutes. Start checking at 20 minutes by inserting a toothpick in the center; it should come out with a few moist crumbs but not wet batter. Avoid overbaking to keep the fudgy texture.
- Cool completely: Let the brownies cool in the pan on a wire rack for at least an hour. This step is crucial; if the brownies are warm, the white chocolate will melt and not hold the web shape.
- Make the white chocolate drizzle: Melt the white chocolate with heavy cream in 20-second bursts in the microwave, stirring well after each. Aim for a smooth, pourable consistency—too thick and it won’t flow well, too thin and it can run off the brownies.
- Create the spider web: Pour the white chocolate into a piping bag or plastic bag. Starting from the center of the brownie, pipe concentric circles outward. Then, using a toothpick, drag lines from the center to the edges to form the web pattern. Don’t worry if your first try isn’t perfect; practice makes better!
- Optional spider accents: Use black food gel or melted dark chocolate to add tiny spider shapes on the web for extra Halloween flair.
- Let set: Allow the white chocolate to firm up at room temperature or pop the brownies in the fridge for about 15 minutes before slicing.
Pro tip: When cutting, use a sharp knife dipped in hot water and wiped dry between cuts. This keeps the edges clean and prevents the white chocolate from cracking.
Cooking Tips & Techniques
Getting the spider web just right takes a little patience, but the payoff is worth it.
- Melting white chocolate: Always melt slowly and stir often. White chocolate burns easily and seizes if overheated. Adding cream thins it out and helps create that glossy drip.
- Spider web drawing: Pipe slow and steady circles. Use a light hand with the toothpick to drag lines—pressing too hard can break the web lines or smudge the design.
- Brownie texture: Don’t overbake! Fudgy brownies hold moisture better and contrast nicely with the sweet white chocolate. If you prefer cakier brownies, bake a couple minutes longer but the webbing might be trickier on a dry surface.
- Cooling is key: If you try piping while the brownies are still warm, the white chocolate will pool and lose its shape.
- Multitasking tip: While the brownies bake, prep your white chocolate drizzle to save time. Just keep it covered so it doesn’t dry out before use.
One time, I tried swirling dark chocolate into the batter before baking for a marbled effect—it looked cool but made the spider web harder to see. Lesson learned: keep the base simple for that crisp white web to pop.
Variations & Adaptations
This recipe is easy to tweak depending on your mood or dietary needs:
- Flavor twists: Add a teaspoon of espresso powder to the brownie batter to deepen the chocolate flavor. Or sprinkle a pinch of cinnamon or chili powder for a subtle kick.
- Seasonal swaps: Around Christmas, swap the white chocolate for peppermint bark drizzle and decorate with crushed candy canes instead of a spider web.
- Dietary adaptations: Use gluten-free flour blends and dairy-free chocolate to make a version suitable for those with allergies. Just check your white chocolate substitute for meltability.
- Alternative decorations: Instead of a spider web, try zigzagging caramel or peanut butter swirl before baking for a different look and flavor combination.
- Spider accents: For a kid-friendly twist, top with gummy spiders or edible eyes for playful fun.
Personally, I once made these with a hint of orange zest in the batter for a citrus-chocolate combo that was surprisingly addictive. You can get creative and still keep that spooky vibe intact.
Serving & Storage Suggestions
These spider web brownies are best served at room temperature so the white chocolate remains soft but set. Cut into small squares for party platters or Halloween lunchboxes.
Pair them with a glass of cold milk or a warm cup of spiced chai for a cozy treat. They also complement savory dishes like the grilled chimichurri shrimp skewers if you’re hosting a mixed menu.
Store leftovers in an airtight container at room temperature for up to 3 days. For longer storage, refrigerate up to a week or freeze individually wrapped brownies for up to 3 months. When reheating, bring to room temp or microwave briefly (about 10 seconds) to soften the white chocolate without melting it completely.
Over time, the spider web design might lose a bit of its crispness but the flavor only improves as the brownies settle—honestly, sometimes a day-old brownie tastes even better!
Nutritional Information & Benefits
Each serving of these spider web brownies (about 1/12th of the pan) contains approximately:
| Calories | 220 kcal |
|---|---|
| Fat | 12 g |
| Carbohydrates | 28 g |
| Protein | 3 g |
| Sugar | 20 g |
The use of unsalted butter and quality cocoa powder means you get antioxidants from the chocolate, and the eggs provide protein and help with satiety. This recipe isn’t low-calorie, but it’s a treat you can enjoy mindfully, especially when shared.
If you’re watching gluten intake, swapping to almond flour lowers carbs and adds healthy fats. Just note that white chocolate typically contains dairy and soy, so it’s not suitable for all allergy restrictions without careful substitution.
Conclusion
These perfect spider web brownies with white chocolate have been my little Halloween baking secret—that fun mix of spooky and sweet that makes the holiday special without stressing me out. Whether you’re a seasoned baker or just looking for a quick festive treat, this recipe welcomes your own twists and tweaks.
I love how easy it is to personalize and how it always gets smiles, no matter the crowd. If you’ve been hunting for a Halloween dessert that’s both impressive and straightforward, this one’s for you.
Give it a try, and don’t forget to share how your spider webs turned out—I’m curious to see your creative spins!
FAQs About Perfect Spider Web Brownies with White Chocolate
Can I make these brownies ahead of time?
Absolutely! Bake and decorate a day ahead, store in an airtight container at room temperature, and the flavors will meld nicely. Just avoid refrigeration if you want the white chocolate web to stay soft.
What’s the best way to melt white chocolate without burning it?
Use short 15-20 second bursts in the microwave, stirring well in between. Alternatively, melt over a double boiler on low heat, stirring frequently to prevent seizing.
Can I use milk chocolate or dark chocolate instead of white chocolate for the web?
You can, but the spider web effect won’t be as striking. White chocolate provides the sharp contrast that makes the design pop against the dark brownie base.
How do I fix cracked or uneven spider webs?
Make sure the brownies are completely cool before piping. Use a steady hand and don’t press too hard with the toothpick when dragging lines. Practice on parchment paper first if needed.
Are these brownies suitable for kids?
Yes! The spider web design is kid-friendly and fun to make together. Just watch the white chocolate piping step for little hands, or let them decorate with gummy spiders instead.
Pin This Recipe!

Perfect Spider Web Brownies Recipe with White Chocolate for Easy Halloween Treats

These fudgy brownies topped with a creamy white chocolate spider web are a quick and festive Halloween treat that’s both playful and comforting.
- Prep Time: 15 minutes
- Cook Time: 25 minutes
- Total Time: 40 minutes
- Yield: 12 servings 1x
- Category: Dessert
- Cuisine: American
Ingredients
- 1/2 cup (113 g) unsalted butter, melted
- 1 cup (200 g) granulated sugar
- 2 large eggs, room temperature
- 1 tsp pure vanilla extract
- 3/4 cup (95 g) all-purpose flour, sifted
- 1/2 cup (50 g) unsweetened cocoa powder, preferably Dutch-processed
- 1/4 tsp salt
- 1 cup (175 g) white chocolate chips or chunks, good quality
- 2 tbsp (30 ml) heavy cream
- Optional: black food gel or melted dark chocolate for spider accents
Instructions
- Preheat oven to 350°F (175°C). Line an 8×8 inch pan with parchment paper, leaving an overhang for easy removal.
- In a medium bowl, whisk melted butter and granulated sugar until combined and glossy. Add eggs one at a time, whisking well after each addition. Stir in vanilla extract.
- In a separate bowl, sift together flour, cocoa powder, and salt.
- Gently fold dry ingredients into wet mixture using a rubber spatula until just combined and smooth. Do not overmix.
- Pour batter into prepared pan and spread evenly. Tap pan lightly to remove air bubbles.
- Bake for 20-25 minutes. Check at 20 minutes with a toothpick; it should come out with a few moist crumbs but no wet batter.
- Cool brownies completely in the pan on a wire rack for at least 1 hour.
- Melt white chocolate with heavy cream in 20-second bursts in the microwave, stirring well after each until smooth and pourable.
- Pour white chocolate into a piping bag or plastic bag. Pipe concentric circles starting from the center of the brownies.
- Use a toothpick to drag lines from the center to the edges to create a spider web pattern.
- Optional: Add small spider shapes using black food gel or melted dark chocolate.
- Let the white chocolate set at room temperature or refrigerate for about 15 minutes before slicing.
- For clean cuts, dip a sharp knife in hot water, wipe dry, and slice.
Notes
Melt white chocolate slowly and stir often to avoid burning. Cool brownies completely before piping the web to prevent melting. Use a sharp knife dipped in hot water for clean cuts. Practice piping on parchment paper if needed.
Nutrition
- Serving Size: 1 brownie (1/12th of
- Calories: 220
- Sugar: 20
- Fat: 12
- Carbohydrates: 28
- Protein: 3
Keywords: Halloween brownies, spider web brownies, white chocolate brownies, easy Halloween treats, fudgy brownies, festive desserts


