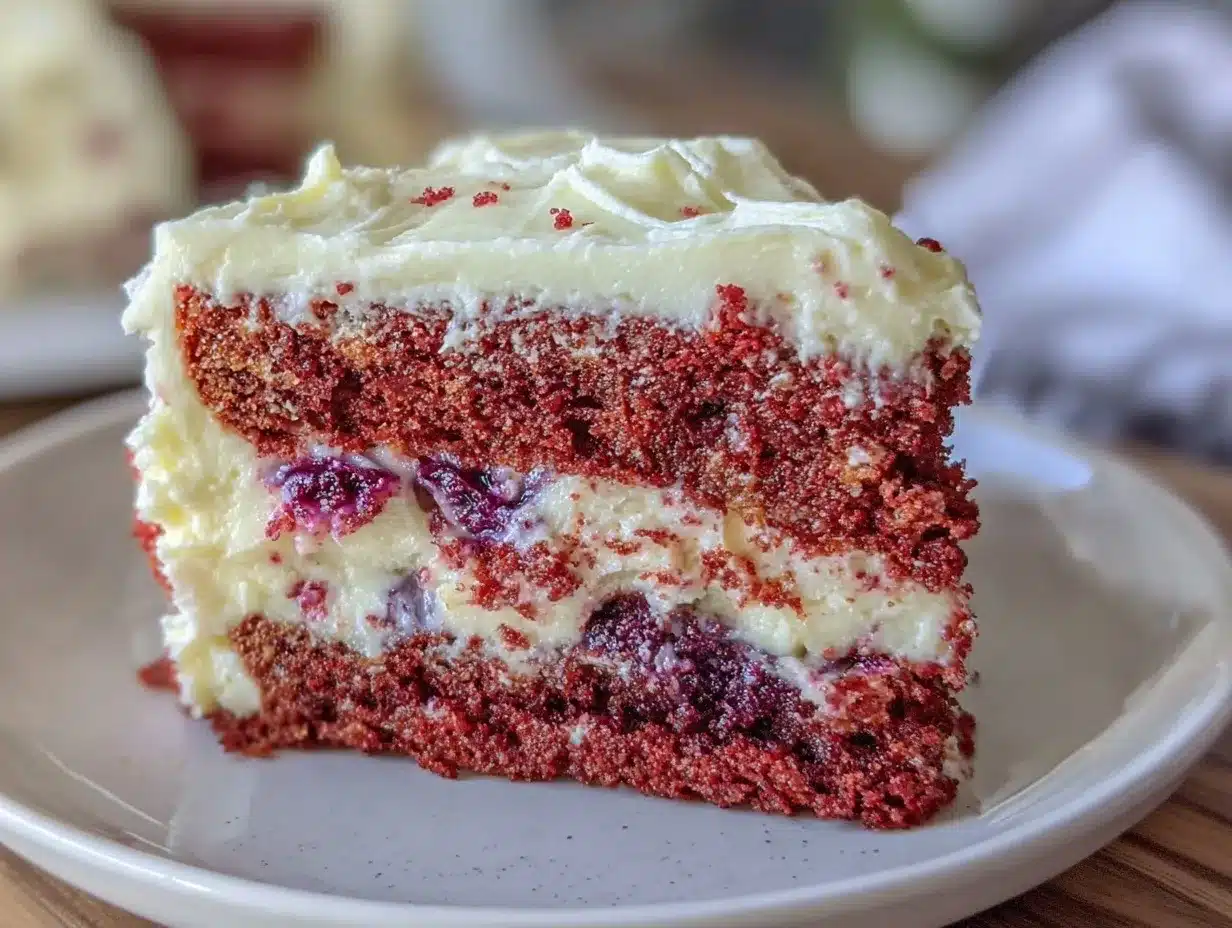
“Hey, can you bring a dessert for the Fourth of July picnic?” my friend texted me just a couple of days before the holiday. Honestly, I wasn’t feeling super inspired at first, but then I remembered this Perfect Flag Cake with Cream Cheese Frosting I had stumbled upon last summer. It was one of those happy accidents when I tried to whip up a quick celebratory cake and ended up with something that looked like a real showstopper. The vibrant red, white, and blue layers weren’t just for looks—they tasted as good as they appeared, with a rich cream cheese frosting tying it all together.
I kept thinking about how this cake had become my go-to for any celebration that needed a little extra sparkle—whether it was a casual backyard BBQ or a more formal gathering. The best part? It’s not fussy or intimidating at all, which is perfect for someone like me who’s not really a baker but loves a good party treat. I remember carefully layering the colors and feeling that quiet satisfaction when the knife cut through, revealing the perfect flag pattern inside. It’s kind of become a tradition now, and I’m pretty convinced this recipe deserves a spot in your celebration lineup too.
So here’s the thing: this recipe isn’t about complicated techniques or rare ingredients. It’s about getting that festive wow factor with simple steps and reliable results. If you’ve been on the lookout for a dessert that’s both crowd-pleasing and visually impressive, this Perfect Flag Cake with Cream Cheese Frosting might just be the answer you didn’t know you were searching for. And hey, if you ever want something equally comforting but savory for your next gathering, you might enjoy my cozy King Ranch chicken casserole—it’s a total crowd favorite.
Why You’ll Love This Recipe
After testing this Perfect Flag Cake recipe multiple times (yes, more than a few occasions!), I’m confident it ticks all the boxes for a dessert that’s easy, delicious, and festive. Here’s what makes it stand out:
- Quick & Easy: You can get this cake from start to finish in about 1 hour and 30 minutes, including baking and frosting—perfect for last-minute celebrations or casual weekend baking.
- Simple Ingredients: No need for fancy or hard-to-find items. The recipe uses pantry staples like all-purpose flour, granulated sugar, eggs, and classic food coloring. You probably already have everything ready to go.
- Perfect for Any Celebration: Whether it’s Independence Day, Memorial Day, a birthday party, or a casual potluck, this cake fits right in with its patriotic charm and crowd-pleasing flavor.
- Crowd-Pleaser: Kids and adults alike love this cake. The cream cheese frosting adds tangy sweetness that balances the moist, tender cake layers beautifully.
- Unbelievably Delicious: Beyond the looks, it’s the texture and flavor combo that makes this cake a winner. The cream cheese frosting is smooth and slightly tangy, complementing the soft, lightly sweetened cake layers perfectly.
This isn’t just another layered cake with food coloring slapped on. The secret is in the careful balance of the frosting’s richness and the cake’s tender crumb, plus the technique of layering the colors for that distinct flag pattern. Honestly, after trying several frosting recipes, I landed on this cream cheese version because it’s not overly sweet, which makes eating multiple slices feel like less of a sugar overload.
Plus, if you’re someone who enjoys a good sweet treat but prefers homemade, from-scratch recipes that don’t require a degree in baking, this is definitely for you. Want to pair it with something savory and just as easy? My easy cheesy beef and rice skillet dinner is another recipe I turn to when I want a no-fuss, satisfying meal after a day of baking.
What Ingredients You Will Need
This Perfect Flag Cake with Cream Cheese Frosting relies on simple, wholesome ingredients that come together to create a bold flavor and satisfying texture without any fuss.
- For the Cake Layers:
- 2 ½ cups (315g) all-purpose flour, sifted (for best results, I like using King Arthur brand)
- 2 ½ teaspoons baking powder
- ½ teaspoon salt
- 1 cup (226g) unsalted butter, softened (room temperature is key for smooth batter)
- 1 ¾ cups (350g) granulated sugar
- 4 large eggs, room temperature (helps with better mixing and rise)
- 1 tablespoon pure vanilla extract
- 1 cup (240ml) whole milk, room temperature
- Red and blue gel food coloring (gel works better than liquid for vibrant colors without thinning batter)
- For the Cream Cheese Frosting:
- 12 ounces (340g) cream cheese, softened
- ½ cup (113g) unsalted butter, softened
- 4 cups (480g) powdered sugar, sifted
- 1 teaspoon vanilla extract
- Pinch of salt (to balance sweetness)
The beauty here is the ingredient flexibility. If you want a dairy-free version, swap the milk for almond or oat milk, and use vegan cream cheese and plant-based butter. For a gluten-free twist, almond flour or a gluten-free blend can substitute the all-purpose flour, though the texture will be a bit different.
When picking food coloring, gels like AmeriColor or Wilton give that rich, bold color without messing with the batter consistency. I’ve tried natural colorings before, but for the flag’s vibrant red and blue, gels really deliver the wow factor.
Equipment Needed
- Two 8-inch (20 cm) round cake pans (non-stick or well-greased and floured)
- Mixing bowls (one large for the batter, one for frosting)
- Electric mixer or stand mixer (hand mixers work, but I prefer stand mixers for ease)
- Measuring cups and spoons
- Rubber spatula (for folding batter and scraping bowls)
- Offset spatula or butter knife (for frosting the cake evenly)
- Cooling racks (to cool the cake layers completely before frosting)
- Toothpicks or a skewer (to check cake doneness)
- Optional: Parchment paper (to line pans for easy removal)
If you don’t have cake pans, you can use square pans or even a 9×13-inch pan, but the layering will be different, and the flag effect might not be as sharp. For frosting, the offset spatula makes a huge difference in getting a smooth finish, but a butter knife works in a pinch.
Keep your mixer’s beaters clean and dry as you switch between mixing batter and whipping frosting—that little detail helps keep everything silky smooth. Budget-wise, you don’t need anything fancy to nail this cake; I’ve made it countless times with basic kitchen tools.
Preparation Method
- Preheat and prep: Set your oven to 350°F (175°C). Grease and flour your two 8-inch round cake pans, or line them with parchment paper circles to prevent sticking. This usually takes about 10 minutes.
- Mix dry ingredients: In a medium bowl, whisk together 2 ½ cups all-purpose flour, 2 ½ teaspoons baking powder, and ½ teaspoon salt. Set aside.
- Cream butter and sugar: In a large mixing bowl, beat 1 cup softened butter and 1 ¾ cups sugar with an electric mixer on medium speed until light and fluffy, around 3-5 minutes. This step is crucial—you want a pale, airy base for a tender crumb.
- Add eggs and vanilla: Add 4 large eggs, one at a time, beating thoroughly after each addition. Stir in 1 tablespoon vanilla extract. This helps with the cake’s flavor depth.
- Combine wet and dry: Add the dry ingredients in three additions alternating with 1 cup whole milk (starting and ending with flour mixture). Beat on low speed just until combined—overmixing can toughen the cake.
- Divide and color batter: Divide the batter evenly into three bowls. Leave one plain (white), add red gel food coloring to the second, and blue gel to the third. Start with a small amount of gel and mix well, adding more until you reach a vibrant color. The batter should be thick but spreadable.
- Layer the batter: Pour the blue batter into one cake pan, smoothing it evenly. Pour the white batter into the other pan. Bake both layers for 25-30 minutes, or until a toothpick inserted comes out clean. For the red layer, you’ll bake it separately in either a third pan or after the first two layers are done, depending on your oven space.
- Bake the red layer: Use the same pan as before, greased and floured. Bake the red batter at 350°F (175°C) for 25-30 minutes. Let all layers cool on racks completely before assembly.
- Make the cream cheese frosting: Beat 12 oz softened cream cheese and ½ cup butter until smooth and creamy. Gradually add 4 cups powdered sugar and 1 teaspoon vanilla extract. Mix until fluffy. Add a pinch of salt to balance sweetness.
- Assemble the cake: Place the blue layer on your serving plate. Spread a thin layer of frosting on top, then add the white layer, followed by more frosting. Finally, top with the red layer. Use the remaining frosting to cover the entire cake evenly. Smooth with an offset spatula, or create swirls for a rustic look.
- Chill and serve: Chill the cake for at least 30 minutes to let the frosting set. This step helps with cleaner slicing and flavor melding.
Remember, the key to that perfect flag look is letting the layers cool completely and handling them gently during assembly. I’ve learned the hard way that frosting a warm cake turns into a melty mess (not fun!).
Cooking Tips & Techniques
One tip I swear by: always use room temperature ingredients. Cold eggs or butter can make the batter lumpy or dense. I’ve made this cake on busy days, and taking the extra 30 minutes to bring ingredients to room temp makes all the difference.
When coloring the batter, gel food coloring is your friend. I once tried liquid color, and the layers turned out watery and less vibrant, which was disappointing. Also, mix the colors well but gently to avoid overworking the batter, which can toughen the cake.
Layering the cake can feel a little intimidating at first. My trick? Use an offset spatula to smooth layers and a light hand to spread frosting between them. Let the layers cool fully—this prevents sliding and keeps your flag pattern crisp.
For frosting, beat cream cheese and butter till silky before adding powdered sugar. If your frosting feels too thick, a teaspoon of milk can loosen it without losing texture. I’ve found that chilling the cake for about 30 minutes before slicing really helps with neat cuts and less crumbling.
Lastly, multitasking helps here. While the layers bake, whip up the frosting so you’re ready to assemble as soon as the cakes are cool. This way, you won’t be tempted to grab a store-bought frosting last minute (been there!).
Variations & Adaptations
- Flavor Swaps: Add a teaspoon of lemon zest to the batter for a subtle citrus twist, or try almond extract instead of vanilla for a nutty note.
- Dietary Adjustments: For a gluten-free version, swap all-purpose flour with a 1:1 gluten-free baking blend. Use dairy-free cream cheese and coconut oil or vegan butter to make the frosting vegan-friendly.
- Seasonal Twists: In summer, swap the red and blue food coloring layers with fresh pureed strawberries and blueberries mixed into the batter for a natural color and fresh flavor. Just be mindful this can make the batter looser, so add a tablespoon of flour if needed.
- Presentation Variations: Instead of a full flag design, make cupcakes with red, white, and blue swirled frosting for a fun, casual option. You can also try piping stars with the cream cheese frosting for a festive touch.
- Personal Favorite: I once tried adding a thin layer of homemade strawberry jam between the white and red layers—it gave an extra fruity surprise that guests loved.
Serving & Storage Suggestions
This Perfect Flag Cake tastes best served slightly chilled or at room temperature. I usually take it out of the fridge about 20 minutes before slicing to bring out the cream cheese frosting’s full flavor and softness.
Presentation-wise, it pairs nicely with a simple cup of coffee or iced tea, especially for summer barbecues or picnic-style gatherings. For a richer dessert spread, consider serving alongside some light fruit salad or a scoop of vanilla ice cream.
To store, wrap the cake tightly with plastic wrap or keep it in an airtight container in the refrigerator. It will stay fresh for up to 4 days. You can freeze the cake layers (unfrosted) wrapped well in plastic and foil for up to 2 months—just thaw overnight in the fridge before frosting.
Reheating isn’t usually recommended for cream cheese frosting cakes, but if you want a warm slice, leave it at room temperature longer or microwave a small piece for 10-15 seconds. I’ve noticed the flavors deepen after a day or two in the fridge, so sometimes waiting pays off.
Nutritional Information & Benefits
One slice (assuming 12 slices) of this Perfect Flag Cake with Cream Cheese Frosting contains approximately 350-400 calories, depending on portion size. It provides a good mix of carbohydrates and fats, with about 5 grams of protein per slice thanks to eggs and cream cheese.
The cream cheese adds calcium and vitamin A, while the eggs provide essential nutrients like vitamin D and choline. Using whole milk gives the cake a bit more richness and nutrition compared to skim options.
For those mindful of dietary needs, this recipe can be adjusted for gluten-free or vegan diets as mentioned earlier. Allergens include dairy, eggs, and gluten unless properly substituted.
From a wellness perspective, this cake is a perfect occasional treat that satisfies sweet cravings while still being homemade and free from artificial preservatives or excessive additives.
Conclusion
The Perfect Flag Cake with Cream Cheese Frosting isn’t just a dessert; it’s a little festive moment you can create with simple ingredients and a bit of care. Whether you’re marking a holiday, a birthday, or just want a cheerful cake to brighten the day, this recipe delivers every time. I love how customizable it is—you can tweak colors, flavors, and even dietary needs without losing the magic of that iconic flag design.
If you give it a try, don’t hesitate to make it your own. Maybe you’ll add a fruity layer, or swap frosting styles, or even turn it into cupcakes for easy sharing. I’d love to hear how your version turns out—sharing those little adaptations is part of what makes cooking so fun and connected.
Before I forget, if you’re looking for another crowd-pleasing party recipe to go alongside your celebration cake, my savory crack dip with ranch, bacon, and cheese is always a hit and super easy to throw together!
Thanks for sticking around—and here’s to many joyful celebrations with cake that’s just right.
FAQs
How can I make the flag colors more vibrant?
Use gel food coloring instead of liquid. Gels provide richer, more intense colors without thinning the batter. Add the coloring gradually until the desired shade is achieved.
Can I prepare this cake ahead of time?
Absolutely. You can bake the cake layers a day or two in advance and store them wrapped tightly in the fridge. Assemble and frost the cake on the day you plan to serve it for the freshest results.
What if I don’t have separate pans for each color layer?
You can bake each colored batter one at a time in the same pan, just be sure to clean and re-grease the pan between batches. Alternatively, bake in a larger pan and cut layers out, but the flag effect might be less defined.
Is the cake suitable for freezing?
Yes, you can freeze the unfrosted cake layers wrapped tightly in plastic wrap and foil for up to 2 months. Thaw in the refrigerator overnight before frosting.
How do I get a smooth finish on the cream cheese frosting?
Beat the cream cheese and butter thoroughly until silky before adding powdered sugar. Use an offset spatula and chill the cake for about 30 minutes after frosting to set it, which helps with cleaner slicing and smoother appearance.
Pin This Recipe!
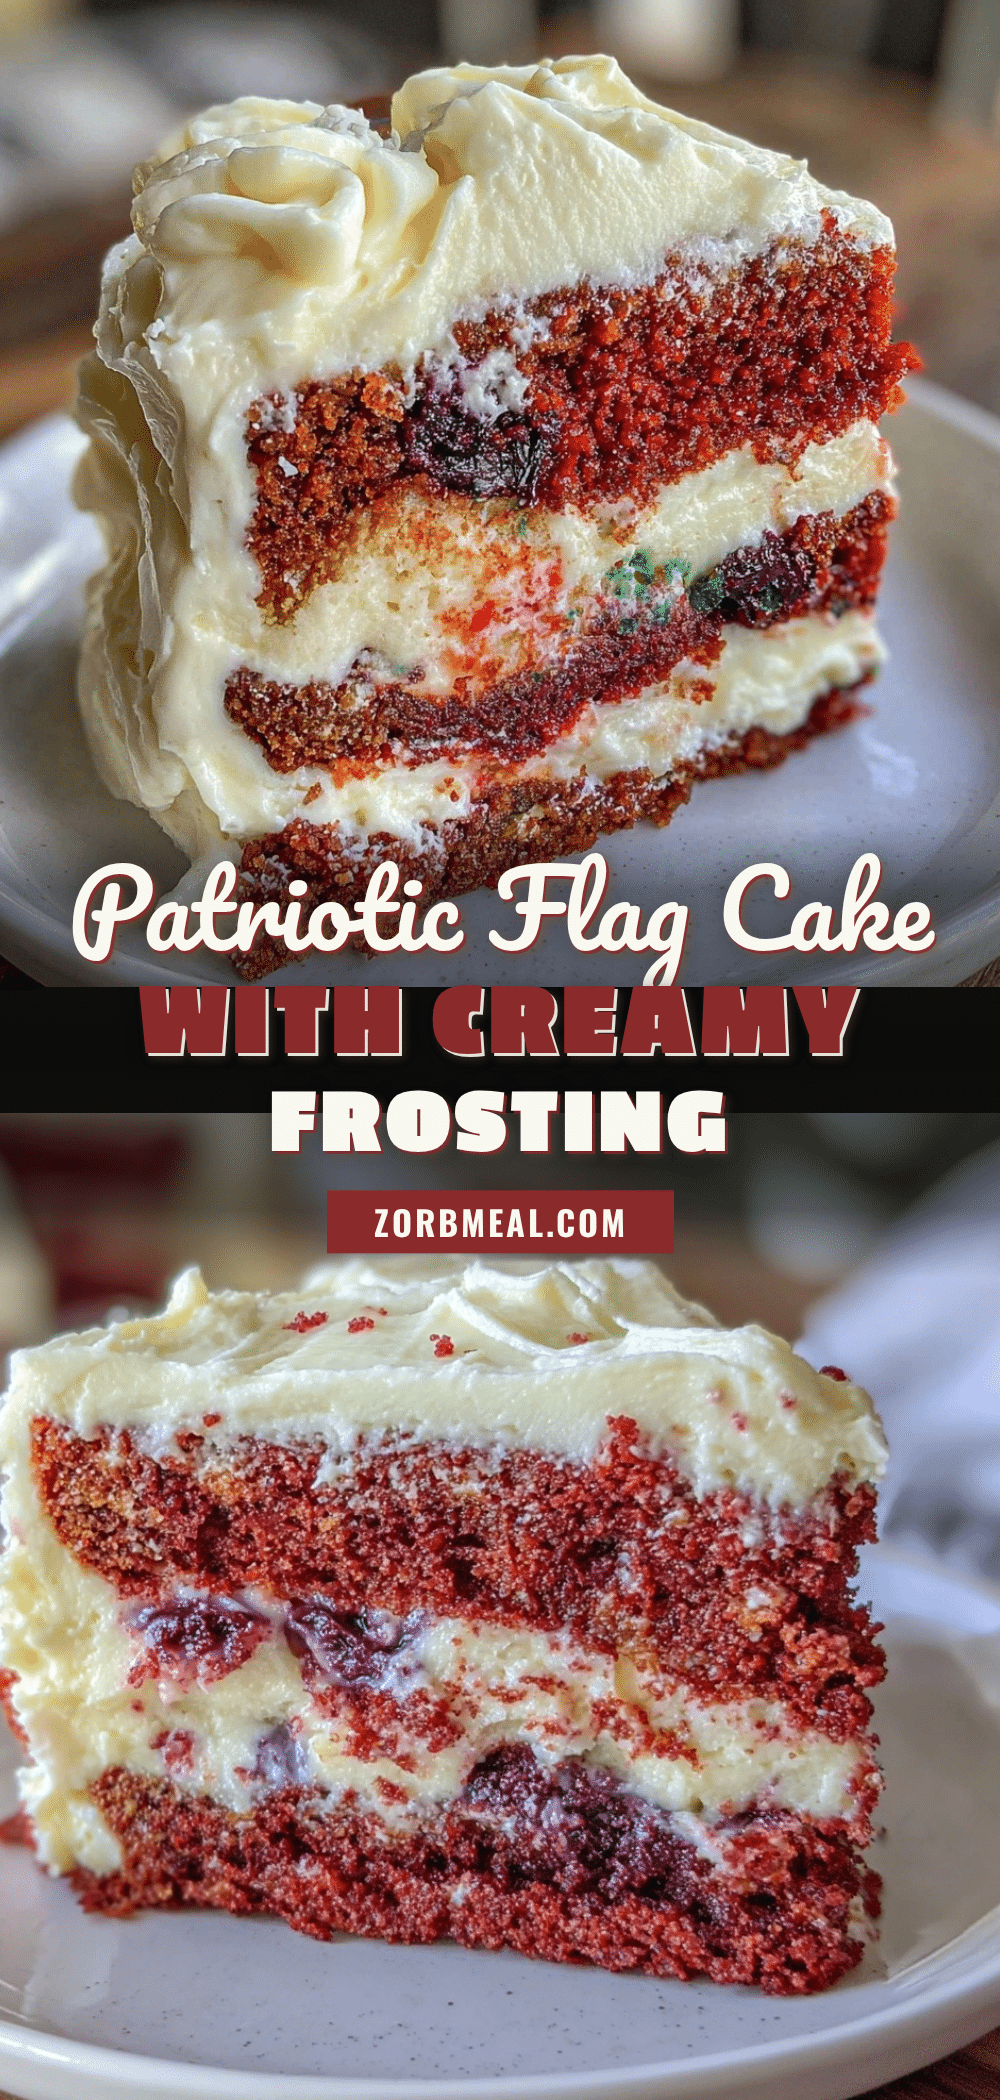
Perfect Flag Cake Recipe with Cream Cheese Frosting
A festive and easy-to-make layered cake with vibrant red, white, and blue colors, topped with a smooth cream cheese frosting. Perfect for celebrations like the Fourth of July.
- Prep Time: 30 minutes
- Cook Time: 1 hour
- Total Time: 1 hour 30 minutes
- Yield: 12 servings 1x
- Category: Dessert
- Cuisine: American
Ingredients
- 2 ½ cups (315g) all-purpose flour, sifted
- 2 ½ teaspoons baking powder
- ½ teaspoon salt
- 1 cup (226g) unsalted butter, softened
- 1 ¾ cups (350g) granulated sugar
- 4 large eggs, room temperature
- 1 tablespoon pure vanilla extract
- 1 cup (240ml) whole milk, room temperature
- Red and blue gel food coloring
- 12 ounces (340g) cream cheese, softened
- ½ cup (113g) unsalted butter, softened
- 4 cups (480g) powdered sugar, sifted
- 1 teaspoon vanilla extract
- Pinch of salt
Instructions
- Preheat oven to 350°F (175°C). Grease and flour two 8-inch round cake pans or line with parchment paper.
- In a medium bowl, whisk together flour, baking powder, and salt. Set aside.
- In a large bowl, beat softened butter and sugar with an electric mixer on medium speed until light and fluffy, about 3-5 minutes.
- Add eggs one at a time, beating thoroughly after each addition. Stir in vanilla extract.
- Add dry ingredients in three additions alternating with milk, starting and ending with flour mixture. Beat on low speed just until combined.
- Divide batter evenly into three bowls. Leave one plain (white), add red gel food coloring to the second, and blue gel to the third. Mix until vibrant colors are achieved.
- Pour blue batter into one cake pan and white batter into the other. Bake for 25-30 minutes or until a toothpick comes out clean.
- Bake the red batter separately in a greased and floured pan at 350°F (175°C) for 25-30 minutes. Cool all layers completely on racks.
- For the frosting, beat cream cheese and butter until smooth. Gradually add powdered sugar and vanilla extract, mixing until fluffy. Add a pinch of salt to balance sweetness.
- Assemble the cake by placing the blue layer on a serving plate, spreading a thin layer of frosting, then adding the white layer, more frosting, and finally the red layer. Cover the entire cake with remaining frosting and smooth with an offset spatula.
- Chill the cake for at least 30 minutes before slicing and serving.
Notes
Use room temperature ingredients for best results. Gel food coloring provides vibrant colors without thinning the batter. Let cake layers cool completely before frosting to avoid melting. Chill cake after frosting for cleaner slices. For dairy-free or gluten-free versions, substitute ingredients as suggested.
Nutrition
- Serving Size: 1 slice (1/12 of cak
- Calories: 375
- Sugar: 35
- Sodium: 250
- Fat: 18
- Saturated Fat: 10
- Carbohydrates: 50
- Fiber: 1
- Protein: 5
Keywords: flag cake, Fourth of July cake, cream cheese frosting, patriotic cake, layered cake, easy cake recipe, celebration dessert


