My sister swore she hated Jello. For years. Since we were kids fighting over the last orange slice in the bowl, she’d turn up her nose at anything jiggly. “It’s not real food,” she’d say, with that look she gets. Then last October, I made these Candy Corn Jello Cups for a Halloween get-together. I didn’t even tell her what they were. I just set out a tray of these little layered cups, all orange and yellow and white, looking like someone had bottled autumn. I walked back into the kitchen to grab the whipped cream, and when I came back, she was standing there, spoon halfway to her mouth, caught red-handed. “These are Jello?” she asked, and honestly, the look on her face was better than the dessert itself. Which is saying something, because these are pretty fantastic.
Maybe you’ve got someone like that in your life. A self-proclaimed dessert snob or a texture skeptic. Or maybe you’re just looking for a fun, no-bake treat that screams “fall” without requiring you to turn on the oven. These Candy Corn Jello Cups are it. They’re ridiculously easy, they look impressive on a buffet table, and they have this way of winning people over. I mean, who can resist those little stripes? Not my sister, apparently. And not anyone I’ve served them to since.
Why You’ll Love This Recipe
This isn’t just another layered dessert. After testing this recipe about four times (the first batch looked more like a science experiment gone wrong, let me tell you), I landed on a method that actually works. Every. Single. Time. Here is why this version is the one you’ll come back to:
- No-Bake & Simple: Comes together in about 20 minutes of active time. The hardest part is waiting for the layers to set.
- Kid-Friendly Fun: My nephews helped me layer the last batch. It was messy, but they were so proud of their “candy corn cups.”
- Perfect for Fall Gatherings: Halloween parties, Thanksgiving dinner, or a random Tuesday when you need a little seasonal cheer.
- Totally Customizable: Use sugar-free Jello, swap the milk for coconut cream, or add a boozy twist for the adults.
- That Texture Combo: The creamy, dreamy middle layer against the bright, fruity Jello layers is honestly addictive. You get the wobble and the smoothness all in one spoonful.
This recipe has been tested by my neighbor Carol (who is notorious for burning water) and my cousin Dave (a professional chef, so the opposite end of the spectrum). Both gave it two thumbs up. It’s the kind of dessert that makes you look like you tried way harder than you actually did. And honestly, isn’t that the best kind of recipe?
What Ingredients You Will Need
You probably already have most of these in your pantry. That’s the beauty of it. This recipe uses simple, store-bought ingredients to create something that feels special without any fancy grocery store runs.
- For the Orange Layer (Bottom):
- 1 box (3 oz) orange Jello (I prefer Jell-O brand for consistent results, but store brands work too)
- 1 cup boiling water
- 1/2 cup cold water
- For the Yellow Layer (Middle):
- 1 box (3 oz) lemon or yellow Jello (lemon gives a nice tang, but peach works great too)
- 1 cup boiling water
- 1/2 cup cold water
- For the White Layer (Top):
- 1 box (3 oz) unflavored gelatin (like Knox)
- 1/4 cup cold water (for blooming the gelatin)
- 1 can (14 oz) sweetened condensed milk (this is the magic ingredient for that creamy texture)
- 1 cup boiling water
- For Assembly:
- 2 tablespoons vegetable oil (for greasing the cups or a 9×13 pan)
- Non-stick cooking spray (an easier alternative to oiling by hand)
- Optional: Whipped cream and a few candy corns for garnish
Pro tip on the Jello: I’ve found that the generic brands sometimes set a little softer. If you’re in a hurry, stick with the name brand. Also, make sure your sweetened condensed milk is fresh. I once used a can that had been sitting in the back of my pantry for a year, and the white layer came out grainy. Learn from my mistakes, folks.
For the unflavored gelatin, don’t skip the “blooming” step. That’s where you sprinkle it over cold water and let it sit for 5 minutes before adding hot liquid. It prevents lumps and ensures a smooth, silky top layer.
Equipment Needed
You don’t need a professional kitchen for this one. Here’s what you’ll need:
- Small Bowls: Three microwave-safe bowls or large measuring cups for mixing each layer.
- Whisk: A small whisk works best to get the gelatin fully dissolved.
- 9×13 Glass Baking Dish: This is the easiest way to make the layers, then cut them into cubes. I prefer glass because you can see the layers.
- Sharp Knife: For cutting the set Jello into perfect little cubes.
- Spatula: A rubber spatula helps scrape every last bit of the creamy white layer.
- Plastic Cups or Serving Dish: Clear plastic cups (like 9 oz party cups) make the candy corn effect pop. You can also use small glass dessert cups.
- Measuring Cups and Spoons: For accuracy. Jello is forgiving, but precision helps.
If you don’t have a 9×13 dish, a loaf pan works too. The layers will just be taller, and you’ll get fewer but thicker cubes. I’ve used both, and honestly, the loaf pan version looks a bit more elegant if you’re serving adults at a dinner party.
Preparation Method
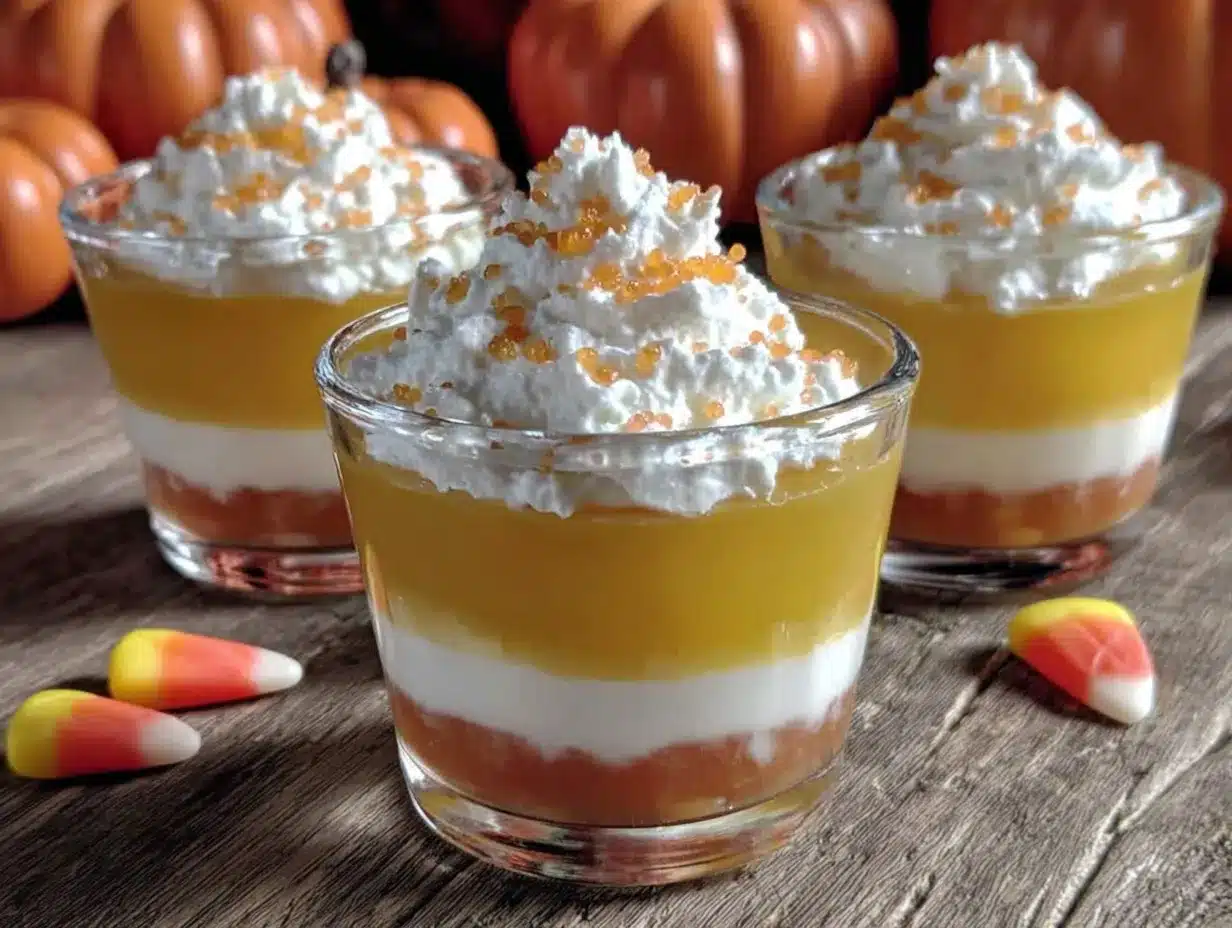
This is a patience game, but I promise it’s worth it. Plan for about 4 hours total, but most of that is waiting time. Here’s the step-by-step breakdown:
- Prep Your Pan: Lightly grease your 9×13 baking dish with vegetable oil or non-stick spray. This is crucial. If you skip this step, you’ll be chiseling Jello out of the pan like a miner. I learned this the hard way on attempt number two.
- Make the Orange Layer (Bottom): In a small bowl, empty the orange Jello packet. Add 1 cup of boiling water and whisk for 2 minutes until the powder is completely dissolved. Then stir in 1/2 cup of cold water. Pour this mixture into the bottom of your prepared 9×13 dish. Place it in the refrigerator and let it set for about 1 hour, or until firm to the touch. It should be solid, not jiggly-wobbly.
- Make the Yellow Layer (Middle): While the orange layer is setting, you can prep the yellow layer. In another bowl, empty the lemon Jello packet. Add 1 cup of boiling water, whisk for 2 minutes, then stir in 1/2 cup cold water. Set this bowl aside at room temperature. Do not refrigerate it yet. You want it to be cool but still liquid when you pour it over the set orange layer.
- Pour the Yellow Layer: Once the orange layer is completely firm, carefully pour the liquid yellow Jello over the top. Try to pour it gently over the back of a spoon to avoid disturbing the orange layer. Place the dish back in the fridge for another 1 hour, until the yellow layer is set.
- Make the White Layer (Top): This is the trickiest part, but you’ve got this. In a small bowl, pour 1/4 cup of cold water. Sprinkle the unflavored gelatin over the top. Let it sit for 5 minutes to bloom. It will look like a weird, spongy mass. That’s exactly what you want. In a separate larger bowl, pour the can of sweetened condensed milk. Add 1 cup of boiling water and whisk until smooth. Now, add the bloomed gelatin mixture to the hot milk mixture. Whisk vigorously for about 2 minutes until everything is completely dissolved and smooth. Let this cool on the counter for about 10 minutes. You don’t want it hot, or it will melt the yellow layer.
- Pour the White Layer: Once the yellow layer is firm, gently pour the white condensed milk mixture over the top. Use the back of a spoon trick again. Place the dish back in the fridge for at least 2 hours, or until the entire thing is completely firm. Overnight is even better.
- Cut and Serve: Once fully set, run a sharp knife around the edges of the dish. Dip the bottom of the dish in warm water for about 10 seconds to help loosen it. Invert the Jello onto a cutting board. Cut into 1-inch cubes. You’ll see the perfect candy corn stripes: orange on the bottom, yellow in the middle, white on top. Place a few cubes in each clear plastic cup. Garnish with whipped cream and a candy corn, if you’re feeling fancy.
One thing I noticed: if you pour the white layer while it’s still warm, it will melt the yellow layer and create a muddy, ugly middle. Let it cool to room temperature first. Trust me on this one.
Cooking Tips & Techniques
I’ve made this recipe about seven times now. Here is everything I wish I knew before I started:
- Patience is Not Optional: I know it’s tempting to rush, but each layer needs to be fully set before you add the next. If the layer underneath is still sticky, the colors will bleed into each other. You’ll end up with a tie-dye mess instead of clean candy corn stripes.
- The Spoon Trick: When pouring any layer over a set layer, always pour it over the back of a spoon. This disperses the liquid gently and prevents it from splashing and creating craters in the set Jello.
- Room Temperature is Your Friend: The yellow and white layers need to be cool before you pour them. If they’re hot, they’ll melt the layer below. I usually set the bowl on the counter for 10-15 minutes while I clean up.
- Don’t Over-Whisk the White Layer: Once the gelatin is dissolved, stop whisking. Over-whisking can incorporate air bubbles, which will look like little white dots in your final product. You want it smooth and creamy.
- Use a Sharp Knife: A dull knife will squish the Jello layers together. A sharp, thin-bladed knife (like a tomato knife) will give you clean, beautiful cuts. Run it under hot water and wipe it dry between cuts for the best results.
- My Biggest Failure: The time I tried to use fat-free sweetened condensed milk. Don’t do it. The texture came out rubbery and weird. The full-fat stuff is the only way to get that silky, creamy top layer.
Variations & Adaptations
This base recipe is a springboard. Here are some ways to make it your own:
- Boozy Adult Version: Replace the cold water in the orange and yellow layers with vodka or a citrus-flavored liquor. Use about 1/4 cup liquor and 1/4 cup water. The alcohol will make the Jello set a little softer, so add an extra 1/2 teaspoon of unflavored gelatin to each layer to compensate.
- Dairy-Free Option: Swap the sweetened condensed milk for a can of full-fat coconut cream. You’ll need to add about 1/2 cup of sugar to the white layer because coconut cream isn’t as sweet. The texture will be slightly different, but still delicious.
- Sugar-Free Version: Use sugar-free Jello packets and replace the sweetened condensed milk with a mixture of 1 cup of heavy cream and 1/2 cup of powdered erythritol (like Swerve). Heat the cream gently and dissolve the unflavored gelatin in it. This works surprisingly well for a low-carb treat.
- Layered in Cups: Instead of making a slab and cutting it, you can layer the Jello directly in individual cups. This is more work but looks stunning. You’ll need to pour a thin layer of orange in each cup, let it set, then yellow, then white. It takes forever, but the presentation is next-level.
- Different Flavors: Try using strawberry Jello instead of orange for a different color combo. Or use lime for a green layer and make “Christmas Tree” Jello cups. The candy corn colors are classic, but don’t be afraid to experiment.
My personal favorite variation is the boozy one. I made it for a Halloween party last year, and it was gone in twenty minutes. Just be careful with the alcohol content—these little cups pack a punch!
Serving & Storage Suggestions
These Jello cups are best served cold. Right out of the fridge, the layers are firm and the flavors are bright. I like to serve them in clear plastic cups so everyone can see the stripes. Add a dollop of whipped cream and a single candy corn on top for the full effect.
They pair beautifully with a warm drink. A cup of hot apple cider or a pumpkin spice latte balances the cool, creamy Jello perfectly. If you’re serving them at a party, set them out on a tray with some caramel apples or pumpkin cookies for a full fall dessert spread.
Storage Instructions:
- Refrigerator: Store the Jello cups covered in the refrigerator for up to 5 days. Keep them covered with plastic wrap or a lid so they don’t absorb fridge odors.
- Freezer: You can freeze these, but the texture changes. The Jello becomes icy and the creamy layer gets a bit grainy. I don’t recommend it for serving, but if you have leftovers you want to save for a smoothie or something, it works.
- Reheating: Do not reheat these. They are meant to be served cold. If you want to soften them slightly, let them sit at room temperature for 10 minutes before serving.
One thing I love about this recipe is that the flavors actually meld together after a day or two. The orange and lemon get a little more mellow, and the creamy layer becomes almost custard-like. If you can wait, make these a day ahead for the best results.
Nutritional Information & Benefits
Let’s be honest: this is a treat, not a health food. But here’s the breakdown if you’re curious:
Estimated per serving (1 cup with about 4 cubes):
- Calories: 210
- Fat: 5g
- Carbohydrates: 38g
- Protein: 4g
- Sugar: 35g
The good news? Gelatin is a great source of collagen, which is excellent for your skin, hair, and joints. So there’s that. The sweetened condensed milk adds calcium and protein, but also a fair amount of sugar. If you’re watching your sugar intake, the sugar-free version above is a great alternative.
This dessert is not gluten-free by default (Jello is usually gluten-free, but check the label), and it contains dairy. For a dairy-free option, see the variations above. It’s also nut-free and egg-free, making it a safe choice for many common allergies.
I personally love that this dessert is portion-controlled. The little cups make it easy to enjoy a sweet treat without going overboard. One cup is satisfying without being overwhelming. It’s all about balance, right?
Conclusion
These Perfect Candy Corn Jello Cups are more than just a pretty dessert. They’re a conversation starter, a nostalgia trip, and a way to bring a little bit of fall magic into your kitchen without a lot of fuss. My sister has since requested them for every family gathering. She even asked me to teach her how to make them, which is basically the highest compliment she can give.
I want you to try this recipe and make it your own. Maybe you’ll add a little extra vanilla to the white layer, or use peach Jello instead of lemon. Maybe you’ll serve them in little mason jars with a sprig of mint. Whatever you do, have fun with it. Cooking should feel like play, not a chore.
If you make these, I’d love to hear about it. Drop a comment below and tell me how they turned out. Did you try a different flavor combo? Did your kids help you layer them? Did you win over a Jello skeptic like my sister? Share your stories. And if you’re looking for another fun fall treat, check out my recipe for candy corn popcorn mix — it’s the perfect crunchy companion to these creamy cups.
Happy fall, friends. Go make something jiggly.
Frequently Asked Questions
Can I use sugar-free Jello for these cups?
Yes, absolutely. Sugar-free Jello works perfectly for the orange and yellow layers. Just follow the same instructions. For the white layer, you’ll need to use the alternative I mentioned in the variations section, as there isn’t a sugar-free sweetened condensed milk that works well in this recipe.
Why did my layers bleed into each other?
This usually happens when the bottom layer isn’t fully set before you pour the next one on top. Make sure each layer is completely firm to the touch, not just jiggly. It takes about an hour per layer in the fridge. Also, make sure the liquid you’re pouring is cool, not warm.
Can I make these in individual cups instead of a big pan?
Yes, but it takes longer. You’ll need to pour a thin layer of orange Jello into each cup, let it set (about 30 minutes), then add the yellow, let it set, then the white. It’s tedious but the presentation is beautiful. I’d recommend making a slab and cutting it for your first try.
How far in advance can I make these?
You can make these up to 3 days in advance. Store them covered in the refrigerator. The texture actually improves after a day because the flavors meld together. Just don’t add the whipped cream garnish until right before serving, or it will get watery.
My white layer came out lumpy. What went wrong?
That sounds like the gelatin didn’t dissolve fully. Make sure you bloom the gelatin in cold water first (let it sit for 5 minutes), then whisk it into hot liquid. If you add the gelatin directly to hot liquid without blooming, it can form lumps. Also, make sure your sweetened condensed milk isn’t old or expired.
Pin This Recipe!
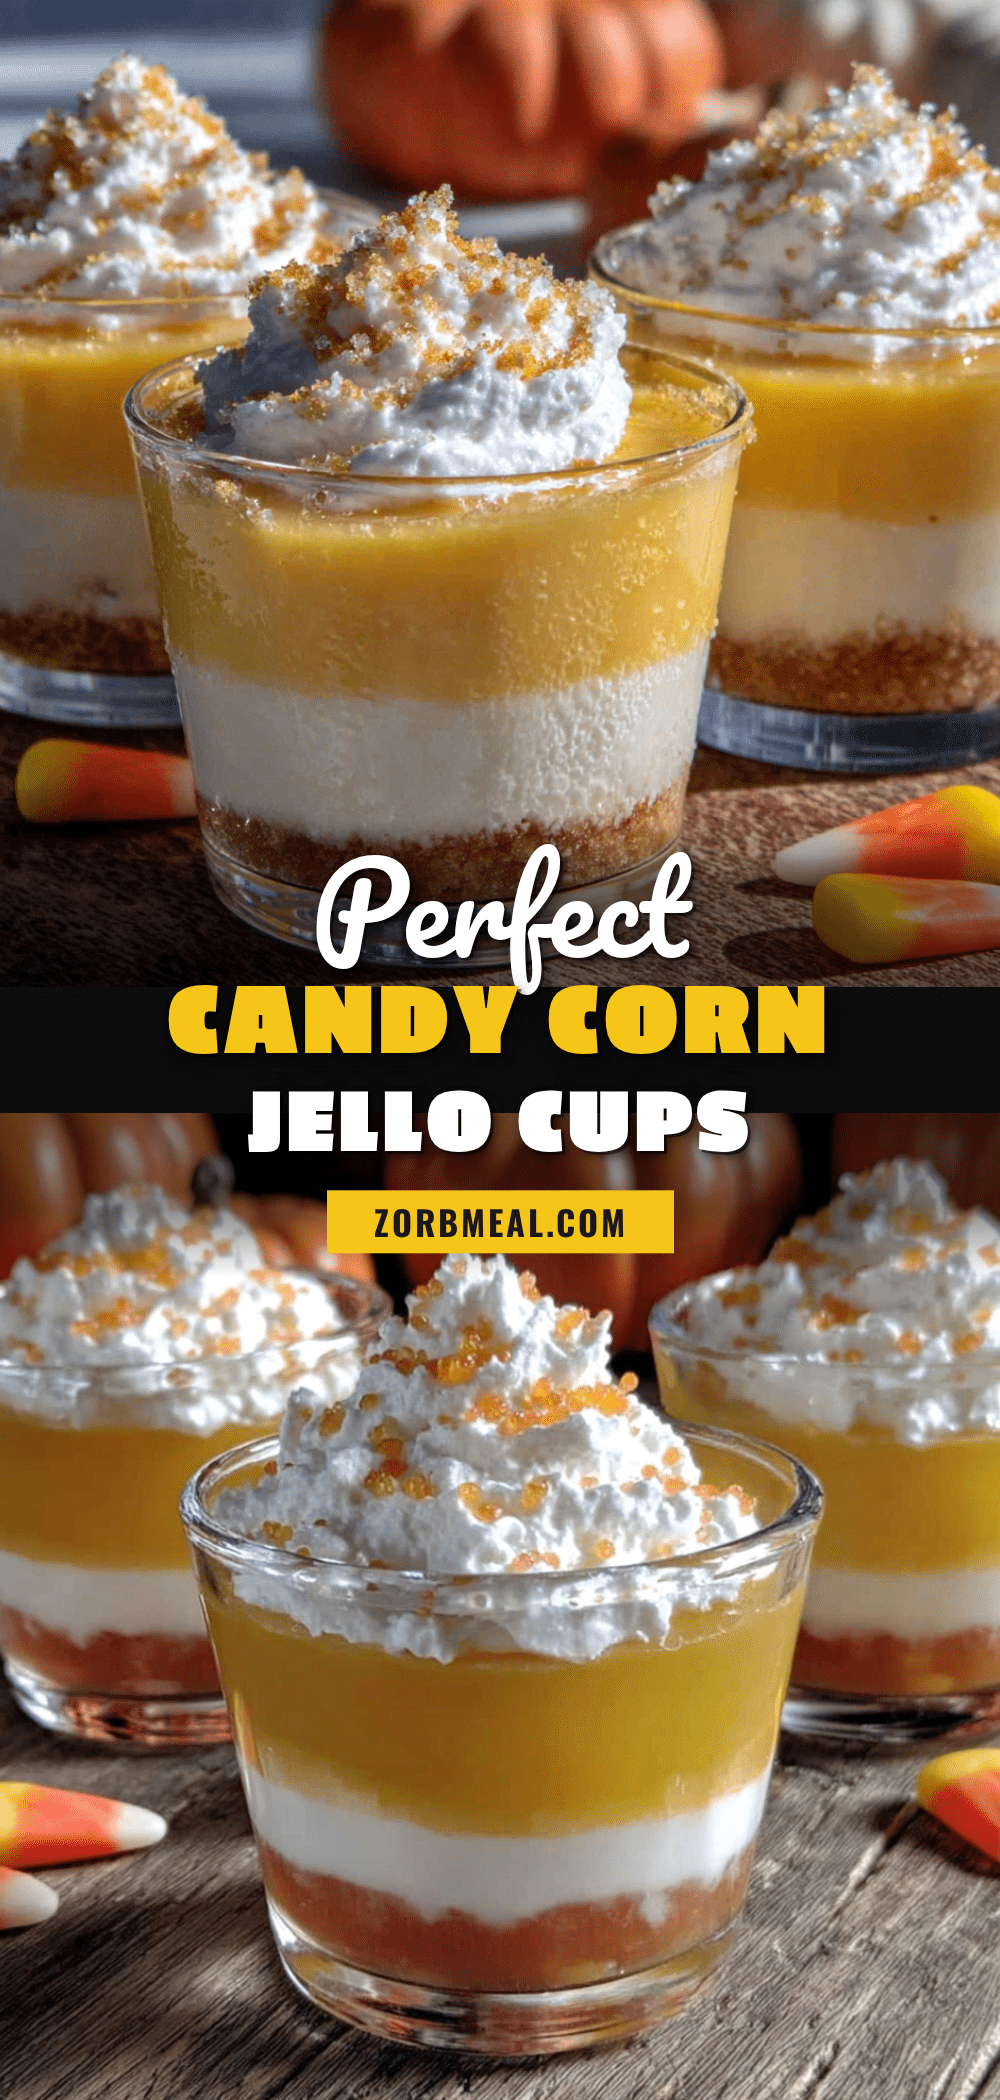
Perfect Candy Corn Jello Cups: An Easy Fall Dessert
These no-bake Candy Corn Jello Cups feature vibrant orange, yellow, and white layers that look like bottled autumn. They’re a fun, kid-friendly treat perfect for Halloween or any fall gathering, and they’re sure to win over even the biggest Jello skeptics.
- Prep Time: 20 minutes
- Cook Time: 0 minutes
- Total Time: 4 hours 20 minutes (includes setting time)
- Yield: 12 servings 1x
- Category: Dessert
- Cuisine: American
Ingredients
- 1 box (3 oz) orange Jello
- 1 cup boiling water
- 1/2 cup cold water
- 1 box (3 oz) lemon or yellow Jello
- 1 cup boiling water
- 1/2 cup cold water
- 1 box (3 oz) unflavored gelatin (like Knox)
- 1/4 cup cold water (for blooming the gelatin)
- 1 can (14 oz) sweetened condensed milk
- 1 cup boiling water
- 2 tablespoons vegetable oil (for greasing)
- Non-stick cooking spray (optional)
- Whipped cream and candy corns for garnish (optional)
Instructions
- Lightly grease a 9×13 baking dish with vegetable oil or non-stick spray.
- Make the orange layer: In a small bowl, empty the orange Jello packet. Add 1 cup boiling water and whisk for 2 minutes until dissolved. Stir in 1/2 cup cold water. Pour into the prepared dish and refrigerate for about 1 hour until firm.
- Make the yellow layer: In another bowl, empty the lemon Jello packet. Add 1 cup boiling water, whisk for 2 minutes, then stir in 1/2 cup cold water. Set aside at room temperature.
- Once the orange layer is firm, gently pour the yellow Jello over the back of a spoon onto the orange layer. Refrigerate for 1 hour until set.
- Make the white layer: In a small bowl, pour 1/4 cup cold water. Sprinkle unflavored gelatin over the top and let sit for 5 minutes to bloom. In a larger bowl, combine sweetened condensed milk and 1 cup boiling water; whisk until smooth. Add the bloomed gelatin and whisk vigorously for 2 minutes until fully dissolved. Let cool on the counter for 10 minutes.
- Once the yellow layer is firm, gently pour the white mixture over the back of a spoon onto the yellow layer. Refrigerate for at least 2 hours or until completely firm (overnight is best).
- To serve, run a sharp knife around the edges of the dish. Dip the bottom in warm water for 10 seconds to loosen. Invert onto a cutting board and cut into 1-inch cubes. Place cubes in clear plastic cups and garnish with whipped cream and a candy corn if desired.
Notes
Patience is key: each layer must be fully set before adding the next to prevent colors from bleeding. Pour liquids over the back of a spoon to avoid disturbing set layers. Let the white layer cool to room temperature before pouring to avoid melting the yellow layer. Use a sharp knife for clean cuts; run it under hot water and wipe dry between cuts. Full-fat sweetened condensed milk is essential for a silky texture.
Nutrition
- Serving Size: 1 cup (about 4 cubes
- Calories: 210
- Sugar: 35
- Sodium: 120
- Fat: 5
- Saturated Fat: 3
- Carbohydrates: 38
- Protein: 4
Keywords: candy corn, jello cups, fall dessert, Halloween dessert, no-bake dessert, layered jello


