Third time in as many days and I finally stopped fiddling with the banana-to-pumpkin ratio. The first loaf came out too dense, like a brick of fall flavor that needed a glass of milk just to get through. The second one? Too wet in the middle, that dreaded raw streak that makes you wonder if your oven is lying to you. But this third attempt, with the maple glaze dripping down the sides in slow motion, felt different. It held together when I sliced it. The crumb was tender but not fragile. And that smell, oh that sweet, spiced smell, hung around my kitchen for hours after the loaf was gone.
I wasn’t trying to invent anything groundbreaking here. I just had two sad bananas on the counter and half a can of pumpkin puree staring at me from the fridge. You know how it goes, you buy pumpkin for one recipe and then it sits there judging you every time you open the door. So I thought, why not combine them? Banana bread is already the most forgiving baked good on the planet, and pumpkin bread is basically fall in a loaf pan. Putting them together felt less like a recipe and more like a logical conclusion.
What surprised me was how the flavors played together. The banana brings this natural sweetness and moisture that pumpkin sometimes lacks, while the pumpkin adds that earthy depth and velvety texture that banana bread can miss. They complement each other in a way I didn’t expect, like they were always meant to share a pan. And the maple glaze? That was a happy accident. I was out of powdered sugar for a standard icing and reached for the maple syrup instead. Best mistake I’ve made in a while.
This is the kind of bread that makes you slow down. You slice it thick, pour yourself something warm to drink, and just sit there for a minute. It’s not fancy, but it feels special. And honestly, that’s the kind of recipe worth making three times in a row.
Why You’ll Love This Recipe
Let me tell you why this banana pumpkin bread is going to become your new fall favorite. I’ve tested this recipe enough times to know it works, and I’ve made enough mistakes along the way to know what to avoid.
- Perfectly Moist Every Time : The combination of banana and pumpkin creates a texture that stays tender for days. No dry crumb here, just soft, sliceable goodness that holds up beautifully.
- Simple Pantry Ingredients : You probably have most of these things already. Bananas, pumpkin puree, flour, sugar, eggs, and basic spices. No weird specialty items that you’ll use once and forget about.
- Fall Flavors Without the Fuss : This bread delivers all the cozy pumpkin spice vibes without needing a complicated technique. It’s straightforward, forgiving, and hard to mess up.
- That Maple Glaze Changes Everything : The glaze is simple, just maple syrup and powdered sugar, but it takes this bread from good to memorable. It adds a subtle sweetness and a beautiful finish that makes the loaf look bakery-worthy.
- Great for Gifting or Freezing : This bread travels well and freezes even better. Wrap it up, stick it in the freezer, and you have homemade treats ready for unexpected guests or lazy weekend mornings.
What makes this recipe different from other pumpkin breads is the banana. It adds a natural sweetness that lets you cut back on refined sugar, and it keeps the crumb soft without making it gummy. I’ve tried versions with just pumpkin and they always come out a bit dense. The banana lightens things up, adds moisture, and brings a subtle fruity note that balances the warm spices perfectly.
This is the kind of bread that makes you close your eyes after the first bite. It’s comfort food, simple and honest, the kind you want to share with people you care about.
What Ingredients You Will Need
This recipe uses simple, wholesome ingredients that work together to create something truly special. Most of these are pantry staples, which makes this bread perfect for those moments when you want to bake something but don’t want to make a special trip to the store.
- Bananas, ripe and mashed : You want bananas that are spotty and soft, the ones that look past their prime. They mash easily and provide natural sweetness and moisture. About 2 medium bananas will give you the right amount.
- Pumpkin puree : Use canned pumpkin puree, not pumpkin pie filling. The puree is just pumpkin with no added sugar or spices. I prefer Libby’s brand for consistent texture and flavor.
- All-purpose flour : Regular all-purpose flour works perfectly here. It gives the bread structure without making it tough. Spoon and level your flour for accurate measuring, don’t scoop directly from the bag.
- Granulated sugar : Regular white sugar adds sweetness and helps with browning. You can reduce it slightly if your bananas are very ripe and sweet.
- Brown sugar, packed : Light or dark brown sugar works. It adds moisture and a deeper flavor thanks to the molasses content. Dark brown sugar will give a richer taste.
- Baking soda : This is the main leavening agent. Make sure it’s fresh, baking soda loses potency over time and your bread won’t rise properly.
- Baking powder : A small amount helps with lift and creates a lighter crumb. Check the expiration date before using.
- Salt : Kosher or fine salt balances the sweetness and enhances all the flavors. Don’t skip it.
- Ground cinnamon : The backbone of the spice blend. It adds warmth and that classic fall aroma.
- Ground nutmeg : A little goes a long way. Freshly grated nutmeg is amazing if you have it, but ground works fine.
- Ground ginger : Adds a subtle warmth and complexity. It pairs beautifully with the pumpkin and banana.
- Ground cloves : Just a pinch, cloves are strong but they add that deep, spicy note that makes pumpkin bread taste complete.
- Eggs, room temperature : Room temperature eggs incorporate better into the batter and create a more even texture. Take them out of the fridge about 30 minutes before you start.
- Vegetable oil : Oil keeps this bread incredibly moist. Use a neutral oil like canola or avocado. Melted coconut oil also works if you prefer.
- Vanilla extract : Pure vanilla extract adds depth and rounds out the flavors. Imitation vanilla works in a pinch but the real stuff is better.
- Buttermilk : Buttermilk adds tenderness and a slight tang that balances the sweetness. If you don’t have buttermilk, you can make a quick substitute by adding a tablespoon of lemon juice or vinegar to regular milk and letting it sit for 5 minutes.
For the Maple Glaze:
- Powdered sugar : Also called confectioners’ sugar, this forms the base of the glaze. Sift it if it’s lumpy for a smooth finish.
- Pure maple syrup : Use real maple syrup, not pancake syrup. The flavor is much better and it makes a difference in the final taste. Grade A dark amber works great.
- Milk or cream : A small amount thins the glaze to the right consistency. Heavy cream makes it richer, milk keeps it lighter.
- Vanilla extract : A tiny splash adds another layer of flavor to the glaze.
Equipment Needed
You don’t need fancy equipment to make this bread, which is part of what makes it so approachable. Here’s what you’ll need:
- 9×5 inch loaf pan : Standard size works perfectly. If you use a different size, you’ll need to adjust the baking time.
- Mixing bowls : One large bowl for the dry ingredients and one for the wet ingredients.
- Whisk : For combining the dry ingredients and smoothing out the wet mixture.
- Spatula or wooden spoon : For folding everything together. A rubber spatula is my preference because it scrapes the bowl clean.
- Measuring cups and spoons : Accurate measuring makes a difference, especially with flour and baking soda.
- Parchment paper : Lining the pan makes removal so much easier. You can also grease the pan well if you don’t have parchment.
- Cooling rack : Allows air to circulate around the bread so it cools evenly and doesn’t get soggy on the bottom.
- Small bowl : For mixing the glaze.
If you don’t have a loaf pan, you can bake this in an 8×8 square pan, just check for doneness earlier since it will bake faster. A standard muffin tin also works, bake for about 18 to 20 minutes for muffins. I’ve made this bread in a well-seasoned cast iron skillet before and it came out great, just watch the edges so they don’t over-brown.
Preparation Method
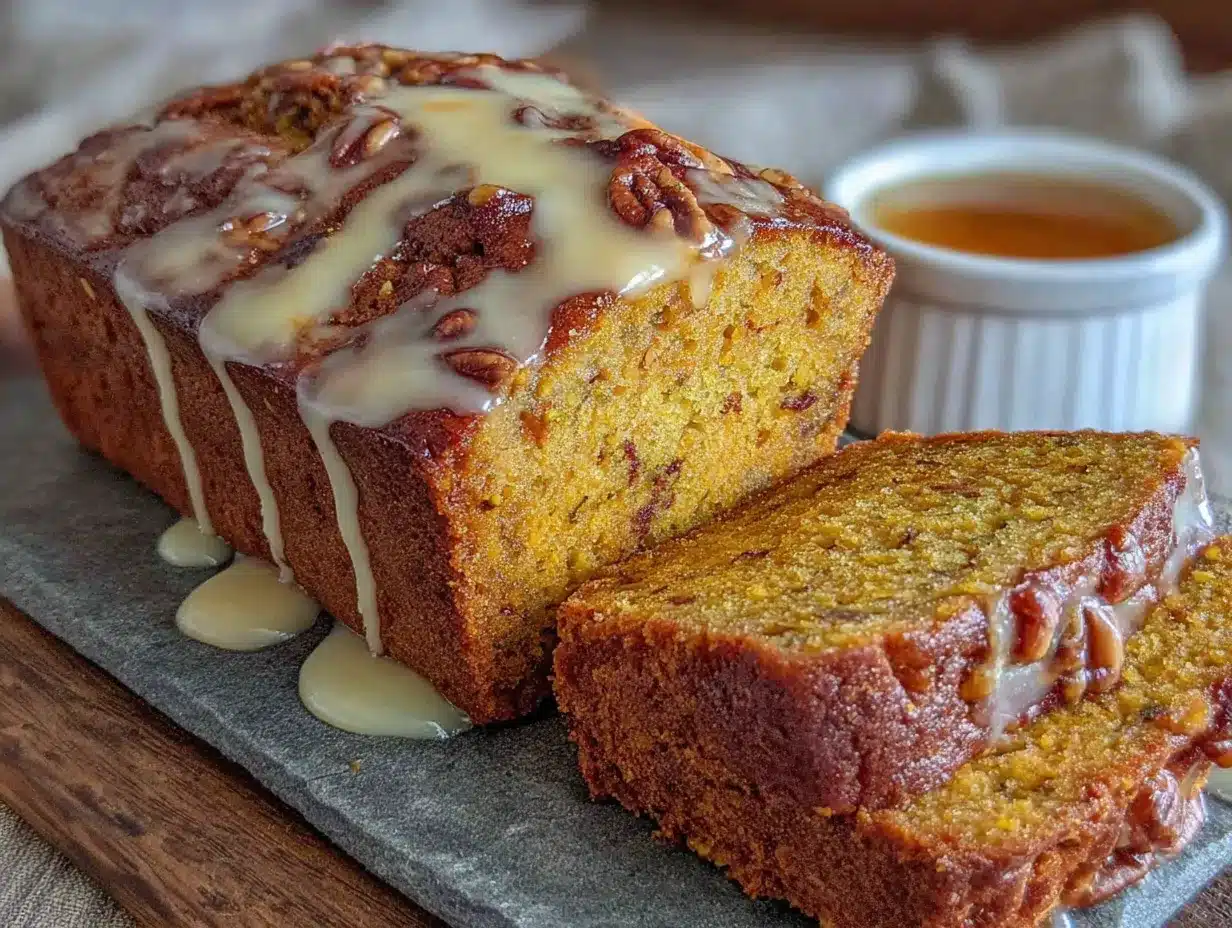
Let me walk you through this step by step. I’ve included all the little details I wish someone had told me when I first started making this bread.
Step 1: Preheat and Prepare
Preheat your oven to 350°F (175°C). Position the rack in the center of the oven. Grease your 9×5 inch loaf pan with butter or nonstick spray, then line it with a strip of parchment paper that hangs over the long sides. This creates handles that make lifting the bread out so much easier. Trust me on this one.
Step 2: Mash the Bananas
In a medium bowl, mash your ripe bananas with a fork until they’re mostly smooth with a few small lumps remaining. You want about 1 cup of mashed banana. Over-mashing can make the texture a bit gluey, so leave some tiny chunks for texture.
Step 3: Mix the Dry Ingredients
In a large bowl, whisk together 1 and ¾ cups (220g) all-purpose flour, 1 teaspoon baking soda, ½ teaspoon baking powder, ½ teaspoon salt, 1 teaspoon ground cinnamon, ½ teaspoon ground nutmeg, ¼ teaspoon ground ginger, and ⅛ teaspoon ground cloves. Whisking aerates the flour and distributes the spices evenly. Set this aside.
Step 4: Combine the Wet Ingredients
In another bowl, whisk together ½ cup (100g) granulated sugar and ½ cup (100g) packed brown sugar. Add 2 large eggs, room temperature, and whisk until smooth and slightly lighter in color, about 1 minute. Add ⅓ cup (80ml) vegetable oil, 1 teaspoon vanilla extract, and ½ cup (120ml) buttermilk. Whisk until everything is well combined.
Step 5: Add the Bananas and Pumpkin
Add the mashed bananas and 1 cup (240g) pumpkin puree to the wet ingredients. Whisk gently until incorporated. The mixture will look slightly lumpy from the banana, that’s fine. Don’t overmix at this stage.
Step 6: Combine Wet and Dry
Pour the wet ingredients into the bowl with the dry ingredients. Use a rubber spatula to fold everything together gently. Stir just until you no longer see streaks of flour. A few small lumps are okay, overmixing will make the bread tough. The batter should be thick but scoopable.
Step 7: Bake
Pour the batter into the prepared loaf pan and spread it evenly. Tap the pan on the counter a few times to release any air bubbles. Bake for 55 to 65 minutes, or until a toothpick inserted into the center comes out clean or with just a few moist crumbs. If the top is browning too quickly after 40 minutes, tent loosely with aluminum foil.
Step 8: Cool
Let the bread cool in the pan for 15 minutes. Then use the parchment handles to lift it out and transfer to a cooling rack. Cool completely before adding the glaze, about 1 to 2 hours. I know it’s tempting to glaze it warm, but it will just slide right off.
Step 9: Make the Glaze
In a small bowl, whisk together 1 cup (120g) powdered sugar, 2 tablespoons pure maple syrup, 1 to 2 tablespoons milk or cream, and ¼ teaspoon vanilla extract. Start with 1 tablespoon of milk and add more if needed. The glaze should be thick but pourable. Drizzle over the cooled bread and let it set for about 15 minutes before slicing.
Cooking Tips & Techniques
I’ve made this bread enough times to know where things can go wrong. Here are the tips I’ve collected through trial and error.
Don’t Overmix the Batter
This is the most common mistake. When you combine the wet and dry ingredients, mix just until the flour disappears. Overmixing develops gluten, which makes the bread tough and dense. You want a tender crumb, not a chewy one. I speak from experience, my first loaf was tough because I kept stirring to get it perfectly smooth.
Check Your Oven Temperature
Ovens run hot or cold more often than you’d think. An oven thermometer is a cheap investment that pays off. If your bread is browning too fast on the outside but still raw in the middle, your oven might be running hot. Tent with foil and reduce the temperature by 25 degrees.
Room Temperature Ingredients Matter
Cold eggs and cold buttermilk can make the batter lumpy and affect how the bread rises. Take them out of the fridge 30 minutes before you start. If you forget, place the eggs in a bowl of warm water for 5 minutes and microwave the buttermilk for 10 seconds.
Test for Doneness Properly
Insert a toothpick into the center of the bread, not the edge. If it comes out with wet batter, it needs more time. If it comes out clean, it’s done. If it comes out with a few moist crumbs, that’s perfect. The bread will continue to cook slightly from residual heat after you take it out.
Let It Cool Completely
I know the smell is intoxicating and you want to slice into it immediately. But cutting warm bread will give you a gummy, messy slice. The structure needs time to set. Patience pays off here.
For a similar approach to quick breads that stay moist and tender, check out this moist lemon raspberry pound cake that uses the same folding technique for a perfect crumb.
Variations & Adaptations
This recipe is flexible, and I’ve tried several variations that turned out great. Here are some ways to make it your own.
Gluten-Free Version
Substitute the all-purpose flour with a good gluten-free baking blend that contains xanthan gum. I’ve had success with King Arthur Measure for Measure flour. The texture will be slightly more delicate, but the flavor is still wonderful.
Dairy-Free Option
Use a dairy-free milk like almond or oat milk mixed with a teaspoon of apple cider vinegar to replace the buttermilk. Coconut oil works instead of vegetable oil. The bread will be a bit less tender but still delicious.
Add Mix-Ins
Fold in ½ cup of chocolate chips, chopped walnuts, or pecans before baking. The chocolate version is dangerously good. I once added butterscotch chips and it tasted like a caramel apple in bread form.
Spice It Up
Add a pinch of cardamom or allspice for a different flavor profile. Pumpkin spice blend works if you have it on hand, use about 2 teaspoons instead of the individual spices.
Make It Muffins
Divide the batter into a lined muffin tin and bake at 350°F for 18 to 22 minutes. You’ll get about 12 muffins. They freeze beautifully and are perfect for grab-and-go breakfasts.
Skip the Glaze
The bread is fantastic on its own without the glaze. Sprinkle the top with coarse sugar before baking for a crunchy crust if you want something special without the extra sweetness.
If you enjoy baking with seasonal flavors, you might also like this rustic nectarine galette with almond filling for another take on fruit-forward baking.
Serving & Storage Suggestions
This bread shines at room temperature, but it’s also wonderful warmed up. Here’s how I like to serve and store it.
Serving
Slice the bread thick, about 1 inch slices, and serve at room temperature. For an extra treat, warm a slice in the microwave for 15 seconds and spread a little butter on top. The warmth melts the glaze slightly and makes everything feel cozier. It’s perfect with a cup of coffee, tea, or a glass of cold milk.
Presentation
Place the glazed loaf on a wooden cutting board or a simple cake stand. Sprinkle a few chopped pecans or a dusting of cinnamon on top for a finished look. It makes a beautiful centerpiece for a brunch table or a thoughtful homemade gift wrapped in parchment and tied with twine.
Storage
Store the bread in an airtight container at room temperature for up to 4 days. If you’ve already glazed it, place a piece of parchment paper between the bread and the container lid to prevent the glaze from sticking. The bread actually gets better on day two as the flavors meld together.
Freezing
This bread freezes beautifully. Wrap the cooled, unglazed loaf tightly in plastic wrap, then in a layer of aluminum foil. Freeze for up to 3 months. When you’re ready to enjoy it, thaw overnight in the refrigerator, bring to room temperature, then glaze and serve. You can also freeze individual slices for quick treats.
Reheating
For a warm slice, microwave for 15 to 20 seconds. If you want the edges to crisp up slightly, pop a slice in a toaster oven at 300°F for about 5 minutes. The glaze will get a bit melty and it’s absolutely wonderful.
Nutritional Information & Benefits
Here’s an approximate nutritional breakdown for one slice of this bread, assuming 10 slices per loaf with the glaze included.
| Nutrient | Amount per Slice |
|---|---|
| Calories | 285 |
| Total Fat | 9g |
| Saturated Fat | 1.5g |
| Cholesterol | 35mg |
| Sodium | 280mg |
| Total Carbohydrates | 48g |
| Dietary Fiber | 2g |
| Sugars | 30g |
| Protein | 4g |
The bananas and pumpkin provide vitamin A, vitamin C, and potassium. Pumpkin is rich in beta-carotene, which supports eye health and immune function. The cinnamon and ginger offer anti-inflammatory benefits. This bread is a treat, but it has some redeeming qualities that make it feel a little less indulgent.
For a lower-sugar version, reduce the granulated sugar to ⅓ cup and use very ripe bananas for natural sweetness. The texture will be slightly less tender but still delicious.
Conclusion
This banana pumpkin bread with maple glaze is the kind of recipe that becomes a staple. It’s forgiving enough for beginners, interesting enough for experienced bakers, and delicious enough for everyone in between. The combination of banana and pumpkin creates something that feels familiar but new, like a classic you’ve just discovered.
I love how this bread makes my kitchen smell like fall, even in the middle of summer. I love that I can make it with ingredients I already have. And I really love that maple glaze, that sweet, sticky finish that makes each slice feel like a special occasion.
Try this recipe and make it your own. Add nuts if you like them, skip the glaze if you don’t want the extra sweetness, or throw in some chocolate chips because why not. The best recipes are the ones that adapt to you.
I’d love to hear how yours turns out. Leave a comment below and let me know if you tried any variations. Share a photo if you’re proud of your loaf, I always love seeing what you create. Happy baking, friends.
Frequently Asked Questions
Can I use fresh pumpkin instead of canned?
Yes, you can use fresh pumpkin puree. Roast a small sugar pumpkin until tender, scoop out the flesh, and blend until smooth. Just be aware that fresh pumpkin has more water content than canned, so you may need to drain it slightly by pressing it through a fine mesh strainer or patting it dry with paper towels. Too much moisture can make the bread dense and gummy.
Why did my bread sink in the middle?
A sunken middle usually means the bread was underbaked or the oven temperature was too low. Make sure your oven is fully preheated and use an oven thermometer to verify the temperature. Also, check that your baking soda and baking powder are fresh, old leavening agents lose their power and the bread won’t rise properly. Bake until a toothpick comes out clean from the center.
Can I make this bread without eggs?
You can try substituting each egg with a flax egg, 1 tablespoon ground flaxseed mixed with 3 tablespoons water, let it sit for 5 minutes to thicken. The texture will be slightly denser and less tender, but it will still taste good. Applesauce also works as an egg substitute, use ¼ cup per egg, but reduce the sugar slightly since applesauce adds sweetness.
How do I know when the bread is fully baked?
Insert a wooden toothpick or a thin skewer into the very center of the bread. If it comes out clean or with just a few moist crumbs attached, it’s done. If it comes out with wet batter, bake for another 5 to 10 minutes and check again. The top should be golden brown and spring back lightly when touched. The internal temperature should reach about 200°F to 205°F if you have an instant-read thermometer.
Can I double this recipe?
Absolutely. Double all the ingredients and bake in two separate loaf pans. You can also bake it in a larger pan, but you’ll need to adjust the baking time. A 9×13 pan will bake faster, start checking at 35 minutes. Don’t try to bake it all in one giant loaf, it won’t cook through evenly and you’ll end up with a burnt exterior and raw center.
Pin This Recipe!
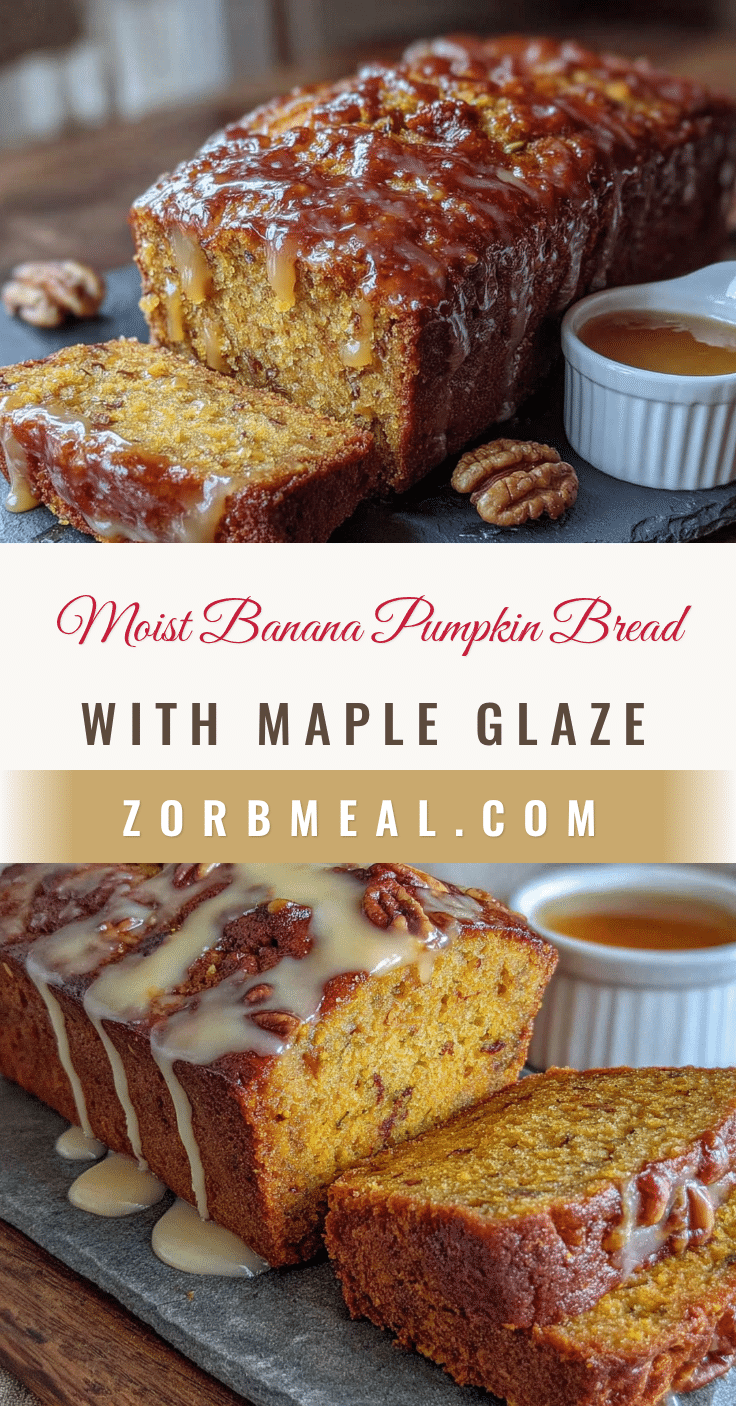
Moist Banana Pumpkin Bread with Easy Maple Glaze
This banana pumpkin bread combines ripe bananas and pumpkin puree for a perfectly moist, tender loaf with warm fall spices. Topped with a simple maple glaze, it’s an easy, comforting treat that’s perfect for breakfast, snacking, or gifting.
- Prep Time: 15 minutes
- Cook Time: 55 minutes
- Total Time: 1 hour 10 minutes
- Yield: 10 servings 1x
- Category: Dessert
- Cuisine: American
Ingredients
- 1 and ¾ cups (220g) all-purpose flour
- 1 teaspoon baking soda
- ½ teaspoon baking powder
- ½ teaspoon salt
- 1 teaspoon ground cinnamon
- ½ teaspoon ground nutmeg
- ¼ teaspoon ground ginger
- ⅛ teaspoon ground cloves
- ½ cup (100g) granulated sugar
- ½ cup (100g) packed brown sugar
- 2 large eggs, room temperature
- ⅓ cup (80ml) vegetable oil
- 1 teaspoon vanilla extract
- ½ cup (120ml) buttermilk
- 1 cup mashed ripe bananas (about 2 medium bananas)
- 1 cup (240g) pumpkin puree
- For the Maple Glaze:
- 1 cup (120g) powdered sugar
- 2 tablespoons pure maple syrup
- 1 to 2 tablespoons milk or cream
- ¼ teaspoon vanilla extract
Instructions
- Preheat your oven to 350°F (175°C). Grease a 9×5 inch loaf pan and line with parchment paper, leaving overhang on the long sides.
- In a medium bowl, mash ripe bananas with a fork until mostly smooth with a few small lumps. Set aside.
- In a large bowl, whisk together flour, baking soda, baking powder, salt, cinnamon, nutmeg, ginger, and cloves.
- In another bowl, whisk together granulated sugar and brown sugar. Add eggs and whisk until smooth and slightly lighter in color, about 1 minute. Add vegetable oil, vanilla extract, and buttermilk; whisk until well combined.
- Add mashed bananas and pumpkin puree to the wet ingredients; whisk gently until incorporated.
- Pour the wet ingredients into the dry ingredients. Fold with a rubber spatula just until no streaks of flour remain. Do not overmix.
- Pour batter into the prepared loaf pan and spread evenly. Tap the pan on the counter a few times to release air bubbles.
- Bake for 55 to 65 minutes, or until a toothpick inserted into the center comes out clean or with a few moist crumbs. If browning too quickly after 40 minutes, tent loosely with foil.
- Let the bread cool in the pan for 15 minutes, then lift out using parchment handles and transfer to a cooling rack. Cool completely before glazing, about 1 to 2 hours.
- For the glaze: In a small bowl, whisk together powdered sugar, maple syrup, 1 tablespoon milk or cream, and vanilla extract. Add more milk if needed to reach a thick but pourable consistency. Drizzle over cooled bread and let set for about 15 minutes before slicing.
Notes
For best results, use very ripe bananas (spotty and soft). Room temperature eggs and buttermilk help create a tender crumb. Do not overmix the batter to avoid a tough bread. The bread can be frozen unglazed for up to 3 months. For a dairy-free version, use almond or oat milk with a teaspoon of apple cider vinegar to replace buttermilk, and coconut oil instead of vegetable oil.
Nutrition
- Serving Size: 1 slice
- Calories: 285
- Sugar: 30
- Sodium: 280
- Fat: 9
- Saturated Fat: 1.5
- Carbohydrates: 48
- Fiber: 2
- Protein: 4
Keywords: banana pumpkin bread, pumpkin banana bread, maple glaze, fall baking, quick bread, moist banana bread, pumpkin spice bread


