I was standing in line at the hardware store—of all places—waiting to return a paint sprayer that I absolutely did not know how to use, when the woman in front of me turned around and started talking about turkey leftovers. Not in a complaining way, either. She was genuinely excited. “You know what I do with mine?” she asked, and before I could even answer, she was describing these adorable little pot pies she makes for her annual Friendsgiving. She told me she got tired of the big, heavy casserole dishes that nobody finishes. So she started making them in individual ramekins. Honestly, I almost forgot about the paint sprayer. I stood there, holding my return receipt, listening to her describe how the pastry gets all golden and flaky around the edges, and how each person gets their own little pie with that perfect crispy top. I mean, who expects cooking advice from a stranger in the hardware aisle? But there I was, completely hooked. I scribbled her method on the back of my receipt, and I’ve been making these Friendsgiving Mini Turkey Pot Pies ever since. Let me tell you—this is the kind of recipe that turns a simple gathering into something everyone remembers. And the best part? Each person gets their own. No fighting over the last piece of crust.
Why You’ll Love This Recipe
These mini turkey pot pies are the perfect solution for using up leftover turkey, but they’re so good you might find yourself roasting a turkey just to make them. I’ve tested this recipe about six times now, tweaking the filling and the crust ratio until it was just right. Here’s why I think you’re going to love them too:
- Quick & Easy: Comes together in under 45 minutes using leftover turkey and store-bought pie crust. Perfect for a post-Thanksgiving gathering when you’re tired but still want something impressive.
- Simple Ingredients: No fancy grocery trips needed. You probably have most of these ingredients in your pantry and fridge right now—frozen veggies, butter, flour, chicken broth.
- Perfect for Friendsgiving: Individual servings mean everyone gets their own perfectly portioned pie. No slicing, no serving dishes to pass around. Just grab your ramekin and dig in.
- Crowd-Pleaser: Kids love the cute individual size, and adults appreciate the classic comfort food flavor. I’ve never had leftovers of these, and I’ve made them for groups as small as four and as large as twelve.
- Unbelievably Delicious: The filling is creamy and savory with tender chunks of turkey and vegetables, all wrapped in a buttery, flaky crust. That first bite—when the steam rises and the crust shatters—is pure magic.
What makes this recipe different from all the other pot pie recipes out there? It’s the way the filling comes together. I use a technique where you let the flour and butter cook together for just a minute longer than usual, which gives the gravy a deeper, nuttier flavor. And instead of just dumping in frozen vegetables, I sauté them first to bring out their sweetness. It’s a small extra step, but honestly, it makes a huge difference. This isn’t just another version of turkey pot pie—it’s the best version.
These little pies are the kind of food that makes you close your eyes after the first bite. It’s comfort food reimagined—faster and more personal, but with the same soul-soothing satisfaction. Perfect for impressing your Friendsgiving guests without spending all day in the kitchen.
What Ingredients You Will Need
This recipe uses simple, wholesome ingredients to deliver bold flavor and satisfying texture without the fuss. Most of these are pantry staples, especially if you’ve just hosted a Thanksgiving dinner.
For the Filling
- Cooked turkey, diced – 3 cups (about 450g). Leftover dark and white meat both work great. I actually prefer a mix of both for the best texture.
- Unsalted butter – 4 tablespoons (56g). Adds richness and helps create that silky roux base.
- Yellow onion, diced – 1 medium (about 150g). You could use a white onion too, but yellow gives a slightly sweeter flavor.
- Carrots, diced – 2 medium (about 150g). I like to dice them small so they cook quickly and fit nicely in each mini pie.
- Celery stalks, diced – 2 medium (about 100g). Adds that classic aromatic base.
- Frozen peas – ½ cup (75g). No need to thaw them first—they’ll cook perfectly in the hot filling.
- All-purpose flour – ⅓ cup (42g). This thickens the gravy. I’ve tried cornstarch, but flour gives a creamier texture.
- Chicken broth – 1½ cups (355ml). Use low-sodium so you can control the salt level. I recommend Swanson or Kitchen Basics for consistent flavor.
- Whole milk – ½ cup (120ml). Adds creaminess. You can substitute with half-and-half for an even richer filling.
- Fresh thyme leaves – 1 teaspoon (about 4 sprigs). Dried thyme works too, but use only ½ teaspoon.
- Salt – 1 teaspoon (6g), plus more to taste.
- Black pepper – ½ teaspoon (2g), freshly ground.
For the Crust
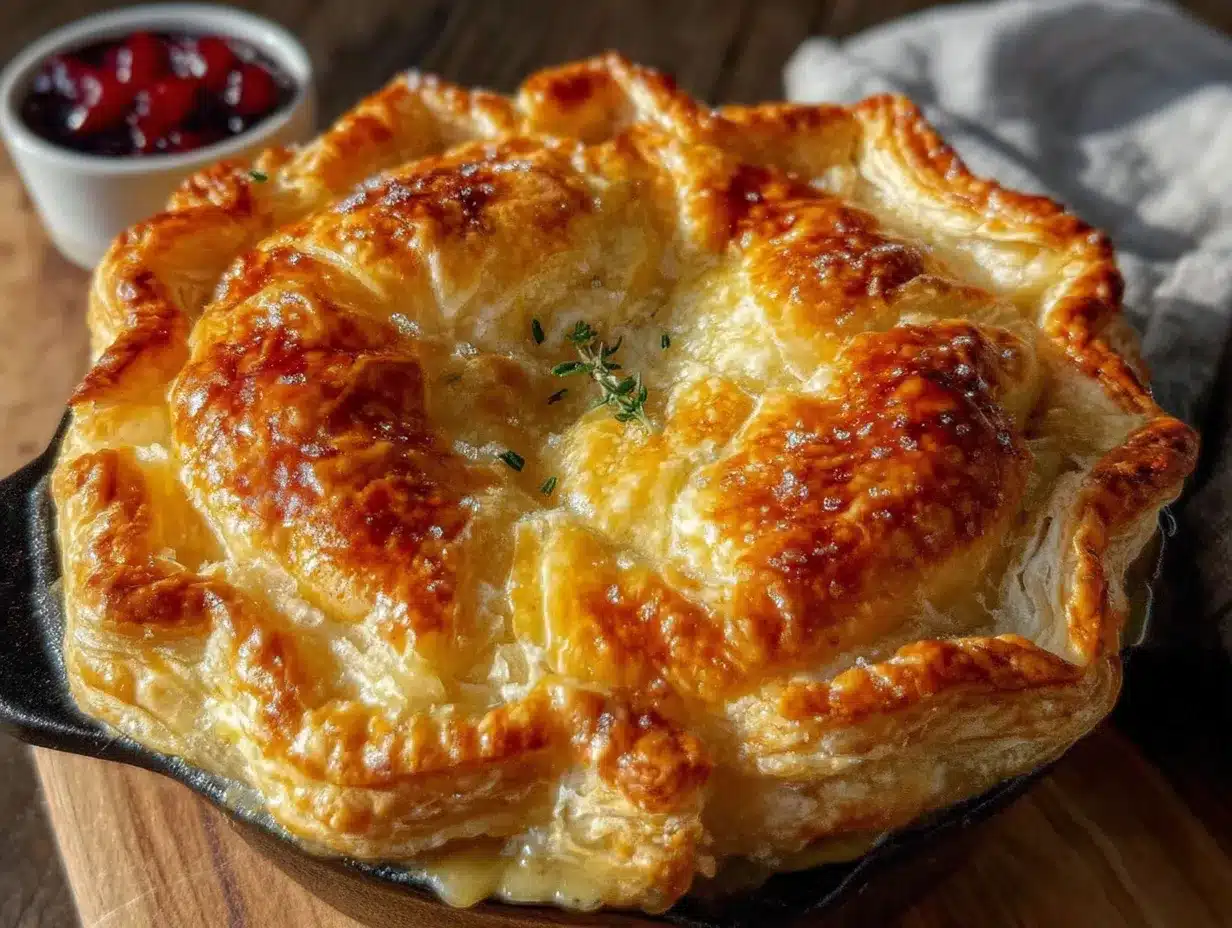
- Refrigerated pie crusts – 1 package (2 crusts, about 14 ounces or 400g total). I use Pillsbury for convenience, but homemade crust works beautifully if you have time.
- Egg – 1 large, beaten with 1 tablespoon of water for the egg wash. This gives the crust that gorgeous golden-brown shine.
Ingredient Selection Tips: For the best texture, use turkey that hasn’t been dried out from reheating. If your leftover turkey is a bit dry, chop it into smaller pieces so it absorbs more of the creamy gravy. For the vegetables, fresh carrots and celery are non-negotiable—frozen ones get too mushy. But frozen peas are actually better than fresh here because they hold their shape and sweetness.
Substitution Guidance: If you’re making this for a vegetarian Friendsgiving, swap the turkey for 3 cups of diced mushrooms and use vegetable broth instead of chicken broth. The mushrooms add that same savory, meaty texture. For a gluten-free version, use a gluten-free all-purpose flour blend for the roux and a gluten-free pie crust. I’ve tested this with King Arthur Measure for Measure flour, and it works perfectly.
Equipment Needed
You don’t need anything fancy for these mini pot pies, which is part of their charm. Here’s what you’ll need:
- 4 (8-ounce) ramekins or oven-safe bowls – These are the star of the show. I got mine at a thrift store for about a dollar each. If you don’t have ramekins, you can use small oven-safe soup bowls or even a muffin tin with larger cups.
- Large skillet or saucepan – For making the filling. A 10-inch skillet works perfectly. I use a cast-iron one because it holds heat well.
- Baking sheet – Place the ramekins on a baking sheet before baking to catch any drips. Trust me on this one—I learned the hard way.
- Rolling pin – Even if you’re using store-bought crust, a rolling pin helps you roll it out just a bit thinner for that perfect crust-to-filling ratio.
- Sharp knife or pizza cutter – For cutting the crust circles. A pizza cutter makes it super easy and gives clean edges.
- Pastry brush – For applying the egg wash. If you don’t have one, you can use a paper towel, but a brush gives a more even coat.
- Measuring cups and spoons – Accuracy matters here, especially for the flour and broth.
Budget-Friendly Options: Don’t have ramekins? No problem. You can use a standard 12-cup muffin tin. Just line the cups with the bottom crust, fill them, and top with a smaller circle of crust. They’ll be even more mini, but just as delicious. I’ve done this for parties where I needed to feed a crowd, and everyone loved the bite-sized versions.
Preparation Method
Let me walk you through this step by step. I’ve included all the little details that make the difference between a good pot pie and a great one.
- Preheat your oven to 400°F (200°C). Place a baking sheet on the middle rack to preheat along with the oven. This helps the bottom crust get crispy from the start.
- Make the filling base. In a large skillet over medium heat, melt the 4 tablespoons of butter. Once it’s bubbling, add the diced onion, carrots, and celery. Cook for about 5-7 minutes, stirring occasionally, until the vegetables are softened and the onions are translucent. You should smell that sweet, savory aroma filling your kitchen—that’s how you know it’s right.
- Build the roux. Sprinkle the ⅓ cup of flour over the cooked vegetables. Stir constantly for about 2 minutes. This is where the magic happens. Let the flour cook until it turns a light golden color and smells a bit nutty. Don’t rush this step—undercooked flour makes the gravy taste pasty. I once skipped this and regretted it immediately.
- Add the liquid. Slowly pour in the chicken broth while whisking continuously. Keep whisking until the mixture is smooth and starts to thicken, about 2-3 minutes. Then pour in the milk and whisk again. The sauce should be thick enough to coat the back of a spoon. If it seems too thick, add a splash more broth. If it’s too thin, let it simmer for another minute.
- Season and add the turkey. Stir in the fresh thyme, salt, and pepper. Add the diced turkey and frozen peas. Stir everything together and let it simmer for 2 minutes so the flavors meld. Taste it here—this is your chance to adjust the seasoning. I usually add another pinch of salt and a bit more pepper.
- Prepare the crust. While the filling cools slightly, roll out the pie crusts on a lightly floured surface. You want them about ⅛-inch thick. Using a ramekin as a guide, cut out circles that are about 1 inch larger than the top of your ramekins. For 4 ramekins, you’ll need 4 top crusts. You can also cut out bottom crusts if you want a double crust—I’ve done both, and honestly, the single top crust is easier and just as satisfying.
- Assemble the pot pies. Divide the filling evenly among the 4 ramekins. Place a crust circle on top of each ramekin, pressing the edges down around the rim. Trim any excess dough, leaving about ½ inch overhang. Crimp the edges with a fork or your fingers to seal. Cut 3 small slits in the top of each crust to let steam escape—if you forget, the filling might bubble over and make a mess.
- Apply the egg wash. Brush the beaten egg mixture over the top of each crust. This gives that beautiful golden-brown color. If you want extra shine, brush a second coat halfway through baking.
- Bake to perfection. Place the ramekins on the preheated baking sheet. Bake for 20-25 minutes, until the crust is deep golden brown and the filling is bubbling up through the slits. Let them cool on a wire rack for 5-10 minutes before serving—the filling is lava-hot straight out of the oven.
Cooking Tips & Techniques
I’ve made these mini pot pies more times than I can count, and I’ve learned a few things along the way. Here are my best tips for getting them right every time:
Don’t skip the roux cooking time. This is the number one mistake I see people make. That two minutes of cooking the flour and butter together isn’t just for show—it cooks out the raw flour taste and deepens the flavor. I learned this the hard way when I made a batch that tasted like paste. Now I set a timer for exactly 2 minutes, and the difference is night and day.
Cool the filling before adding the crust. If you put hot filling in the ramekins and then top it with raw pie dough, the dough will start to soften and get soggy before it even hits the oven. Let the filling cool for about 10 minutes after you take it off the heat. This also helps prevent the crust from sliding off the edge during baking.
Use the baking sheet. I cannot stress this enough. Even with the slits cut in the crust, bubbling filling can escape. One time I didn’t use a baking sheet, and I spent an hour scrubbing burnt filling off the bottom of my oven. Just put the ramekins on a sheet pan—it saves so much cleanup.
Multitask like a pro. While the filling is cooling, roll out your crust and cut the circles. While the pies are baking, clean up your workspace. The whole process takes about 45 minutes, but active time is only about 20 minutes. The rest is just waiting for the oven to do its thing.
Check for doneness visually. Every oven runs a little differently. Instead of relying solely on time, look for the signs: the crust should be a deep golden brown, and you should see bubbles of filling coming up through the slits. If the crust is browning too quickly but the filling isn’t bubbling, tent the pies loosely with foil and bake for another 5 minutes.
Let them rest. I know it’s hard to wait, but those 5-10 minutes of cooling time are crucial. The filling sets up as it cools, so it won’t be runny. Plus, you won’t burn your mouth. Take it from someone who has definitely burned their mouth on hot pot pie filling.
Variations & Adaptations
One of the best things about this recipe is how adaptable it is. Here are some variations I’ve tried and loved:
Vegetarian Version
Swap the turkey for 3 cups of diced cremini mushrooms and use vegetable broth instead of chicken broth. Sauté the mushrooms with the vegetables until they release their liquid and start to brown. The mushrooms add that same savory, umami flavor that makes pot pie so satisfying. I made this for a vegetarian friend last Friendsgiving, and she asked for the recipe before she even finished eating.
Chicken Pot Pie Version
If you don’t have leftover turkey, this works beautifully with rotisserie chicken. Just shred the meat from a store-bought rotisserie chicken—you’ll get about 3 cups of meat. It’s a great way to make these pot pies any time of year, not just after Thanksgiving.
Dairy-Free Adaptation
Use vegan butter or olive oil instead of regular butter, and replace the milk with unsweetened oat milk or almond milk. I’ve tested this with oat milk, and the gravy is still creamy and delicious. Just make sure your pie crust is dairy-free too—many store-bought crusts contain butter.
Spicy Twist
Add ½ teaspoon of smoked paprika and ¼ teaspoon of cayenne pepper to the filling along with the thyme. The smokiness adds a whole new dimension to the flavor. I tried this on a whim one night, and now it’s my go-to version when I’m cooking just for myself.
Mini Muffin Tin Version
For bite-sized appetizers, use a 24-cup mini muffin tin. Roll out the crust and cut small circles to fit the cups. Fill each with about a tablespoon of filling, then top with a smaller crust circle. Bake for 12-15 minutes. These are perfect for parties—everyone can grab one and keep mingling.
Serving & Storage Suggestions
These mini pot pies are best served warm, straight from the oven. The contrast between the hot, creamy filling and the flaky, buttery crust is at its peak within the first 15 minutes after baking. I like to serve them right in the ramekins on a small plate, with a fork and maybe a side salad for a complete meal.
What to Serve With Them: A simple green salad with a tangy vinaigrette cuts through the richness of the pot pie beautifully. I also love serving roasted Brussels sprouts or steamed green beans on the side. For a true Friendsgiving spread, pair these with homemade cranberry sauce and creamy garlic mashed potatoes.
Storage: If you have leftovers (unlikely, but possible), let the pot pies cool completely, then cover each ramekin tightly with plastic wrap or aluminum foil. They’ll keep in the refrigerator for up to 3 days. The crust will soften a bit in the fridge, but it still tastes great.
Reheating: To reheat, place the ramekins on a baking sheet and warm them in a 350°F (175°C) oven for about 15 minutes, or until the filling is hot and bubbly. You can also microwave them for 2-3 minutes, but the crust won’t be as crispy. If you’re reheating in the oven, brush the crust with a little melted butter to bring back some of that golden shine.
Freezing: These freeze beautifully. Assemble the pot pies completely but don’t bake them. Wrap each ramekin tightly in plastic wrap, then in foil. Freeze for up to 3 months. When you’re ready to bake, remove the wrapping and place the frozen ramekins on a baking sheet. Bake at 400°F (200°C) for 30-35 minutes, adding 5-10 minutes to the baking time. The crust might need a foil tent if it browns too quickly.
Flavor Development: Honestly, these pot pies taste even better the next day. The flavors meld together overnight, and the filling becomes even richer and more savory. If you’re planning ahead, I actually recommend making the filling a day in advance and assembling the pies just before baking. It’s one of those recipes that rewards a little patience.
Nutritional Information & Benefits
Here’s the approximate nutritional breakdown for one mini turkey pot pie (based on 4 servings):
| Nutrient | Amount Per Serving |
|---|---|
| Calories | 485 |
| Total Fat | 24g |
| Saturated Fat | 11g |
| Cholesterol | 95mg |
| Sodium | 820mg |
| Total Carbohydrates | 38g |
| Dietary Fiber | 3g |
| Sugars | 5g |
| Protein | 32g |
These pot pies are a good source of lean protein from the turkey, which helps keep you full and satisfied. The carrots and peas provide vitamin A and fiber, while the celery adds a bit of vitamin K. The butter and milk contribute calcium, though they also add saturated fat—so this is definitely a treat, not an everyday meal.
Dietary Considerations: This recipe contains gluten (from the flour and pie crust) and dairy (from the butter and milk). For a gluten-free version, use gluten-free flour and crust. For a dairy-free version, use vegan butter and plant-based milk. The recipe is nut-free as written, and can be made egg-free by omitting the egg wash (the crust will still brown, just not as deeply).
From a wellness perspective, I love that these pot pies feel indulgent but are made with whole, recognizable ingredients. There’s nothing processed or artificial in the filling—just real food that happens to taste amazing. It’s comfort food you can feel good about serving to the people you love.
Conclusion
These Friendsgiving Mini Turkey Pot Pies are everything you want in a holiday recipe: they’re easy to make, incredibly satisfying, and just plain fun to eat. Each person gets their own little pie, which makes the meal feel special without any extra fuss. Whether you’re using up Thanksgiving leftovers or making them fresh with rotisserie chicken, this is one of those recipes that will become a tradition.
I love how flexible this recipe is. You can make it exactly as written, or you can tweak it to fit your crowd—add more vegetables, swap in different herbs, or make it spicy. The basic method is foolproof, and once you’ve made it once, you’ll start dreaming up your own variations. That’s the mark of a great recipe, honestly.
So here’s my challenge to you: make these for your next Friendsgiving gathering. Watch your friends’ faces light up when you set down those little ramekins with the golden, flaky crusts. Listen to the oohs and ahhs. And then, after everyone’s finished, let me know how it went. Did you add your own twist? Did someone ask for the recipe? I’d love to hear about it in the comments below. And if you share a photo on Pinterest, tag me—I want to see your beautiful mini pot pies!
Happy cooking, and here’s to good food and even better company.
Frequently Asked Questions
Can I use a different type of meat?
Absolutely! This recipe works great with shredded rotisserie chicken, leftover roast chicken, or even diced cooked pork. If you’re using raw meat, cook it fully before adding it to the filling.
How do I prevent the bottom crust from getting soggy?
If you’re using a bottom crust, blind bake it for 5-7 minutes at 400°F before adding the filling. You can also brush the bottom crust with a thin layer of egg wash before filling it—this creates a barrier that keeps the crust crispy.
Can I make these ahead of time for a party?
Yes! Assemble the pot pies completely but don’t bake them. Cover and refrigerate for up to 24 hours. When you’re ready to serve, add 5-10 minutes to the baking time. You can also freeze them unbaked for up to 3 months.
What if I don’t have ramekins?
No problem! Use a muffin tin, small oven-safe bowls, or even a standard 9-inch pie dish. If you use a larger dish, just adjust the baking time—a full-size pot pie will need about 35-40 minutes.
Can I add cheese to the filling?
Definitely! Stir in ½ cup of shredded cheddar or Gruyère cheese after you add the milk. It melts into the gravy and adds a lovely richness. I’ve done this with sharp cheddar, and it’s absolutely delicious.
Pin This Recipe!

Friendsgiving Mini Turkey Pot Pies: Easy Individual Servings

These adorable mini turkey pot pies are the perfect solution for using up leftover turkey, featuring a creamy, savory filling with tender chunks of turkey and vegetables, all wrapped in a buttery, flaky crust. Each person gets their own perfectly portioned pie, making them ideal for Friendsgiving gatherings.
- Prep Time: 20 minutes
- Cook Time: 25 minutes
- Total Time: 45 minutes
- Yield: 4 servings 1x
- Category: Main Course
- Cuisine: American
Ingredients
- 3 cups (about 450g) cooked turkey, diced
- 4 tablespoons (56g) unsalted butter
- 1 medium yellow onion, diced (about 150g)
- 2 medium carrots, diced (about 150g)
- 2 medium celery stalks, diced (about 100g)
- ½ cup (75g) frozen peas
- ⅓ cup (42g) all-purpose flour
- 1½ cups (355ml) low-sodium chicken broth
- ½ cup (120ml) whole milk
- 1 teaspoon fresh thyme leaves (or ½ teaspoon dried)
- 1 teaspoon salt (6g), plus more to taste
- ½ teaspoon freshly ground black pepper (2g)
- 1 package (2 crusts, about 14 ounces or 400g) refrigerated pie crusts (e.g., Pillsbury)
- 1 large egg, beaten with 1 tablespoon water (for egg wash)
Instructions
- Preheat your oven to 400°F (200°C). Place a baking sheet on the middle rack to preheat along with the oven.
- In a large skillet over medium heat, melt the 4 tablespoons of butter. Add the diced onion, carrots, and celery. Cook for about 5-7 minutes, stirring occasionally, until the vegetables are softened and the onions are translucent.
- Sprinkle the ⅓ cup of flour over the cooked vegetables. Stir constantly for about 2 minutes, until the flour turns a light golden color and smells nutty.
- Slowly pour in the chicken broth while whisking continuously. Keep whisking until the mixture is smooth and starts to thicken, about 2-3 minutes. Then pour in the milk and whisk again. The sauce should be thick enough to coat the back of a spoon.
- Stir in the fresh thyme, salt, and pepper. Add the diced turkey and frozen peas. Stir everything together and let it simmer for 2 minutes. Taste and adjust seasoning if needed. Let the filling cool for about 10 minutes.
- While the filling cools, roll out the pie crusts on a lightly floured surface to about ⅛-inch thick. Using a ramekin as a guide, cut out circles that are about 1 inch larger than the top of your ramekins. You’ll need 4 top crusts.
- Divide the filling evenly among 4 (8-ounce) ramekins. Place a crust circle on top of each ramekin, pressing the edges down around the rim. Trim any excess dough, leaving about ½ inch overhang. Crimp the edges with a fork or your fingers to seal. Cut 3 small slits in the top of each crust to let steam escape.
- Brush the beaten egg mixture over the top of each crust.
- Place the ramekins on the preheated baking sheet. Bake for 20-25 minutes, until the crust is deep golden brown and the filling is bubbling up through the slits. Let them cool on a wire rack for 5-10 minutes before serving.
Notes
For the best texture, use turkey that hasn’t been dried out from reheating. If your leftover turkey is a bit dry, chop it into smaller pieces so it absorbs more of the creamy gravy. For the vegetables, fresh carrots and celery are non-negotiable—frozen ones get too mushy. But frozen peas are actually better than fresh here because they hold their shape and sweetness. Don’t skip the roux cooking time—it cooks out the raw flour taste and deepens the flavor. Cool the filling before adding the crust to prevent sogginess. Use a baking sheet to catch any drips. Let the pot pies rest for 5-10 minutes before serving to allow the filling to set.
Nutrition
- Serving Size: 1 mini pot pie
- Calories: 485
- Sugar: 5
- Sodium: 820
- Fat: 24
- Saturated Fat: 11
- Carbohydrates: 38
- Fiber: 3
- Protein: 32
Keywords: mini turkey pot pie, Friendsgiving, individual pot pie, leftover turkey, comfort food, Thanksgiving leftovers, easy pot pie


