For a while, I just accepted that pumpkin cheesecake meant turning on the oven and waiting. And waiting. And then waiting some more while it chilled overnight. The flavor was always worth it, but the process? Not so much on a busy Tuesday or when the house was already warm from the day’s cooking. I wanted that creamy, spiced, slightly tangy pumpkin filling on a buttery crust without the whole production. It felt like a small thing to want, honestly. A no-bake dessert that actually tasted like the real deal, not a sad, wobbly compromise.
So I started testing. The first few attempts were, well, educational. Too soft, too runny, or that weird gelatin texture that just feels wrong. But I kept tweaking because the idea of a quick, effortless pumpkin cheesecake bar felt too good to give up on. I wanted something that set up firmly enough to slice cleanly, but stayed luxuriously creamy on the inside. A crust that held together without baking. A filling that tasted like autumn in a single bite.
These bars are what came out of that little mission. They’re the answer to the craving without the hassle. No oven, no water bath, no stress. Just a simple dessert that looks impressive and tastes like you spent hours. And honestly? The first time I pulled a perfectly set pan of these out of the fridge, I felt a quiet kind of victory. This was the one.
Why You’ll Love This Recipe
This isn’t just another no-bake dessert. These Easy No-Bake Pumpkin Cheesecake Bars have become my go-to for fall gatherings, and here’s why they stand out from the crowd.
- Truly No-Bake: No oven required. Not for the crust, not for the filling. This keeps your kitchen cool and your prep time short.
- Perfectly Sliceable Texture: The filling sets up firm enough to cut into clean, beautiful bars without any gelatin or complicated techniques. It holds its shape on a serving plate beautifully.
- Real Pumpkin Flavor: We’re using real pumpkin puree and a warm blend of spices. It tastes like the filling of your favorite pumpkin pie, but creamier and richer.
- Make-Ahead Magic: These bars actually get better after a few hours in the fridge. You can make them a full day ahead of your party, which is a lifesaver during the busy holiday season.
- Crowd-Pleasing Appeal: Everyone from kids to adults loves these. They’re familiar enough to be comforting but special enough to feel like a treat. I’ve brought them to potlucks and watched the pan disappear faster than almost anything else.
What makes these different from other no-bake cheesecake recipes is the balance. The crust is buttery and crisp without baking. The filling is dense and creamy, not airy or mousse-like. It has that signature tang from the cream cheese that cuts through the sweetness of the pumpkin. It’s the kind of dessert where you take a bite and just nod. You know. This is it.
What Ingredients You Will Need
This recipe relies on simple, pantry-friendly ingredients to create something truly special. Each component plays a specific role in building the perfect texture and flavor.
For the Crust:
- Graham Cracker Crumbs (2 cups / 240g): The classic base. You can buy pre-crushed crumbs or pulse whole graham crackers in a food processor. I prefer the texture of homemade crumbs, but store-bought works perfectly in a pinch.
- Granulated Sugar (¼ cup / 50g): Adds just a touch of sweetness to balance the buttery, salty notes.
- Unsalted Butter (½ cup / 113g, melted): The binder. Use unsalted butter so you can control the salt level. Melt it completely for the best consistency.
- Pinch of Salt: Enhances all the flavors and keeps the crust from tasting flat.
For the Pumpkin Cheesecake Filling:
- Full-Fat Cream Cheese (16 oz / 452g, softened): This is non-negotiable for the best texture. Low-fat cream cheese contains more water and can result in a softer, less stable filling. Let it sit at room temperature for at least 30 minutes before starting.
- Pumpkin Puree (1 cup / 245g): Make sure you’re using 100% pure pumpkin puree, not pumpkin pie filling. The pie filling has added sugar and spices that will throw off the balance. I usually go with Libby’s or a store brand with no added ingredients.
- Powdered Sugar (1 cup / 120g): Dissolves seamlessly into the cream cheese, creating a silky-smooth filling without any graininess.
- Heavy Cream (½ cup / 120ml): Adds richness and helps stabilize the filling as it sets. Don’t substitute with milk or half-and-half—the fat content is crucial here.
- Pumpkin Pie Spice (1½ teaspoons): A warm blend of cinnamon, nutmeg, ginger, and cloves. You can use store-bought or make your own.
- Vanilla Extract (1 teaspoon): Rounds out the flavors and adds depth.
For the Whipped Cream Topping (Optional but Recommended):
- Heavy Cream (1 cup / 240ml, cold): For the fluffiest, most stable whipped cream.
- Powdered Sugar (2 tablespoons / 15g): Sweetens without making it grainy.
- Vanilla Extract (½ teaspoon): For flavor.
Equipment Needed
You won’t need any fancy gadgets for these Easy No-Bake Pumpkin Cheesecake Bars, which is part of their charm.
- 9×9-inch Baking Pan: This size gives you the perfect thickness for the bars. An 8×8 pan will work, but your bars will be slightly taller. A 9×13 pan will make them too thin.
- Parchment Paper: Line your pan with two overlapping strips, leaving overhang on two sides. This creates “handles” that let you lift the entire block of cheesecake out for clean slicing.
- Mixing Bowls: One for the crust, one for the filling.
- Hand Mixer or Stand Mixer: A hand mixer is perfectly fine. A stand mixer with the paddle attachment works beautifully too. You just need something to beat the cream cheese until smooth.
- Measuring Cups and Spoons: For accuracy.
- Spatula: For pressing the crust and spreading the filling evenly.
- Sharp Knife: For slicing clean bars. Wipe it clean between cuts for the best presentation.
If you don’t have a 9×9 pan, a 9-inch springform pan also works well. Just note that the bars will be round instead of square. A glass or ceramic baking dish is fine, but metal pans tend to chill faster and more evenly.
Preparation Method
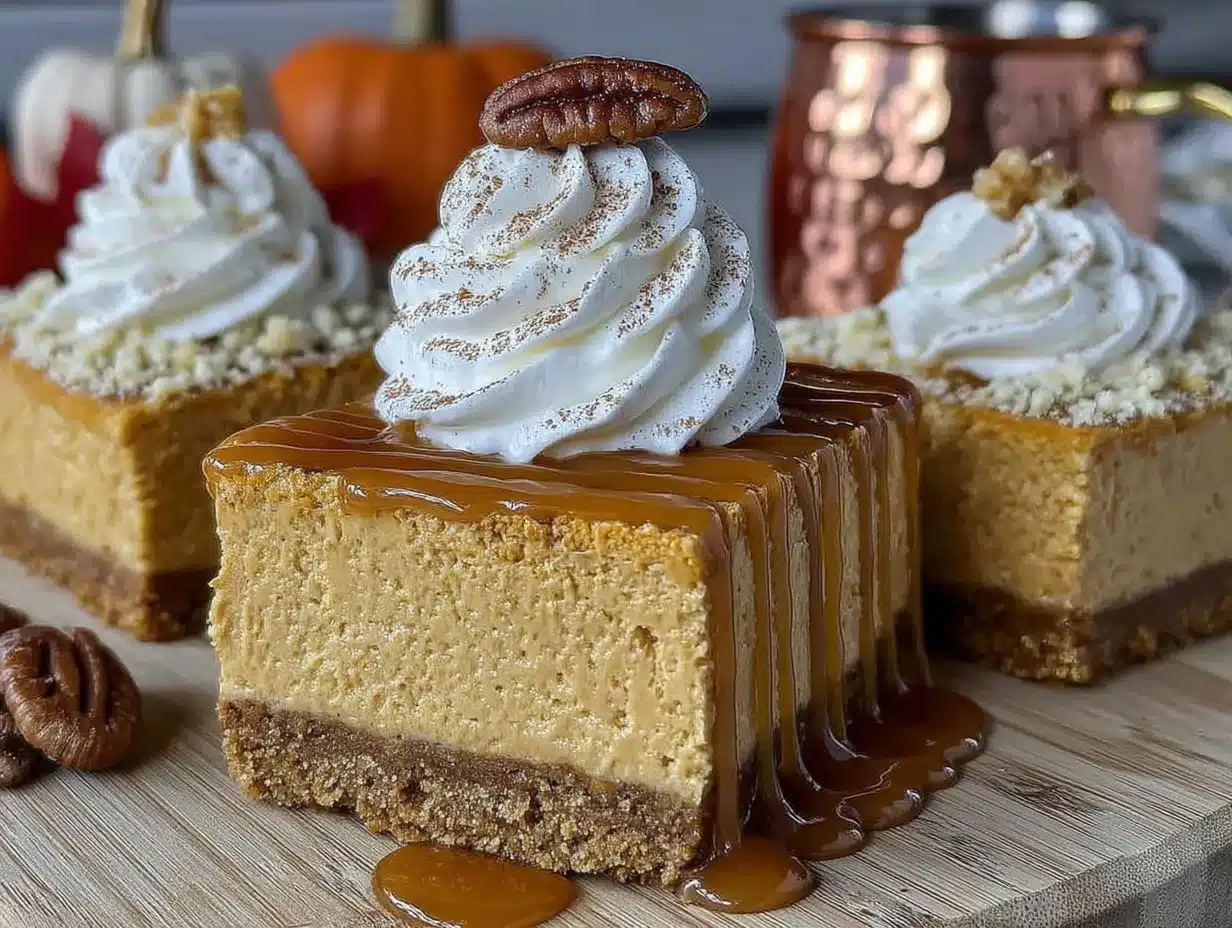
Follow these steps carefully, and you’ll have a perfect pan of bars every time. The key is patience during the chilling process—don’t rush it.
- Prepare the Pan: Line your 9×9-inch baking pan with parchment paper, leaving a 2-inch overhang on two opposite sides. This will be your lifting mechanism later. Set the pan aside.
- Make the Crust: In a medium bowl, combine 2 cups of graham cracker crumbs, ¼ cup of granulated sugar, and a pinch of salt. Pour in ½ cup of melted unsalted butter and stir with a fork until the mixture looks like wet sand and all the crumbs are evenly moistened.
- Press the Crust: Transfer the crumb mixture to your prepared pan. Use the bottom of a flat measuring cup or a glass to press it down firmly and evenly. Don’t just pat it—really pack it down. A well-packed crust holds together much better. Place the pan in the refrigerator while you make the filling.
- Beat the Cream Cheese: In a large mixing bowl, add 16 oz of softened full-fat cream cheese. Beat with a hand mixer on medium speed for about 2 minutes, until it’s completely smooth and fluffy. Scrape down the sides and the bottom of the bowl with a spatula. There should be no lumps at all.
- Add the Sugar and Spices: Add 1 cup of powdered sugar and 1½ teaspoons of pumpkin pie spice to the cream cheese. Beat on low speed at first to avoid a sugar cloud, then increase to medium and beat for another minute until well combined and smooth.
- Incorporate the Pumpkin and Vanilla: Add 1 cup of pumpkin puree and 1 teaspoon of vanilla extract. Beat on medium speed until the mixture is uniform and a beautiful orange color. Scrape the bowl again.
- Add the Heavy Cream: With the mixer running on low speed, slowly pour in ½ cup of heavy cream. Once it’s all in, increase the speed to medium-high and beat for 2-3 minutes. The mixture will thicken noticeably and become light and airy. It should hold soft peaks when you lift the beaters.
- Assemble the Bars: Remove the crust from the refrigerator. Spoon the pumpkin cheesecake filling over the crust and spread it into an even layer using an offset spatula or the back of a spoon. Give the pan a gentle tap on the counter to release any air bubbles.
- Chill: Cover the pan tightly with plastic wrap or aluminum foil. Refrigerate for at least 6 hours, but preferably overnight. This is the most important step. The bars need this time to set up firmly. If you try to cut them too early, they’ll be too soft.
- Make the Whipped Cream (Optional): Just before serving, pour 1 cup of cold heavy cream into a chilled bowl. Add 2 tablespoons of powdered sugar and ½ teaspoon of vanilla extract. Beat on medium-high speed until soft peaks form. Don’t overbeat, or you’ll end up with butter.
- Slice and Serve: When the bars are fully set, use the parchment overhang to lift the entire block out of the pan. Place it on a cutting board. Use a sharp knife to slice into 9 or 16 bars, wiping the knife clean between cuts for the neatest edges. Serve cold with a dollop of whipped cream and a light dusting of cinnamon, if desired.
Cooking Tips & Techniques
Over the years, I’ve learned a few things that make these bars come out perfectly every single time. Here are the details that matter.
Softened Cream Cheese is Crucial: Cold cream cheese will leave you with lumpy filling, no matter how long you beat it. Let it sit on the counter for at least 30-40 minutes before you start. If you’re in a hurry, cut it into small cubes and let them sit for 15 minutes. They’ll soften much faster.
Don’t Skip the Heavy Cream: I tried making these with whole milk once because I thought I could save a few calories. Big mistake. The filling was much softer and never set up properly. The fat in the heavy cream is what gives these bars their firm, sliceable texture. It’s worth every drop.
Patience with Chilling: This is the part where most people mess up. Six hours is the absolute minimum, and overnight is strongly recommended. If you’re planning to serve these for a dinner party, make them the day before. Your future self will thank you when all you have to do is slice and serve.
Crust Pressing: Don’t be gentle with the crust. Use the flat bottom of a glass or a measuring cup and really press down with some force. A loosely packed crust will crumble when you try to cut the bars. You want it to be as compact as a store-bought cheesecake crust.
Clean Slices: For the prettiest presentation, dip your knife in hot water, wipe it dry, and then make your cut. Repeat this for each slice. The heat helps the knife glide through the cold cheesecake without dragging or sticking.
Variations & Adaptations
One of the best things about this recipe is how easily it adapts to different tastes and dietary needs. Here are a few variations I’ve tried and loved.
- Gluten-Free Version: Simply swap the graham cracker crumbs for gluten-free graham crackers or crushed gluten-free shortbread cookies. The rest of the ingredients are naturally gluten-free. I’ve used Schär’s graham-style crackers with excellent results.
- Gingersnap Crust: For a more intense ginger flavor, replace the graham crackers with crushed gingersnaps. The spicy, molasses notes pair beautifully with the pumpkin filling. Reduce the sugar in the crust to 2 tablespoons since gingersnaps are already sweet.
- Chocolate Drizzle: Melt ½ cup of semi-sweet chocolate chips with 1 teaspoon of coconut oil. Drizzle it over the top of the set bars before slicing. The combination of pumpkin, cream cheese, and chocolate is surprisingly addictive.
- Maple Pecan Twist: Add 2 tablespoons of pure maple syrup to the filling along with the sugar. After the bars are set, top with a sprinkle of toasted, chopped pecans and a light drizzle of maple syrup. This gives them a wonderful fall flavor that’s a little different from the classic spice blend.
- Dairy-Free Option: Use dairy-free cream cheese (like Kite Hill or Tofutti) and a full-fat coconut cream instead of heavy cream. The texture will be slightly different—a little less firm—but still delicious. Make sure your graham crackers are also dairy-free.
Serving & Storage Suggestions
These Easy No-Bake Pumpkin Cheesecake Bars are incredibly versatile when it comes to serving and storing. They’re designed to be made ahead, which is their superpower.
Serving: Serve these bars straight from the refrigerator. They’re meant to be enjoyed cold, which keeps the texture firm and creamy. A dollop of fresh whipped cream on top is the classic choice, but a dusting of cinnamon or a drizzle of caramel sauce works beautifully too. For a fun presentation, cut them into small squares and serve them on a platter with fresh cranberries and rosemary sprigs for a festive holiday look.
These bars pair wonderfully with a hot cup of coffee, a spiced chai latte, or even a glass of cold milk. They’re rich enough to stand alone, but light enough that you won’t feel weighed down after one serving.
Storage: Store leftover bars in an airtight container in the refrigerator for up to 5 days. Place a sheet of parchment paper between layers if you need to stack them. The bars will stay perfectly firm and creamy throughout this time. In fact, the flavor often deepens after a day or two as the spices meld together.
Freezing: These bars freeze exceptionally well. Once the bars are fully set, slice them into individual portions. Place them on a baking sheet lined with parchment paper and freeze for 1-2 hours, or until solid. Transfer the frozen bars to a freezer-safe container or zip-top bag, separating layers with parchment paper. They’ll keep for up to 3 months. To serve, thaw them in the refrigerator overnight. Do not thaw them at room temperature, as they can become too soft.
If you’re serving these at a party, you can make the entire recipe, freeze the uncut block, and then slice it the morning of your event. It’s a real time-saver during the busy holiday season.
Nutritional Information & Benefits
While these bars are definitely a treat, they do offer some surprising nutritional perks thanks to the star ingredient: pumpkin.
Estimated Nutritional Values (per bar, based on 16 servings):
- Calories: Approximately 280-320
- Fat: 20-22g
- Carbohydrates: 24-28g
- Protein: 4-5g
- Sugar: 18-20g
Health Benefits: Pumpkin is packed with vitamin A, which is excellent for eye health and immune function. It’s also a good source of fiber and antioxidants. The cream cheese provides calcium and protein, while the heavy cream adds a dose of healthy fats that help keep you feeling satisfied. Of course, these are still a dessert, so moderation is key. But it’s nice to know there’s a little nutritional value hidden in that creamy, spiced goodness.
Dietary Considerations: This recipe can be made gluten-free and dairy-free with simple substitutions (see Variations section). It is naturally vegetarian. It is not suitable for a vegan diet without significant modifications.
Potential Allergens: This recipe contains dairy (cream cheese, butter, heavy cream) and gluten (graham crackers). Always check your ingredient labels if you’re serving someone with allergies.
Conclusion
These Easy No-Bake Pumpkin Cheesecake Bars are exactly what a fall dessert should be: simple, comforting, and absolutely delicious. They capture all the warm, spiced flavors of the season without requiring any oven time or complicated techniques. The creamy pumpkin filling sits on a buttery graham cracker crust, and the whole thing comes together in about 20 minutes of active work.
What I love most about this recipe is how reliable it is. It works every single time, and it always gets compliments. Whether you’re bringing it to a Thanksgiving potluck, a Halloween party, or just making it for a cozy weekend at home, these bars deliver. They’re the kind of dessert that makes people ask for the recipe before they’ve even finished their first bite.
I’d love to hear how yours turn out. Did you try a fun variation? Did you add a chocolate drizzle or a gingersnap crust? Leave a comment below and share your experience. And if you loved these, don’t forget to share this recipe with a friend who needs a little no-bake magic in their life. Happy fall baking—or should I say, happy fall no-baking!
Frequently Asked Questions
Can I use pumpkin pie filling instead of pumpkin puree?
No, I don’t recommend it. Pumpkin pie filling already contains sugar and spices, which will throw off the balance of this recipe. Your bars could end up too sweet or with an overpowering spice flavor. Stick with 100% pure pumpkin puree for the best results.
Why are my bars too soft after chilling?
This usually happens for one of two reasons. Either the cream cheese wasn’t softened properly, or the bars weren’t chilled long enough. Make sure your cream cheese is at room temperature before you start, and give the bars at least 6 hours in the fridge—overnight is even better. If you used low-fat cream cheese, that could also be the culprit.
Can I make these bars in a different size pan?
You can, but you’ll need to adjust the quantities. An 8×8 pan will give you slightly thicker bars, which is fine. A 9×13 pan will make them too thin and they might not hold their shape as well. I recommend sticking with a 9×9 pan for the best results. If you want to use a springform pan, a 9-inch round one works beautifully.
How far in advance can I make these bars?
You can make them up to 3 days in advance if you’re storing them in the refrigerator. They actually taste better after a day or two as the flavors meld together. You can also freeze the entire block (unsliced) for up to 3 months. Just thaw it in the refrigerator overnight before serving.
Can I skip the whipped cream topping?
Absolutely. The whipped cream is optional and purely for presentation. The bars are delicious on their own. If you want a lighter finish, a simple dusting of powdered sugar or cinnamon works beautifully. If you’re serving these for a party, the whipped cream does add a lovely touch, but it’s not necessary for the recipe to shine.
Pin This Recipe!
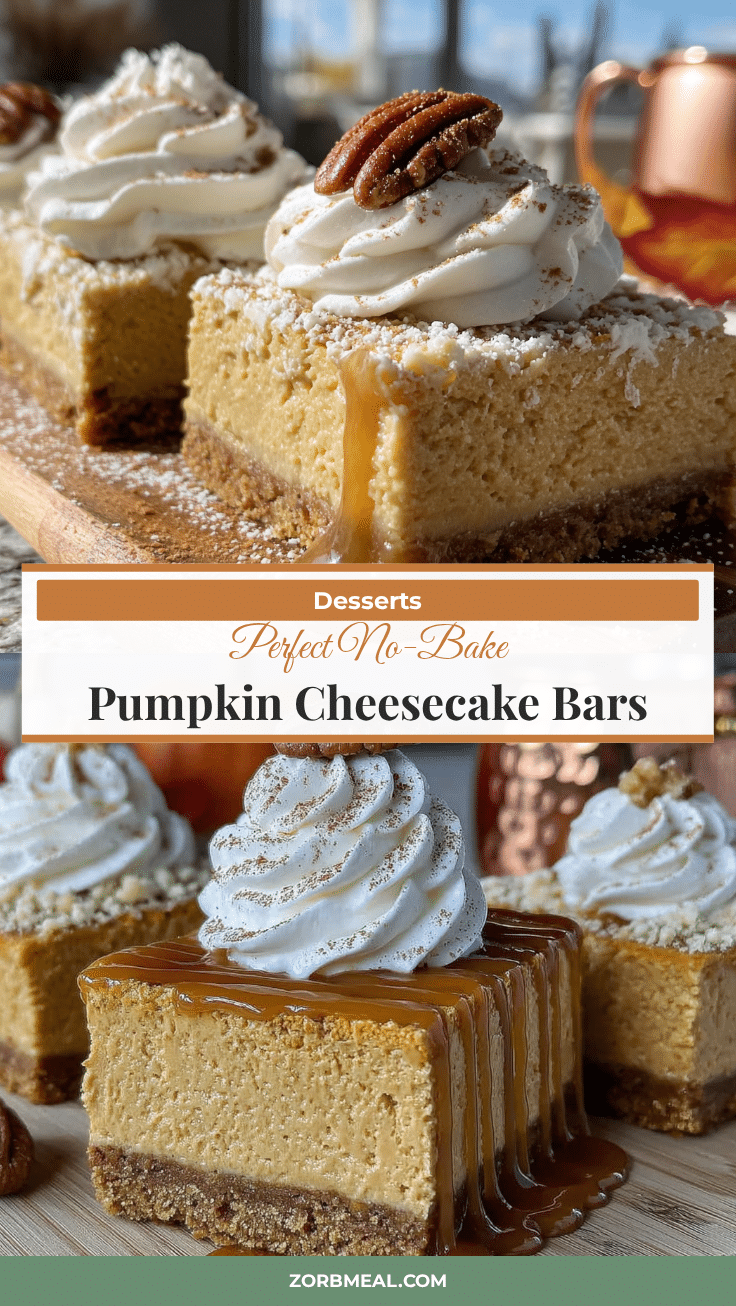
Easy No-Bake Pumpkin Cheesecake Bars: Best Fall Dessert
These Easy No-Bake Pumpkin Cheesecake Bars are the perfect fall dessert with a buttery graham cracker crust and a creamy, spiced pumpkin filling. No oven required, and they set up perfectly for clean slicing.
- Prep Time: 20 minutes
- Cook Time: 0 minutes
- Total Time: 6 hours 20 minutes (includes chilling)
- Yield: 16 servings 1x
- Category: Dessert
- Cuisine: American
Ingredients
- 2 cups (240g) graham cracker crumbs
- 1/4 cup (50g) granulated sugar
- 1/2 cup (113g) unsalted butter, melted
- Pinch of salt
- 16 oz (452g) full-fat cream cheese, softened
- 1 cup (245g) pumpkin puree (100% pure, not pie filling)
- 1 cup (120g) powdered sugar
- 1/2 cup (120ml) heavy cream
- 1 1/2 teaspoons pumpkin pie spice
- 1 teaspoon vanilla extract
- For the whipped cream topping (optional):
- 1 cup (240ml) cold heavy cream
- 2 tablespoons (15g) powdered sugar
- 1/2 teaspoon vanilla extract
Instructions
- Line a 9×9-inch baking pan with parchment paper, leaving a 2-inch overhang on two opposite sides.
- In a medium bowl, combine graham cracker crumbs, granulated sugar, and a pinch of salt. Pour in melted butter and stir until the mixture looks like wet sand.
- Press the crumb mixture firmly and evenly into the prepared pan using the bottom of a flat measuring cup or glass. Refrigerate while making the filling.
- In a large mixing bowl, beat softened cream cheese with a hand mixer on medium speed for about 2 minutes until smooth and fluffy. Scrape down the sides.
- Add powdered sugar and pumpkin pie spice. Beat on low speed to combine, then increase to medium and beat for another minute until smooth.
- Add pumpkin puree and vanilla extract. Beat on medium speed until uniform and well combined. Scrape the bowl again.
- With the mixer running on low, slowly pour in heavy cream. Once incorporated, increase speed to medium-high and beat for 2-3 minutes until the mixture thickens and holds soft peaks.
- Remove the crust from the refrigerator. Spoon the pumpkin cheesecake filling over the crust and spread into an even layer. Tap the pan gently on the counter to release air bubbles.
- Cover the pan tightly with plastic wrap or aluminum foil. Refrigerate for at least 6 hours, preferably overnight.
- Just before serving, make the whipped cream (optional): In a chilled bowl, beat cold heavy cream, powdered sugar, and vanilla extract on medium-high speed until soft peaks form.
- Use the parchment overhang to lift the entire block out of the pan. Place on a cutting board and slice into 9 or 16 bars using a sharp knife, wiping the knife clean between cuts. Serve cold with whipped cream and a dusting of cinnamon, if desired.
Notes
For best results, use full-fat cream cheese and let it soften at room temperature for 30-40 minutes. Do not substitute low-fat cream cheese or milk for heavy cream. Chilling for at least 6 hours is essential; overnight is recommended. For clean slices, dip the knife in hot water and wipe dry between cuts.
Nutrition
- Serving Size: 1 bar
- Calories: 300
- Sugar: 19
- Sodium: 200
- Fat: 21
- Saturated Fat: 12
- Carbohydrates: 26
- Fiber: 1
- Protein: 4.5
Keywords: no-bake pumpkin cheesecake bars, pumpkin cheesecake, fall dessert, no-bake dessert, pumpkin bars, cheesecake bars


