Someone asked me last week why I couldn’t just use instant pudding mix instead of making it from scratch for Halloween treats. It was my neighbor, Mark, who’d wandered into my kitchen while I was testing recipes. I started to explain why that wouldn’t work — then stopped. Honestly? I’d never actually tried it. I’ve spent years being a bit of a snob about homemade everything, and here was a guy who’d never baked a cake in his life asking the most practical question imaginable. So I shut my mouth, grabbed the box, and said, “Let’s find out.”
Two hours later, I was eating my words — and a really good dirt cup. The texture was perfect, the chocolate flavor was spot-on, and nobody at the party that weekend even asked if it was homemade. They were too busy fighting over the gummy worms. Mark still brings it up every time he sees me, and honestly? I’m glad he does. It reminds me that good food doesn’t have to be complicated, and sometimes the best ideas come from the people who aren’t overthinking it.
These crowd-pleasing Halloween dirt cups with gummy worms have become my go-to for every spooky gathering since. They’re the kind of dessert that makes people light up — kids dive in without hesitation, and adults sneak seconds when they think nobody’s watching. Maybe you’ve been there, standing in the party aisle wondering what to bring that won’t cause a mess or require a million dishes. Trust me, this is it.
Why You’ll Love This Recipe
Let me tell you why these Halloween dirt cups have earned a permanent spot in my hosting rotation. I’ve tested this recipe at six different gatherings over the past two years, and it’s never let me down.
- Quick & Easy: Comes together in under 20 minutes of active prep time. No baking, no complicated steps, no stress when you’re already juggling decorations and costumes.
- Simple Ingredients: You likely have most of these in your pantry right now. The only special purchase is the gummy worms and maybe the crushed Oreos.
- Perfect for Halloween Parties: These are designed for crowds. Make a dozen or make three dozen — the recipe scales effortlessly, and they look incredible on a dessert table.
- Crowd-Pleaser: I’ve watched kids as young as three and adults well into their seventies grin exactly the same way when they dig into these. It’s universal joy in a cup.
- Make-Ahead Magic: You can assemble these the night before your party. The pudding sets perfectly overnight, and the cookies stay crunchy on top. One less thing to worry about when guests arrive.
What makes these different from every other dirt cup recipe? It’s the texture balance. The pudding is silky and rich, the crushed cookies give that satisfying crunch, and the gummy worms add a chewy surprise. I’ve perfected the pudding-to-cookie ratio so you get the perfect bite every time — not too wet, not too dry. Plus, I’ll share my trick for getting the gummy worms to look like they’re genuinely crawling out of the dirt.
This is the dessert that makes you look like a Halloween hero without breaking a sweat. It’s fun, it’s nostalgic, and it’s exactly what your party needs.
What Ingredients You Will Need
This recipe uses simple, everyday ingredients to create something that feels special. Here’s what you’ll need and why each one matters.
For the Pudding Layer
- 2 boxes (3.4 ounces each) instant chocolate pudding mix — I prefer Jell-O brand for its reliable texture, but store brands work fine too. Make sure you get instant, not cook-and-serve.
- 4 cups cold whole milk — Whole milk gives the richest, creamiest pudding. You can use 2% in a pinch, but avoid skim — the pudding won’t set up as nicely. For dairy-free, try oat milk or full-fat coconut milk.
For the Dirt Layer
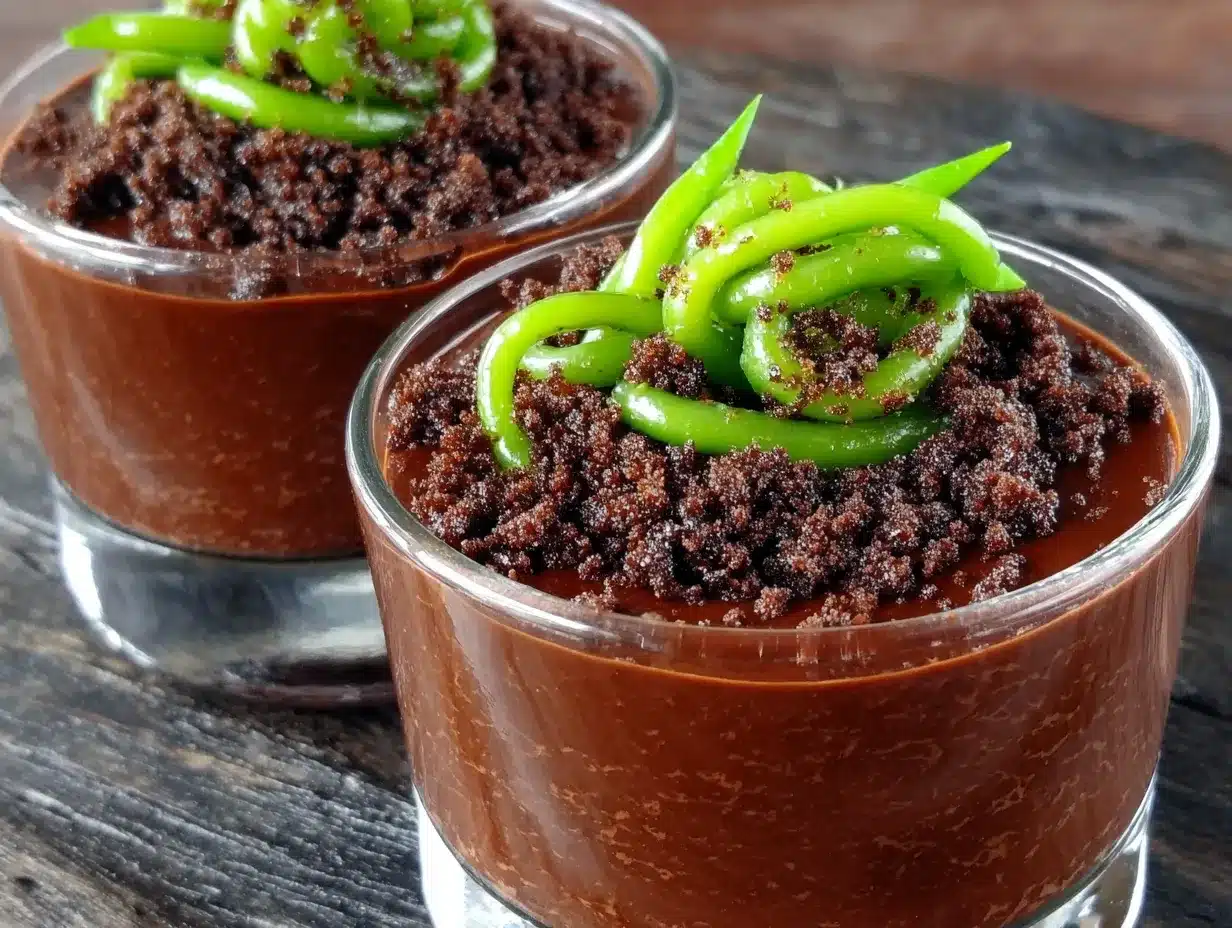
- 1 family-size package (about 14-16 ounces) chocolate sandwich cookies — Oreos are the gold standard here. The cream filling helps the crumbs stick together and adds a subtle sweetness. Generic brands work but may need extra crushing.
For the Decoration
- 1 to 2 bags gummy worms — Get the colorful sour ones for maximum visual impact. I like the Trolli brand because they’re extra wiggly and come in bright colors that pop against the dark “dirt.”
- Optional: Halloween-themed sprinkles or candy eyeballs — These add a fun touch but aren’t necessary. I sometimes add a few candy pumpkins on top for extra color.
For Serving
- Clear plastic cups (7-ounce size works perfectly) — You want cups that show off the layers. I buy the 50-packs at the dollar store and never regret having extras.
Ingredient Selection Tips: When choosing your pudding mix, check the expiration date — old pudding mix won’t set properly. For the cookies, don’t bother removing the cream filling. It actually helps create a more realistic “dirt” texture because the crumbs clump together slightly, just like real soil. If you’re making these for a classroom party, check for nut-free certification on all packaged ingredients.
Substitution Guidance: Need a gluten-free version? Use gluten-free chocolate sandwich cookies (Kinnikinnick makes a good one) and check that your pudding mix is certified gluten-free. For a lower-sugar option, use sugar-free pudding mix and reduce the cookies slightly. The texture will be a bit different, but the kids won’t notice.
Equipment Needed
You don’t need fancy equipment for this recipe, which is part of the beauty. Here’s what you’ll need:
- Large mixing bowl — For making the pudding. Any bowl works, but a glass one lets you see when the pudding starts to set.
- Whisk — A wire whisk is best for getting pudding smooth without lumps. A fork works in a pinch but takes longer.
- Food processor or zip-top bags — For crushing the cookies. A food processor gives the most consistent texture, but I’ve crushed plenty of cookies by hand using a rolling pin and a zip-top bag. The uneven chunks actually look more like real dirt.
- Measuring cups and spoons — For accurate pudding mix and milk measurements. I’ve eyeballed it before and regretted it.
- Small spatula or spoon — For layering the pudding and crumbs into cups. A small offset spatula works beautifully for getting clean layers.
- Clear plastic cups — 7-ounce size is ideal. You can also use small mason jars or even paper cups if that’s what you have.
Budget-Friendly Tip: Don’t own a food processor? No problem. Put the cookies in a large zip-top bag, squeeze out the air, and go to town with a rolling pin. It’s oddly satisfying and gives you more control over the crumb size. My kids fight over who gets to do this step.
Preparation Method
Let me walk you through this step by step. I’ve made these so many times I could do it in my sleep, but I’ll share all the little tricks I’ve learned along the way.
Step 1: Make the Pudding (5 minutes)
In your large mixing bowl, combine both boxes of instant chocolate pudding mix with the 4 cups of cold milk. Whisk vigorously for about 2 minutes until the mixture starts to thicken. You’ll feel it get heavier in the bowl — that’s how you know it’s working. Let it sit for 5 minutes to fully set. Don’t rush this part. I once tried to speed things up and ended up with soupy pudding that never firmed up properly.
Step 2: Crush the Cookies (5 minutes)
While the pudding sets, crush your cookies. If using a food processor, pulse until you get fine crumbs with some slightly larger pieces — think garden soil, not sand. If using the bag method, place cookies in a zip-top bag and crush with a rolling pin until you get the same texture. You want about 3 cups of crumbs total. Set aside 1/4 cup for the final topping.
Step 3: Layer the Cups (10 minutes)
Now comes the fun part. Spoon about 2 tablespoons of cookie crumbs into the bottom of each cup. Tap the cup gently on the counter to level it out. Next, spoon about 1/4 cup of pudding on top of the crumbs. You want the pudding layer to be about halfway up the cup. Then add another 2 tablespoons of crumbs on top of the pudding. The cup should be about three-quarters full at this point.
Step 4: Add the Worms (5 minutes)
Here’s the trick that makes these look amazing. Take a gummy worm and press it into the side of the cup so it’s partially buried in the top crumb layer and partially sticking out. Push a second worm in from the opposite side. It looks like the worms are crawling out of the dirt. For extra drama, let one worm dangle over the rim of the cup. The kids go absolutely wild for this.
Step 5: Finish and Chill (2 minutes + 1 hour)
Sprinkle the reserved cookie crumbs over the top of each cup, covering the pudding completely. Don’t cover the worms — you want them visible. Place the cups in the refrigerator for at least 1 hour before serving. This allows the pudding to fully set and the flavors to meld together. Overnight is even better.
Pro Tip: If you’re making these for a party, assemble them the night before. The texture actually improves overnight — the cookie crumbs soften slightly into the pudding, creating that perfect dirt-like consistency. Just add the worms right before serving so they stay chewy and bright.
Cooking Tips & Techniques
After making these Halloween dirt cups more times than I can count, I’ve collected a few lessons worth sharing. Some came from successes, others from spectacular failures.
The Milk Temperature Matters
Cold milk is non-negotiable for instant pudding. I learned this the hard way when I used room-temperature milk and ended up with a grainy, lumpy mess that never set properly. Keep your milk in the fridge until the moment you’re ready to use it. If you forgot to chill it, pop it in the freezer for 10 minutes — that works in a pinch.
Don’t Overmix the Pudding
Whisk just until the powder dissolves and the mixture starts to thicken. Overmixing can break down the pudding structure and prevent it from setting. You’ll see it go from thin to thick pretty quickly — that’s your cue to stop.
The Perfect Crumb Texture
Aim for crumbs that are mostly fine with some pea-sized pieces mixed in. This creates the most realistic dirt texture. If all your crumbs are too fine, they’ll turn into mud when they hit the pudding. If they’re too chunky, they won’t look like dirt at all. I keep a few larger pieces aside specifically for the top layer — they look more natural.
Timing Your Assembly
Work in an assembly line when you’re making multiple cups. Line up all your cups, add the bottom crumbs to all of them, then add the pudding to all of them, and so on. This is way faster than doing each cup individually. I can assemble 24 cups in about 15 minutes using this method.
The Worms Will Try to Escape
Gummy worms have a mind of their own. If you add them too early, they’ll slowly slide down into the pudding. Wait until you’ve added the top crumb layer, then gently push them in. They’ll stay put much better.
What I Learned from My Biggest Failure
I once tried to make these in glass mason jars for a “fancy” Halloween party. The layers looked beautiful, but nobody could get their spoon to the bottom without making a huge mess. Stick with wide-mouth cups — they’re easier to eat from and show off the layers just as well.
Variations & Adaptations
One of the best things about this recipe is how easy it is to adapt. Here are some variations I’ve tried and loved.
Peanut Butter Dirt Cups
Add 1/2 cup of creamy peanut butter to the pudding mix before adding the milk. Whisk until smooth, then proceed as usual. The peanut butter adds richness and pairs beautifully with the chocolate. Just check for allergies if you’re serving a crowd.
Mint Chocolate Dirt Cups
Use chocolate pudding mix and add 1/2 teaspoon of peppermint extract. Top with crushed chocolate mint cookies instead of regular Oreos. The minty freshness is a surprising twist that adults especially love.
Vegan Dirt Cups
Use dairy-free chocolate pudding mix and oat milk or coconut milk. Most instant pudding mixes are accidentally vegan — just check the label. Use vegan chocolate sandwich cookies (some brands use palm oil instead of butter). The texture is slightly different but still delicious.
Dirt Cup Parfaits
For a more grown-up version, layer the pudding and crumbs in small glass bowls or wine glasses. Add a dollop of whipped cream on top and garnish with a single gummy worm and a mint leaf. This looks elegant enough for an adult Halloween party.
Pumpkin Dirt Cups
Replace one box of chocolate pudding with one box of instant vanilla pudding and add 1/2 cup of pumpkin puree and 1 teaspoon of pumpkin pie spice. Layer with crushed graham crackers instead of chocolate cookies. The orange and brown layers look incredibly festive.
Serving & Storage Suggestions
These Halloween dirt cups are designed to be served cold, straight from the refrigerator. The contrast between the chilled pudding and the room-temperature gummy worms is part of the experience.
Presentation Tips for Hosting: Arrange the cups on a large platter or serving tray. Scatter a few extra gummy worms around the base of the cups for visual effect. If you’re feeling extra creative, add a small plastic spider or skeleton finger to each cup. I put mine on a black tablecloth with orange napkins, and it looks like a graveyard scene.
What to Serve Alongside: These pair perfectly with other Halloween treats. I usually set them out next to a bowl of popcorn balls and some pumpkin-shaped sugar cookies. For drinks, serve apple cider or a punch bowl with dry ice for that spooky fog effect.
Storage Instructions: Keep the cups covered in the refrigerator for up to 3 days. If you’re making them ahead, don’t add the gummy worms until the day you’re serving. The worms will absorb moisture from the pudding and get soft and sticky if left too long. I learned this the hard way when I made them two days early and ended up with sad, soggy worms.
Reheating? Don’t even think about it. These are meant to be served cold. If they’ve been sitting out at a party for more than 2 hours, it’s time to wrap them up and refrigerate the leftovers.
How Flavors Develop: The pudding actually gets richer and more chocolatey after 24 hours in the fridge. The cookie crumbs soften slightly, creating a texture that’s even more like real dirt. If you can resist eating them immediately, the next day is when they’re at their peak.
Nutritional Information & Benefits
Let’s be real — these are a treat, not a health food. But here’s what you should know if you’re keeping track.
Estimated Nutritional Values (per serving, based on 12 servings):
- Calories: 285
- Total Fat: 11g
- Saturated Fat: 4g
- Cholesterol: 15mg
- Sodium: 410mg
- Total Carbohydrates: 44g
- Dietary Fiber: 1g
- Sugars: 32g
- Protein: 5g
Dietary Considerations: This recipe contains dairy and gluten. It can be adapted for vegan and gluten-free diets using the substitutions mentioned earlier. The gummy worms may contain gelatin, so check the label if you’re serving vegetarians.
Health Benefits: On the bright side, the milk provides calcium and vitamin D. The cookies offer a small amount of iron. And honestly? There’s a mental health benefit to sharing something fun and nostalgic with people you care about. That counts for something.
My Personal Perspective: I don’t believe in labeling food as “good” or “bad.” These dirt cups are a Halloween tradition in my house, and they bring people together. That’s worth more than the sugar content. Just balance them out with a healthy dinner and maybe a walk around the block.
Conclusion
These crowd-pleasing Halloween dirt cups with gummy worms have become my signature party contribution, and I’m not ashamed to admit that Mark’s suggestion changed everything. Sometimes the best recipes come from letting go of perfectionism and listening to the person next to you who just wants a simple, delicious dessert.
I love that this recipe brings out the kid in everyone. I’ve watched grumpy teenagers crack a smile, seen shy kids come out of their shells to grab a second cup, and heard grown adults giggle as they pull a gummy worm out of the “dirt.” That’s what Halloween is really about — joy, connection, and a little bit of silly fun.
If you make these for your next Halloween gathering, I’d love to hear about it. Drop a comment below and tell me how your guests reacted. Did the kids fight over the worms? Did anyone try to put a spider in the cup? Share your photos and tag me — I want to see your creations. And if you come up with your own variation, definitely share that too. We’re all learning from each other here.
Go ahead, grab those pudding boxes, and make something that’ll have everyone talking. Your party guests will thank you — and you’ll probably end up making these every year from now on. Happy Halloween!
Frequently Asked Questions
Can I make these Halloween dirt cups ahead of time?
Yes! You can assemble them up to 24 hours in advance. Just wait to add the gummy worms until right before serving so they stay chewy and bright. The pudding actually gets better after a day in the fridge.
How many servings does this recipe make?
This recipe makes about 12 servings using 7-ounce cups. You can easily double or triple the recipe for larger parties. Just make sure you have enough refrigerator space to chill all the cups.
Can I use sugar-free pudding mix?
Absolutely. Sugar-free instant pudding works perfectly in this recipe. The texture is slightly different — a bit less creamy — but the taste is still great. Use skim milk to keep the calories lower.
My pudding didn’t set properly. What went wrong?
This usually happens for one of three reasons: the milk wasn’t cold enough, you didn’t whisk long enough, or the pudding mix was expired. Make sure your milk is straight from the fridge and whisk for a full 2 minutes. If all else fails, pop the cups in the freezer for 15 minutes to speed up the setting process.
Can I use different types of gummy candies?
Definitely! Gummy spiders, bats, or even gummy skeletons work great. You can also use candy eyeballs, pumpkin candies, or any Halloween-themed candy. Just make sure they’re colorful enough to stand out against the dark “dirt.”
PrintEasy Halloween Dirt Cups with Gummy Worms
These crowd-pleasing Halloween dirt cups with gummy worms are quick, easy, and perfect for spooky gatherings. Made with instant chocolate pudding, crushed Oreos, and gummy worms, they’re a no-bake dessert that kids and adults love.
- Prep Time: 20 minutes
- Cook Time: 0 minutes
- Total Time: 1 hour 20 minutes (includes chilling time)
- Yield: 12 servings 1x
- Category: Dessert
- Cuisine: American
Ingredients
- 2 boxes (3.4 ounces each) instant chocolate pudding mix
- 4 cups cold whole milk
- 1 family-size package (about 14–16 ounces) chocolate sandwich cookies (e.g., Oreos)
- 1 to 2 bags gummy worms
- Optional: Halloween-themed sprinkles or candy eyeballs
- Clear plastic cups (7-ounce size)
Instructions
- In a large mixing bowl, combine both boxes of instant chocolate pudding mix with 4 cups of cold milk. Whisk vigorously for about 2 minutes until the mixture starts to thicken. Let it sit for 5 minutes to fully set.
- While the pudding sets, crush the cookies. Use a food processor or place them in a zip-top bag and crush with a rolling pin until you get fine crumbs with some slightly larger pieces. You want about 3 cups of crumbs total. Set aside 1/4 cup for the final topping.
- Spoon about 2 tablespoons of cookie crumbs into the bottom of each cup. Tap the cup gently on the counter to level it out.
- Spoon about 1/4 cup of pudding on top of the crumbs. The pudding layer should be about halfway up the cup.
- Add another 2 tablespoons of crumbs on top of the pudding. The cup should be about three-quarters full.
- Press gummy worms into the side of the cup so they are partially buried in the top crumb layer and partially sticking out, as if crawling out of the dirt. For extra drama, let one worm dangle over the rim.
- Sprinkle the reserved cookie crumbs over the top of each cup, covering the pudding completely but leaving the worms visible.
- Refrigerate for at least 1 hour before serving. Overnight is even better.
Notes
For best results, use cold milk straight from the fridge. Don’t overmix the pudding. Assemble cups the night before for improved texture. Add gummy worms just before serving to keep them chewy. For gluten-free version, use gluten-free chocolate sandwich cookies and certified gluten-free pudding mix. For vegan version, use dairy-free pudding mix and oat milk or coconut milk.
Nutrition
- Serving Size: 1 cup
- Calories: 285
- Sugar: 32
- Sodium: 410
- Fat: 11
- Saturated Fat: 4
- Carbohydrates: 44
- Fiber: 1
- Protein: 5
Keywords: Halloween dirt cups, gummy worms, no-bake dessert, chocolate pudding, Oreo dirt cups, easy Halloween treat, spooky dessert, kids party dessert


