It was just past midnight on a drizzly October night, and I was alone in my kitchen with a bowl of egg whites that needed using up. The house was quiet except for the hum of the mixer and the soft patter of rain against the window. I wasn’t trying to make anything spooky—I just had leftover egg whites from a batch of classic vanilla bean layer cake I’d baked earlier that day. But as I watched the stiff peaks form, something clicked. These glossy white clouds of meringue looked like tiny ghosts already, just waiting for a face.
I grabbed a bag of chocolate chips from the pantry and started piping little blobs onto parchment. No template, no fancy piping tips—just a star tip and a steady hand. The first few looked more like lumpy snowmen than ghosts, but by the fifth one, I’d found my rhythm. There’s something deeply satisfying about making these ghost meringue cookies. They’re simple enough that you don’t need to be a pastry chef, but they look like you spent hours on them. And honestly? The fact that they only take about 20 minutes of active work feels like a little kitchen magic trick.
These Easy Ghost Meringue Cookies with Chocolate Chip Eyes have become my go-to for Halloween parties, classroom treats, and even just a quiet night in when I want something sweet without a ton of effort. They’re light, airy, and melt on your tongue like a whispered secret. I’ve made them three times this month alone, and each batch disappears faster than I can pipe them. If you’ve never made meringue before, don’t worry—I’ve made every mistake in the book so you don’t have to. Let me show you how it’s done.
Why You’ll Love This Recipe
I’ve tested this recipe six times to get the texture just right—crisp on the outside, chewy in the center, and stable enough to hold those chocolate chip eyes without cracking. Here’s why this version works better than any other ghost cookie I’ve tried:
- Quick & Easy: From start to finish, you’re looking at about 1 hour 15 minutes, but only 20 minutes of that is active work. The oven does the rest.
- Simple Ingredients: You probably have everything already—egg whites, sugar, cream of tartar, vanilla, and chocolate chips. No weird specialty items.
- Perfect for Halloween: These are adorable for parties, trick-or-treat bags, or classroom celebrations. Kids love making them too.
- Crowd-Pleaser: They’re naturally gluten-free and low-fat, so almost everyone can enjoy them. I’ve had people who “don’t like meringue” go back for thirds.
- Unbelievably Delicious: The texture is like a marshmallow crossed with a cloud, and the chocolate eyes add just the right amount of richness.
What makes this recipe different from all those other ghost cookie recipes out there? It’s the technique. I use a combination of superfine sugar and a longer whipping time to create a meringue that holds its shape perfectly without weeping or cracking. The chocolate chips get pressed in at just the right moment—when the meringue is still slightly tacky but firm enough to hold them in place. This isn’t just another Halloween treat; it’s the one that’ll have people asking for the recipe before the party’s over.
There’s something about watching someone take their first bite of these cookies. Their eyes go wide, then they smile, then they reach for another one. That’s why I keep making them. They’re comfort food in its purest form—simple, sweet, and a little bit magical.
What Ingredients You Will Need
This recipe uses simple, pantry-friendly ingredients to create something that looks far more impressive than it actually is. Each ingredient plays a specific role in building the perfect ghost meringue.
- 4 large egg whites, room temperature (about 120g or ½ cup) — Room temperature egg whites whip up higher and more stable than cold ones. Separate your eggs when they’re cold, then let the whites sit on the counter for 30 minutes before starting.
- 1 cup (200g) superfine sugar — Also called caster sugar. It dissolves faster than regular granulated sugar, which gives you a smoother, more stable meringue. If you can’t find it, pulse regular sugar in a food processor for 30 seconds.
- ½ teaspoon cream of tartar — This acidic powder stabilizes the egg whites and helps prevent them from deflating. It’s non-negotiable for foolproof meringue.
- 1 teaspoon vanilla extract — Use pure vanilla extract if you have it. The flavor difference is noticeable, and it adds warmth to the otherwise plain meringue.
- ⅓ cup (60g) mini chocolate chips — I prefer mini chips because they look more proportionate on the ghost faces. Regular chocolate chips work too, but they look a bit cartoonish. I recommend Ghirardelli or Nestlé Toll House for consistent melting quality.
- Optional: ¼ teaspoon almond extract — This adds a subtle nutty flavor that pairs beautifully with the vanilla. I use it about half the time, depending on my mood.
- Optional: Gel food coloring (black or orange) — If you want to pipe little mouths or add spooky details, gel coloring works better than liquid because it doesn’t affect the meringue’s consistency.
For the best results, use fresh eggs—older egg whites whip up better, but they need to be free of any yolk contamination. A single drop of yolk can ruin your entire batch. I learned this the hard way and had to start over twice in one afternoon. If you’re worried about separating, crack each egg into a small bowl first, then transfer the white to your mixing bowl. That way, if one yolk breaks, you only lose one egg instead of the whole batch.
You can substitute the superfine sugar with regular granulated sugar, but you’ll need to beat the meringue for about 5 minutes longer to ensure the sugar dissolves completely. Run a tiny bit between your fingers—if it feels gritty, keep beating.
Equipment Needed
You don’t need a professional pastry kitchen for these ghost meringue cookies, but having the right tools makes the process much smoother.
- Stand mixer or hand mixer — A stand mixer with the whisk attachment is ideal, but a hand mixer works perfectly fine. You’ll be beating for 10-12 minutes, so a stand mixer saves your arms.
- Large mixing bowl — Make sure it’s completely clean and dry. Any grease or moisture will prevent the egg whites from whipping properly. Glass or metal bowls work best—plastic can hold onto oils.
- Piping bag with star tip (Wilton 1M or similar) — A star tip gives the ghosts their ruffled, spooky shape. You can use a round tip for a smoother look, or even snip the corner of a zip-top bag in a pinch.
- Baking sheet lined with parchment paper — Parchment is essential here. Wax paper will stick, and silicone mats can cause the meringues to spread too much.
- Rubber spatula — For folding in the chocolate chips gently without deflating the meringue.
- Small offset spatula — Helpful for smoothing the meringue in the piping bag and for any touch-ups.
- Oven thermometer — This is my secret weapon. Ovens run hot or cold, and meringues are sensitive to temperature. An accurate thermometer costs about $10 and saves you from ruined batches.
If you don’t have a piping bag, you can use a sturdy zip-top bag with the corner snipped off. The ghosts won’t have as defined ruffles, but they’ll still look adorable. I’ve done this in a pinch when traveling, and honestly, nobody noticed the difference.
Preparation Method
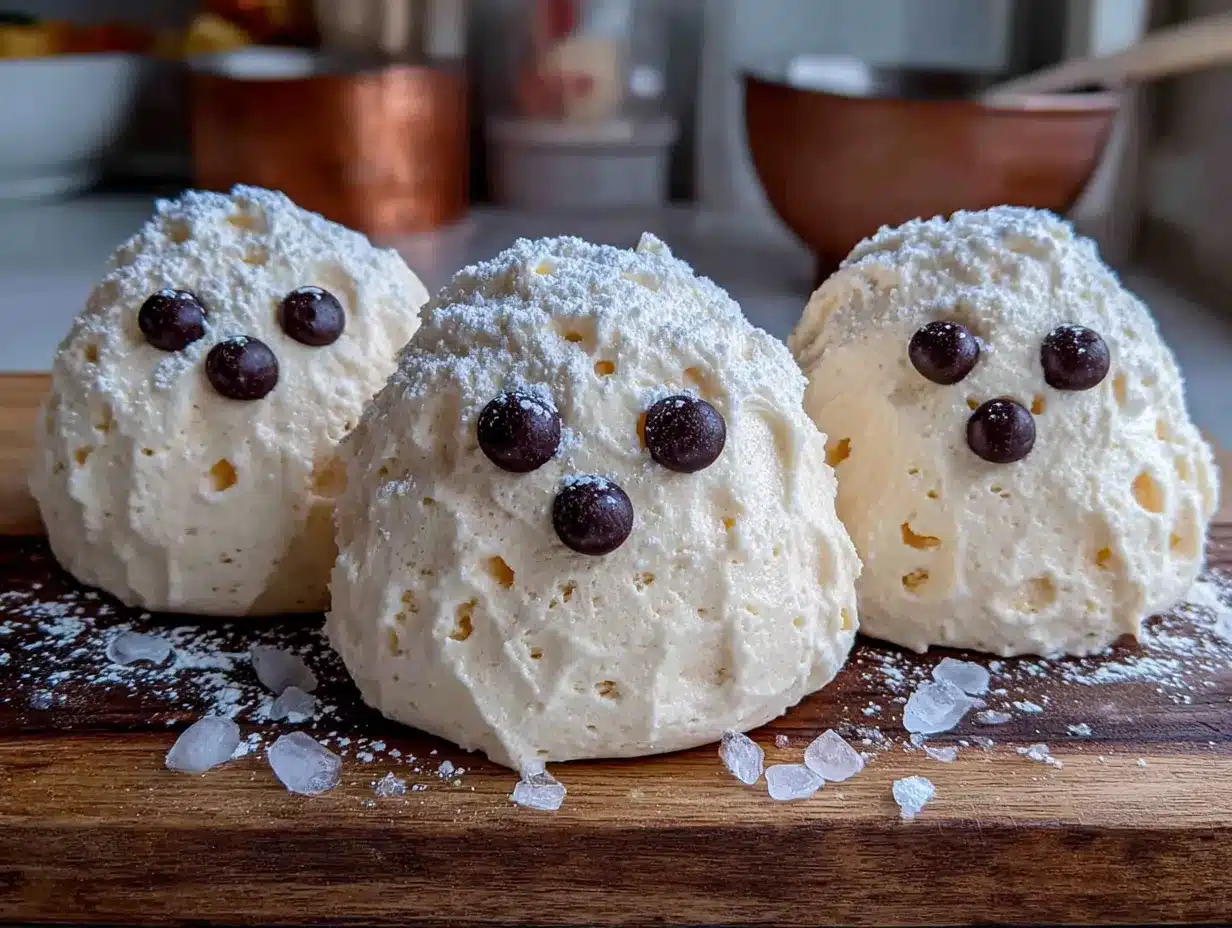
Follow these steps carefully, and you’ll have perfect ghost meringue cookies every time. I’ve broken it down so even first-timers can nail it.
- Preheat your oven to 200°F (95°C) and line two baking sheets with parchment paper. This low temperature dries the meringues out slowly without browning them. If your oven runs hot, reduce to 190°F (88°C).
- Clean your mixing bowl and whisk attachment thoroughly with hot soapy water, then wipe with white vinegar to remove any trace of grease. Dry completely. Any residual fat will prevent your egg whites from whipping.
- Add the egg whites and cream of tartar to the bowl. Beat on medium speed until foamy and opaque, about 2 minutes. You’ll see lots of tiny bubbles, and the mixture will look like soapy water.
- Increase speed to medium-high and begin adding the sugar one tablespoon at a time, waiting about 15 seconds between additions. This slow incorporation helps the sugar dissolve fully. If you dump it all in at once, you’ll get gritty meringue.
- Continue beating on high speed for 8-10 minutes total. The meringue should look glossy, thick, and hold stiff peaks. To test: lift the whisk attachment straight up—the peak should stand upright without flopping over. Rub a tiny bit between your fingers; it should feel smooth, not gritty. If it’s gritty, keep beating.
- Add the vanilla extract (and almond extract if using) and beat for 30 seconds more. The meringue will tighten up slightly.
- Stop the mixer and remove the bowl. Gently fold in the mini chocolate chips using a rubber spatula. Use a light hand—you want to distribute the chips without deflating the meringue. About 10-12 folds should do it.
- Transfer the meringue to your piping bag fitted with the star tip. Twist the top of the bag to seal and push the meringue down toward the tip.
- Pipe the ghosts: Hold the piping bag perpendicular to the baking sheet about ½ inch above the surface. Squeeze firmly to create a base, then lift straight up while continuing to squeeze, forming a tall, tapered shape. Release pressure and pull away quickly to create a little peak on top. Each ghost should be about 1½ to 2 inches tall. Leave 1 inch of space between them—they don’t spread much, but they need airflow.
- Press in the chocolate chip eyes: While the meringue is still wet, gently press two mini chocolate chips into each ghost for eyes. Position them about ⅓ of the way down from the top. You can also add a tiny dot of black gel food coloring for a mouth using a toothpick if you’re feeling fancy.
- Bake for 60-75 minutes at 200°F (95°C). Do not open the oven door during the first 45 minutes. The meringues are done when they lift easily off the parchment paper and sound hollow when tapped on the bottom. They should be dry to the touch but not browned.
- Turn off the oven and crack the door open (use a wooden spoon handle to prop it). Let the meringues cool completely inside the oven for at least 1 hour. This gradual cooling prevents cracking.
- Remove from the oven and let them cool completely on the baking sheet before handling. If they stick to the parchment, they need more drying time—pop them back in the turned-off oven for 30 more minutes.
Pro tip: If you’re making these on a humid day, add an extra 10-15 minutes to the baking time. Humidity is the enemy of meringue, and I’ve lost batches to summer thunderstorms more times than I care to admit.
Cooking Tips & Techniques
I’ve made every mistake possible with meringue, so you don’t have to. Here’s what I’ve learned the hard way.
Humidity is your enemy. Meringue is essentially sugar and egg whites, and sugar attracts moisture like nothing else. If it’s raining or super humid, either wait for a drier day or add an extra 15 minutes to the baking time. I once made these during a summer thunderstorm and ended up with sticky, weeping ghosts that looked like they were crying. Not the spooky vibe I was going for.
Don’t overmix after adding the chocolate chips. I know it’s tempting to keep folding until everything looks perfectly distributed, but overworking the meringue deflates all that beautiful air you whipped into it. Stop as soon as you can’t see any more streaks of white. A few uneven spots are fine—they add character.
Use a timer for your sugar additions. I set a timer for 15 seconds between each spoonful of sugar. It feels tedious, but it makes a huge difference in texture. When I rush this step, I end up with grainy meringue that weeps sugar syrup during baking.
Pipe with confidence. Hesitation creates lumpy ghosts. Squeeze firmly, lift steadily, and pull away quickly. If you mess up, just scrape the meringue back into the bag and try again. No harm done.
Let them cool completely in the oven. This is non-negotiable. The sudden temperature change when you pull hot meringue into cool air causes cracking. I’ve lost entire batches to this mistake. Patience pays off here.
Store them properly. Meringue cookies are hygroscopic—they absorb moisture from the air. Store them in an airtight container at room temperature with a silica gel packet if you have one. They’ll stay crisp for up to 2 weeks. Do not refrigerate them, or they’ll get sticky.
Variations & Adaptations
One of the best things about this recipe is how easily it adapts to different tastes and dietary needs. Here are some variations I’ve tried:
- Pumpkin Spice Ghosts: Add 1 teaspoon pumpkin pie spice and ¼ teaspoon cinnamon to the sugar before whipping. Use orange gel food coloring to tint the meringue. These are perfect for fall parties and taste like pumpkin pie in cloud form.
- Chocolate Ghosts: Sift 2 tablespoons of unsweetened cocoa powder with the sugar before adding. The meringue will be a pale brown, and the chocolate flavor is subtle but delicious. Use white chocolate chips for the eyes instead of dark—the contrast is striking.
- Vegan Version: Substitute the egg whites with aquafaba (the liquid from a can of chickpeas). Use 6 tablespoons of aquafaba for 4 egg whites. Add an extra ¼ teaspoon cream of tartar and beat for 12-15 minutes. The texture is slightly less stable, but it works surprisingly well. I tested this for a vegan friend’s Halloween party, and nobody could tell the difference.
- Peppermint Ghosts: Replace the vanilla extract with 1 teaspoon peppermint extract and add 2 drops of red gel food coloring for a pale pink tint. Crush a few candy canes and sprinkle on top before baking. These are festive for Christmas too.
- Air Fryer Method: Preheat your air fryer to 200°F (95°C). Pipe the ghosts onto parchment rounds that fit your air fryer basket. Cook for 25-30 minutes, then let them cool in the turned-off air fryer with the door open for 30 minutes. This works great for small batches and uses less energy than the oven.
My personal favorite variation is the pumpkin spice version. I made them for a Halloween potluck last year, and they disappeared in 10 minutes. One friend asked if she could pay me to make a batch for her daughter’s birthday party. That’s when I knew this recipe was a keeper.
Serving & Storage Suggestions
These ghost meringue cookies are best served at room temperature, straight from the container. They’re delicate, so handle them gently.
Presentation ideas: Arrange them on a platter with some dry ice for a spooky fog effect (use tongs—dry ice burns skin). Or stick them upright in a bowl of white popcorn for a “graveyard” snack display. For Halloween parties, I like to put them in mini cupcake liners and arrange them on a tiered stand. They look adorable next to other spooky treats like bacon-wrapped smokies or deviled eggs with bacon crumbles for a sweet-savory spread.
Storage: Place the cooled meringues in an airtight container with parchment paper between layers. Store at room temperature (not in the fridge) for up to 2 weeks. If they get sticky, you can re-crisp them in a 200°F (95°C) oven for 10 minutes. I’ve done this several times, and they come back to life perfectly.
Freezing: You can freeze baked meringues for up to 3 months. Place them in a single layer in a freezer-safe container with parchment between layers. Thaw at room temperature for 30 minutes before serving. Do not thaw in the fridge—the moisture will ruin them.
Flavor development: These cookies actually taste better after 24 hours. The flavors meld together, and the texture becomes perfectly crisp throughout. I always try to make them a day ahead for parties.
Pairing suggestions: Serve with hot cocoa, coffee, or a glass of cold milk. For adult gatherings, they’re lovely with a dessert wine or a creamy cocktail like a White Russian. The sweetness of the meringue balances the bitterness of coffee beautifully.
Nutritional Information & Benefits
Per serving (2 ghost cookies):
- Calories: 85
- Total Fat: 1.5g
- Saturated Fat: 0.8g
- Cholesterol: 0mg
- Sodium: 25mg
- Total Carbohydrates: 17g
- Sugars: 16g
- Protein: 1.5g
Health benefits: These cookies are naturally gluten-free, low in fat, and contain no butter or oil. Egg whites are a good source of protein and contain no cholesterol. The cream of tartar provides potassium, and the chocolate chips offer a small dose of antioxidants. While they’re certainly a treat, they’re lighter than most cookies and won’t leave you feeling heavy.
Dietary considerations: This recipe is naturally gluten-free, nut-free (unless you add almond extract), and vegetarian. For a vegan version, use the aquafaba substitution mentioned above. They’re also relatively low in calories compared to traditional cookies—perfect for satisfying a sweet tooth without derailing your diet.
I personally love that I can enjoy two of these with my afternoon coffee for under 100 calories. They feel indulgent without the guilt, and that’s a win in my book.
Conclusion
These Easy Ghost Meringue Cookies with Chocolate Chip Eyes have become a staple in my Halloween rotation, and I have a feeling they’ll become one in yours too. They’re proof that you don’t need fancy equipment or professional skills to create something that looks and tastes amazing. Just four simple ingredients, a little patience, and a willingness to get a bit messy.
What I love most about this recipe is how forgiving it is. The first batch I ever made looked like sad, lumpy blobs, but they still tasted incredible. My kids ate them anyway and asked for more. That’s the thing about homemade treats—they don’t have to be perfect to be perfect. So if your ghosts come out a little lopsided or your chocolate chip eyes end up on the side instead of the front, don’t stress. They’ll still disappear in minutes.
I’d love to see your ghost creations! Drop a comment below and tell me how yours turned out, or share your own variations. Did you try the pumpkin spice version? Did your kids help pipe the ghosts? I read every comment, and your stories make my day. Happy Halloween baking, friends—may your ghosts be spooky, your meringue be crisp, and your chocolate chips be plenty.
Frequently Asked Questions
Can I make these ghost meringue cookies without a piping bag?
Absolutely! If you don’t have a piping bag, use a sturdy zip-top bag with a corner snipped off. You can also use a spoon to drop dollops of meringue onto the baking sheet and shape them gently with the back of the spoon. They won’t have the ruffled texture, but they’ll still look like cute little ghosts.
Why did my meringue cookies turn brown?
Your oven temperature was too high. Meringues should bake at a low temperature (200°F/95°C) to dry out slowly without browning. If your oven runs hot, reduce the temperature by 10-15 degrees. Using an oven thermometer helps ensure accuracy.
Can I use liquid food coloring in the meringue?
I don’t recommend it. Liquid food coloring adds moisture to the meringue, which can cause it to deflate or become sticky. Use gel or powder food coloring instead, which won’t affect the texture. A little goes a long way—start with just a drop on the tip of a toothpick.
How do I know when the meringue is done baking?
The meringues should lift easily off the parchment paper and sound hollow when tapped on the bottom. They should be dry to the touch but not browned. If they stick to the parchment, they need more time. Bake for 60-75 minutes, then check. If they’re not ready, continue baking in 10-minute increments.
Can I double this recipe?
Yes, but you’ll need to bake the cookies in batches. Most stand mixers can handle up to 6 egg whites comfortably. If you double the recipe, use two baking sheets and rotate them halfway through baking. Do not crowd the oven, or the meringues won’t dry properly.
Pin This Recipe!
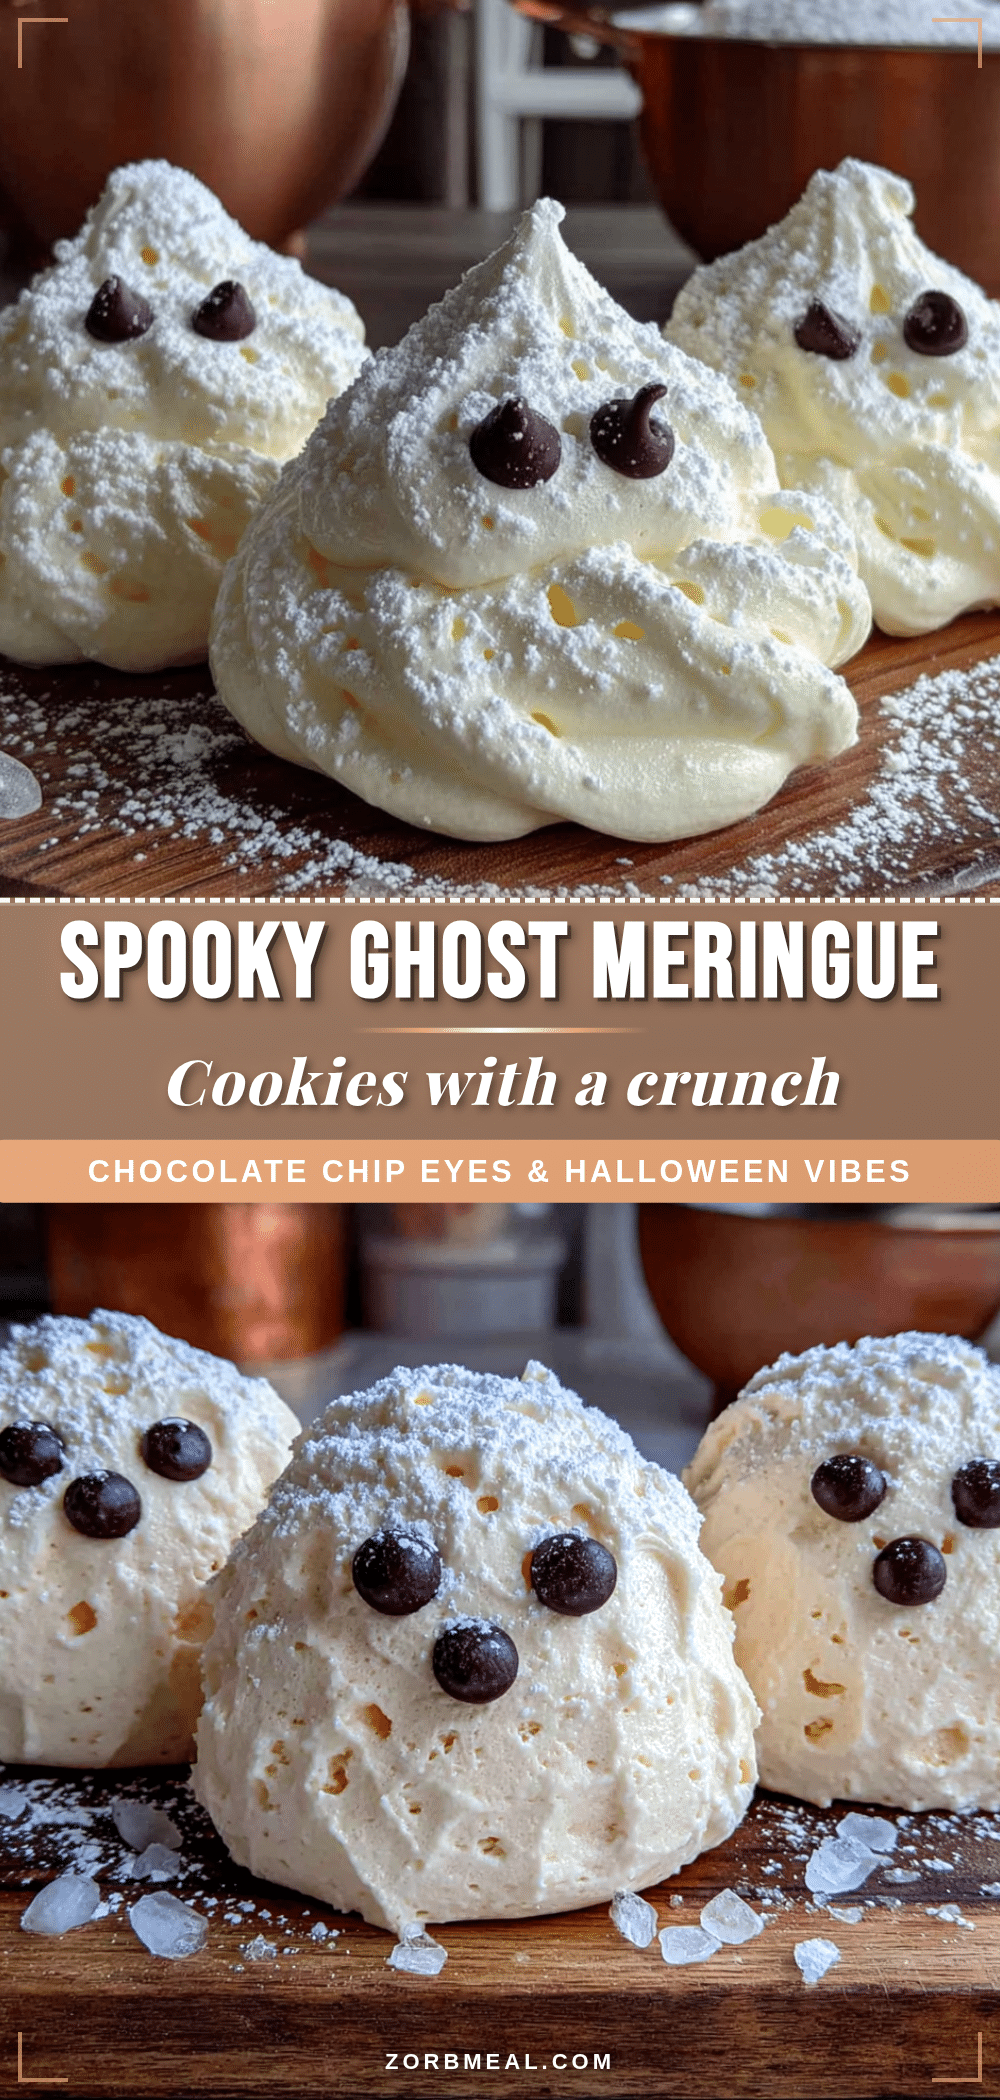
Easy Ghost Meringue Cookies with Chocolate Chip Eyes
These light, airy ghost meringue cookies are perfect for Halloween. With a crisp exterior and chewy center, they’re quick to make and naturally gluten-free.
- Prep Time: 20 minutes
- Cook Time: 60-75 minutes
- Total Time: 1 hour 15 minutes
- Yield: 24 servings 1x
- Category: Dessert
- Cuisine: American
Ingredients
- 4 large egg whites, room temperature (about 120g or ½ cup)
- 1 cup (200g) superfine sugar
- ½ teaspoon cream of tartar
- 1 teaspoon vanilla extract
- ⅓ cup (60g) mini chocolate chips
- Optional: ¼ teaspoon almond extract
- Optional: Gel food coloring (black or orange)
Instructions
- Preheat your oven to 200°F (95°C) and line two baking sheets with parchment paper.
- Clean your mixing bowl and whisk attachment thoroughly with hot soapy water, then wipe with white vinegar to remove any trace of grease. Dry completely.
- Add the egg whites and cream of tartar to the bowl. Beat on medium speed until foamy and opaque, about 2 minutes.
- Increase speed to medium-high and begin adding the sugar one tablespoon at a time, waiting about 15 seconds between additions.
- Continue beating on high speed for 8-10 minutes total until the meringue is glossy, thick, and holds stiff peaks.
- Add the vanilla extract (and almond extract if using) and beat for 30 seconds more.
- Stop the mixer and gently fold in the mini chocolate chips using a rubber spatula, about 10-12 folds.
- Transfer the meringue to a piping bag fitted with a star tip.
- Pipe the ghosts: Hold the piping bag perpendicular to the baking sheet about ½ inch above the surface. Squeeze firmly to create a base, then lift straight up while continuing to squeeze, forming a tall, tapered shape. Release pressure and pull away quickly to create a little peak on top. Each ghost should be about 1½ to 2 inches tall. Leave 1 inch of space between them.
- Press in the chocolate chip eyes: While the meringue is still wet, gently press two mini chocolate chips into each ghost for eyes, about ⅓ of the way down from the top.
- Bake for 60-75 minutes at 200°F (95°C). Do not open the oven door during the first 45 minutes. The meringues are done when they lift easily off the parchment paper and sound hollow when tapped on the bottom.
- Turn off the oven and crack the door open (use a wooden spoon handle to prop it). Let the meringues cool completely inside the oven for at least 1 hour.
- Remove from the oven and let them cool completely on the baking sheet before handling.
Notes
Humidity is the enemy of meringue. On humid days, add an extra 10-15 minutes to the baking time. Store in an airtight container at room temperature for up to 2 weeks. Do not refrigerate.
Nutrition
- Serving Size: 2 ghost cookies
- Calories: 85
- Sugar: 16
- Sodium: 25
- Fat: 1.5
- Saturated Fat: 0.8
- Carbohydrates: 17
- Protein: 1.5
Keywords: ghost meringue cookies, Halloween cookies, meringue cookies, gluten-free cookies, easy Halloween treats


