I figured making rice krispie treats was just melting marshmallows and stirring in cereal — no big deal. It took about five minutes for everything to get sticky, messy, and honestly, a little chaotic. But what actually happened was a burst of creativity and a dozen little hands begging to help shape the treats into tiny school buses. The bright yellow, the careful placement of licorice wheels, and the way those crispy squares snapped when bitten into made this simple recipe so much more than a quick snack.
The whole scene unfolded on a Saturday afternoon, with my kitchen smelling of sweet butter and vanilla, and the kids buzzing with excitement for the upcoming school party. I wasn’t aiming for perfection, just something fun and easy. Yet, these Easy Fun School Bus Rice Krispie Treats ended up being the hit of the party — and honestly, they were way easier than I expected to pull off. The best part? No fancy ingredients or complicated steps, just good old-fashioned sticky, crispy, sweet goodness shaped into a playful treat that made everyone smile.
Looking back, I realize this recipe stuck with me because it’s more than just a dessert — it’s a chance to get the kids involved in the kitchen, create something that looks like a celebration on a plate, and share a few laughs while making a mess. If you’re after a treat that’s kid-approved and party-ready, this one’s a quiet winner. It’s the kind of recipe that makes you feel like a fun parent without breaking a sweat.
Why You’ll Love This Recipe
Honestly, these Easy Fun School Bus Rice Krispie Treats have a charm that goes beyond their simple ingredients. I’ve tested a bunch of rice krispie variations over the years, and this one nails it for kids’ parties every time. Here’s why you’ll want to make them:
- Quick & Easy: Comes together in about 15 minutes, so it’s perfect for last-minute party prep or a weekend activity with the kids.
- Simple Ingredients: You probably already have everything in your pantry — marshmallows, butter, cereal, and some candy for decoration.
- Perfect for Kids’ Parties: The school bus shape is a playful touch that gets kids excited and makes your treat table stand out.
- Crowd-Pleaser: The crispy, chewy texture with a hint of vanilla is always a hit, with kids asking for seconds (and thirds!).
- Unbelievably Delicious: The buttery marshmallow mix clings perfectly to the cereal, giving you that classic rice krispie treat flavor with a fun twist.
This recipe isn’t just another rice krispie treat — it’s the one I reach for when I want a fuss-free, fun dessert that feels homemade but looks festive. The trick is in the shaping and the little candy details that turn a humble snack into a mini school bus parade. Plus, it’s a chance to get kids hands-on in the kitchen without stressing over complicated steps or weird ingredients.
If you’re curious about other easy party snacks, you might enjoy the fresh caprese skewers recipe or the honey bourbon baked beans that go great alongside these treats for a well-rounded party spread.
What Ingredients You Will Need
This recipe uses simple, wholesome ingredients to deliver bold flavor and a satisfying crispy-chewy texture without any fuss. The ingredients are pantry staples, making it a breeze to whip up these treats whenever the party calls for them.
- For the base:
- 6 cups Rice Krispies cereal (I prefer Kellogg’s for the best crunch)
- 4 tablespoons unsalted butter (softened for easy melting)
- 10 ounces mini marshmallows (about 3 1/2 cups; you can use regular marshmallows cut into smaller pieces)
- 1 teaspoon pure vanilla extract (adds a lovely depth to the sweetness)
- For decorating the school buses:
- Yellow food coloring gel (for coloring part of the marshmallow mixture if you want a brighter yellow)
- Black licorice strings or Twizzlers (cut into small rounds or strips for wheels and details)
- Mini chocolate chips or black decorating gel (for headlights and windows)
- Optional: small candy eyes or edible markers for extra fun details
- Substitution tips:
- Use gluten-free rice cereal if you need a gluten-free treat.
- For dairy-free, substitute butter with coconut oil and use vegan marshmallows.
- If you want to avoid artificial food coloring, you can skip it or try natural options like turmeric (but be careful with the flavor).
All these ingredients come together to create a treat that’s as fun to make as it is to eat. And since the decorations are simple candies, you can personalize the buses however you want — more colorful, more detailed, or just plain and sweet.
Equipment Needed
- Large nonstick saucepan or pot (for melting the butter and marshmallows evenly)
- Wooden spoon or heat-resistant spatula (for stirring the sticky mixture)
- 9×13-inch baking pan (to press the mixture evenly; glass or metal works fine)
- Butter or nonstick spray (to grease the pan and your hands to prevent sticking)
- Sharp knife or pizza cutter (to cut the treats into bus shapes)
- Small bowls or plates (to hold decorating candies and make assembly easier)
- Optional: silicone spatula (makes scraping the sticky mix easier)
Honestly, you don’t need any fancy gadgets here. I’ve made these treats in a basic saucepan and just greased my hands with butter to shape the buses. If you want to get a bit neater, a pizza cutter is a game-changer for straight edges. And if you plan on making a bunch, having a cooling rack nearby can help speed things up.
Preparation Method
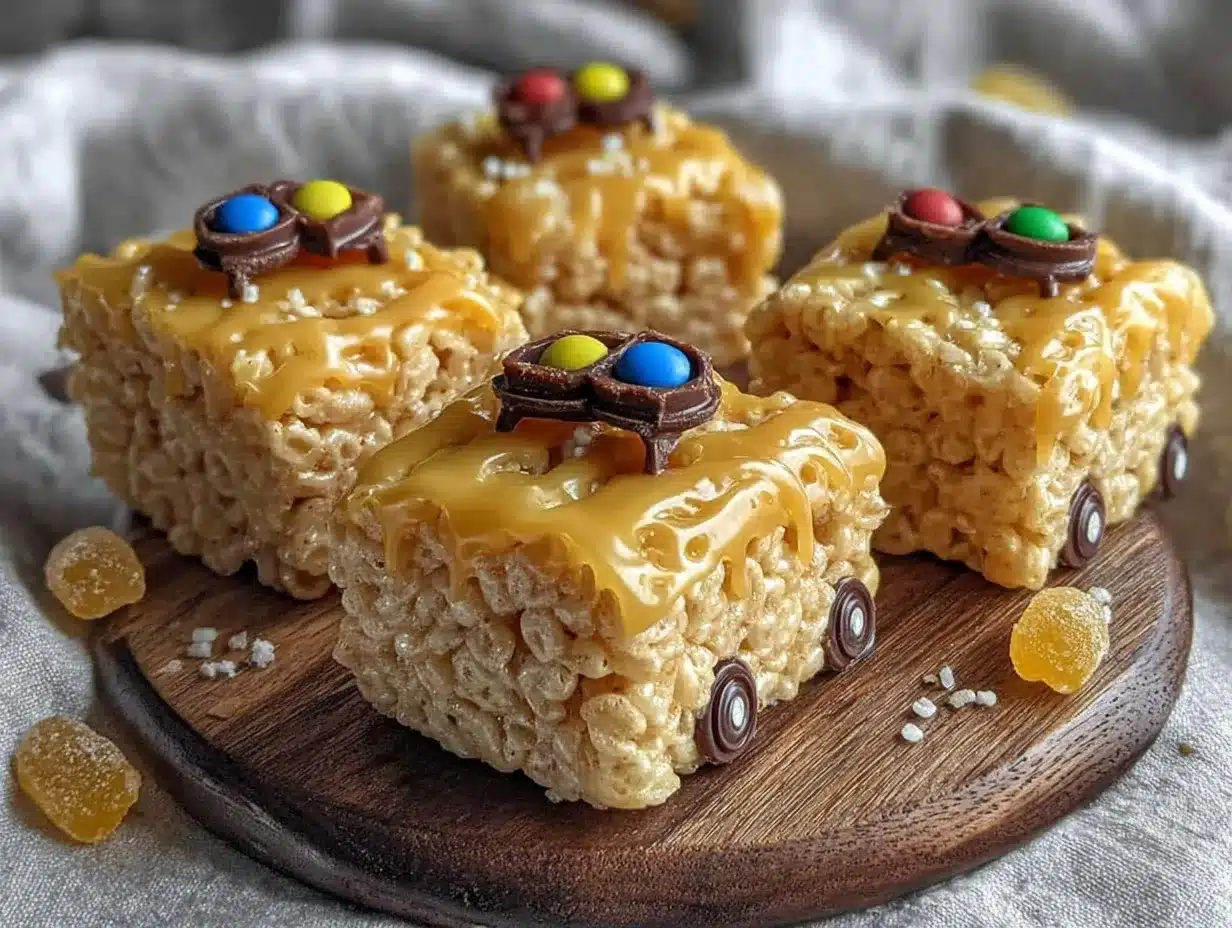
- Prepare your pan: Grease a 9×13-inch baking pan with butter or nonstick spray. Set aside to keep the rice krispie mixture from sticking.
- Melt the butter: In a large nonstick saucepan over low heat, melt 4 tablespoons (about 57 grams) of unsalted butter. Keep an eye on it; you just want it melted, not browned.
- Add marshmallows: Stir in 10 ounces (about 280 grams or 3 1/2 cups) of mini marshmallows. Keep stirring gently with a wooden spoon until the marshmallows are completely melted and smooth. This usually takes about 3-5 minutes. Avoid high heat to prevent burning.
- Add vanilla: Remove from heat and stir in 1 teaspoon of pure vanilla extract for that subtle, cozy flavor that makes these treats taste homemade.
- Color your mixture (optional): If you want your rice krispie treats to be a bright school bus yellow, add a few drops of yellow food coloring gel now and stir well until evenly mixed.
- Mix in the cereal: Immediately pour in 6 cups (about 21 ounces or 180 grams) of Rice Krispies cereal. Stir gently but thoroughly until every bit of cereal is coated with the marshmallow mixture.
- Transfer to pan: Pour the mixture into your prepared pan. Using a buttered spatula or lightly buttered hands, press the mixture firmly and evenly into the pan. Don’t press too hard or the treats will be too dense; you want a nice crispy-chewy texture.
- Cool and set: Let the treats cool at room temperature for about 30 minutes to firm up. If you’re impatient like me, popping the pan in the fridge for 15-20 minutes speeds things along.
- Cut into school bus shapes: Once firm, use a sharp knife or pizza cutter to cut the treats into rectangles roughly 2 inches by 3 inches (5×7.5 cm). If you’re feeling fancy, trim corners to create a bus shape, or keep it simple with rectangles.
- Decorate: Use black licorice rounds for wheels, mini chocolate chips or decorating gel for windows and headlights. Press candies gently into the treats so they stick. This step is where the fun really happens!
- Serve or store: Serve immediately or store in an airtight container at room temperature for up to 3 days.
If your marshmallow mixture hardens before you mix in the cereal, just warm it gently again on low heat. Also, don’t skip buttering your hands or spatula — that sticky marshmallow mix will cling to everything else!
Cooking Tips & Techniques
Making rice krispie treats might seem foolproof, but a few tips I’ve picked up can keep you from ending up with a sticky disaster or rock-hard squares. First off, low and slow is the way to go when melting butter and marshmallows. Too much heat and you risk scorching, which ruins that smooth texture and leaves a bitter taste.
When mixing in the cereal, fold gently. You want all the pieces coated, but stirring too vigorously can crush the cereal and make the treats dense. Pressing the mixture evenly but not too firmly into the pan is key — the treats should hold together but still feel light and crispy.
Another honest tip: butter your hands before shaping or pressing. I learned the hard way that marshmallow goo sticks to everything, including your fingers, making decorating a sticky nightmare. Using black licorice for wheels and details is a classic move, but if you can’t find any, you can substitute with chocolate chips or even small round candies.
Timing your decorating is a bit of a balancing act too. If the treats cool too much, the marshmallow hardens, and candies won’t stick well. But if they’re too warm, the treats get squishy. I usually decorate right after cutting when the treats are firm but still slightly tacky.
If you want to prep ahead, you can make the base treats a day in advance and decorate just before serving. Just keep them wrapped airtight to maintain that perfect texture.
Variations & Adaptations
These Easy Fun School Bus Rice Krispie Treats are pretty flexible, so you can switch them up depending on your party theme or dietary needs.
- Color variations: Swap the yellow food coloring for orange or red to make fire trucks or other vehicles. You can even split the marshmallow mixture and color portions differently for multi-colored treats.
- Healthier twist: Substitute half of the Rice Krispies with puffed quinoa or millet for a nutty flavor and slightly more nutrition. Use natural marshmallow brands without additives if preferred.
- Gluten-free: Make sure you use certified gluten-free rice cereal if you’re serving guests with gluten allergies.
- Vegan option: Use coconut oil in place of butter and vegan marshmallows to keep things plant-based.
- Creative toppings: Instead of licorice, try edible markers to draw bus windows and doors or use small candies like M&Ms for colorful accents.
One time, I even tried making these treats into little trains by stacking and linking rectangles with peanut butter “glue” — kids loved the idea and it was surprisingly easy to pull off. These treats really let you get creative without complicating the process.
Serving & Storage Suggestions
Serve these school bus rice krispie treats fresh at room temperature for the best crispy-chewy texture. They’re perfect finger food for kids, so no plates or forks needed, which keeps things casual and fun.
If you’re setting up a party table, line a tray with colorful napkins or a themed tablecloth to bring out the bright yellow treats. Pairing them with savory bites like creamy buffalo chicken dip or loaded baked potato salad balances sweet and savory nicely and keeps the party spread interesting.
Store leftover treats in an airtight container at room temperature for up to 3 days. Avoid refrigerating — the cool air can make them hard and less enjoyable. If you need to keep them longer, you can freeze the treats in a sealed container for up to 4 weeks. Just thaw at room temperature before serving.
Flavors stay stable, but the texture is best when fresh. If you want to refresh slightly stale treats, a few seconds in the microwave (5-10 seconds) softens them nicely — but watch closely so they don’t melt.
Nutritional Information & Benefits
While these Easy Fun School Bus Rice Krispie Treats are definitely a sweet indulgence, they bring some simple ingredients without complicated additives. Each treat (about 2×3 inch) has roughly 120-150 calories depending on the size and exact ingredients.
Key ingredients like butter and marshmallows provide quick energy, but keep in mind this is a treat meant for fun occasions rather than everyday snacking. Using real butter and pure vanilla adds a touch of wholesome flavor without artificial chemicals.
For kids, these treats are a fun way to enjoy a sweet snack that’s easy to chew and share, with no nuts or common allergens unless you add them in decorations. Just be mindful of portion size and balance with meals that include fruits, veggies, and protein.
Conclusion
These Easy Fun School Bus Rice Krispie Treats are a simple idea that turned into a favorite party staple in my kitchen. They’re quick to make, require minimal ingredients, and bring big smiles to kids’ faces with their playful shape and sweet crunch. What I love most is how they bring everyone together — kids helping shape the treats, parents sharing a laugh, and the buzz of a party that feels special without stress.
Feel free to tweak the colors, decorations, or even the shapes to match your party theme or your child’s favorites. This recipe is a blank canvas of fun that anyone can handle, whether you’re a seasoned baker or a practical cook who learns by doing.
If you try these treats out, I’d love to hear how you customized them or what fun twists you added — sharing those moments is what keeps cooking exciting. Here’s to many more sweet, simple celebrations!
Frequently Asked Questions
Can I make these school bus rice krispie treats without food coloring?
Yes! The treats will have a natural creamy color from the marshmallows and butter. They’ll still taste great and you can decorate with colorful candies instead.
What’s the best way to cut the treats into school bus shapes?
Use a sharp knife or pizza cutter to slice the treats into rectangles about 2×3 inches. For bus shapes, trim the corners slightly or add candy details to mimic windows and wheels.
Can I prepare these treats ahead of time for a party?
Definitely. You can make the base treats a day ahead and decorate them just before serving to keep candies fresh and vibrant.
What’s a good alternative to licorice for decorating the wheels?
Mini chocolate chips, black jelly beans, or small round candies work well as wheels if you don’t have licorice handy.
Are these treats safe for kids with nut allergies?
Yes, the basic recipe contains no nuts. Just be sure any candies you add for decoration are also nut-free.
Pin This Recipe!
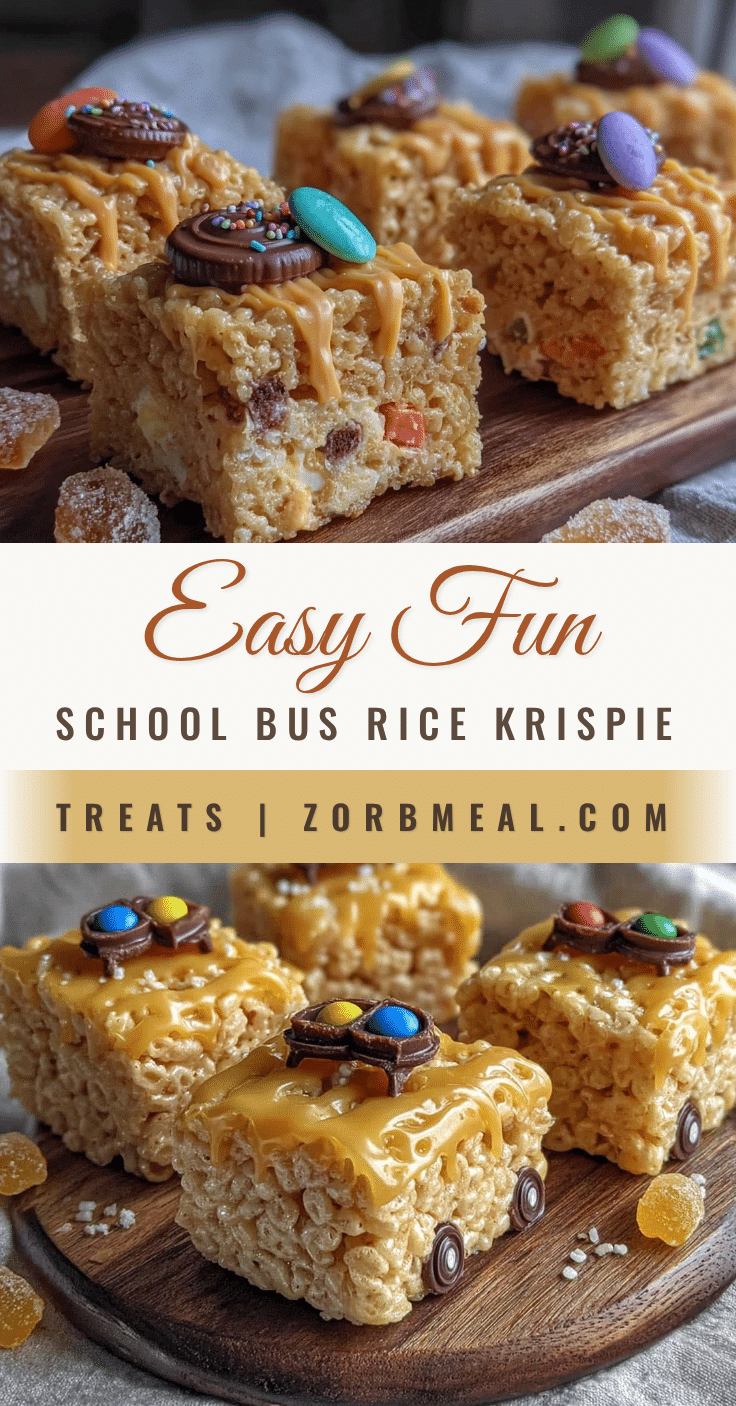
Easy Fun School Bus Rice Krispie Treats Perfect for Kids Parties

These playful rice krispie treats shaped like school buses are quick, easy, and perfect for kids’ parties. Made with simple ingredients and decorated with candy details, they bring fun and smiles to any celebration.
- Prep Time: 10 minutes
- Cook Time: 5 minutes
- Total Time: 35 minutes
- Yield: 12 servings 1x
- Category: Dessert
- Cuisine: American
Ingredients
- 6 cups Rice Krispies cereal
- 4 tablespoons unsalted butter, softened
- 10 ounces mini marshmallows (about 3 1/2 cups)
- 1 teaspoon pure vanilla extract
- Yellow food coloring gel (optional)
- Black licorice strings or Twizzlers, cut into small rounds or strips
- Mini chocolate chips or black decorating gel
- Optional: small candy eyes or edible markers for decoration
Instructions
- Grease a 9×13-inch baking pan with butter or nonstick spray and set aside.
- In a large nonstick saucepan over low heat, melt 4 tablespoons of unsalted butter without browning.
- Stir in 10 ounces of mini marshmallows until completely melted and smooth, about 3-5 minutes.
- Remove from heat and stir in 1 teaspoon of pure vanilla extract.
- If desired, add a few drops of yellow food coloring gel and stir until evenly mixed.
- Pour in 6 cups of Rice Krispies cereal and stir gently until all cereal is coated.
- Transfer the mixture to the prepared pan and press firmly but not too hard to maintain a crispy-chewy texture.
- Let the treats cool at room temperature for about 30 minutes or refrigerate for 15-20 minutes to set.
- Cut into rectangles about 2×3 inches using a sharp knife or pizza cutter; optionally trim corners to create bus shapes.
- Decorate with black licorice rounds for wheels, mini chocolate chips or decorating gel for windows and headlights, and other candies as desired.
- Serve immediately or store in an airtight container at room temperature for up to 3 days.
Notes
Use low heat to melt butter and marshmallows to avoid burning. Butter your hands or spatula to prevent sticking when pressing and shaping. Decorate treats while slightly tacky for best candy adhesion. Store in airtight container at room temperature for up to 3 days or freeze for up to 4 weeks.
Nutrition
- Serving Size: One 2x3 inch treat
- Calories: 135
- Sugar: 14
- Sodium: 90
- Fat: 4.5
- Saturated Fat: 2.7
- Carbohydrates: 24
- Fiber: 0.3
- Protein: 1
Keywords: rice krispie treats, kids party snacks, school bus treats, easy dessert, marshmallow treats, fun party food


