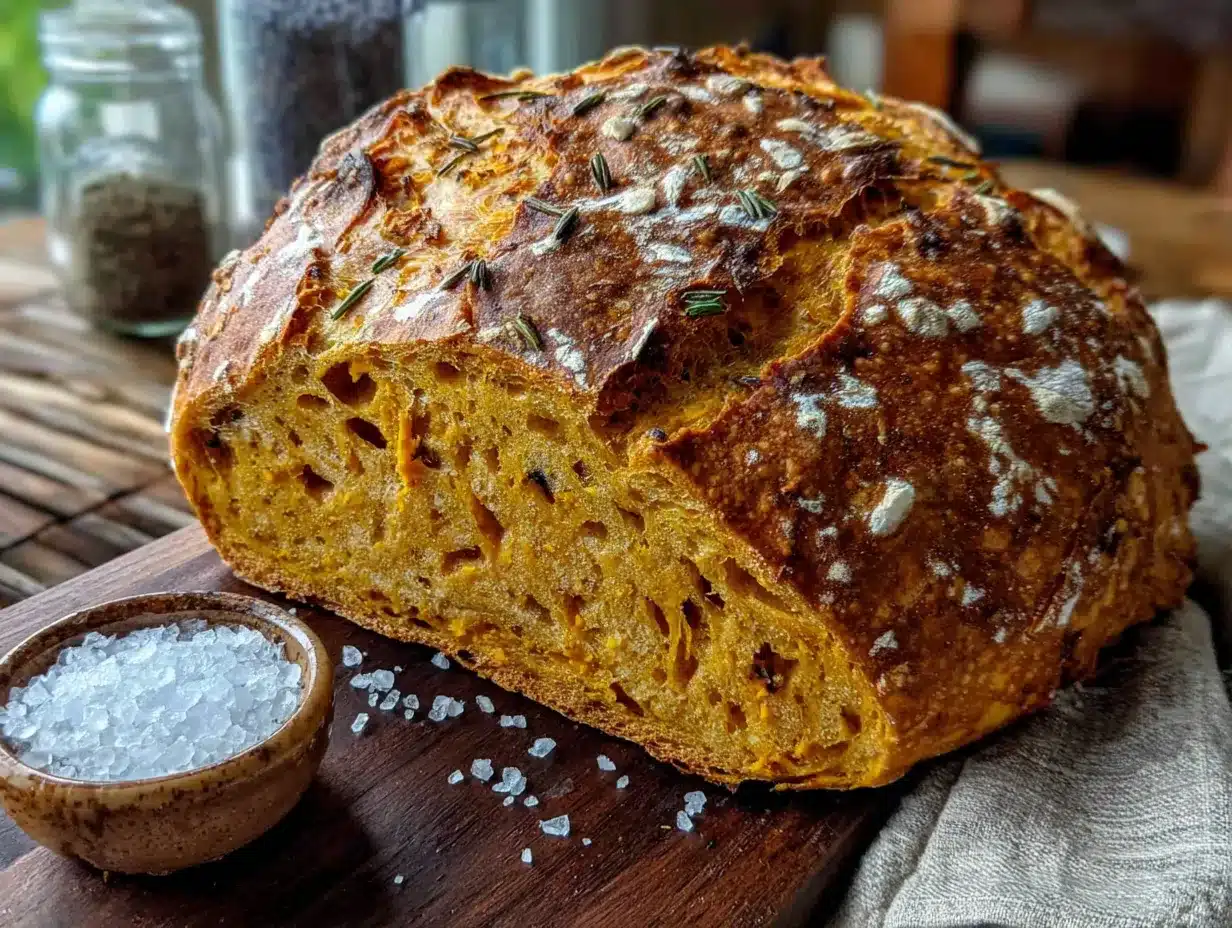
The way the crumb catches the light is what gets me every single time. Not the deep orange from the pumpkin, though that’s pretty, and not the faint freckling of spice. It’s the tiny, irregular holes. The kind that tell you the sourdough did its job, even when you barely planned for it. That, and the way the top domes just slightly, like it’s proud of itself. I made this loaf for the first time on a rainy Tuesday when my discard jar was threatening to take over the fridge. Honestly, I wasn’t expecting much—pumpkin can sometimes make bread heavy and sad. But the first slice came out with that perfect, pillowy give, and I just stood there in the kitchen, holding the warm bread in my hand, thinking, “This is the one.”
It’s not just another pumpkin bread, you know. It’s the answer to what to do with that tangy, bubbly discard that feels too precious to throw away. This fluffy pumpkin sourdough discard bread is the kind of recipe that makes you feel like a genius. It’s soft and tender, with a gentle sourdough tang that plays beautifully against the sweet, earthy pumpkin. The texture is light, not dense, and the flavor is complex without being fussy. I’ve made it three times in two weeks, and each time, I’m surprised by how good it is.
This bread doesn’t need a special occasion. It’s for the mornings when you want something homemade but don’t have hours to babysit a dough. It’s for the afternoons when you need a slice of something that tastes like fall, no matter what season it is outside. If you’ve been sitting on a pile of sourdough discard, wondering if it can do something more than pancakes, this is your sign. Trust me on this one.
Why You’ll Love This Recipe
I’ve tested this recipe more times than I care to admit. The first few loaves were fine, but they weren’t fluffy. They were more like pumpkin bricks. So I went back, tweaked the hydration, adjusted the baking soda ratio, and finally landed on a version that actually feels light and airy. This isn’t just a recipe I found online—it’s one I built from the ground up to solve a very specific problem: how to make sourdough discard bread that doesn’t taste like a science experiment gone wrong.
- Quick & Easy: No long fermentation, no stretch-and-fold routines. This comes together in about 15 minutes of active work and bakes in under an hour.
- Simple Ingredients: You probably have everything in your pantry right now. Flour, sugar, pumpkin puree, butter, eggs, and that jar of discard staring at you from the fridge.
- Perfect for Fall Mornings: It’s equally at home on a Thanksgiving brunch table or a random Wednesday breakfast with a smear of butter.
- Crowd-Pleaser: I brought a loaf to a neighbor’s house, and she asked for the recipe before I even made it back to my front door.
- Unbelievably Fluffy: The texture is the star here. It’s soft, tender, and has that slight sourdough tang that makes you want another slice.
What makes this different from every other pumpkin sourdough recipe out there? It’s the balance. The pumpkin adds moisture without making it gummy. The discard adds flavor without making it overly sour. And the technique—creaming the butter and sugar thoroughly—creates the structure that keeps this bread light. It’s comfort food that actually delivers on its promise.
This is the kind of bread that makes you close your eyes after the first bite. It’s fall in a slice, but without the heaviness that sometimes comes with it. Perfect for sharing, perfect for hoarding, and perfect for using up that discard you’ve been saving.
What Ingredients You Will Need
This recipe uses simple, wholesome ingredients that work together to create that signature fluffy texture and deep fall flavor. Most of these are pantry staples, which makes this an easy weeknight or weekend bake.
- All-purpose flour (2 cups / 250g): This provides the structure for the bread. I’ve tested this with bread flour, and it works, but all-purpose gives a softer, more tender crumb. Spoon and level your flour—don’t scoop directly from the bag, or you’ll end up with a dry loaf.
- Pumpkin puree (1 cup / 240g): Make sure you’re using 100% pure pumpkin puree, not pumpkin pie filling. The pie filling has added sugar and spices that will throw off the balance. I prefer Libby’s for consistency, but any brand works. If your puree is watery, pat it dry with a paper towel before using.
- Sourdough discard (1 cup / 240g): This is the star of the show. Use unfed discard straight from the fridge. It can be a few days old or just from yesterday—it doesn’t matter. The discard adds tang and tenderness. If your discard is very thick, you might need to adjust the milk slightly.
- Unsalted butter (½ cup / 113g), softened: Butter adds richness and helps create a tender crumb. I use unsalted so I can control the salt level. Let it come to room temperature before creaming—cold butter won’t incorporate properly.
- Granulated sugar (¾ cup / 150g): This sweetens the bread and helps with browning. You can reduce it to ½ cup if you prefer a less sweet loaf, but don’t go lower than that or the texture will suffer.
- Light brown sugar (¼ cup / 50g), packed: Brown sugar adds moisture and a hint of molasses flavor that pairs beautifully with pumpkin. Dark brown sugar works too, but it will make the bread slightly darker.
- Eggs (2 large), room temperature: Eggs provide structure and help the bread rise. Room temperature eggs incorporate more easily into the creamed butter, creating a lighter texture.
- Milk (¼ cup / 60ml): Whole milk adds richness, but 2% or even oat milk works well. The milk helps thin the batter to the right consistency. If your discard is very liquidy, you may only need 2 tablespoons.
- Vanilla extract (1 teaspoon): This rounds out the flavors. Use pure vanilla extract if you have it—it makes a difference.
- Baking soda (1 teaspoon): This is the main leavening agent. The acidity in the sourdough discard reacts with the baking soda to create lift. Make sure your baking soda is fresh—test it by dropping a bit into vinegar; it should fizz immediately.
- Baking powder (½ teaspoon): This gives a little extra lift. It’s not strictly necessary, but I find it helps the bread rise more evenly.
- Salt (½ teaspoon): Salt enhances all the flavors. Don’t skip it—it balances the sweetness.
- Pumpkin pie spice (2 teaspoons): You can use store-bought or make your own with cinnamon, ginger, nutmeg, and cloves. I make my own because I like a stronger cinnamon presence. If you’re using a blend, taste it first—some brands are more clove-heavy than others.
- Cinnamon (1 teaspoon): This is in addition to the pumpkin pie spice. I like a double dose of cinnamon because it complements the sourdough tang so well.
Equipment Needed
You don’t need a bakery’s worth of equipment for this, but a few key tools make the process smoother. I’ve made this in a friend’s kitchen with mismatched bowls and a whisk, and it still turned out great. Here’s what you’ll need:
- 9×5-inch loaf pan: This is the standard size. If you use an 8×4-inch pan, your bread will take longer to bake and might dome more. Line it with parchment paper for easy removal—I learned this the hard way after my first loaf stuck to the pan like glue.
- Mixing bowls: One large bowl for the dry ingredients and one medium bowl for the wet ingredients. Glass or stainless steel works best.
- Electric hand mixer or stand mixer: You can do this by hand with a wooden spoon, but an electric mixer makes creaming the butter and sugar much easier. If you’re using a stand mixer, use the paddle attachment.
- Rubber spatula: For folding the batter together and scraping down the sides of the bowl. Get a good one—it’s worth the investment.
- Cooling rack: This allows air to circulate around the bread, preventing a soggy bottom. If you don’t have one, you can use the grates from your oven (just make sure they’re clean).
- Parchment paper: This is my non-negotiable. It makes lifting the bread out of the pan so much easier, and cleanup is a breeze.
If you don’t have a loaf pan, you can bake this in an 8×8-inch square pan for about 30-35 minutes. The texture will be slightly different, but it’s still delicious. I’ve also used a disposable aluminum loaf pan when I was traveling, and it worked fine—just keep an eye on the baking time.
Preparation Method
Let’s get to it. This recipe is straightforward, but a few key steps make the difference between a good loaf and a great one. Take your time with the creaming step—it’s where the fluffiness starts.
- Preheat your oven to 350°F (175°C). Position the rack in the center of the oven. Line your 9×5-inch loaf pan with parchment paper, leaving some overhang on the long sides. This will help you lift the bread out later. If you don’t have parchment, grease the pan thoroughly with butter or non-stick spray.
- In a medium bowl, whisk together the dry ingredients: 2 cups all-purpose flour, 1 teaspoon baking soda, ½ teaspoon baking powder, ½ teaspoon salt, 2 teaspoons pumpkin pie spice, and 1 teaspoon cinnamon. Whisk until everything is evenly distributed. This ensures your bread will rise evenly and have consistent flavor in every bite.
- In a large bowl, cream the butter and sugars: Add ½ cup softened unsalted butter, ¾ cup granulated sugar, and ¼ cup packed light brown sugar to the bowl. Beat with an electric mixer on medium speed for 3-4 minutes, until the mixture is light and fluffy. Scrape down the sides of the bowl halfway through. This step is crucial—it incorporates air into the batter, which helps create that fluffy texture. Don’t rush it.
- Add the eggs one at a time: Beat in the first egg on medium speed until fully incorporated, about 30 seconds. Then add the second egg and beat again. The mixture should look smooth and slightly glossy. If it looks curdled, don’t panic—it will come together once you add the other ingredients.
- Stir in the pumpkin puree, sourdough discard, milk, and vanilla: Add 1 cup pumpkin puree, 1 cup sourdough discard, ¼ cup milk, and 1 teaspoon vanilla extract. Mix on low speed until just combined. The batter will look a bit loose and lumpy at this stage—that’s normal. Don’t overmix.
- Add the dry ingredients in two additions: Sprinkle half the flour mixture over the wet ingredients and fold gently with a rubber spatula until just a few streaks of flour remain. Then add the remaining flour and fold until no dry spots are visible. A few small lumps are fine—overmixing will develop the gluten and make the bread tough. The final batter should be thick but scoopable, like a very thick muffin batter.
- Pour the batter into the prepared loaf pan: Use your spatula to spread it evenly. Smooth the top gently—it will level itself as it bakes. If you want, sprinkle a little turbinado sugar or cinnamon sugar on top for a crunchy crust.
- Bake for 50-60 minutes: Place the pan in the preheated oven and bake until a toothpick inserted into the center comes out clean or with just a few moist crumbs. The top should be golden brown and spring back when lightly pressed. If the top is browning too quickly (after about 30 minutes), tent the loaf loosely with aluminum foil.
- Cool in the pan for 10 minutes: This allows the bread to set before you remove it. After 10 minutes, use the parchment overhang to lift the bread out of the pan and transfer it to a wire rack to cool completely. Resist the urge to slice it while it’s still warm—it will be too fragile and may crumble. Wait at least 1 hour for the best texture.
Pro tip: If you’re unsure whether the bread is done, use an instant-read thermometer. The internal temperature should be around 200°F (93°C). This takes the guesswork out of baking and ensures a perfectly cooked loaf every time.
Cooking Tips & Techniques
I’ve made this bread more times than I can count, and I’ve learned a few things along the way. Some of these tips came from happy accidents, and others from outright failures. Here’s what I wish I’d known from the start.
Don’t skip the creaming step. I know it’s tempting to just dump everything in a bowl and mix, but creaming the butter and sugar for a full 3-4 minutes is what gives this bread its light, fluffy texture. The sugar crystals create tiny air pockets in the butter, which expand during baking. If you’re in a rush, you’ll end up with a denser loaf. Trust the process—it’s worth the extra few minutes.
Watch your discard consistency. Sourdough discard can vary wildly depending on how you feed your starter. If your discard is very thick (like peanut butter), you might need to add an extra tablespoon of milk. If it’s very thin (like pancake batter), reduce the milk slightly. The batter should be thick but not stiff—similar to a banana bread batter. I’ve had to adjust mid-batch before, and it’s always better to add liquid slowly than to end up with a soupy mess.
Room temperature ingredients matter. Cold eggs or cold butter won’t emulsify properly, leading to a denser texture. Take your eggs and butter out of the fridge about 30 minutes before you start baking. If you forget, you can warm the eggs in a bowl of warm water for 5 minutes, and microwave the butter in 5-second bursts until it’s softened but not melted. I’ve done this more times than I’ll admit.
Use fresh baking soda. This is the most common culprit when bread doesn’t rise. Baking soda loses its potency over time, especially if the box has been open for months. If your loaf comes out flat and dense, check your baking soda first. I keep a new box in my pantry just for baking and use the old one for cleaning.
Don’t overmix the batter. Once you add the flour, mix just until the dry ingredients are incorporated. Overmixing develops gluten, which can make the bread tough and rubbery. A few lumps in the batter are perfectly fine—they’ll bake out in the oven. I’ve ruined batches by being too aggressive with the spatula, and the difference is noticeable.
Test for doneness properly. A toothpick test is reliable, but it’s not foolproof. Sometimes a toothpick comes out clean, but the center is still underdone. I use a combination of the toothpick test and the thermometer method. If you don’t have a thermometer, press gently on the top of the loaf—it should spring back. If your finger leaves an indentation, it needs more time.
Variations & Adaptations
One of the best things about this recipe is how adaptable it is. I’ve made several variations over the past few weeks, and each one has its own charm. Here are some of my favorites.
Chocolate Chip Pumpkin Sourdough Bread: Fold in ½ cup of semi-sweet chocolate chips with the dry ingredients. The chocolate adds a rich, melty contrast to the pumpkin and spice. I did this on a whim one afternoon, and my kids devoured the entire loaf in one sitting. Dark chocolate chips work especially well if you want to balance the sweetness.
Whole Wheat Version: Substitute 1 cup of the all-purpose flour with whole wheat flour. The bread will be slightly denser and nuttier, but it’s still delicious. You might need to add an extra tablespoon of milk since whole wheat flour absorbs more liquid. This is my go-to when I want something a little more wholesome for breakfast.
Gluten-Free Adaptation: Use a 1:1 gluten-free flour blend that contains xanthan gum. I’ve tested this with Bob’s Red Mill 1:1 Baking Flour, and it works beautifully. The texture is slightly more crumbly, but the flavor is spot-on. Let the batter rest for 15 minutes before baking to allow the gluten-free flour to hydrate fully.
Vegan Version: Replace the butter with vegan butter (I like Miyoko’s), and use flax eggs (2 tablespoons ground flaxseed mixed with 6 tablespoons water, let sit for 5 minutes). Use oat milk or almond milk instead of dairy milk. The bread will be a bit denser, but it’s still very good. I brought a vegan version to a friend’s house, and no one could tell the difference.
Spice It Up: If you like things spicy, add ¼ teaspoon of cayenne pepper or a pinch of black pepper to the dry ingredients. The heat plays surprisingly well with the pumpkin and sourdough tang. I tried this on a dare and ended up loving it—it’s unexpected but addictive.
Add Nuts or Seeds: Fold in ½ cup of toasted pecans or walnuts for crunch. Pumpkin seeds (pepitas) on top add a nice visual touch and a bit of texture. I’m partial to pecans because they remind me of my grandmother’s pumpkin bread.
Serving & Storage Suggestions
This bread is versatile—it works for breakfast, brunch, dessert, or a midday snack. Here’s how I like to serve and store it.
Serving: Slice the bread when it’s completely cool. I like mine toasted lightly, with a generous smear of salted butter. The heat brings out the pumpkin flavor and softens the crumb. For a sweeter treat, top with cream cheese frosting or a drizzle of maple glaze. If you’re serving it for brunch, pair it with a creamy blueberry cream cheese stuffed French toast for a truly indulgent spread. The combination of pumpkin and blueberry is surprisingly good.
Storage: Store the bread in an airtight container at room temperature for up to 3 days. The moisture from the pumpkin actually helps keep it soft. If you live in a humid climate, you might want to store it in the fridge after day two to prevent mold. I’ve never had it last longer than 3 days in my house, but it should be fine.
Freezing: This bread freezes beautifully. Wrap the cooled loaf tightly in plastic wrap, then in aluminum foil, and freeze for up to 3 months. You can also slice it before freezing and grab individual slices as needed. To thaw, leave it at room temperature for about an hour, or pop a slice in the toaster directly from the freezer. I always keep a loaf in the freezer for unexpected guests or lazy Sunday mornings.
Reheating: The toaster is your best friend here. Toasted slices regain that slightly crisp exterior and soft interior. If you’re reheating the whole loaf, wrap it in foil and warm it in a 300°F oven for 10-15 minutes. The microwave works in a pinch, but it can make the bread a bit rubbery.
Flavor Development: This bread actually tastes better the next day. The flavors meld together overnight, and the sourdough tang becomes more pronounced. If you can resist eating it on day one, you’re in for a treat on day two. I’ve started baking it the day before I plan to serve it, just for this reason.
Nutritional Information & Benefits
This bread is a treat, but it’s not without its redeeming qualities. Here’s a rough estimate of the nutritional content per slice (based on 12 slices):
| Nutrient | Amount per slice |
|---|---|
| Calories | ~220 |
| Total Fat | 9g |
| Saturated Fat | 5g |
| Cholesterol | 55mg |
| Sodium | 260mg |
| Total Carbohydrates | 32g |
| Dietary Fiber | 2g |
| Sugars | 15g |
| Protein | 4g |
Health Benefits: Pumpkin is packed with vitamin A (in the form of beta-carotene), which is great for eye health and immune function. It’s also a good source of fiber, which helps with digestion. The sourdough fermentation process breaks down some of the gluten and phytic acid, making the bread easier to digest for some people. Plus, the discard itself contains beneficial bacteria and yeasts that support gut health.
Dietary Considerations: This recipe is vegetarian and can be made vegan or gluten-free with the substitutions mentioned above. It contains dairy, eggs, and gluten in its standard form. If you’re sensitive to lactose, use dairy-free butter and milk. The sugar content is moderate, but you can reduce it to ½ cup granulated sugar if you prefer a less sweet loaf.
I’m not a nutritionist, but I do believe in balance. This bread isn’t health food, but it’s made with real ingredients, and that counts for something. A slice with some scrambled eggs and fruit makes a satisfying breakfast that doesn’t leave you crashing an hour later.
Conclusion
This fluffy pumpkin sourdough discard bread is the recipe I keep coming back to, and I think you will too. It solves the eternal problem of what to do with sourdough discard without requiring a complicated process or special skills. The result is a loaf that’s soft, flavorful, and just a little bit tangy—everything you want in a pumpkin bread.
I love how forgiving this recipe is. You can tweak the spices, swap in different flours, add chocolate chips or nuts, and it still works. It’s the kind of recipe that becomes a staple because it fits into your life, not the other way around. Whether you’re an experienced baker or someone who’s just starting out with sourdough, this bread will make you look good.
I’d love to hear how yours turns out. Did you add any variations? Did you serve it with something special? Drop a comment below and let me know—I read every single one. And if you’re looking for more ways to use up that discard, check out my fluffy buttermilk pancakes for another breakfast favorite. Happy baking, friends!
Frequently Asked Questions
Can I use active sourdough starter instead of discard?
Yes, you can! If you use active starter, the bread will be slightly less tangy and might rise a bit more. Just reduce the milk by 1-2 tablespoons since active starter is usually thinner than discard. The baking time should remain the same.
Why did my bread turn out dense and heavy?
This usually happens for one of three reasons: overmixing the batter, expired baking soda, or not creaming the butter and sugar long enough. Check your baking soda by dropping a pinch into vinegar—it should fizz immediately. If it doesn’t, replace it. And remember, mix just until the flour disappears.
Can I make this bread without a mixer?
Absolutely. You can cream the butter and sugar by hand with a wooden spoon—it just takes a bit more elbow grease. Beat the mixture until it’s light and fluffy, which might take 5-6 minutes. The rest of the recipe can be done with a spatula. I’ve done it many times when I didn’t feel like hauling out the mixer.
How do I know when the bread is fully baked?
Use a combination of methods. Insert a toothpick into the center—it should come out clean or with just a few moist crumbs. The top should be golden brown and spring back when lightly pressed. If you have an instant-read thermometer, the internal temperature should be around 200°F (93°C). If the top is browning too quickly, tent it with foil.
Can I add extra pumpkin puree for more pumpkin flavor?
I wouldn’t recommend it. Adding more pumpkin will increase the moisture content, which can make the bread gummy or cause it to sink in the middle. If you want more pumpkin flavor, try adding an extra teaspoon of pumpkin pie spice or using a darker, more flavorful pumpkin puree. The texture is more important than the flavor intensity.
Pin This Recipe!
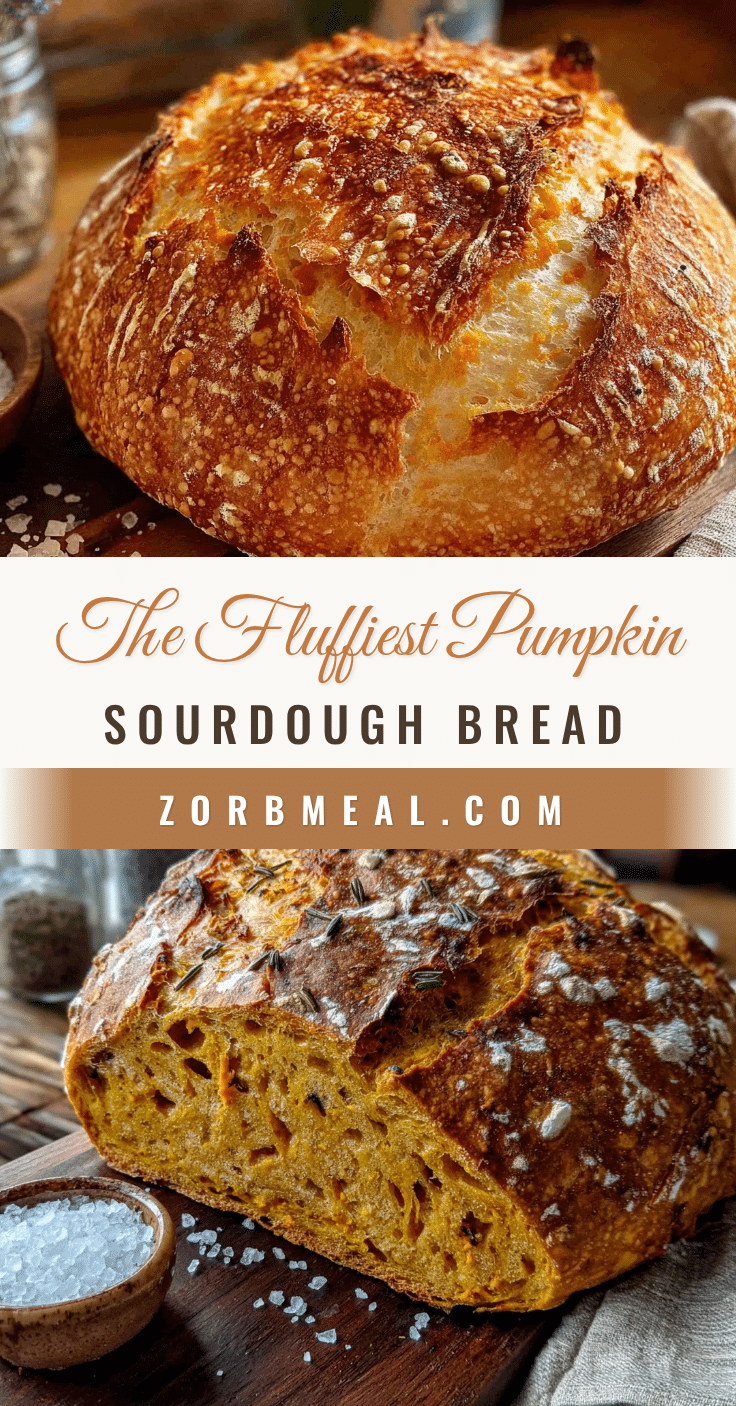
Easy Fluffy Pumpkin Sourdough Discard Bread Recipe

This fluffy pumpkin sourdough discard bread is soft, tender, and has a gentle sourdough tang that plays beautifully against the sweet, earthy pumpkin. It’s the perfect way to use up sourdough discard without a complicated process.
- Prep Time: 15 minutes
- Cook Time: 55 minutes
- Total Time: 1 hour 10 minutes
- Yield: 12 servings 1x
- Category: Bread
- Cuisine: American
Ingredients
- 2 cups (250g) all-purpose flour
- 1 cup (240g) pumpkin puree (100% pure, not pie filling)
- 1 cup (240g) sourdough discard (unfed, straight from fridge)
- ½ cup (113g) unsalted butter, softened
- ¾ cup (150g) granulated sugar
- ¼ cup (50g) light brown sugar, packed
- 2 large eggs, room temperature
- ¼ cup (60ml) milk (whole milk preferred)
- 1 teaspoon vanilla extract
- 1 teaspoon baking soda
- ½ teaspoon baking powder
- ½ teaspoon salt
- 2 teaspoons pumpkin pie spice
- 1 teaspoon cinnamon
Instructions
- Preheat your oven to 350°F (175°C). Position the rack in the center of the oven. Line a 9×5-inch loaf pan with parchment paper, leaving some overhang on the long sides.
- In a medium bowl, whisk together the dry ingredients: 2 cups all-purpose flour, 1 teaspoon baking soda, ½ teaspoon baking powder, ½ teaspoon salt, 2 teaspoons pumpkin pie spice, and 1 teaspoon cinnamon. Whisk until evenly distributed.
- In a large bowl, cream the butter and sugars: Add ½ cup softened unsalted butter, ¾ cup granulated sugar, and ¼ cup packed light brown sugar. Beat with an electric mixer on medium speed for 3-4 minutes until light and fluffy. Scrape down the sides halfway through.
- Add the eggs one at a time: Beat in the first egg on medium speed until fully incorporated (about 30 seconds), then add the second egg and beat again until smooth and slightly glossy.
- Stir in the pumpkin puree, sourdough discard, milk, and vanilla: Add 1 cup pumpkin puree, 1 cup sourdough discard, ¼ cup milk, and 1 teaspoon vanilla extract. Mix on low speed until just combined. The batter will look loose and lumpy.
- Add the dry ingredients in two additions: Sprinkle half the flour mixture over the wet ingredients and fold gently with a rubber spatula until just a few streaks of flour remain. Add the remaining flour and fold until no dry spots are visible. A few small lumps are fine. The batter should be thick but scoopable.
- Pour the batter into the prepared loaf pan and spread evenly. Smooth the top gently. Optionally, sprinkle turbinado sugar or cinnamon sugar on top for a crunchy crust.
- Bake for 50-60 minutes until a toothpick inserted into the center comes out clean or with just a few moist crumbs. The top should be golden brown and spring back when lightly pressed. If browning too quickly (after about 30 minutes), tent loosely with aluminum foil.
- Cool in the pan for 10 minutes, then use the parchment overhang to lift the bread out and transfer to a wire rack to cool completely. Wait at least 1 hour before slicing for best texture.
Notes
For best results, use room temperature ingredients. Don’t skip creaming the butter and sugar for 3-4 minutes—it’s crucial for fluffiness. If your discard is very thick, add an extra tablespoon of milk; if very thin, reduce milk slightly. The bread tastes even better the next day as flavors meld. For a vegan version, use vegan butter, flax eggs (2 tbsp ground flaxseed + 6 tbsp water), and oat milk. For gluten-free, use a 1:1 gluten-free flour blend with xanthan gum and let batter rest 15 minutes before baking.
Nutrition
- Serving Size: 1 slice
- Calories: 220
- Sugar: 15
- Sodium: 260
- Fat: 9
- Saturated Fat: 5
- Carbohydrates: 32
- Fiber: 2
- Protein: 4
Keywords: pumpkin sourdough discard bread, fluffy pumpkin bread, sourdough discard recipe, pumpkin bread, fall baking, easy pumpkin bread


