I messed up my first batch of these layered jello cups so badly I had to throw the whole pan away. It wasn’t even close to being salvageable. The layers bled into each other, the colors looked muddy, and honestly? It was a complete disaster that left me frustrated and covered in sticky gelatin. But that failure taught me exactly what not to do, and the next time I tried, these Colorful Layered Candy Corn Jello Cups came out looking like little edible works of art. I actually stood there in my kitchen staring at them, thinking, wait, I made those?
There is something about the way the orange, yellow, and white layers stack up that feels almost too pretty to eat. Almost. The first time I brought these to a Halloween party, a friend grabbed one and said “These look like candy corn but better.” She was right. They have that same nostalgic sweetness but with a jiggly, melt-in-your-mouth texture that candy corn just cannot compete with. The layers take a little patience, sure, but the payoff is huge. You get a dessert that looks like you spent hours fussing over it when really, it is just jello and a little cream.
I keep coming back to this recipe because it is the kind of treat that makes people smile. Kids love the colors, adults appreciate the nostalgia, and nobody can resist that first wobble. If you have ever wanted to make something that feels special without a ton of complicated steps, this is it.
Why You Will Love This Recipe
These Colorful Layered Candy Corn Jello Cups are one of those desserts that looks way more complicated than it actually is. Every time I make them, someone asks if I bought them from a bakery. Nope. Just jello, some evaporated milk, and a little bit of waiting between layers. Here is why this recipe works so well:
- Simple Ingredients: You only need a few boxes of jello, some unflavored gelatin, evaporated milk, and water. Nothing fancy, nothing hard to find.
- No Baking Required: This is a no-bake dessert that sets up in the fridge. Perfect for hot days when you do not want to turn on the oven.
- Perfect for Parties: These cups are individual servings, which means no slicing, no mess, and everyone gets their own little treat.
- Kid-Friendly Fun: My niece helped me layer these last time and she felt like a real chef. Easy enough for little hands to help with.
- Customizable Colors: You can swap the orange and yellow for any colors you like. Red and blue for patriotic holidays, green and red for Christmas, pastels for Easter.
What makes these different from other jello recipes is the creamy middle layer. Most layered jello cups are just different flavors of clear jello stacked on top of each other. Those are fine, but the evaporated milk layer adds a richness that makes these feel more like a dessert and less like a snack. It is the same technique I used in these festive red white and blue layered jello cups, and it works beautifully here too.
What Ingredients You Will Need
This recipe uses simple, everyday ingredients to create something that looks impressive. Most of these are pantry staples, so you probably already have everything you need except maybe the jello flavors. Here is what you will need:
- 1 box (3 oz) orange gelatin – This gives you the bottom layer. I use Jell-O brand because it sets consistently, but store brands work fine too.
- 1 box (3 oz) lemon gelatin – This is for the middle yellow layer. Lemon has a nice bright flavor that pairs well with the orange.
- 1 box (3 oz) unflavored gelatin – You need this to stabilize the creamy white layer. Regular jello will not set properly with the evaporated milk on its own.
- 1 can (12 oz) evaporated milk – This is what makes the white layer creamy and opaque. Do not substitute sweetened condensed milk here, the sugar content will mess with the setting time.
- 2 cups boiling water – Divided between the different layers. You will use boiling water to dissolve each gelatin packet.
- 1 cup cold water – Used to cool down the gelatin mixture before adding the evaporated milk.
- Nonstick cooking spray – Just a light spritz on your measuring cup so the gelatin slides out easily.
For the orange and yellow layers, I recommend using clear plastic cups so you can see the layers. I get the 9-ounce cups from the grocery store, they hold the perfect amount. If you want to make these for a party, you can also use small glass cups or even shot glasses for a fun appetizer-style serving.
One thing I learned the hard way: check the expiration date on your gelatin. Old gelatin does not set properly and you will end up with soupy layers. Trust me on this one.
Equipment Needed
You do not need much to make these cups, which is part of why I love this recipe. Here is what you will need:
- Clear plastic cups (9 oz) – These are ideal because you can see the layers. I get mine at the grocery store in the party supply section.
- Medium mixing bowls – You will need at least three bowls for the different gelatin mixtures.
- Measuring cups – A 1-cup and a 2-cup measure will cover everything.
- Whisk – For stirring the gelatin until it dissolves completely.
- Liquid measuring cup with spout – This makes pouring the gelatin into the cups much easier and less messy.
- Refrigerator space – You need a flat spot in your fridge where the cups can sit undisturbed for at least 4 hours total.
If you do not have clear plastic cups, small glass jars or even small bowls will work. Just make sure they are heat-safe if you are pouring hot gelatin directly into them. I have used small mason jars before and they look really cute, especially if you tie a little ribbon around them for parties.
Preparation Method
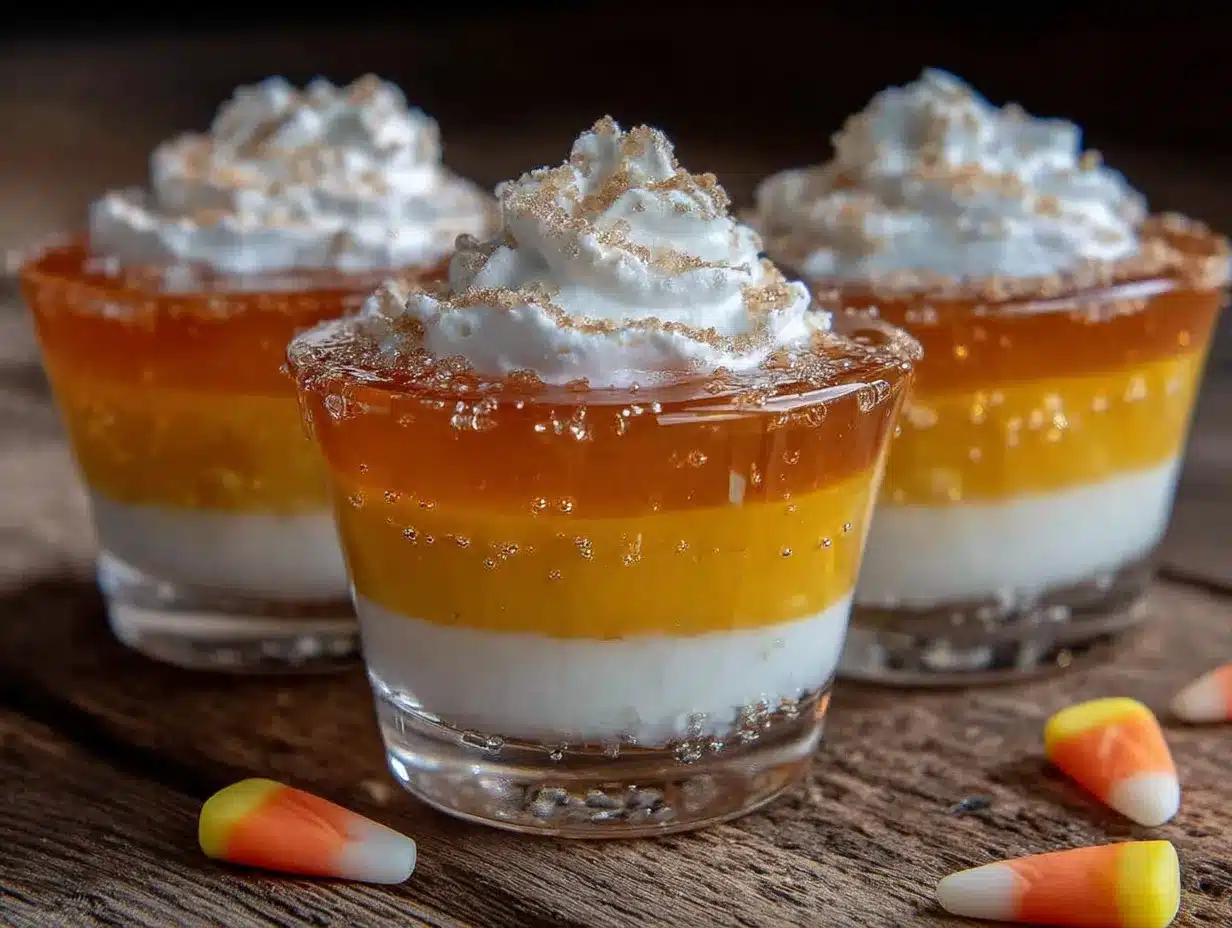
Making these cups is all about patience between layers. The actual hands-on time is maybe 20 minutes total, but you need to let each layer set before adding the next one. Here is how it goes:
- Prepare the orange layer: In a medium bowl, combine the orange gelatin with 1 cup of boiling water. Stir for about 2 minutes until the powder is completely dissolved. Add 1/2 cup of cold water and stir again. Let this sit at room temperature for about 10 minutes to cool slightly.
- Pour the first layer: Divide the orange gelatin evenly among your cups. You want each cup to have about 1/3 of the total volume filled with this layer. Place the cups in the refrigerator and let them set for about 45 minutes to 1 hour. The layer should be firm to the touch, not jiggly.
- Prepare the white creamy layer: While the orange layer sets, make the white layer. In a bowl, combine 1 packet of unflavored gelatin with 1/2 cup of cold water. Let it sit for about 5 minutes to bloom. Then add 1/2 cup of boiling water and stir until the gelatin dissolves completely. Stir in the evaporated milk and mix well. Let this cool to room temperature.
- Add the white layer: Once the orange layer is firm, gently pour the white mixture over it. Fill each cup about halfway now. Return the cups to the fridge and let this set for another 45 minutes to 1 hour.
- Prepare the yellow layer: In a clean bowl, combine the lemon gelatin with 1 cup of boiling water. Stir until dissolved. Add 1/2 cup of cold water and mix. Let it cool for about 10 minutes.
- Add the yellow layer: Once the white layer is firm, carefully pour the yellow gelatin over it. Fill the cups almost to the top. Return to the fridge and let everything set for at least 2 hours, or overnight for best results.
- Serve: The cups are ready to serve once the top layer is firm and jiggly. You can eat them straight from the cup or turn them out onto a plate if you want a cleaner presentation.
The key here is patience. I know it is tempting to rush, but if you pour the next layer before the previous one is fully set, the colors will bleed together and you will lose that beautiful candy corn look. I learned this the messy way.
Cooking Tips & Techniques
After making these cups more times than I care to count, I have picked up a few tricks that make the process smoother. Here are the ones that matter most:
Let each layer cool before pouring. This is probably the most important tip I can give you. If you pour warm gelatin over a set layer, it can melt the surface and cause bleeding. I let each mixture sit at room temperature until it feels barely warm to the touch, usually about 10 minutes. This little step saves so much frustration.
Use a measuring cup with a spout. Pouring from a bowl is messy and you will end up with gelatin everywhere. I use a Pyrex liquid measuring cup and it makes the process so much cleaner. Just pour slowly and steadily.
Check for firmness before adding the next layer. The gelatin should be firm enough that when you tilt the cup slightly, the surface does not move. If it still jiggles like crazy, give it more time. I usually err on the side of caution and wait the full hour between layers.
Keep the cups level in the fridge. If your fridge has uneven shelves, the layers will set at an angle and your candy corn look will be off. I put the cups on a small baking sheet to keep them stable and level.
Make these the day before. These cups actually taste better after sitting overnight. The flavors meld together and the texture gets even smoother. Plus, it takes all the pressure off if you are making them for a party.
Variations & Adaptations
One of the best things about this recipe is how easy it is to change up. Here are some variations I have tried and loved:
- Patriotic Version: Use red, white, and blue layers for the Fourth of July. I used this same technique for these festive red white and blue layered jello cups and they were a huge hit at our summer barbecue.
- Christmas Colors: Go with green, white, and red layers. Use lime gelatin for the green, strawberry for the red, and keep the creamy white middle layer.
- Easter Pastels: Use pink, white, and yellow for a softer, springtime look. The flavors change but the technique stays exactly the same.
- Dairy-Free Option: Substitute the evaporated milk with full-fat coconut milk. The texture will be slightly different but it still sets up nicely. Just make sure to shake the coconut milk well before using.
- Adult Version: Add a splash of vodka or coconut rum to each layer before pouring. About 1 tablespoon per cup of gelatin works well. Keep in mind that alcohol can affect how the gelatin sets, so you might need to add a little extra unflavored gelatin to compensate.
I once made a batch with lime, white, and strawberry for a Christmas party and they disappeared before the main course even came out. People cannot resist colorful layers, it is like a visual trick that makes everyone want one.
Serving & Storage Suggestions
These cups are best served cold, straight from the fridge. The texture is perfect when they are chilled, firm but jiggly, and the flavors are bright and refreshing. If you want to dress them up, here are some ideas:
Presentation: Set the cups on a tray with some Halloween sprinkles or candy corn scattered around. You can also top each cup with a dollop of whipped cream and a few pieces of candy corn for extra flair. If you are serving them at a party, write names on the cups with a marker so everyone gets their own.
Storage: Keep the cups covered in the refrigerator. I use plastic wrap over the top of each cup or put them in a container with a lid. They will stay good for up to 5 days, though they rarely last that long in my house. Do not freeze them, the texture gets weird and watery when thawed.
Flavor Development: These cups actually taste better on day two. The flavors meld together and the texture gets even smoother. I always make mine the day before I plan to serve them. It makes party prep so much easier too.
If you are bringing these to a potluck or picnic, transport them in a cooler with ice packs. They can sit out at room temperature for about an hour before they start to soften, so keep them chilled until serving time.
Nutritional Information & Benefits
These are a treat, so I am not going to pretend they are health food. But here is the breakdown if you are curious:
- Calories: Approximately 120-150 per cup, depending on the exact ingredients and serving size.
- Protein: About 4 grams from the gelatin and evaporated milk.
- Carbohydrates: Around 25 grams, mostly from the sugar in the jello.
- Fat: 3-4 grams from the evaporated milk.
Gelatin itself has some benefits. It is a good source of collagen, which supports joint health and skin elasticity. The evaporated milk adds calcium and vitamin D. Is this a health food? No. But it is a fun treat that is lower in calories than a slice of cake or a brownie, and it satisfies that sweet tooth without sending you into a sugar coma.
If you are watching your sugar intake, you can use sugar-free jello for the colored layers. The texture will be slightly different, but it still works. The creamy white layer will still have some sugar from the evaporated milk, but you can use a low-fat version to cut back a little.
Conclusion
These Colorful Layered Candy Corn Jello Cups are one of those recipes that looks like you spent hours on it when really, it is just a little patience and some basic ingredients. I love making them for Halloween parties, but honestly, I make them year-round with different color combos. There is something satisfying about watching those layers come together in the cup, knowing you made something that looks this good.
If you try these, do not stress about getting the layers perfect. A little bit of wobble or a slightly uneven pour just adds character. And if your first batch does not come out right, well, you are in good company. My first batch ended up in the trash, and now this is one of my most-requested recipes.
I would love to hear how yours turn out. Leave a comment below and let me know what colors you used, or tag me in your photos if you share them online. Happy layering!
Frequently Asked Questions
Can I use sugar-free jello for this recipe?
Yes, you can. Sugar-free jello works fine for the colored layers. The texture might be slightly softer, so make sure each layer is fully set before adding the next one. The creamy white layer still needs the regular unflavored gelatin to set properly.
How long do these jello cups need to set?
Each layer needs about 45 minutes to 1 hour in the fridge. The final layer needs at least 2 hours, but overnight is best. Total time is about 4-5 hours from start to finish, including all the setting time between layers.
Can I make these in a large dish instead of individual cups?
Absolutely. Use a 9×13 inch glass dish and pour the layers the same way. You will need to let each layer set before adding the next. Once everything is firm, cut into squares and serve. This works great for potlucks where you want to feed a crowd.
Why did my layers bleed into each other?
This usually happens when you pour the next layer before the previous one is fully set, or when the gelatin mixture is too warm. Make sure each layer is firm to the touch before adding the next, and let the gelatin cool to room temperature before pouring.
Can I use other flavors of jello?
Yes, any flavor will work. Just stick with the same technique. For the candy corn look, you want a light color on top and a darker color on the bottom. For other themes, use whatever colors and flavors you like. The creamy white layer stays the same no matter what flavors you choose.
Pin This Recipe!
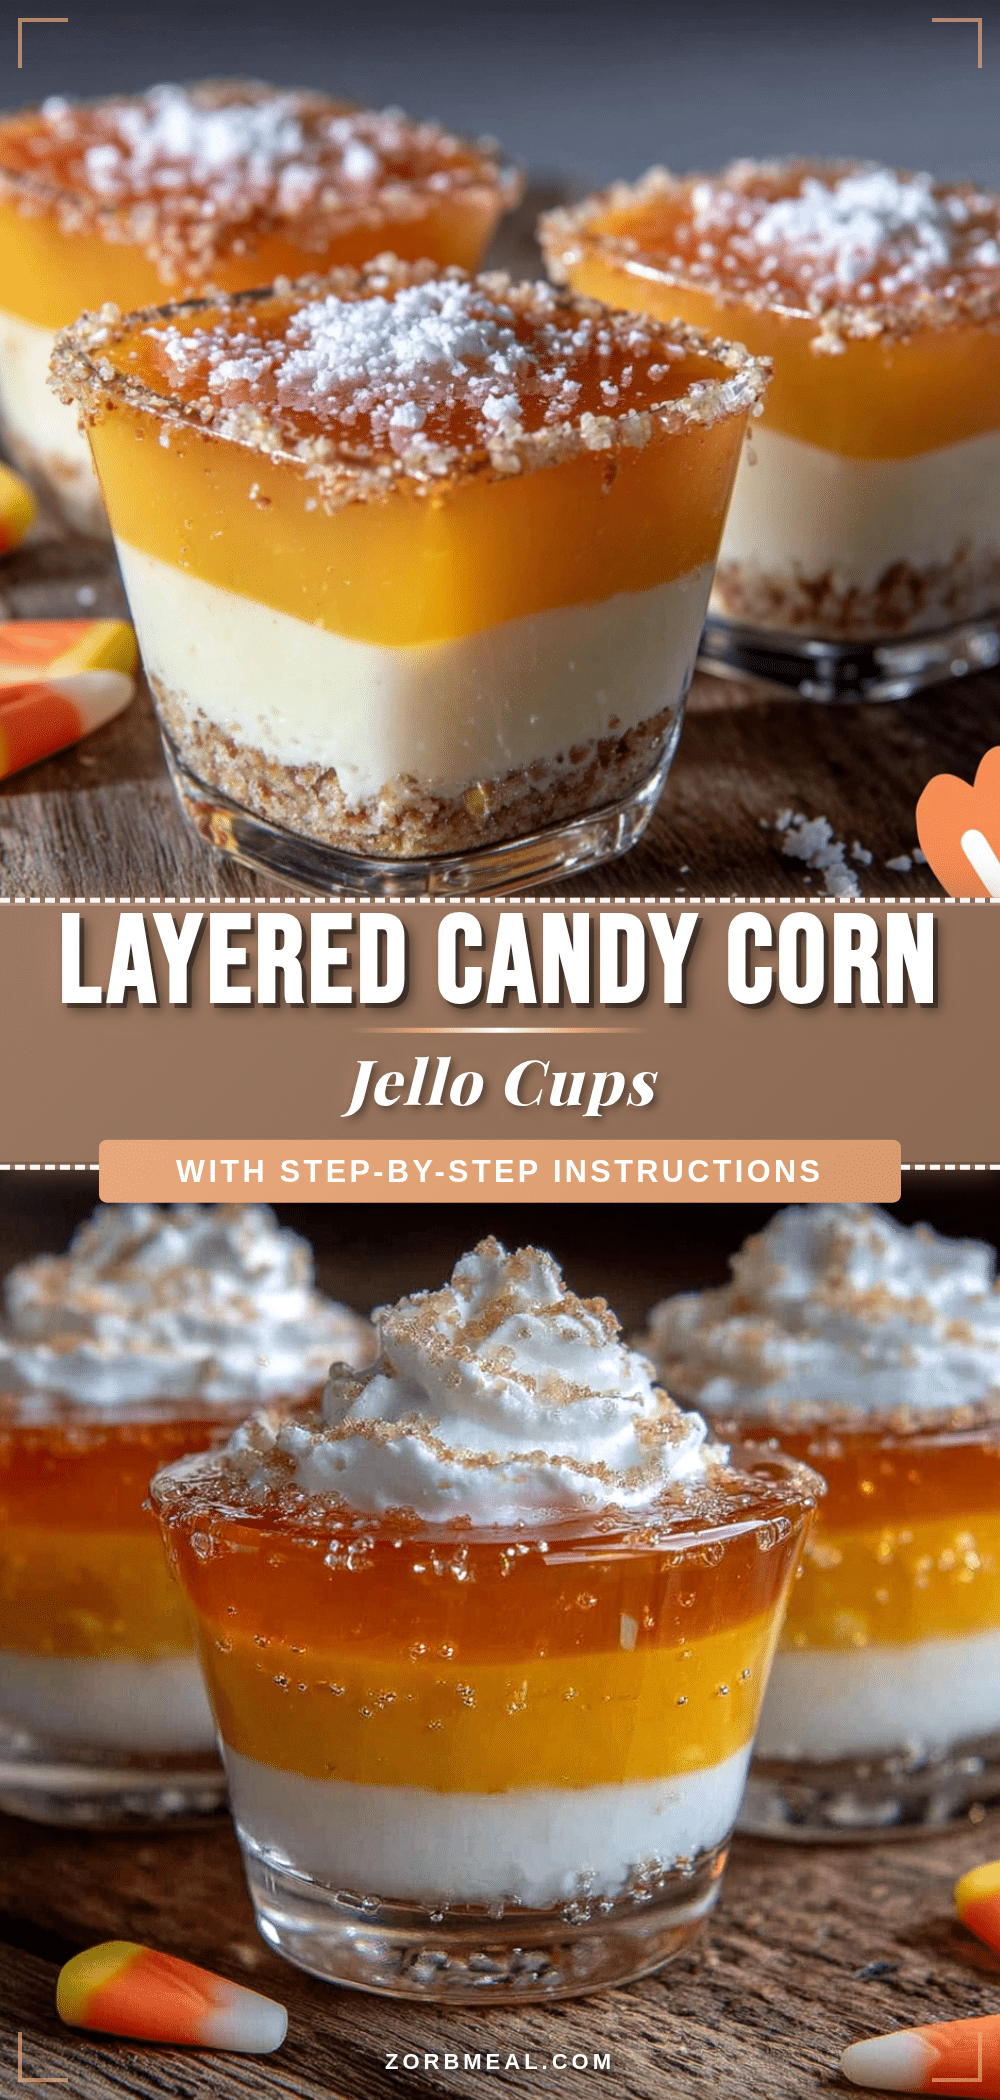
Easy Colorful Layered Candy Corn Jello Cups Recipe
These Colorful Layered Candy Corn Jello Cups are a fun, no-bake dessert with vibrant orange, yellow, and white layers that look like candy corn. Perfect for Halloween parties or any celebration, they require simple ingredients and a little patience between layers.
- Prep Time: 20 minutes
- Cook Time: 0 minutes
- Total Time: 4 hours 5 minutes
- Yield: 6 servings 1x
- Category: Dessert
- Cuisine: American
Ingredients
- 1 box (3 oz) orange gelatin
- 1 box (3 oz) lemon gelatin
- 1 box (3 oz) unflavored gelatin
- 1 can (12 oz) evaporated milk
- 2 cups boiling water, divided
- 1 cup cold water, divided
- Nonstick cooking spray
Instructions
- Prepare the orange layer: In a medium bowl, combine the orange gelatin with 1 cup of boiling water. Stir for about 2 minutes until the powder is completely dissolved. Add 1/2 cup of cold water and stir again. Let this sit at room temperature for about 10 minutes to cool slightly.
- Pour the first layer: Divide the orange gelatin evenly among your cups. You want each cup to have about 1/3 of the total volume filled with this layer. Place the cups in the refrigerator and let them set for about 45 minutes to 1 hour. The layer should be firm to the touch, not jiggly.
- Prepare the white creamy layer: While the orange layer sets, make the white layer. In a bowl, combine 1 packet of unflavored gelatin with 1/2 cup of cold water. Let it sit for about 5 minutes to bloom. Then add 1/2 cup of boiling water and stir until the gelatin dissolves completely. Stir in the evaporated milk and mix well. Let this cool to room temperature.
- Add the white layer: Once the orange layer is firm, gently pour the white mixture over it. Fill each cup about halfway now. Return the cups to the fridge and let this set for another 45 minutes to 1 hour.
- Prepare the yellow layer: In a clean bowl, combine the lemon gelatin with 1 cup of boiling water. Stir until dissolved. Add 1/2 cup of cold water and mix. Let it cool for about 10 minutes.
- Add the yellow layer: Once the white layer is firm, carefully pour the yellow gelatin over it. Fill the cups almost to the top. Return to the fridge and let everything set for at least 2 hours, or overnight for best results.
- Serve: The cups are ready to serve once the top layer is firm and jiggly. You can eat them straight from the cup or turn them out onto a plate if you want a cleaner presentation.
Notes
Patience is key between layers to prevent colors from bleeding. Let each layer cool before pouring to avoid melting the previous layer. These cups taste better after sitting overnight.
Nutrition
- Serving Size: 1 cup
- Calories: 135
- Sugar: 22
- Sodium: 85
- Fat: 3.5
- Saturated Fat: 2
- Carbohydrates: 25
- Protein: 4
Keywords: candy corn jello cups, layered jello, Halloween dessert, no-bake dessert, jello cups, colorful jello


