“You can’t just plop pudding in a cup and call it Halloween,” my niece had declared that afternoon as we rummaged through the pantry for something spooky yet sweet. Honestly, I wasn’t convinced at first—how could simple pudding and crushed Oreos possibly measure up to the elaborate treats floating around Pinterest? But as I started layering chocolate pudding and Oreo crumbs, adding those tiny tombstone cookies and gummy worms, something clicked. The whole kitchen smelled like childhood mischief and late-night candy raids. It wasn’t just a dessert; it felt like a little Halloween world tucked inside a cup. The best part? It came together so quickly, perfect for when you’re juggling costumes, candy runs, and last-minute party prep. This recipe for Delicious Oreo Graveyard Pudding Cups became our go-to easy Halloween dessert, surprising me every time with how much joy a simple treat can bring. It’s the kind of recipe you’ll find yourself making again and again, not because you have to, but because it just feels right for the season—a little spooky, a little sweet, and totally fun.”
Why You’ll Love This Recipe
After testing countless Halloween desserts, these Oreo Graveyard Pudding Cups stood out—not just for their fun factor, but for how effortlessly they come together. Honestly, they’re a lifesaver when you want to impress without the stress.
- Quick & Easy: Ready in under 20 minutes, perfect for busy parents or last-minute holiday gatherings.
- Simple Ingredients: Uses pantry staples like chocolate pudding mix and Oreos, no specialty items needed.
- Perfect for Halloween Parties: These pudding cups bring that spooky theme to the table without any fuss.
- Crowd-Pleaser: Kids love the creepy graveyard look, while adults appreciate the classic Oreo and creamy pudding combo.
- Unbelievably Delicious: The crushed Oreos mimic dirt perfectly, creating a texture contrast that’s just right.
What sets this recipe apart? It’s all about the layering technique and the little details—the tombstone cookies, gummy worms peeking out, and just enough crushed Oreos to give that authentic graveyard feel. Honestly, I’ve tried other spooky desserts, but nothing nails the balance between creepy and delicious as well as this one. Plus, it’s flexible; you can swap out the pudding flavor or add your own spooky decorations. Whether you’re aiming for a quick treat or a Halloween centerpiece, these pudding cups deliver that satisfying, playful vibe we all want this time of year.
What Ingredients You Will Need
This recipe uses simple, wholesome ingredients to deliver bold flavor and a satisfying texture without any tricky steps or hard-to-find items. Most of these you probably have on hand already, which makes it perfect for spontaneous Halloween fun.
- Chocolate pudding mix (instant or cook-and-serve): Base of the creamy, smooth layer. I prefer brands like Jell-O for quick prep.
- Milk (2 cups / 480 ml): For mixing the pudding, whole milk gives the best richness, but 2% works fine too.
- Oreos (about 15-20 cookies): Crushed to create the “dirt” layer. You can swap with gluten-free Oreos if needed.
- Mini tombstone cookies or graham crackers: Cut into tombstone shapes for decoration (optional but highly recommended).
- Gummy worms or other Halloween candy: Adds a fun, creepy touch that kids adore.
- Whipped cream (about 1 cup / 240 ml): For a light topping layer—use store-bought or homemade.
- Chocolate chips or sprinkles (optional): For extra texture and visual interest.
For a dairy-free version, swap the milk with almond or oat milk and use dairy-free pudding mix. Seasonal twist? Add orange or pumpkin spice-flavored pudding instead of chocolate for a festive flavor change. Just a heads up—if you use homemade pudding, let it chill properly to get that perfect creamy texture. I’ve found that a cold pudding base makes layering easier and the final cups taste less runny.
Equipment Needed
- Mixing bowl (medium-sized) for pudding preparation
- Whisk or electric mixer to blend pudding smooth
- Measuring cups and spoons for precise ingredient amounts
- Food processor or zip-top bag and rolling pin for crushing Oreos
- Clear plastic cups or small glass jars for assembling the pudding cups
- Small cookie cutter or knife for shaping tombstones (optional)
- Spatula for layering and smoothing pudding
If you don’t have a food processor, placing Oreos in a sealed bag and gently crushing them with a rolling pin works just fine—been there, done that! For budget-friendly options, plastic cups from the dollar store are perfect for serving. I’ve also used mason jars to make these pudding cups feel a bit more special when handing them out at parties. Keeping your tools clean and dry, especially the mixing bowl and whisk, really helps pudding set nicely without clumps.
Preparation Method
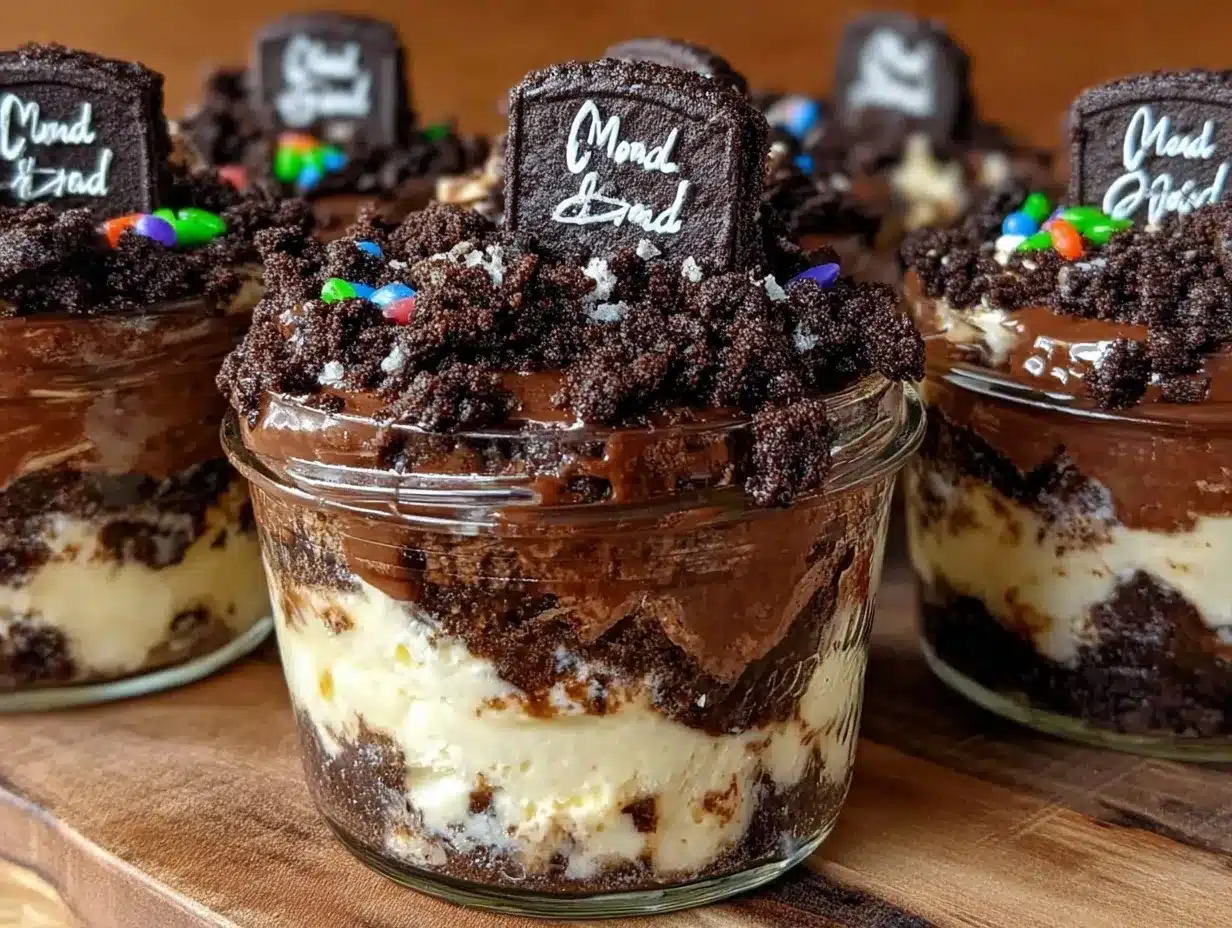
- Prepare the pudding: In a medium bowl, whisk together the chocolate pudding mix with 2 cups (480 ml) of cold milk. If using instant pudding, whisk for about 2 minutes until thickened. For cook-and-serve, follow package instructions and chill until set, about 5 minutes. (Tip: Make sure to chill the pudding thoroughly to get the best texture.)
- Crush the Oreos: Place 15-20 Oreo cookies into a zip-top plastic bag, seal tightly, and crush them using a rolling pin until you get mostly fine crumbs with some larger chunks for texture. (If you like it extra crunchy, crush less.)
- Prepare tombstones: If using graham crackers, cut into tombstone shapes with a small cookie cutter or knife. Alternatively, you can buy pre-made mini tombstone cookies to save time.
- Layer the cups: Add a tablespoon of crushed Oreos to the bottom of each serving cup to create the “dirt” base.
- Add pudding: Spoon about ½ cup (120 ml) of pudding over the Oreo layer and smooth gently with the back of the spoon.
- Add more Oreo crumbs: Sprinkle another tablespoon of crushed Oreos on top of the pudding to mimic soil.
- Finish with whipped cream: Add a dollop of whipped cream on top of the Oreo crumbs, about 2 tablespoons (30 ml).
- Decorate: Insert a mini tombstone cookie or graham cracker piece into the whipped cream. Nestle a gummy worm or two around the tombstone to add that creepy crawl.
- Chill before serving: Refrigerate the assembled cups for at least 30 minutes to let flavors meld and pudding firm up a bit more.
Pro tip: When layering, don’t pack the Oreos too tightly; you want a crumbly dirt feel, not compacted. Also, if your pudding gets too stiff, give it a quick whisk before layering to keep it silky. I’ve learned that spooning the pudding gently rather than dumping it helps keep the layers clean and visually appealing.
Cooking Tips & Techniques
One thing I’ve learned is that timing matters a lot with pudding desserts like this. If the pudding isn’t chilled enough, the cups can turn watery and messy. So, patience is key—even if it’s hard to wait! Whipping the pudding just until it thickens helps maintain that creamy texture without being too stiff.
When crushing Oreos, leaving some chunks adds a nice texture contrast. I once made the mistake of crushing them too finely, and the “dirt” layer felt almost like powder—definitely less fun. Also, layering is an art here; using a small spoon or even a piping bag for the pudding can help create neat layers.
Don’t skip the whipped cream—honestly, it adds a lightness that balances the richness of the pudding and the crunch of the Oreos. If you want to save time, store-bought whipped cream works just fine, but homemade is a game changer.
Multitasking tip: While the pudding chills, prep your Oreo crumbs and tombstones so you’re ready to assemble quickly. I often make the Oreo dirt layer in advance and store it in an airtight container to keep it fresh and crumbly.
Variations & Adaptations
These Oreo Graveyard Pudding Cups are a blank canvas for your Halloween creativity. Here are some ways to make them your own:
- Pudding Flavor Swap: Use vanilla or butterscotch pudding instead of chocolate for a lighter taste and a different color contrast.
- Gluten-Free Option: Swap regular Oreos for gluten-free chocolate sandwich cookies, and use gluten-free graham crackers or cookies for tombstones.
- Vegan Version: Use dairy-free pudding mix, plant-based milk, and vegan whipped cream. Many brands like Silk and So Delicious offer great dairy-free options.
- Extra Creepy: Add red gel food coloring drops to the whipped cream to simulate “bloody” frosting, or use candy eyeballs for a spooky twist.
- Seasonal Twist: Mix in pumpkin puree with the pudding for a pumpkin-chocolate graveyard theme, and dust with cinnamon or nutmeg.
Once, I tried adding crushed peppermint candies for a winter version of the graveyard cups—strange but surprisingly good! Also, if you’re pressed for time, layering in bigger cups makes the process faster while still looking great. These tweaks can keep the recipe fresh and tailored to your taste.
Serving & Storage Suggestions
Serve these pudding cups chilled for the best texture and flavor. They’re perfect as individual portions for Halloween parties or classroom treats. Presentation-wise, clear plastic cups show off the layers beautifully, but small glass jars add a rustic charm if you want to impress guests.
Pair these graveyard pudding cups with light snacks like caramel popcorn or a simple fruit platter to balance the richness. For drinks, a cold glass of milk or a festive punch complement the dessert nicely.
Store leftover pudding cups in the refrigerator covered with plastic wrap or airtight lids for up to 3 days. The “dirt” layer may soften over time, so if you want to keep that crunchy texture, add fresh crushed Oreos just before serving. Reheat? Nope, these are best enjoyed cold!
Fun fact: flavors tend to meld and deepen after a few hours, so making them a day ahead can actually improve the taste.
Nutritional Information & Benefits
Each serving of Oreo Graveyard Pudding Cups roughly contains:
| Calories | 250-300 |
|---|---|
| Fat | 10-12g |
| Sugar | 25-30g |
| Protein | 3-4g |
While this dessert is an indulgence, it also offers some nutritional perks—chocolate pudding brings calcium and some protein from milk, and Oreos provide a bit of iron and carbohydrates for quick energy (perfect for little ghosts and goblins!). For a slightly healthier spin, you can use low-fat milk and reduced-sugar pudding mixes. Just a heads up: this recipe contains dairy and gluten unless substitutions are made.
From a wellness perspective, treats like these are all about balance—enjoying the fun and flavors without stress. After all, Halloween is about joy and a little playful indulgence, right?
Conclusion
These Delicious Oreo Graveyard Pudding Cups are more than just a Halloween treat—they’re a simple way to bring some spooky fun to your table with minimal effort. Whether you’re feeding a crowd or sneaking a solo midnight snack, the layers of creamy pudding, crunchy Oreo “dirt,” and whimsical tombstone decorations make this dessert a standout. I love how easy it is to customize and how it always gets smiles, especially from the kids who can’t wait to dig in.
Feel free to experiment with flavors or decorations to make it your own. And if you try this recipe, I’d love to hear how you put your spin on it! Sharing those moments is what makes cooking fun and keeps the treats coming year after year. So grab your pudding mix and Oreos, and get ready—it’s time to bury some deliciousness!
FAQs
- Can I make these pudding cups ahead of time? Yes! They taste even better after chilling for a few hours, but add the gummy worms and tombstones just before serving to keep them fresh.
- What if I don’t have pudding mix? You can make homemade chocolate pudding from scratch or use ready-made pudding cups as a shortcut.
- How do I keep the Oreo crumbs crunchy? Store them separately and add on top just before serving to maintain that “dirt” texture.
- Can I use other cookies instead of Oreos? Definitely. Chocolate wafer cookies or crushed chocolate graham crackers work well.
- Are these cups suitable for kids with allergies? They contain dairy and gluten by default, but you can swap ingredients to make them dairy-free or gluten-free as needed.
For a savory balance after your Halloween sweets, you might enjoy a flavorful grilled chimichurri shrimp skewers or cozy up with a creamy crockpot white chicken chili after all the trick-or-treating. Both offer a delicious contrast to these fun pudding cups and keep your meals exciting throughout the fall.
Pin This Recipe!
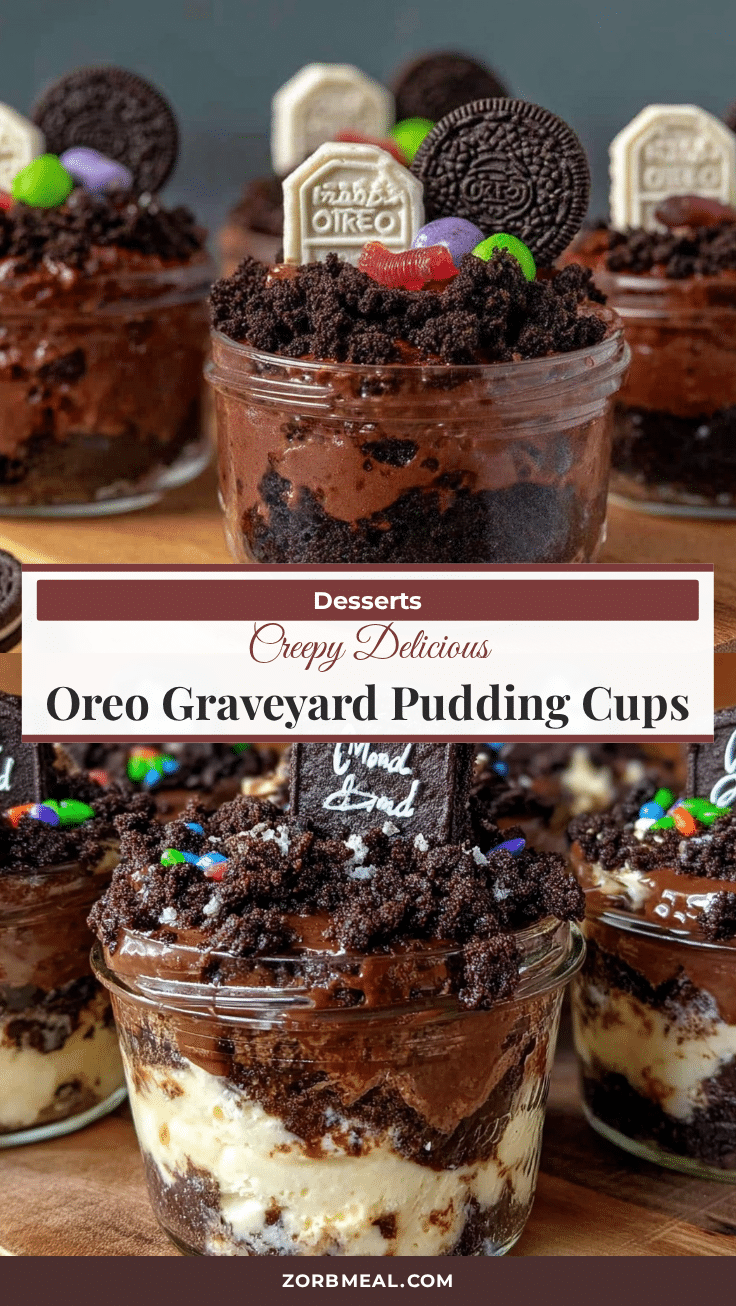
Delicious Oreo Graveyard Pudding Cups
A quick and easy Halloween dessert featuring layers of creamy chocolate pudding, crushed Oreos mimicking dirt, and spooky decorations like tombstone cookies and gummy worms. Perfect for parties and last-minute treats.
- Prep Time: 10 minutes
- Cook Time: 5 minutes (if cook-and-serve pudding) or 2 minutes (if instant pudding)
- Total Time: 20 minutes
- Yield: 6 servings 1x
- Category: Dessert
- Cuisine: American
Ingredients
- Chocolate pudding mix (instant or cook-and-serve)
- 2 cups (480 ml) milk (whole or 2%)
- 15–20 Oreo cookies, crushed
- Mini tombstone cookies or graham crackers, cut into tombstone shapes (optional)
- Gummy worms or other Halloween candy
- 1 cup (240 ml) whipped cream (store-bought or homemade)
- Chocolate chips or sprinkles (optional)
Instructions
- Prepare the pudding: In a medium bowl, whisk together the chocolate pudding mix with 2 cups (480 ml) of cold milk. If using instant pudding, whisk for about 2 minutes until thickened. For cook-and-serve, follow package instructions and chill until set, about 5 minutes.
- Crush the Oreos: Place 15-20 Oreo cookies into a zip-top plastic bag, seal tightly, and crush them using a rolling pin until you get mostly fine crumbs with some larger chunks for texture.
- Prepare tombstones: If using graham crackers, cut into tombstone shapes with a small cookie cutter or knife. Alternatively, use pre-made mini tombstone cookies.
- Layer the cups: Add a tablespoon of crushed Oreos to the bottom of each serving cup to create the “dirt” base.
- Add pudding: Spoon about ½ cup (120 ml) of pudding over the Oreo layer and smooth gently with the back of the spoon.
- Add more Oreo crumbs: Sprinkle another tablespoon of crushed Oreos on top of the pudding to mimic soil.
- Finish with whipped cream: Add a dollop of whipped cream on top of the Oreo crumbs, about 2 tablespoons (30 ml).
- Decorate: Insert a mini tombstone cookie or graham cracker piece into the whipped cream. Nestle a gummy worm or two around the tombstone.
- Chill before serving: Refrigerate the assembled cups for at least 30 minutes to let flavors meld and pudding firm up.
Notes
Chill pudding thoroughly for best texture. Leave some Oreo chunks for texture contrast. Use a small spoon or piping bag for neat layering. Add gummy worms and tombstones just before serving to keep fresh. Store leftover pudding cups refrigerated up to 3 days; add fresh Oreo crumbs before serving to maintain crunch.
Nutrition
- Serving Size: 1 pudding cup (about
- Calories: 275
- Sugar: 27
- Sodium: 150
- Fat: 11
- Saturated Fat: 6
- Carbohydrates: 28
- Fiber: 1
- Protein: 3.5
Keywords: Halloween dessert, Oreo pudding cups, easy Halloween recipe, spooky dessert, pudding cups, Oreo dirt, Halloween party dessert


