Late Saturday morning, sunlight filters softly through the kitchen window, dust motes drifting lazily in the quiet air. The only thing on my mind is a Crispy Chicken Caesar Wrap — that perfect balance of crunchy, creamy, and fresh that feels just right for a midday pause. It’s not about rushing or impressing anyone. This wrap is a small ritual, a moment of calm in the middle of a busy weekend, when the world slows enough for simple pleasures.
I first settled into this recipe on an unassuming spring afternoon when pantry staples and leftover rotisserie chicken collided in a way that felt quietly satisfying. The crispness of the chicken, the cool tang of Caesar dressing, and the gentle chew of a soft tortilla made this wrap an unexpected comfort. It’s become my go-to lunchbox meal — not because it shouts, but because it whispers ease and care with every bite.
What stuck with me was how effortlessly this recipe fits into the rhythm of a day, like a familiar tune. The kind of meal that doesn’t ask for much but gives back a lot — flavor, texture, and a reminder that good food can be simple and unhurried. It’s a quiet promise of nourishment and a brief escape, wrapped neatly in one hand.
Why You’ll Love This Recipe
Honestly, the Crispy Chicken Caesar Wrap is one of those few recipes that feels like it was made for real life — you know, the chaotic, grab-what-you-have moments that still deserve to taste good. Here’s why it’s stood the test of my kitchen experiments and why it might just become your lunchbox hero:
- Quick & Easy: This wrap comes together in under 20 minutes, perfect for those rushed mornings or last-minute lunches.
- Simple Ingredients: No need for a special trip to the store. You likely already have most of these in your fridge or pantry.
- Perfect for Lunchboxes: It’s sturdy enough to hold up until lunchtime without getting soggy, making it ideal for school, work, or picnics.
- Crowd-Pleaser: Kids and adults alike tend to ask for seconds. The familiar flavors with a crispy twist usually win everyone over.
- Unbelievably Delicious: The combo of crunchy chicken, creamy Caesar, and crisp romaine is just so satisfying — like comfort food with a fresh finish.
This recipe isn’t just another Caesar salad tossed in a wrap. I fine-tuned the chicken coating, using a blend of panko and Parmesan to get that perfect crunch without feeling greasy. Plus, blending the dressing into the chicken a bit before assembly locks in flavor. It’s subtle, but it makes all the difference. It’s the kind of lunch that makes you close your eyes mid-bite and quietly appreciate the simple things — all without fuss or fanfare.
What Ingredients You Will Need
This Crispy Chicken Caesar Wrap uses straightforward, wholesome ingredients to deliver bold flavor and satisfying texture without fuss. Most are pantry staples or easy to find, making this recipe approachable any day of the week.
- For the Crispy Chicken:
- Boneless, skinless chicken breasts (about 2 medium-sized, around 1 pound/450g), sliced into strips
- Panko breadcrumbs (1 cup/100g) – I like using Japanese-style panko for extra crunch
- Grated Parmesan cheese (½ cup/50g), freshly grated if possible (adds savory depth)
- All-purpose flour (½ cup/60g), for light dredging
- Large eggs (2), beaten, room temperature
- Garlic powder (1 tsp) and onion powder (½ tsp), to season the coating
- Salt and freshly ground black pepper, to taste
- Olive oil or vegetable oil, for frying
- For the Wrap Assembly:
- Large flour tortillas (4, 10-inch/25cm size) – soft, pliable ones work best
- Romaine lettuce leaves (1 cup/30g), chopped crisp
- Caesar dressing (⅓ cup/80ml), store-bought or homemade (I recommend a creamy version with anchovy paste for authenticity)
- Shaved Parmesan cheese (2 tbsp/10g), for garnish inside the wrap
- Freshly ground black pepper, a light sprinkle
Substitutions: For a gluten-free version, swap the flour and panko for almond flour and gluten-free breadcrumbs. You can also try Greek yogurt mixed with lemon juice instead of Caesar dressing for a lighter take. Using leftover rotisserie chicken instead of freshly fried strips works in a pinch, especially when paired with the creamy dressing and crisp lettuce.
Equipment Needed
- Medium-sized frying pan or skillet – a non-stick or cast iron pan works well for frying the chicken strips evenly
- Mixing bowls (at least two) – one for the flour, one for the egg wash, and one for the breadcrumb mixture
- Tongs or a fork – handy for dipping and flipping the chicken
- Paper towels – to drain excess oil from fried chicken
- Sharp knife and cutting board – for slicing chicken and chopping lettuce
- Measuring cups and spoons – to keep ingredient proportions just right
If you don’t have a deep skillet, a wide sauté pan will do just fine. A splatter guard can save you some cleanup, but it’s not essential. For those watching the oil, an air fryer can crisp up the chicken nicely — just adjust the cooking time to about 12 minutes at 400°F (200°C) and flip halfway through. I’ve tried both methods; frying yields a slightly richer crust, but air frying is a welcome shortcut on busy days.
Preparation Method

- Prep the Chicken: Start by slicing the chicken breasts into strips about 1-inch (2.5cm) wide. Pat them dry with paper towels to help the coating stick better. Season lightly with salt and pepper. (Prep time: 5 minutes)
- Set Up Breading Stations: In one shallow bowl, place the flour seasoned with garlic powder, onion powder, and a pinch of salt. In a second bowl, beat the eggs. In a third bowl, combine panko breadcrumbs with the grated Parmesan cheese. Mixing the cheese into the crumbs gives the coating a lovely savory punch. (Prep time: 5 minutes)
- Coat the Chicken: Dredge each chicken strip first in the flour, shaking off excess, then dip into the egg, and finally coat thoroughly with the panko-Parmesan mixture. Press the coating lightly onto the chicken to help it adhere. (Prep time: 10 minutes)
- Fry the Chicken: Heat about ¼ inch (0.6cm) of oil in your skillet over medium heat. Test the oil by dropping a breadcrumb in—if it sizzles immediately, it’s ready. Fry the chicken strips in batches to avoid overcrowding, about 3-4 minutes per side or until golden brown and cooked through. The internal temp should reach 165°F (74°C). Drain on paper towels. (Cooking time: 15 minutes)
- Prepare the Wrap: Warm the flour tortillas slightly in a dry pan or microwave until pliable. Spread about 1 tablespoon of Caesar dressing on each tortilla, then layer with chopped romaine lettuce, a few crispy chicken strips, and a sprinkle of shaved Parmesan. Add a light crack of black pepper. (Prep time: 5 minutes)
- Roll It Up: Fold in the sides of the tortilla, then roll tightly from one end to the other. The dressing keeps everything together, but if you like, you can secure with a toothpick for packing. (Prep time: 2 minutes)
- Serve or Pack: These wraps are best enjoyed fresh but hold up well in a lunchbox for a few hours. If packing for later, wrap tightly in parchment paper or foil to keep them intact. (Ready to eat or pack!)
Quick tip: If your chicken strips aren’t crisp enough after frying, pop them under a broiler for a minute or two while watching closely. This little trick revives the crunch without drying out the meat.
Cooking Tips & Techniques
Getting that perfect crispy crust on the chicken is the heart of this recipe. Here’s what I learned after many trials:
- Patience with the oil: Too hot, and the coating burns before the chicken cooks; too cool, and the chicken absorbs oil and gets soggy. Medium heat is your friend — steady, not rushed.
- Pressing the coating: When you apply the panko-Parmesan mix, press it onto the chicken firmly but gently. It sticks better and crisps up beautifully.
- Don’t overcrowd the pan: Fry in batches so the temperature stays consistent. Overcrowding causes the oil temp to drop, leading to greasy chicken.
- Use fresh panko: Old breadcrumbs can be stale or clumpy, which affects texture. Fresh panko is lighter and crispier.
- Timing the wrap assembly: Assemble just before eating or packing. Lettuce wilts fast if sitting too long with dressing, so if you prep ahead, keep components separate until lunchtime.
Honestly, the first time I tried skipping the flour step, the coating slid right off. Lesson learned: that light flour dredge is crucial for the egg wash to cling. Also, blending a little grated Parmesan into the panko was a game-changer — it adds saltiness and umami that lifts the whole wrap.
Variations & Adaptations
This Crispy Chicken Caesar Wrap is pretty flexible, so you can tweak it depending on mood, diet, or what’s on hand:
- Low-carb option: Swap the flour tortillas for large romaine leaves or collard greens for a fresh, crisp wrap without the carbs.
- Spicy kick: Add a dash of cayenne or smoked paprika to the breadcrumb mix. Or drizzle a little chipotle mayo inside the wrap for smoky heat.
- Vegetarian twist: Use crispy fried tofu or cauliflower “wings” breaded the same way, paired with a vegetarian-friendly Caesar dressing.
- Seasonal touches: In summer, toss in some sliced cherry tomatoes or cucumber ribbons for extra freshness. In fall, roasted red peppers add a sweet warmth.
- Cooking method: Air fryer lovers can cook the chicken strips at 400°F (200°C) for about 12 minutes, flipping halfway. It’s less messy and still yields good crunch.
I once tried swapping out the Parmesan for nutritional yeast to make it vegan-friendly, and while it wasn’t exactly the same, it still had a nice bite. And for a quick weeknight dinner, I’ve used leftover grilled chicken from my garlic butter chicken recipe — just warmed it up, coated lightly, and pan-fried to crisp. It worked surprisingly well!
Serving & Storage Suggestions
This wrap is best served fresh for that crisp texture and cool crunch, but it also packs well for lunches. Here’s how to make sure your Crispy Chicken Caesar Wrap stays delicious:
- Serving temperature: Room temperature or slightly warm is perfect. If freshly made, eat immediately to enjoy the crisp chicken.
- Presentation: Slice diagonally for a neat, inviting look. A sprinkle of extra Parmesan or a lemon wedge on the side adds a nice touch.
- Complementary sides: Pair with fresh fruit, crunchy veggie sticks, or a light salad. For a snack, something like creamy buffalo chicken dip with crispy tortilla scoops (recipe here) is a fun match.
- Storage: Wrap tightly in parchment and then foil or place in an airtight container. Refrigerate for up to 2 days.
- Reheating: Reheat chicken strips in a skillet or air fryer to revive crispiness before assembling the wrap again. Avoid microwaving wrapped sandwiches to prevent sogginess.
- Flavor development: If you like, let the chicken marinate briefly in a little Caesar dressing before breading for deeper flavor, but be cautious as too long can soften the crust.
Nutritional Information & Benefits
This Crispy Chicken Caesar Wrap offers a balanced meal with protein, greens, and satisfying crunch. Per serving (1 wrap), here’s an estimate:
| Calories | 450-500 kcal |
|---|---|
| Protein | 35g |
| Carbohydrates | 30g |
| Fat | 20g |
| Fiber | 3g |
Chicken is a great lean protein source, helping keep you full through the afternoon. Romaine adds fiber and vitamins A and K, while Parmesan contributes calcium. Using panko keeps the coating lighter than traditional breadcrumbs, and making your own or choosing a dressing with real anchovies adds umami and depth without artificial ingredients.
For those mindful of allergens, this recipe contains dairy, gluten, and eggs. You can adjust with gluten-free flours and vegan cheese/dressings as mentioned earlier. From a wellness perspective, this wrap feels like a satisfying way to fuel your day without unnecessary heaviness.
Conclusion
This Crispy Chicken Caesar Wrap is an honest, straightforward meal that fits beautifully into busy lives and quiet moments alike. Its simple ingredients and easy prep make it approachable, but the thoughtful touches — like the Parmesan in the crust and the creamy Caesar dressing — give it a little something extra you keep coming back to.
Feel free to tweak it to your taste: swap out greens, add a spicy kick, or try a different cooking method. It’s your lunchbox, your rules. I love this recipe because it reminds me that the best meals don’t have to be complicated, just thoughtfully made and quietly enjoyed.
If you give this recipe a try, I’d love to hear how you make it your own — drop a comment or share your favorite variations. Here’s to many peaceful lunch breaks with a wrap that’s more than just a quick bite.
FAQs
Can I make the Crispy Chicken Caesar Wrap ahead of time?
You can prep the chicken and chop the lettuce ahead but assemble the wrap just before eating to keep everything crisp and fresh.
What’s the best way to reheat the crispy chicken?
Reheat in a skillet or air fryer for a few minutes to restore crunch. Avoid microwaving as it can make the coating soggy.
Can I use store-bought Caesar dressing?
Yes, a good-quality store-bought dressing works well. For a richer flavor, try one with anchovy paste or make a quick homemade version.
Is there a vegetarian alternative for this wrap?
Absolutely. Try crispy breaded tofu or cauliflower bites with a vegetarian Caesar dressing for a satisfying meat-free version.
How can I make this recipe gluten-free?
Substitute the flour and panko with gluten-free flour blends and gluten-free breadcrumbs or crushed cornflakes for a crunchy coating.
Pin This Recipe!
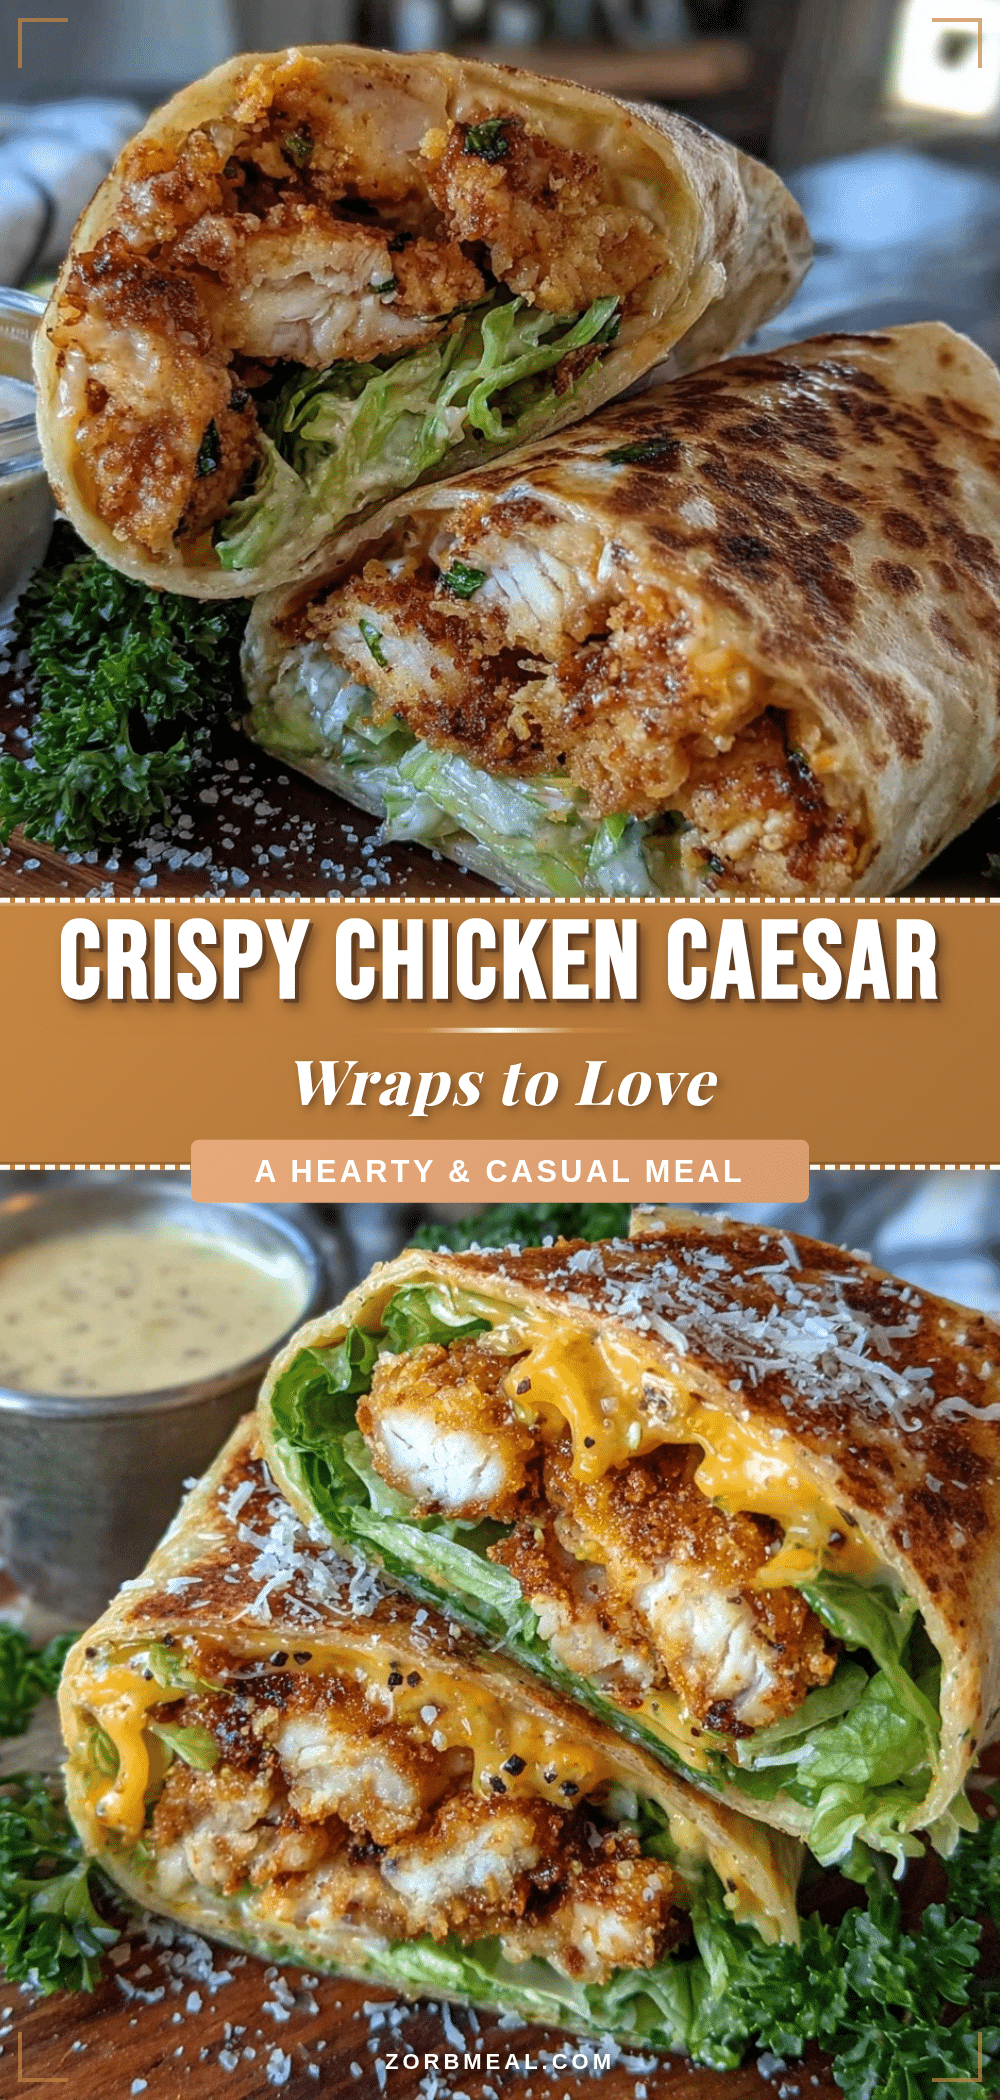
Crispy Chicken Caesar Wrap

A quick and easy lunchbox meal featuring crispy panko-Parmesan coated chicken strips, fresh romaine, and creamy Caesar dressing wrapped in a soft flour tortilla. Perfectly balanced with crunch, creaminess, and fresh flavors.
- Prep Time: 17 minutes
- Cook Time: 15 minutes
- Total Time: 32 minutes
- Yield: 4 servings 1x
- Category: Main Course
- Cuisine: American
Ingredients
- 2 medium boneless, skinless chicken breasts (about 1 pound/450g), sliced into strips
- 1 cup (100g) Japanese-style panko breadcrumbs
- ½ cup (50g) grated Parmesan cheese, freshly grated if possible
- ½ cup (60g) all-purpose flour
- 2 large eggs, beaten, room temperature
- 1 tsp garlic powder
- ½ tsp onion powder
- Salt and freshly ground black pepper, to taste
- Olive oil or vegetable oil, for frying
- 4 large flour tortillas (10-inch/25cm size)
- 1 cup (30g) romaine lettuce leaves, chopped crisp
- ⅓ cup (80ml) Caesar dressing, store-bought or homemade
- 2 tbsp (10g) shaved Parmesan cheese, for garnish
- Freshly ground black pepper, a light sprinkle
Instructions
- Slice chicken breasts into 1-inch (2.5cm) strips. Pat dry with paper towels and season lightly with salt and pepper.
- Set up breading stations: In one bowl, mix flour with garlic powder, onion powder, and a pinch of salt. In a second bowl, beat the eggs. In a third bowl, combine panko breadcrumbs with grated Parmesan cheese.
- Dredge each chicken strip in the flour mixture, shaking off excess, then dip into the beaten eggs, and finally coat thoroughly with the panko-Parmesan mixture, pressing lightly to adhere.
- Heat about ¼ inch (0.6cm) of oil in a skillet over medium heat. Test oil readiness by dropping a breadcrumb; it should sizzle immediately.
- Fry chicken strips in batches for 3-4 minutes per side until golden brown and cooked through (internal temperature 165°F/74°C). Drain on paper towels.
- Warm tortillas slightly in a dry pan or microwave until pliable. Spread about 1 tablespoon of Caesar dressing on each tortilla.
- Layer chopped romaine lettuce, a few crispy chicken strips, and a sprinkle of shaved Parmesan on each tortilla. Add a light crack of black pepper.
- Fold in the sides of the tortilla and roll tightly from one end to the other. Secure with a toothpick if desired.
- Serve immediately or wrap tightly in parchment paper or foil for packing.
Notes
For gluten-free, substitute flour and panko with almond flour and gluten-free breadcrumbs. Air fryer can be used at 400°F (200°C) for 12 minutes, flipping halfway. Reheat chicken in skillet or air fryer to maintain crispiness. Assemble wraps just before eating to prevent sogginess. Press coating firmly onto chicken for best crunch.
Nutrition
- Serving Size: 1 wrap
- Calories: 475
- Fat: 20
- Carbohydrates: 30
- Fiber: 3
- Protein: 35
Keywords: crispy chicken wrap, Caesar wrap, lunchbox meal, easy chicken recipe, panko chicken, quick lunch, chicken Caesar wrap


