I was standing in my kitchen on a drizzly Tuesday afternoon, staring at a half-can of pumpkin puree left over from a creamy Tuscan chicken I made two nights before. The weather had turned—that sudden shift where the air gets crisp and you start craving something warm and spiced. My coffee was going cold in the mug, and honestly, I was in that weird between-meal slump where you want a treat but not something heavy. A muffin felt too dense, a cookie too simple. I wanted something that felt like a moment.
That’s when I spotted the maple syrup hiding behind the salt shaker. And the pumpkin pie spice I’d bought on a whim last October (still good, still fragrant). The idea hit me like a warm blanket: scones. Not the dry, crumbly kind that fall apart the second you look at them. I wanted scones with a soft, tender center and those beautiful craggy edges that catch every bit of glaze. The kind you dip in coffee and forget the world for five minutes.
So I pulled out the butter, got my hands in the flour, and started working. Twenty minutes later, these cozy pumpkin spice scones with maple glaze came out of the oven, and I swear, the whole apartment smelled like a pumpkin patch had moved in. The first bite—warm, spiced, with that sweet maple finish—made me close my eyes. This wasn’t just a snack. It was the exact thing I needed to reset my afternoon. And honestly, that’s how most of my best recipes get born—not from planning, but from what’s already sitting in the fridge waiting to become something good.
Why You’ll Love This Recipe
Let me tell you why these scones have become my official fall baking project. I’ve tested this recipe six times—yes, six—to get the texture just right. Not too cakey, not too dry, but that perfect in-between that melts in your mouth.
- Quick & Easy: From mixing bowl to plate in under 30 minutes. No yeast, no rising time, no fuss. Perfect for when that pumpkin craving strikes out of nowhere.
- Simple Ingredients: You probably have most of this in your pantry right now. Pumpkin puree, flour, butter, sugar, and that jar of pumpkin pie spice you bought last year. No fancy grocery runs needed.
- Perfect for Fall Mornings: These scones pair beautifully with a hot cup of coffee or chai tea. They’re cozy enough for a quiet weekend breakfast and pretty enough for a brunch spread.
- Crowd-Pleaser: I brought a batch to a friend’s potluck last week, and they disappeared before the main course. Kids love them, adults love them—everyone loves them.
- Unbelievably Delicious: The combo of warm pumpkin spice and sweet maple glaze is pure comfort. The scones are tender on the inside, slightly crisp on the outside, and the glaze adds that final touch of sweetness that makes you reach for another one.
What makes these different from other pumpkin scone recipes? It’s the technique. I use cold butter cut into the flour until it looks like coarse sand—that’s the secret to flaky layers without being dry. And the pumpkin puree keeps them moist without making them heavy. This isn’t just another pumpkin recipe. This is the one you’ll come back to every fall.
What Ingredients You Will Need
This recipe uses simple, wholesome ingredients to deliver bold flavor and satisfying texture without the fuss. Most of these are pantry staples, so you can whip up a batch anytime the mood strikes.
For the Scones
- 2 cups all-purpose flour (spooned and leveled—don’t scoop directly from the bag or you’ll pack it down)
- 1/3 cup granulated sugar (adds just enough sweetness without overpowering the spice)
- 1 tablespoon baking powder (make sure it’s fresh for proper rise)
- 1/2 teaspoon salt (balances the sweetness and enhances the pumpkin flavor)
- 1 teaspoon pumpkin pie spice (I use McCormick, but any brand works—add an extra 1/4 teaspoon if you love strong spice)
- 1/2 teaspoon ground cinnamon (for that warm, cozy layer)
- 1/4 teaspoon ground nutmeg (freshly grated if you have it—it makes a difference)
- 1/2 cup cold unsalted butter, cut into small cubes (this is non-negotiable—cold butter creates flaky layers)
- 1/2 cup pumpkin puree (not pumpkin pie filling—look for 100% pure pumpkin)
- 1/4 cup heavy cream (plus extra for brushing the tops)
- 1 large egg, room temperature (helps bind everything together)
- 1 teaspoon vanilla extract (pure vanilla, not imitation, for the best flavor)
For the Maple Glaze
- 1 cup powdered sugar, sifted (sifting prevents lumps in the glaze)
- 3 tablespoons pure maple syrup (use the real stuff—not pancake syrup—for that deep, authentic flavor)
- 1-2 tablespoons milk or heavy cream (to adjust consistency—start with 1 tablespoon and add more if needed)
- Pinch of salt (trust me on this—it balances the sweetness)
Ingredient Tips: If you don’t have pumpkin pie spice, mix 1/2 teaspoon cinnamon, 1/4 teaspoon nutmeg, 1/4 teaspoon ginger, and a pinch of cloves. For the butter, I recommend using a high-fat European-style butter like Kerrygold—it makes the scones extra tender. And if you’re dairy-free, you can substitute cold coconut oil for the butter and use oat milk in the glaze. The texture will be slightly different, but still delicious.
Equipment Needed
You don’t need a fancy pastry kitchen for these scones. Here’s what you’ll need:
- Large mixing bowl (any bowl works, but a wide one makes cutting in the butter easier)
- Pastry cutter or two forks (I prefer a pastry cutter—it’s faster and gives you more control. But forks work in a pinch)
- Baking sheet (lined with parchment paper—trust me, cleanup is so much easier)
- Parchment paper (keeps the scones from sticking and makes transferring a breeze)
- Whisk (for mixing dry ingredients and the glaze)
- Measuring cups and spoons (accurate measurements make a difference in baking)
- Sharp knife or bench scraper (for cutting the scones into triangles—a bench scraper gives cleaner edges)
- Pastry brush (for brushing cream on top—optional but gives a beautiful golden finish)
- Cooling rack (allows air to circulate so the bottoms don’t get soggy)
Budget-Friendly Tip: If you don’t have a pastry cutter, use two knives in a scissor motion to cut the butter into the flour. It takes a little longer, but it works just as well. And if you don’t have a cooling rack, a wire oven rack turned upside down does the trick.
Preparation Method
Let’s get baking! Follow these steps carefully, and you’ll have perfect scones every time.
- Preheat your oven to 400°F (200°C). Line a baking sheet with parchment paper. This high heat is key for getting those golden, slightly crisp edges while keeping the inside tender.
- Mix the dry ingredients. In a large bowl, whisk together the flour, sugar, baking powder, salt, pumpkin pie spice, cinnamon, and nutmeg. Make sure everything is evenly distributed—you don’t want a pocket of baking powder in one bite.
- Cut in the cold butter. Add the cold butter cubes to the flour mixture. Using a pastry cutter or two forks, cut the butter into the flour until the mixture looks like coarse sand with some pea-sized butter pieces remaining. This should take about 2-3 minutes. Pro tip: Work quickly so the butter stays cold. If the butter starts to soften, pop the bowl in the fridge for 5 minutes.
- Mix the wet ingredients. In a separate small bowl, whisk together the pumpkin puree, heavy cream, egg, and vanilla extract until smooth. The mixture should be a beautiful orange color and smell amazing already.
- Combine wet and dry ingredients. Pour the wet mixture into the dry mixture. Stir with a spatula or wooden spoon until just combined. The dough will look shaggy and slightly sticky—that’s perfect. Don’t overmix! Overmixing develops gluten and makes scones tough. Stop as soon as you don’t see any more dry flour.
- Shape the dough. Turn the dough out onto a lightly floured surface. Gently bring it together with your hands, patting it into a circle about 3/4-inch thick. Don’t knead it—just press it together. If the dough is too sticky, dust your hands with a little flour.
- Cut the scones. Using a sharp knife or bench scraper, cut the circle into 8 equal wedges (like a pizza). For cleaner edges, cut straight down without twisting the knife. Place the wedges on the prepared baking sheet, spacing them about 2 inches apart.
- Brush and bake. Brush the tops of the scones with a little heavy cream. This gives them that beautiful golden color. Bake for 14-16 minutes, or until the scones are lightly golden on the bottom and the tops are set. They should feel firm to the touch but still soft inside.
- Cool completely. Transfer the scones to a cooling rack and let them cool for at least 10-15 minutes before glazing. If you glaze them while they’re hot, the glaze will slide right off and soak in—still tasty, but not as pretty.
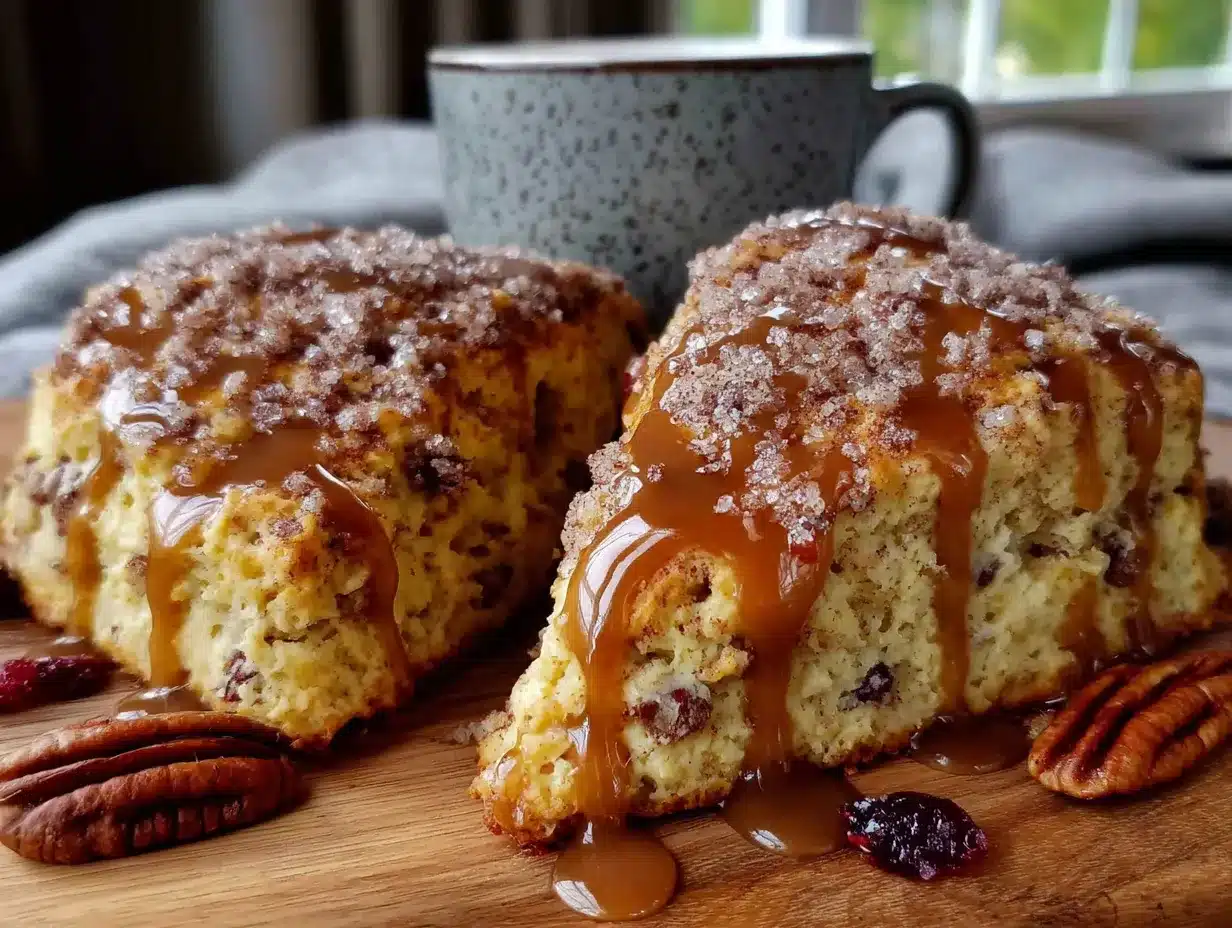
- Make the glaze. While the scones cool, whisk together the powdered sugar, maple syrup, and 1 tablespoon of milk or cream in a small bowl. Add more liquid if needed until the glaze is thick but pourable—it should drizzle off the whisk in a steady ribbon. Drizzle the glaze over the cooled scones using a spoon or a piping bag with a small tip.
Sensory cues: When you cut the butter into the flour, you should feel the mixture turn from powdery to sandy between your fingers. When you add the wet ingredients, the dough should smell like pumpkin pie filling—warm and inviting. And when the scones come out of the oven, the kitchen should smell like fall in a bakery.
Cooking Tips & Techniques
I’ve made my share of baking mistakes, so let me save you some trouble. Here are the things I wish someone had told me when I first started making scones.
Keep everything cold. This is the number one rule of scone-making. Cold butter creates steam pockets in the oven, which gives you those flaky layers. If your butter melts before baking, you’ll get dense, flat scones. I sometimes pop my mixing bowl in the freezer for 5 minutes before adding the wet ingredients if my kitchen is warm.
Don’t overwork the dough. I learned this the hard way after making a batch of hockey pucks. Scone dough should be shaggy and barely holding together. The more you handle it, the tougher it gets. Mix until just combined, shape gently, and get them in the oven fast.
Use a bench scraper for clean cuts. A knife can drag through the dough and seal the edges, which prevents the scones from rising properly. A bench scraper cuts cleanly through. If you don’t have one, use a sharp chef’s knife and press straight down without sawing.
Brush with cream, not egg wash. Egg wash gives a shiny, almost plastic-looking finish. Cream gives a soft, golden sheen that looks more rustic and homemade. Plus, it adds a touch of richness to the top.
Let them cool before glazing. I know it’s tempting to drizzle that maple glaze right away, but patience pays off. Warm scones absorb the glaze and get soggy. Cool scones let the glaze sit on top, creating that beautiful, crackly layer. Worth the wait, I promise.
Variations & Adaptations
One of the best things about this recipe is how flexible it is. Here are some variations I’ve tried and loved.
Gluten-Free Version: Substitute the all-purpose flour with a 1:1 gluten-free baking flour blend (I like Bob’s Red Mill). Add 1/2 teaspoon xanthan gum if your blend doesn’t already include it. The texture will be slightly more tender, but still delicious. I tested this for a friend with celiac, and she said they were the best scones she’s had in years.
Vegan Option: Use cold coconut oil instead of butter, replace the egg with a flax egg (1 tablespoon ground flaxseed mixed with 3 tablespoons water, let sit for 5 minutes), and use oat milk in place of cream. The scones will be a little less flaky but still tender and flavorful. The maple glaze works perfectly with oat milk.
Add Mix-Ins: Fold in 1/2 cup of chopped pecans, walnuts, or dried cranberries after combining the wet and dry ingredients. The nuts add a lovely crunch, and the cranberries bring a tart pop that balances the sweetness. I made a batch with candied ginger once—amazing.
Spice It Up: If you want a bolder flavor, add an extra 1/2 teaspoon of pumpkin pie spice and a pinch of ground cardamom. Cardamom adds a warm, almost floral note that pairs beautifully with pumpkin. This is my go-to variation when I want something a little different.
Chocolate Lover’s Version: Add 1/2 cup of white chocolate chips or dark chocolate chunks to the dough. The chocolate melts into little pockets of sweetness. Drizzle with the maple glaze and sprinkle with a tiny bit of sea salt. Trust me on this one—it’s dangerous.
Serving & Storage Suggestions
These scones are best served warm, fresh from the oven, with the maple glaze still slightly soft. I love pairing them with a hot cup of coffee, chai tea, or even a glass of cold milk. They’re perfect for breakfast, brunch, or an afternoon snack with a good book.
For a brunch spread, arrange the scones on a wooden board alongside fresh fruit, a bowl of whipped butter, and maybe some fluffy buttermilk pancakes for variety. The scones add that cozy, bakery-style touch that makes any gathering feel special.
Storage: Store leftover scones in an airtight container at room temperature for up to 3 days. If you’ve already glazed them, place a piece of parchment paper between layers to prevent sticking. The glaze will stay set and crackly for about 24 hours, then start to soften—still delicious, just less crunchy.
Freezing: You can freeze unglazed baked scones for up to 3 months. Wrap them individually in plastic wrap, then place in a freezer bag. To reheat, thaw at room temperature, then warm in a 300°F oven for 5-7 minutes. Glaze after reheating for the best texture. You can also freeze the unbaked scone wedges on a baking sheet, then transfer to a freezer bag. Bake from frozen, adding 2-3 minutes to the baking time.
Reheating: The best way to reheat a scone is in a toaster oven or regular oven at 300°F for 5 minutes. Microwaving works in a pinch, but it softens the texture and can make the scone chewy. If you must microwave, do it for 10-15 seconds max.
Flavor Development: These scones actually taste even better the next day. The pumpkin and spice flavors meld together overnight, and the texture stays tender. If you can resist eating them all fresh, save a couple for tomorrow morning with your coffee.
Nutritional Information & Benefits
Here’s the approximate nutritional breakdown per scone (based on 8 servings, with glaze):
- Calories: 320
- Fat: 14g
- Saturated Fat: 8g
- Carbohydrates: 46g
- Sugar: 24g
- Fiber: 2g
- Protein: 4g
- Sodium: 280mg
Health Benefits: Pumpkin is packed with vitamin A (great for eye health) and fiber, which helps with digestion. The spices—cinnamon, nutmeg, and ginger—have anti-inflammatory properties and can help regulate blood sugar. Maple syrup contains antioxidants and minerals like zinc and manganese. While these scones are definitely a treat, they’re made with real ingredients that offer more nutritional value than a store-bought pastry.
Dietary Considerations: This recipe contains gluten, dairy, and eggs. For gluten-free and vegan adaptations, see the variations section above. The scones are nut-free as written, but check your pumpkin pie spice blend if you have severe nut allergies.
Conclusion
These cozy pumpkin spice scones with maple glaze are everything I love about fall baking—simple ingredients, warm spices, and that feeling of wrapping your hands around something homemade and delicious. They’re the kind of recipe that makes you slow down and enjoy the moment, whether you’re baking them on a rainy afternoon or sharing them with friends at a weekend brunch.
I’d love to hear how yours turn out! Did you add any fun mix-ins? Did you double the glaze like I always do? Leave a comment below and share your version—I read every single one. And if you snap a photo, tag me on social media so I can see your beautiful scones. Happy baking, friends. Here’s to cozy kitchens, warm scones, and the best season of the year.
Frequently Asked Questions
Can I use pumpkin pie filling instead of pumpkin puree?
No, please don’t. Pumpkin pie filling is pre-sweetened and spiced, which will throw off the balance of this recipe. You want 100% pure pumpkin puree. It’s usually sold in the same aisle, just check the label carefully.
Why did my scones turn out dry?
Dry scones usually happen for two reasons: too much flour or overbaking. Make sure you spoon and level your flour (don’t scoop from the bag). And check your scones at 14 minutes—ovens vary, and even one extra minute can make them dry.
Can I make the dough ahead of time?
Absolutely. You can shape the scone wedges, place them on a parchment-lined baking sheet, and refrigerate for up to 24 hours. Bake straight from the fridge, adding 1-2 minutes to the baking time. This is perfect for holiday mornings when you want fresh scones without the early-morning work.
How do I get a thicker maple glaze?
If your glaze is too thin, add more powdered sugar, one tablespoon at a time, until it reaches your desired consistency. If it’s too thick, add a tiny splash of milk or cream. The glaze should be thick but still pourable—it should coat the back of a spoon and drizzle off in a ribbon.
Can I use a different spice blend?
Of course! Try using chai spice blend, apple pie spice, or even a mix of cinnamon and cardamom. The pumpkin flavor is mild enough to work with lots of different warm spices. Just keep the total spice amount around 1 1/2 teaspoons so you don’t overpower the scones.
Pin This Recipe!

Cozy Pumpkin Spice Scones with Maple Glaze: Easy Fall Recipe

These tender, flaky pumpkin spice scones are topped with a sweet maple glaze and come together in under 30 minutes. Perfect for cozy fall mornings or a crowd-pleasing brunch treat.
- Prep Time: 15 minutes
- Cook Time: 16 minutes
- Total Time: 31 minutes
- Yield: 8 servings 1x
- Category: Dessert
- Cuisine: American
Ingredients
- 2 cups all-purpose flour (spooned and leveled)
- 1/3 cup granulated sugar
- 1 tablespoon baking powder
- 1/2 teaspoon salt
- 1 teaspoon pumpkin pie spice
- 1/2 teaspoon ground cinnamon
- 1/4 teaspoon ground nutmeg
- 1/2 cup cold unsalted butter, cut into small cubes
- 1/2 cup pumpkin puree (100% pure pumpkin)
- 1/4 cup heavy cream (plus extra for brushing tops)
- 1 large egg, room temperature
- 1 teaspoon vanilla extract
- 1 cup powdered sugar, sifted
- 3 tablespoons pure maple syrup
- 1–2 tablespoons milk or heavy cream
- Pinch of salt
Instructions
- Preheat your oven to 400°F (200°C). Line a baking sheet with parchment paper.
- Mix the dry ingredients: In a large bowl, whisk together the flour, sugar, baking powder, salt, pumpkin pie spice, cinnamon, and nutmeg.
- Cut in the cold butter: Add the cold butter cubes to the flour mixture. Using a pastry cutter or two forks, cut the butter into the flour until the mixture looks like coarse sand with some pea-sized butter pieces remaining (about 2-3 minutes). Work quickly so the butter stays cold.
- Mix the wet ingredients: In a separate small bowl, whisk together the pumpkin puree, heavy cream, egg, and vanilla extract until smooth.
- Combine wet and dry ingredients: Pour the wet mixture into the dry mixture. Stir with a spatula or wooden spoon until just combined. The dough will look shaggy and slightly sticky. Do not overmix.
- Shape the dough: Turn the dough out onto a lightly floured surface. Gently bring it together with your hands, patting it into a circle about 3/4-inch thick. Do not knead.
- Cut the scones: Using a sharp knife or bench scraper, cut the circle into 8 equal wedges. Place the wedges on the prepared baking sheet, spacing them about 2 inches apart.
- Brush and bake: Brush the tops of the scones with a little heavy cream. Bake for 14-16 minutes, or until the scones are lightly golden on the bottom and the tops are set.
- Cool completely: Transfer the scones to a cooling rack and let them cool for at least 10-15 minutes before glazing.
- Make the glaze: While the scones cool, whisk together the powdered sugar, maple syrup, and 1 tablespoon of milk or cream in a small bowl. Add more liquid if needed until the glaze is thick but pourable. Drizzle the glaze over the cooled scones.
Notes
Keep all ingredients cold for flaky layers. Do not overmix the dough. Let scones cool completely before glazing. For gluten-free, use a 1:1 gluten-free flour blend. For vegan, use cold coconut oil, flax egg, and oat milk. Store in an airtight container at room temperature for up to 3 days. Freeze unglazed baked scones for up to 3 months.
Nutrition
- Serving Size: 1 scone
- Calories: 320
- Sugar: 24
- Sodium: 280
- Fat: 14
- Saturated Fat: 8
- Carbohydrates: 46
- Fiber: 2
- Protein: 4
Keywords: pumpkin scones, maple glaze, fall baking, pumpkin spice, easy scone recipe, breakfast, brunch


