I had refused to bother with one-pan meals for years. Honestly, I thought they were a gimmick—some internet trend that promised the world but delivered soggy vegetables and unevenly cooked meat. Then my neighbor, a woman named Carol who gardens in flip-flops and never seems to rush, handed me a foil-covered dish on a Tuesday evening. “Just try it,” she said. “Eat it while it’s hot.” I took a bite of that garlic butter chicken and rice, and let me tell you—I had to sit down. The rice was fluffy, the chicken was tender, and that garlic butter situation had soaked into every single grain. I asked for the recipe before I finished chewing, which is not something I normally do. Carol just smiled and said, “It’s the pan, not the chef.” But I knew better.
I made it three times that week. The first time, I burned the garlic. The second time, I used too much butter and the rice turned into a kind of glorious, buttery risotto situation that wasn’t exactly rice anymore—but nobody complained. The third time, I got it right. That’s the version I’m sharing with you today. This cozy one-pan garlic butter chicken and rice has become my go-to for those evenings when I need the kitchen to feel like a warm hug rather than a science experiment. Maybe you’ve been there—standing in front of your stove, tired from the day, wondering if you have the energy to make something that actually tastes good. This recipe is the answer.
The magic here isn’t complicated. It’s about browning the chicken just right, letting the garlic butter do its thing, and letting the rice cook in all those rendered juices until it absorbs every bit of flavor. No draining, no transferring, no extra pots to wash. Just one pan, a little patience, and dinner that feels like more than the sum of its parts. I keep coming back to this recipe because it delivers exactly what it promises: comfort, simplicity, and a meal that makes you close your eyes after the first bite.
Why You’ll Love This Recipe
This cozy one-pan garlic butter chicken and rice isn’t just another dinner idea—it’s the kind of recipe that earns a permanent spot in your weekly rotation. I’ve tested this dozens of times, adjusting the liquid ratios and the garlic quantity until it was just right. Here’s what makes it stand out:
- Quick & Easy: From start to finish, this meal comes together in about 45 minutes. Most of that time is hands-off while the rice simmers, giving you a chance to set the table or just breathe for a minute.
- Simple Ingredients: You likely have everything in your kitchen right now—chicken, rice, butter, garlic, and a few pantry staples. No fancy grocery trips required.
- Perfect for Cozy Evenings: This dish was made for cold nights, rainy afternoons, or any day that calls for something warm and satisfying. It’s comfort food that delivers without the fuss.
- Crowd-Pleaser: I’ve served this to picky eaters, to guests who usually avoid rice dishes, and to my own family. It gets rave reviews every single time.
- Unbelievably Delicious: The way the garlic butter infuses the rice while the chicken stays juicy? That’s not luck. It’s technique, and I’ll walk you through every step.
What makes this recipe different from the dozens of similar versions online is the method. I sear the chicken first to build that deep, golden crust, then let it rest while the rice cooks in the same pan. The rice absorbs the chicken drippings and the garlic butter, creating a flavor that tastes like you spent hours in the kitchen. But you didn’t. You just followed a smart sequence and let the pan do the work.
This isn’t just good—it’s the kind of meal that makes you forget you’re eating something relatively simple. It’s comfort food reimagined: faster, easier, but with the same soul-soothing satisfaction. Perfect for impressing guests without stress, or turning a regular Tuesday into something memorable.
What Ingredients You Will Need
This recipe uses simple, wholesome ingredients to deliver big flavor without the fuss. Most of these are pantry staples, which is exactly what you want on a busy night.
- Chicken thighs (bone-in, skin-on): 4 pieces, about 1.5 pounds total. The bone keeps the meat moist, and the skin crisps up beautifully. You can use boneless thighs, but reduce cooking time by about 5-7 minutes. I prefer thighs over breasts here—they stay juicier and have more flavor.
- Unsalted butter: 4 tablespoons, divided. Use good-quality butter if you can; it makes a difference. I like Kerrygold for its richness, but any unsalted butter works fine.
- Garlic: 6 cloves, minced. Fresh garlic is non-negotiable here. The jarred stuff won’t give you the same aromatic depth. Mince it yourself—it takes two minutes.
- Long-grain white rice: 1 cup. Basmati or jasmine both work beautifully. Avoid short-grain rice here; it can get too sticky. Rinse the rice before using to remove excess starch.
- Chicken broth: 2 cups. Low-sodium is best so you can control the salt level. If you only have regular broth, reduce the added salt later.
- Yellow onion: 1 medium, diced. About 1 cup. This adds a subtle sweetness that balances the garlic.
- Dried thyme: 1 teaspoon. It pairs perfectly with the garlic butter. You can use fresh thyme if you have it—about 1 tablespoon of leaves.
- Paprika: 1 teaspoon. Smoked paprika adds a lovely depth, but sweet paprika works too.
- Salt: 1 teaspoon, plus more for seasoning the chicken.
- Black pepper: 1/2 teaspoon, plus more for the chicken.
- Fresh parsley: For garnish. Optional but nice for color.
- Lemon juice: 1 tablespoon, fresh squeezed. This brightens everything at the end.
For the best texture, use a good-quality chicken broth. I recommend Swanson or Kitchen Basics for consistent results. If you’re using homemade broth, you might need to adjust the salt slightly. The rice absorbs the liquid, so the broth quality really matters here.
Substitution guidance: For a dairy-free version, use olive oil instead of butter. The flavor will be different but still delicious. For gluten-free, this recipe is naturally gluten-free as long as your broth is certified gluten-free. You can swap the chicken thighs for drumsticks if you prefer—just adjust cooking time slightly.
Equipment Needed
You don’t need much for this recipe, which is part of the appeal. Here’s what you’ll need:
- Large oven-safe skillet or Dutch oven: A 12-inch skillet with a tight-fitting lid is ideal. I use my Lodge cast iron skillet for this—it holds heat beautifully and gives the chicken a gorgeous crust. If you don’t have cast iron, any heavy-bottomed oven-safe pan will work.
- Tongs: For flipping the chicken without piercing the skin. I’ve used forks in a pinch, but tongs are better for keeping those juices locked in.
- Cutting board and knife: For mincing garlic and dicing the onion. A sharp knife makes this part go quickly.
- Measuring cups and spoons: For accuracy. Rice can be finicky with liquid ratios, so measure carefully.
- Wooden spoon or spatula: For stirring the rice and scraping up the browned bits from the bottom of the pan.
- Aluminum foil: Optional, for covering the pan if your lid doesn’t fit perfectly.
If you don’t have an oven-safe skillet, you can transfer everything to a baking dish after searing the chicken. It’s an extra step, but it works. I’ve done this when my cast iron was already in use. Budget-friendly tip: a basic stainless steel skillet from a restaurant supply store costs about $20 and works perfectly for this recipe.
Preparation Method
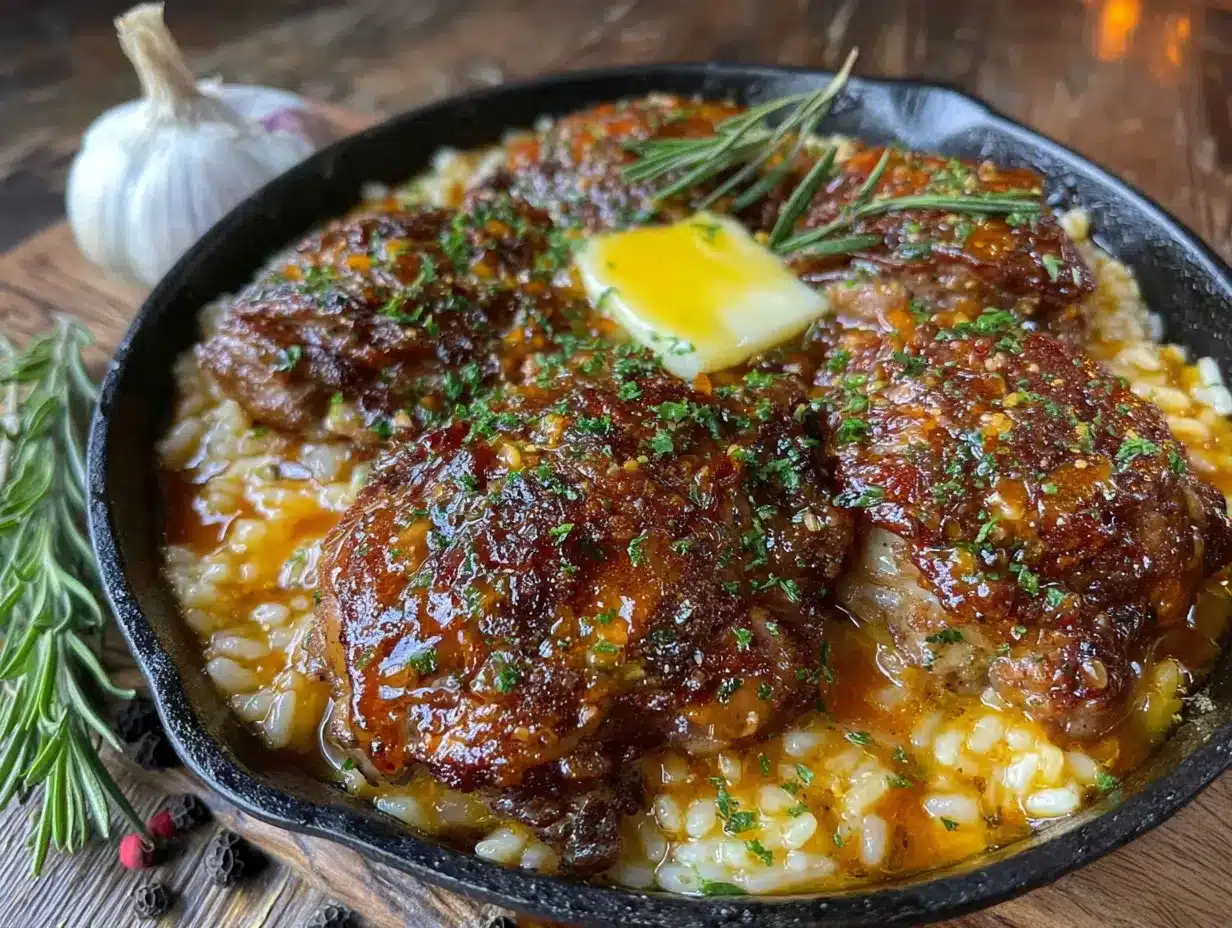
- Pat the chicken dry with paper towels. This is crucial for getting a good sear. Season both sides generously with salt and pepper. Don’t skimp—the chicken needs to be well-seasoned to flavor the rice later.
- Heat your skillet over medium-high heat for about 2 minutes. Add 2 tablespoons of butter. Let it melt and start to foam, but don’t let it brown. Swirl the pan to coat the bottom.
- Sear the chicken skin-side down for 5-6 minutes without moving it. You want a deep golden crust. Flip with tongs and cook the other side for 4 minutes. The chicken won’t be cooked through yet—that’s fine. Transfer to a plate and set aside.
- Reduce heat to medium and add the remaining 2 tablespoons of butter. Add the diced onion and cook for 3-4 minutes until softened and translucent. Scrape up any browned bits from the bottom of the pan—that’s flavor you want in the rice.
- Add the minced garlic, thyme, and paprika. Stir constantly for 30 seconds until fragrant. Don’t let the garlic burn, or it will turn bitter. If it starts to brown too quickly, remove the pan from the heat briefly.
- Add the rinsed rice to the pan. Stir to coat the grains in the garlic butter mixture. Let it toast for 1-2 minutes, stirring frequently. This step adds a nutty flavor to the rice.
- Pour in the chicken broth and lemon juice. Stir to combine, scraping up any remaining bits from the bottom. Bring to a gentle simmer. Taste the liquid and adjust salt if needed—it should be slightly saltier than you want the final dish because the rice will absorb it.
- Nestle the chicken thighs back into the pan, skin-side up. They should be sitting on top of the rice, not submerged. The skin will stay crispy this way.
- Cover the pan with a tight-fitting lid. Reduce heat to low. Let it simmer gently for 20 minutes. Do not lift the lid during this time—the steam is what cooks the rice evenly.
- After 20 minutes, remove from heat and let it rest, still covered, for 5-10 minutes. This allows the rice to finish absorbing the liquid and the chicken to rest.
- Remove the lid carefully (steam will escape). Fluff the rice with a fork. Garnish with fresh parsley and a squeeze of extra lemon if desired. Serve hot.
Your rice should be tender and fluffy, not mushy. If it’s still slightly undercooked after resting, add 2 tablespoons of broth, cover, and let it sit for another 5 minutes on low heat. The chicken should reach an internal temperature of 165°F (74°C).
Cooking Tips & Techniques
I’ve made this recipe enough times to know where things can go wrong. Here’s what I’ve learned:
Don’t rush the sear. The chicken needs that undisturbed time to develop a golden crust. If you try to flip it too early, it will stick to the pan. Trust the process—when it’s ready, it will release easily. I once got impatient and ended up with torn chicken skin and a sad dinner. Never again.
Toast the rice properly. That 1-2 minutes of toasting in the garlic butter makes a huge difference. It keeps the grains separate and adds a subtle nuttiness. Skip this step, and you’ll end up with stickier, less flavorful rice.
Watch your heat levels. Medium-high for searing, medium for the aromatics, low for simmering. If you keep the heat too high during the simmer, the liquid will evaporate before the rice is cooked. If it’s too low, the rice will take forever. Low and slow is the sweet spot.
Let it rest. That 5-10 minute rest at the end isn’t optional. It lets the steam finish cooking the rice and allows the chicken juices to redistribute. I’ve skipped this step when I was starving, and the rice was always a little wetter and less fluffy.
Use a timer. It’s easy to lose track of time when you’re multitasking. Set a timer for each step, especially the simmer. Twenty minutes feels like forever when you’re hungry, but it’s exactly what the rice needs.
Variations & Adaptations
This recipe is flexible, and I’ve tried several variations over the months. Here are my favorites:
- Lemon Herb Version: Add the zest of one lemon along with the garlic, and stir in 1 tablespoon of fresh rosemary and 1 tablespoon of fresh thyme. The citrus brightens everything beautifully. I made this version for a spring dinner party, and it was gone in minutes.
- Spicy Kick: Add 1/2 teaspoon of red pepper flakes along with the garlic, and use smoked paprika instead of sweet. The heat cuts through the richness of the butter. My husband loves this version—he adds extra cayenne to his serving.
- Vegetable Addition: Stir in 1 cup of frozen peas and 1 cup of diced carrots during the last 5 minutes of cooking. They steam right in the pan and add color and nutrition. I do this when I want to pretend I’m eating a balanced meal.
- Creamy Version: Stir in 1/4 cup of heavy cream or full-fat coconut milk after the rice is cooked. It turns the whole dish into a luxurious, risotto-like experience. Save this for a special occasion or a really bad day.
- Dairy-Free Adaptation: Substitute the butter with 3 tablespoons of olive oil and 1 tablespoon of vegan butter. The flavor changes slightly but is still delicious. I’ve tested this for a friend with dairy sensitivities, and she asked for seconds.
You can also swap the chicken for boneless, skinless thighs or even chicken breasts. Just adjust the cooking time—boneless thighs need about 15 minutes of simmering, and breasts need 12-14 minutes. Check internal temperature to be safe.
Serving & Storage Suggestions
This dish is best served hot, straight from the pan. The contrast between the crispy chicken skin and the tender, buttery rice is at its peak right after resting. I like to serve it with a simple green salad dressed with lemon vinaigrette to cut through the richness. A side of roasted green beans or steamed broccoli also works beautifully.
For beverages, a crisp white wine like Sauvignon Blanc or a light Pinot Grigio complements the garlic butter without overwhelming it. If you’re in a beer mood, a pilsner or a light lager is perfect. For non-alcoholic options, sparkling water with lemon or a simple iced tea works great.
Storage: Store leftovers in an airtight container in the refrigerator for up to 4 days. The rice will absorb more liquid as it sits, so don’t be alarmed if it seems drier the next day. To reheat, add a splash of broth or water and microwave in 30-second bursts, stirring between each, until hot. You can also reheat in a covered skillet over low heat with a tablespoon of water.
Freezing: This dish freezes well for up to 3 months. Let it cool completely, then transfer to a freezer-safe container. Thaw overnight in the refrigerator before reheating. The rice texture will be slightly softer after freezing, but the flavor holds up beautifully.
The flavors actually meld and deepen overnight, so leftovers are often even better the next day. I’ve been known to make a double batch just for this reason.
Nutritional Information & Benefits
Here’s the estimated nutritional breakdown per serving (based on 4 servings):
| Nutrient | Amount |
|---|---|
| Calories | 485 |
| Protein | 32g |
| Fat | 22g |
| Saturated Fat | 10g |
| Carbohydrates | 38g |
| Fiber | 1g |
| Sugar | 2g |
| Sodium | 680mg |
This recipe provides a good balance of protein, carbohydrates, and healthy fats. Chicken thighs are rich in B vitamins, particularly B6 and B12, which support energy metabolism. Garlic offers allicin, a compound with anti-inflammatory properties. The butter provides fat-soluble vitamins A, D, and E, though it should be enjoyed in moderation.
For dietary considerations: This recipe is gluten-free (check your broth), but it is not dairy-free due to the butter. It’s also relatively low in sugar and fiber. If you’re watching your sodium, use low-sodium broth and reduce the added salt. I personally appreciate that this meal feels indulgent without being over-the-top—it’s satisfying enough to keep you full for hours without that heavy, sluggish feeling.
Conclusion
This cozy one-pan garlic butter chicken and rice has earned its place in my regular rotation, and I think it will in yours too. It’s the kind of recipe that delivers exactly what you need on a busy weeknight or a lazy Sunday: big flavor, minimal cleanup, and that warm, comforting feeling that only a home-cooked meal can provide. I love how forgiving it is—even when I’ve made mistakes, it’s still been delicious. That’s the mark of a great recipe.
I encourage you to make this your own. Add extra vegetables if you want, adjust the garlic to your liking, or try one of the variations I shared. The beauty of this dish is its simplicity and adaptability. Once you understand the basic method, you can riff on it endlessly. I’d love to hear how it turns out for you—drop a comment below and let me know if you tried any twists, or just share how much you enjoyed that first bite. Happy cooking, and don’t forget to save this one for those days when you need a little extra comfort.
Frequently Asked Questions
Can I use chicken breasts instead of thighs?
Yes, you can. Boneless, skinless chicken breasts will work, but they cook faster and can dry out more easily. Reduce the simmering time to about 12-14 minutes, and check that the internal temperature reaches 165°F. I recommend pounding the breasts to an even thickness for consistent cooking.
Why is my rice mushy?
Mushy rice usually means too much liquid or too high heat. Make sure you’re using a tight-fitting lid and keeping the heat on low during the simmer. Also, rinse your rice thoroughly before adding it to remove excess starch. If your rice is still mushy, reduce the broth by 1/4 cup next time.
Can I make this in a slow cooker or Instant Pot?
I don’t recommend it for this specific recipe. The magic comes from searing the chicken and toasting the rice in the same pan, which builds layers of flavor. A slow cooker won’t give you that crispy skin, and an Instant Pot will change the rice texture. Stick with the one-pan method for the best results.
How do I prevent the garlic from burning?
Garlic burns quickly, especially in butter. Add it after the onion is softened, and keep stirring constantly for just 30 seconds before adding the rice and broth. If your pan is too hot, remove it from the heat for a few seconds while you stir. Burnt garlic tastes bitter, so it’s worth being careful here.
Can I double this recipe?
Yes, but you’ll need a larger pan—at least a 14-inch skillet or a Dutch oven. The cooking time will stay roughly the same, but you may need to add 5 minutes to the simmer. Make sure the chicken pieces aren’t crowded in the pan when searing; work in batches if needed.
Pin This Recipe!
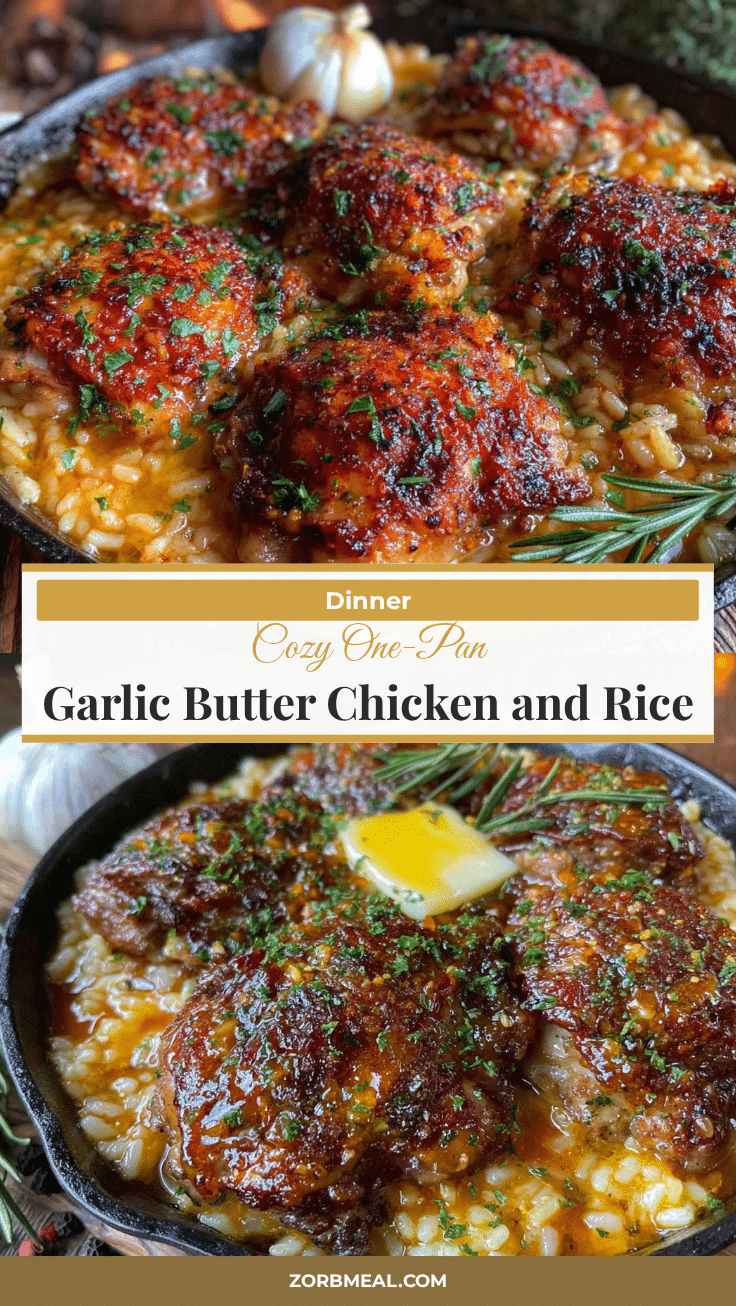
Cozy One-Pan Garlic Butter Chicken and Rice

A comforting one-pan meal featuring juicy seared chicken thighs and fluffy rice infused with garlic butter. Perfect for busy weeknights, this easy recipe delivers big flavor with minimal cleanup.
- Prep Time: 15 minutes
- Cook Time: 30 minutes
- Total Time: 45 minutes
- Yield: 4 servings 1x
- Category: Main Course
- Cuisine: American
Ingredients
- 4 bone-in, skin-on chicken thighs (about 1.5 pounds total)
- 4 tablespoons unsalted butter, divided
- 6 cloves garlic, minced
- 1 cup long-grain white rice (basmati or jasmine), rinsed
- 2 cups low-sodium chicken broth
- 1 medium yellow onion, diced (about 1 cup)
- 1 teaspoon dried thyme
- 1 teaspoon paprika (smoked or sweet)
- 1 teaspoon salt, plus more for seasoning chicken
- 1/2 teaspoon black pepper, plus more for seasoning chicken
- 1 tablespoon fresh lemon juice
- Fresh parsley, for garnish (optional)
Instructions
- Pat the chicken dry with paper towels. Season both sides generously with salt and pepper.
- Heat a large oven-safe skillet or Dutch oven over medium-high heat for 2 minutes. Add 2 tablespoons of butter and let it melt until foamy but not browned.
- Sear the chicken skin-side down for 5-6 minutes without moving, until deep golden brown. Flip and cook the other side for 4 minutes. Transfer chicken to a plate and set aside.
- Reduce heat to medium. Add remaining 2 tablespoons of butter and the diced onion. Cook for 3-4 minutes until softened, scraping up browned bits from the pan.
- Add minced garlic, thyme, and paprika. Stir constantly for 30 seconds until fragrant. Do not let garlic burn.
- Add the rinsed rice and stir to coat in the garlic butter mixture. Toast for 1-2 minutes, stirring frequently.
- Pour in chicken broth and lemon juice. Stir to combine, scraping up any remaining bits. Bring to a gentle simmer. Taste and adjust salt if needed.
- Nestle the chicken thighs back into the pan, skin-side up, on top of the rice.
- Cover the pan with a tight-fitting lid. Reduce heat to low and simmer gently for 20 minutes. Do not lift the lid.
- Remove from heat and let rest, still covered, for 5-10 minutes.
- Carefully remove the lid. Fluff the rice with a fork. Garnish with fresh parsley and extra lemon juice if desired. Serve hot.
Notes
For best results, don’t rush the sear—let the chicken develop a deep golden crust. Toast the rice in the garlic butter for nutty flavor. Keep heat low during simmering to prevent liquid from evaporating too quickly. Let the dish rest after cooking for fluffier rice. Leftovers can be stored in an airtight container in the refrigerator for up to 4 days or frozen for up to 3 months.
Nutrition
- Serving Size: 1 serving (about 1 c
- Calories: 485
- Sugar: 2
- Sodium: 680
- Fat: 22
- Saturated Fat: 10
- Carbohydrates: 38
- Fiber: 1
- Protein: 32
Keywords: one-pan chicken and rice, garlic butter chicken, easy dinner, comfort food, weeknight meal, chicken thighs, one-pot meal


