My sister claimed she hated pumpkin desserts for seventeen years. Seventeen years of Thanksgiving pies sliding her way, and she’d pass them along with a polite “no thank you” that somehow felt like a personal rejection of the entire autumn season. Then last October, I caught her standing in front of my open refrigerator at 10 p.m., eating these no-bake pumpkin cheesecake bites straight off the parchment paper with her fingers. She didn’t even try to hide it. She just looked at me, mouth full, and mumbled, “These don’t count.”
And honestly? She’s not wrong. There’s something about these little bites that feels almost like a loophole in the dessert rules. Maybe it’s the fact that they come together in ten minutes flat. Maybe it’s the way the pumpkin and cream cheese melt into this velvety, spiced situation that tastes way more indulgent than it has any right to. Or maybe it’s just that you can eat three of them without feeling like you’ve committed to a full slice of pie. I don’t know. What I do know is that I made them one Tuesday afternoon when I needed something sweet but couldn’t face turning on the oven, and now I can’t stop making them.
The first batch came out a little too soft because I got impatient and didn’t chill them long enough. You know that feeling when you’re so excited to try something that you skip the waiting part? Yeah, that was me. I ate one with a spoon and it was still delicious, so I called it a win. The second batch though — that’s when the magic happened. I let them set properly, rolled them into perfect little balls, and realized I’d accidentally created the kind of recipe that makes people close their eyes while they eat. That’s the version I’m sharing with you today.
Why You’ll Love This Recipe
Let me tell you why these little bites have become my most-requested recipe for fall gatherings, cozy nights in, and honestly, random Tuesdays when I need a pick-me-up. I’ve tested this recipe at least eight times now, tweaking the ratios and chilling times until every single batch came out perfect. My neighbor Karen, who runs a small catering business on the side, tried one and immediately asked for the recipe. That felt like a win.
- No Oven Required : This is a true no-bake situation. No heating up the kitchen, no watching the clock, no worrying about over-baking. Just mix, chill, and roll.
- 10 Minutes of Active Time : I timed myself. From pulling ingredients out of the fridge to having the mixture ready to chill, it took me nine minutes and forty-two seconds. You can literally make these during a commercial break.
- Simple Pantry Ingredients : Pumpkin puree, cream cheese, graham crackers, and a few spices. Nothing fancy, nothing hard to find. You probably have most of this stuff already.
- Perfect for Cozy Evenings : These are the kind of treats you want when the weather turns cold and you’re curled up under a blanket with a hot drink. They’re comfort food in bite-sized form.
- Crowd-Pleaser Status : I brought these to a Friendsgiving last year and watched people who swore they didn’t like pumpkin go back for thirds. The texture is just so smooth and creamy that it wins people over.
- Make-Ahead Friendly : You can prep these a day or two ahead, which makes them perfect for holiday entertaining or meal prep. They actually taste better after they’ve had time to set and meld together.
What really sets these apart from other pumpkin cheesecake recipes is the texture. Instead of using a traditional crust that can get soggy, I pulse the graham crackers into fine crumbs and mix them right into the filling. It creates this subtle crunch throughout every bite that keeps things interesting. Plus, the cream cheese to pumpkin ratio is carefully balanced — enough pumpkin for that unmistakable fall flavor, but enough cream cheese to keep things luxuriously creamy. It’s the kind of recipe that makes you wonder why you ever bothered with complicated baking in the first place.
What Ingredients You Will Need
This recipe uses simple, wholesome ingredients that come together to create something truly special. The beauty is in how these everyday staples transform into little bites of autumn heaven with almost no effort on your part.
- 8 ounces cream cheese, softened to room temperature (I prefer Philadelphia brand for the smoothest texture, but any full-fat block cream cheese works beautifully. Low-fat versions will change the texture, so stick with full-fat if you can.)
- 1/2 cup pumpkin puree (not pumpkin pie filling — make sure you grab the 100% pure pumpkin. Libby’s is my go-to because it’s consistently thick and not watery. If your pumpkin puree looks loose, pat it dry with paper towels before using.)
- 1/4 cup powdered sugar, sifted (this dissolves into the mixture much better than granulated sugar and keeps the texture silky smooth. No one wants gritty cheesecake bites.)
- 1 teaspoon vanilla extract (use the real stuff if you have it. Imitation vanilla works in a pinch, but pure vanilla adds a warmth that pairs beautifully with the pumpkin spices.)
- 1 teaspoon pumpkin pie spice (you can buy this pre-mixed, or make your own by combining 1/2 teaspoon cinnamon, 1/4 teaspoon ginger, 1/8 teaspoon nutmeg, and 1/8 teaspoon cloves. I actually prefer making my own blend because I can adjust the cinnamon up a bit.)
- 1/2 teaspoon ground cinnamon (for that extra warmth. I use Saigon cinnamon when I want a stronger, slightly sweeter flavor, but regular cinnamon works great too.)
- 1 cup graham cracker crumbs (about 8 full sheets, crushed finely. You can use a food processor or put them in a zip-top bag and go at them with a rolling pin. I’ve done both methods and they both work — the rolling pin method is oddly satisfying.)
- 1/4 cup unsalted butter, melted (salted butter works if that’s what you have, just reduce any added salt in the recipe. I like using European-style butter for a richer flavor, but standard butter is perfectly fine.)
- Optional coatings: extra graham cracker crumbs, crushed pecans, shredded coconut, or a dusting of cinnamon for rolling (this is where you can get creative and make these your own)
A quick note on ingredient selection: when you’re picking out your pumpkin puree, look for cans that feel heavy for their size — that usually means they’re packed full with less water content. And please, I’m begging you, don’t use the leftover pumpkin puree that’s been sitting in your fridge for two weeks. Fresh can or nothing. Trust me on this one.
Equipment Needed
One of the best things about this recipe is how little equipment it requires. You don’t need a stand mixer or any fancy gadgets. Here’s what you’ll actually need:
- Large mixing bowl — any size works, but I prefer a medium-large bowl so I have room to mix without spilling. My favorite is a glass bowl because I can see when everything is fully combined.
- Hand mixer or stand mixer — you can technically do this by hand with a wooden spoon, but a mixer makes the cream cheese so much smoother. I’ve made these with my trusty hand mixer that’s probably older than I am, and they turn out perfect every time.
- Measuring cups and spoons — precise measurements matter here, especially with the spices. A little too much nutmeg can overwhelm everything.
- Parchment paper or wax paper — for lining the baking sheet while the bites chill. Parchment is better because it’s non-stick, but wax paper works in a pinch.
- Baking sheet — any size will do, you just need something flat to put in the fridge. A small cookie sheet or even a large plate works.
- Small cookie scoop or tablespoon — for portioning the mixture evenly. I use a 1-tablespoon scoop and it makes the perfect bite-sized balls.
- Ziploc bag and rolling pin (if crushing graham crackers by hand) — this is my preferred method because it’s oddly therapeutic. Plus, you get to take out any frustrations on the bag.
If you don’t have a food processor for the graham crackers, don’t worry about it. The bag-and-rolling-pin method works just as well, and honestly, I think the crumbs come out more evenly sized that way. Just make sure you get them fine enough — no one wants a jagged piece of graham cracker in their smooth cheesecake bite.
Preparation Method
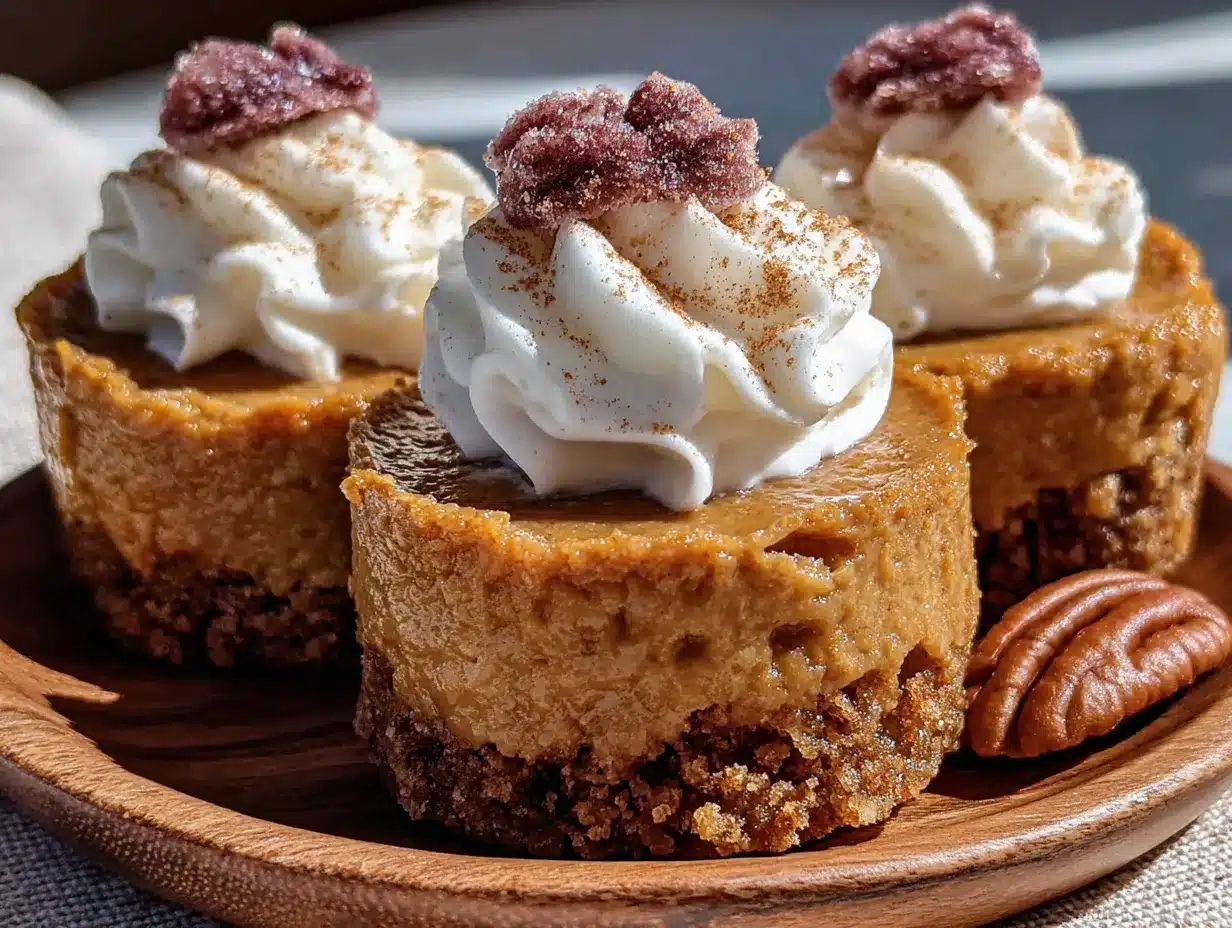
Alright, let’s get into the actual making of these little bites of heaven. I’ve broken this down step by step so you can follow along without any confusion. Trust the process, and don’t skip the chilling time — I learned that lesson the hard way.
- Soften your cream cheese. Take the cream cheese out of the fridge about 30 minutes before you start. You want it to be soft enough that when you press your finger into it, it leaves an indent without resistance. If you forgot to plan ahead (which happens to me constantly), you can microwave it in 10-second bursts until it’s soft but not melted. Cut it into cubes first for faster softening.
- Beat the cream cheese. In your large mixing bowl, beat the softened cream cheese with your hand mixer on medium speed until it’s completely smooth and fluffy. This usually takes about 2 minutes. Scrape down the sides of the bowl halfway through to make sure everything gets incorporated. You’re looking for a texture that’s light and airy, not dense or lumpy.
- Add the pumpkin and wet ingredients. Add the pumpkin puree, powdered sugar, and vanilla extract to the bowl. Beat on low speed at first so the powdered sugar doesn’t fly everywhere (ask me how I know this), then increase to medium and mix until everything is well combined. The mixture should be a beautiful pale orange color at this point. If it looks streaky, keep mixing.
- Mix in the spices. Add the pumpkin pie spice and cinnamon. Beat on low speed until the spices are fully incorporated. Take a moment to smell the mixture — that warm, spicy aroma is what fall dreams are made of. Give it a taste too, but don’t eat too much because you still need to make the bites.
- Prepare the graham cracker mixture. In a separate small bowl, combine the graham cracker crumbs and melted butter. Stir with a fork until all the crumbs are moistened and the mixture looks like wet sand. It should clump together slightly when you press it between your fingers. If it seems too dry, add another teaspoon of melted butter.
- Combine everything together. Add the graham cracker mixture to the pumpkin cream cheese mixture. Fold everything together gently with a spatula until no dry patches remain. Don’t overmix — you want some texture from the crumbs, not a uniform paste. The mixture should be thick enough to hold its shape when scooped.
- Chill the mixture. Cover the bowl with plastic wrap and place it in the refrigerator for at least 1 hour. This step is crucial. The mixture needs to firm up enough to roll into balls without turning into a sticky mess on your hands. I usually chill mine for 2 hours if I have the time, and the texture is even better.
- Roll into bites. Once the mixture is chilled and firm, line a baking sheet with parchment paper. Using your cookie scoop or a tablespoon, portion out the mixture and roll it between your palms to form smooth balls. Each ball should be about 1 inch in diameter. If the mixture starts to get too sticky as you work, pop it back in the fridge for 10 minutes.
- Coat the bites (optional but recommended). If you want to add a coating, roll each ball in extra graham cracker crumbs, crushed pecans, shredded coconut, or a cinnamon-sugar mixture. This adds a nice texture contrast and makes them look prettier too. I usually do half plain and half coated for variety.
- Final chill. Place the rolled bites on the lined baking sheet and refrigerate for at least 30 minutes before serving. This final chill helps them set completely and makes them easier to handle. If you’re making these ahead of time, you can leave them in the fridge for up to 3 days.
And that’s it. Ten minutes of active work, a little patience for chilling, and you’ve got yourself a batch of the most addictive pumpkin treats you’ll ever make. The first time I made these, I was shocked at how easy they were. I kept checking the recipe thinking I must have missed a step. Nope. It’s really that simple.
Cooking Tips & Techniques
After making these pumpkin cheesecake bites more times than I care to count, I’ve picked up a few tricks that make the process even smoother. Let me share what I’ve learned so you don’t have to make the same mistakes I did.
Don’t skip the cream cheese softening step. I know, I know, you’re in a hurry. But cold cream cheese creates lumps that are nearly impossible to get rid of once they form. I once tried to rush this step and ended up with little white flecks throughout my otherwise beautiful orange mixture. It still tasted fine, but the texture wasn’t as luxurious. Set your cream cheese out 30 minutes before you start, and you’ll thank me later.
Pat your pumpkin puree dry if it looks watery. Different brands of pumpkin puree can vary significantly in moisture content. If yours looks loose or has liquid pooling on top, spread it out on a paper towel-lined plate and pat it dry before using. Too much moisture will make your mixture too soft to roll, and nobody wants to eat pumpkin soup with a spoon. Well, actually, that sounds kind of good, but not what we’re making here.
Use a cookie scoop for consistent sizing. This might seem like a small detail, but uniform-sized bites chill at the same rate and look so much more professional on a serving platter. I use a 1-tablespoon scoop and it gives me exactly 18 bites every time. If you’re serving these at a party, consistent sizing makes the presentation look intentional and polished.
Wet your hands slightly when rolling. If the mixture starts sticking to your palms, dampen your hands with a little cold water. The moisture creates a barrier that prevents sticking without adding enough water to affect the texture. This trick saved me during my third batch when I was trying to roll them on a particularly humid day.
Chill between steps if needed. If you’re working in a warm kitchen or it’s a hot day, the mixture might soften faster than you’d like. Don’t fight it — just pop the bowl back in the fridge for 15-20 minutes. I once tried to power through and ended up with misshapen blobs instead of neat little balls. Patience is your friend here.
Variations & Adaptations
One of the things I love most about this recipe is how easily it adapts to different tastes and dietary needs. Here are some variations I’ve tried and loved:
Gluten-Free Version : Swap the graham crackers for gluten-free graham crackers or use crushed gluten-free vanilla wafers. I’ve tested this with Schar brand graham crackers and they work perfectly. You can also use crushed gluten-free pretzels for a sweet-salty twist that’s absolutely addictive.
Vegan Adaptation : Use vegan cream cheese (I like Kite Hill or Violife) and vegan butter. The texture will be slightly different — a bit softer — but the flavor is still incredible. Just make sure you chill the mixture for an extra 30 minutes to help it firm up. I made these for a vegan friend’s birthday and she ate six of them before anyone else got a chance.
Keto/Low-Carb Option : Replace the graham cracker crumbs with almond flour and use a sugar-free sweetener like monk fruit or erythritol in place of the powdered sugar. The texture will be denser and nuttier, but the flavor is still wonderfully pumpkin-spiced. I’d recommend toasting the almond flour first for a deeper flavor.
Chocolate-Dipped Bites : After rolling and chilling the bites, dip half of each one in melted dark chocolate and let it set on parchment paper. The combination of pumpkin spice and dark chocolate is honestly life-changing. I did this for a Christmas party and they disappeared faster than anything else on the dessert table.
Spiced-Up Version : Add a pinch of cayenne pepper or chipotle powder to the mixture for a subtle heat that plays beautifully with the sweet pumpkin and spices. Start with just 1/8 teaspoon and adjust from there. My brother-in-law, who claims to hate sweet desserts, ate an entire batch of these.
I’ve also tried rolling these in crushed gingersnap cookies instead of graham crackers, and let me tell you — that’s a game changer. The extra ginger and molasses flavors complement the pumpkin perfectly. Give it a try if you’re feeling adventurous.
Serving & Storage Suggestions
These little bites are incredibly versatile when it comes to serving. Here’s how I like to enjoy them and how to keep them fresh.
Serving Temperature : Serve these straight from the fridge for the best texture. They should be firm but not hard, with a creamy, almost mousse-like interior. If you leave them out at room temperature for more than 15-20 minutes, they’ll start to soften significantly. I’ve found that they’re actually best right out of the fridge — the cold temperature makes the flavors pop and the texture more satisfying.
Presentation Ideas : Arrange the bites on a pretty platter or cake stand for a fall-themed dessert spread. Dust them with a little cinnamon or pumpkin pie spice right before serving for a beautiful finish. I like to serve them on a wooden board with small dishes of extra coatings so guests can customize their own. Mini cupcake liners make them look extra special and keep hands clean at parties.
Perfect Pairings : These bites are wonderful alongside a cup of hot apple cider, spiced chai latte, or a cozy pumpkin spice coffee. For a dessert board, pair them with dark chocolate squares, fresh apple slices, and a drizzle of caramel sauce. They also make a lovely addition to a Thanksgiving dessert table alongside pumpkin pie and pecan bars.
Storage Instructions : Store the bites in an airtight container in the refrigerator for up to 5 days. Place them in a single layer with parchment paper between layers if you need to stack them. They actually taste even better on day two after the flavors have had time to meld together. I’ve never had a batch last longer than three days in my house, but theoretically they should hold up well.
Freezing Tips : These freeze beautifully for up to 2 months. Place the rolled bites on a baking sheet and freeze until solid, then transfer them to a freezer-safe bag or container. To thaw, move them to the refrigerator for about 2 hours before serving. Don’t thaw them at room temperature or they might become too soft. I always keep a batch in my freezer for unexpected guests or late-night cravings.
Nutritional Information & Benefits
While these are definitely a treat, there are some surprising nutritional perks to these little bites. Here’s what you can expect per serving (based on 18 bites):
- Calories: Approximately 110-120 calories per bite
- Fat: 8g (mostly from cream cheese and butter, which provides satiety)
- Carbohydrates: 9g (from graham crackers and sugar)
- Protein: 2g (thanks to the cream cheese)
- Fiber: 1g (from the pumpkin puree)
- Vitamin A: Excellent source — pumpkin is packed with beta-carotene, which supports eye health and immune function
- Calcium: Provides about 4% of your daily needs per bite from the cream cheese
Pumpkin itself is a nutritional powerhouse. It’s loaded with antioxidants, particularly vitamin A in the form of beta-carotene, which gives it that beautiful orange color. It’s also a good source of vitamin C, potassium, and fiber. The spices in this recipe — cinnamon, ginger, nutmeg, and cloves — all have anti-inflammatory properties and can help with blood sugar regulation.
Of course, these are still a dessert, so enjoy them in moderation. But compared to a slice of traditional pumpkin cheesecake, these bites are much lighter and more portion-controlled. I find that having just two or three satisfies my sweet tooth without the heavy feeling that sometimes comes with richer desserts.
Dietary Considerations : These contain dairy (cream cheese, butter) and gluten (graham crackers). See the variations section for vegan and gluten-free adaptations. They are egg-free and nut-free as written, though the optional pecan coating would add nuts.
Conclusion
These no-bake pumpkin cheesecake bites have become my official fall signature treat, and I don’t see that changing anytime soon. There’s just something so satisfying about a recipe that delivers maximum flavor with minimum effort — the kind of dessert that makes you look like a kitchen genius without actually having to work for it. I mean, ten minutes of active time and you’ve got a batch of creamy, spiced, irresistible little bites that taste like autumn in every single mouthful.
What I love most about this recipe is how forgiving it is. You can tweak the spices, change up the coating, make it dairy-free or gluten-free, and it still works. It’s the kind of recipe that invites experimentation and rewards creativity. And honestly? It’s the kind of recipe that makes people smile. Every time I’ve served these, I’ve watched faces light up. There’s a reason my sister ate them straight from the fridge with her fingers — they’re just that good.
I’d love to hear how these turn out for you! Did you try any fun variations? Did you coat them in something unexpected? Drop a comment below and let me know. And if you’re looking for more easy, no-bake treats, be sure to check out my no-bake chocolate peanut butter bars and my easy lemon cheesecake dip — they follow the same simple, mix-and-chill philosophy. Happy fall baking, friends. Or should I say, happy fall no-baking!
Frequently Asked Questions
Can I use pumpkin pie filling instead of pumpkin puree?
No, please don’t. Pumpkin pie filling is already sweetened and spiced, which will throw off the entire balance of this recipe. You’ll end up with something way too sweet and the texture will be off. Stick with 100% pure pumpkin puree for the best results.
How long do these need to chill before I can eat them?
At minimum, you need 1 hour for the mixture to firm up enough to roll, and then another 30 minutes after rolling. So total chill time is about 1.5 hours. But honestly, they’re even better if you let them chill overnight. The flavors really develop and meld together beautifully.
Can I make these ahead of time for a party?
Absolutely! In fact, I recommend it. You can make them up to 3 days in advance and keep them in the refrigerator. They actually taste better on day two after the flavors have had time to meld. Just keep them in an airtight container and add any coatings right before serving for the best texture.
Why did my mixture turn out too soft to roll?
This usually happens for one of two reasons: either your cream cheese wasn’t fully softened (leading to an uneven texture), or your pumpkin puree had too much moisture. Next time, try patting your pumpkin puree dry with paper towels before using, and make sure you chill the mixture for the full recommended time. If it’s still too soft, add a few extra tablespoons of graham cracker crumbs to absorb the excess moisture.
Can I use a different type of cookie for the crust?
Yes! This recipe is super adaptable when it comes to the crust. Gingersnaps, vanilla wafers, shortbread cookies, or even crushed pretzels all work beautifully. Just keep the ratio the same — 1 cup of crumbs to 1/4 cup melted butter. Each cookie will give the bites a slightly different flavor profile, so feel free to experiment and find your favorite combination.
Pin This Recipe!
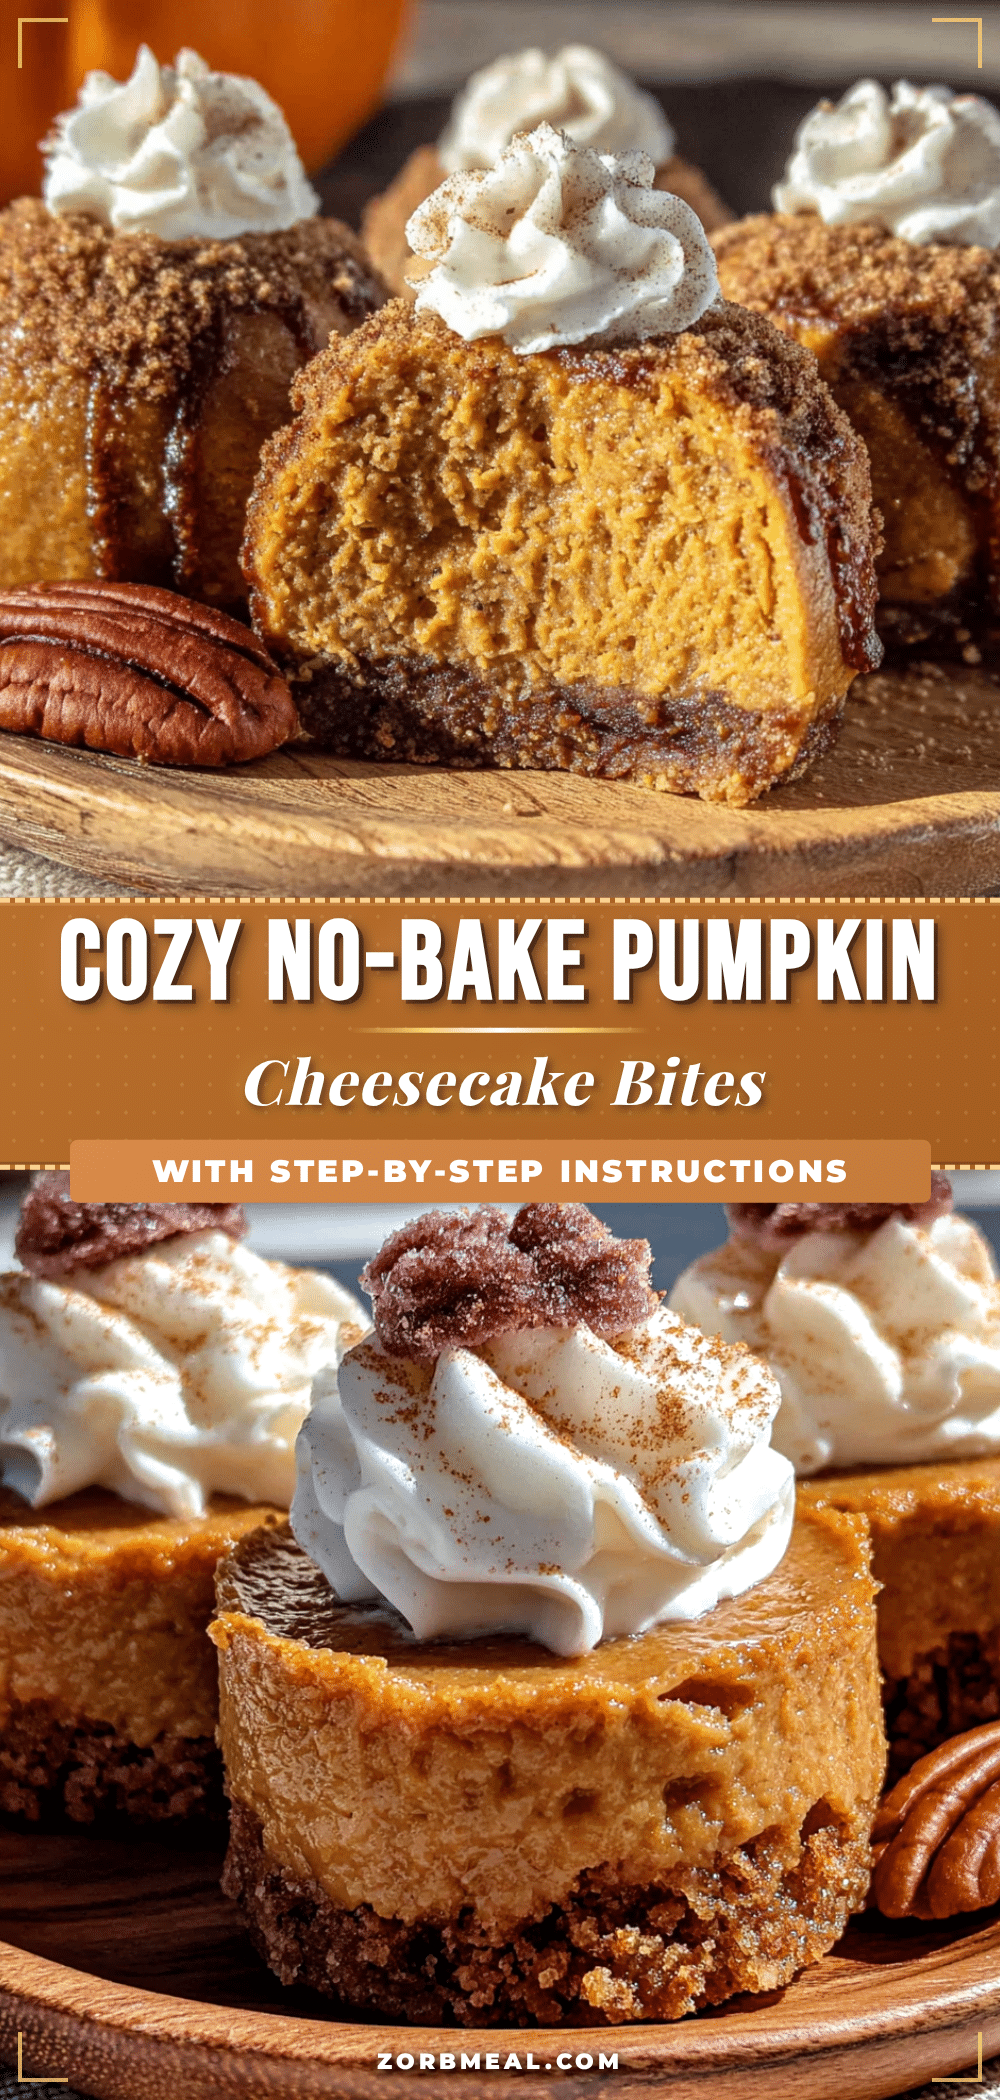
Cozy No-Bake Pumpkin Cheesecake Bites: Easy 10-Min Recipe
These no-bake pumpkin cheesecake bites come together in just 10 minutes of active time. Creamy, spiced, and perfectly portioned, they’re an easy fall treat that requires no oven and tastes like autumn in every bite.
- Prep Time: 10 minutes
- Cook Time: 0 minutes
- Total Time: 1 hour 40 minutes (includes chilling)
- Yield: 18 bites 1x
- Category: Dessert
- Cuisine: American
Ingredients
- 8 ounces cream cheese, softened to room temperature
- 1/2 cup pumpkin puree (not pumpkin pie filling)
- 1/4 cup powdered sugar, sifted
- 1 teaspoon vanilla extract
- 1 teaspoon pumpkin pie spice
- 1/2 teaspoon ground cinnamon
- 1 cup graham cracker crumbs (about 8 full sheets)
- 1/4 cup unsalted butter, melted
- Optional coatings: extra graham cracker crumbs, crushed pecans, shredded coconut, or cinnamon
Instructions
- Soften cream cheese by leaving it at room temperature for 30 minutes or microwaving in 10-second bursts until soft.
- In a large mixing bowl, beat softened cream cheese with a hand mixer on medium speed until smooth and fluffy, about 2 minutes. Scrape down sides halfway through.
- Add pumpkin puree, powdered sugar, and vanilla extract. Beat on low speed to combine, then increase to medium until well mixed and pale orange.
- Add pumpkin pie spice and cinnamon. Beat on low until fully incorporated.
- In a separate small bowl, combine graham cracker crumbs and melted butter. Stir with a fork until all crumbs are moistened and mixture resembles wet sand.
- Add graham cracker mixture to pumpkin cream cheese mixture. Fold gently with a spatula until no dry patches remain. Do not overmix.
- Cover bowl with plastic wrap and refrigerate for at least 1 hour (2 hours is better) until firm.
- Line a baking sheet with parchment paper. Using a cookie scoop or tablespoon, portion mixture and roll into 1-inch balls.
- Optional: Roll each ball in extra graham cracker crumbs, crushed pecans, shredded coconut, or cinnamon-sugar mixture.
- Place rolled bites on lined baking sheet and refrigerate for at least 30 minutes before serving.
Notes
Don’t skip the chilling time. If mixture is too soft to roll, add extra graham cracker crumbs. Wet hands slightly with cold water to prevent sticking when rolling. For best texture, serve straight from the fridge. Store in an airtight container in the refrigerator for up to 5 days. Freeze for up to 2 months.
Nutrition
- Serving Size: 1 bite
- Calories: 115
- Sugar: 5
- Sodium: 95
- Fat: 8
- Saturated Fat: 5
- Carbohydrates: 9
- Fiber: 1
- Protein: 2
Keywords: no-bake pumpkin cheesecake bites, easy pumpkin dessert, no-bake fall treat, pumpkin cheesecake balls, 10-minute recipe


