The last cookie from the batch disappeared before I could even offer it to my neighbor. She’d come over to borrow a cup of sugar, saw the cooling rack on the counter, and just stood there staring. I told her to grab one, thinking she’d take a polite bite and move on. Instead, she ate two standing up in my kitchen, then asked me to email her the recipe before she left. That’s when I knew these brown butter pumpkin snickerdoodle cookies were something special.
I’d been chasing a way to combine the cozy warmth of pumpkin season with that classic cinnamon-sugar crunch of a snickerdoodle for a while. The problem with most pumpkin cookies is they turn out cakey and soft—good for a muffin, not so much for a chewy, crackly cookie. I wanted something with a real bite, a cookie that felt substantial but still tasted like fall in every single mouthful. And honestly, the answer was sitting right there in my butter dish, waiting to be browned.
Browning the butter was a game-changer I stumbled into on a rainy Tuesday when I was out of patience and regular butter. The nutty, almost toffee-like aroma that filled my kitchen made me forget I was even baking. It added this deep, warm complexity that plain butter just can’t touch. The pumpkin puree keeps the centers soft and tender, while the brown butter gives the edges a satisfying chew. It’s the kind of cookie that makes you close your eyes after the first bite—not because you’re being dramatic, but because it genuinely tastes that good.
Why You’ll Love This Recipe
Let me tell you why these cozy brown butter pumpkin snickerdoodle cookies are going to be your new fall baking staple. I’ve tested this recipe at least six times—yes, six—to get the texture just right. The first batch spread too much. The second was too puffy. The third? That one had that perfect crackly top and soft, buttery middle I was hunting for, and I’ve been tweaking it to perfection ever since.
- Quick & Easy : These come together in under 30 minutes, including chilling time. Yes, you read that right. No long waits, just pure cookie satisfaction fast.
- Simple Ingredients : You probably have most of these in your pantry right now. No weird extracts or hard-to-find spices. Just good, honest baking staples.
- Perfect for Fall Baking : Great for Thanksgiving cookie exchanges, cozy weekend baking sessions, or surprising your coworkers on a chilly Monday morning.
- Crowd-Pleaser : I’ve brought these to three different gatherings now, and every single time someone asks for the recipe. Kids love the cinnamon sugar coating, adults go crazy for that brown butter depth.
- Unbelievably Delicious : The texture is what gets people. It’s not a cakey pumpkin cookie—it’s a real, chewy snickerdoodle with a soft, almost fudgy center. The brown butter makes it taste like you spent hours in the kitchen when you really just followed a simple recipe.
What makes these different from every other pumpkin cookie out there? It’s that brown butter technique. Most recipes just dump in melted butter and call it a day. Taking the extra five minutes to brown it transforms the entire cookie. The nutty flavor pairs perfectly with pumpkin and cinnamon, creating a depth that regular cookies just don’t have. Plus, I use a trick of chilling the dough briefly to prevent spreading—so you get thick, bakery-style cookies every single time.
This recipe isn’t just good—it’s the kind that makes you text your friend at 9 PM to tell them they need to make it immediately. It’s comfort food reimagined: richer, more flavorful, and with the same soul-soothing satisfaction you expect from a perfect snickerdoodle.
What Ingredients You Will Need
This recipe uses simple, wholesome ingredients to deliver bold flavor and satisfying texture without any fuss. Most of these are pantry staples, but a few key players make all the difference. Here’s what you’ll need and why each one matters.
For the Brown Butter
- Unsalted butter, 1 cup (2 sticks / 226g) – Use unsalted so you control the salt level. I prefer Kerrygold for its richer flavor, but any good-quality unsalted butter works. The browning process brings out nutty, caramel notes that plain butter just can’t match.
For the Cookie Dough
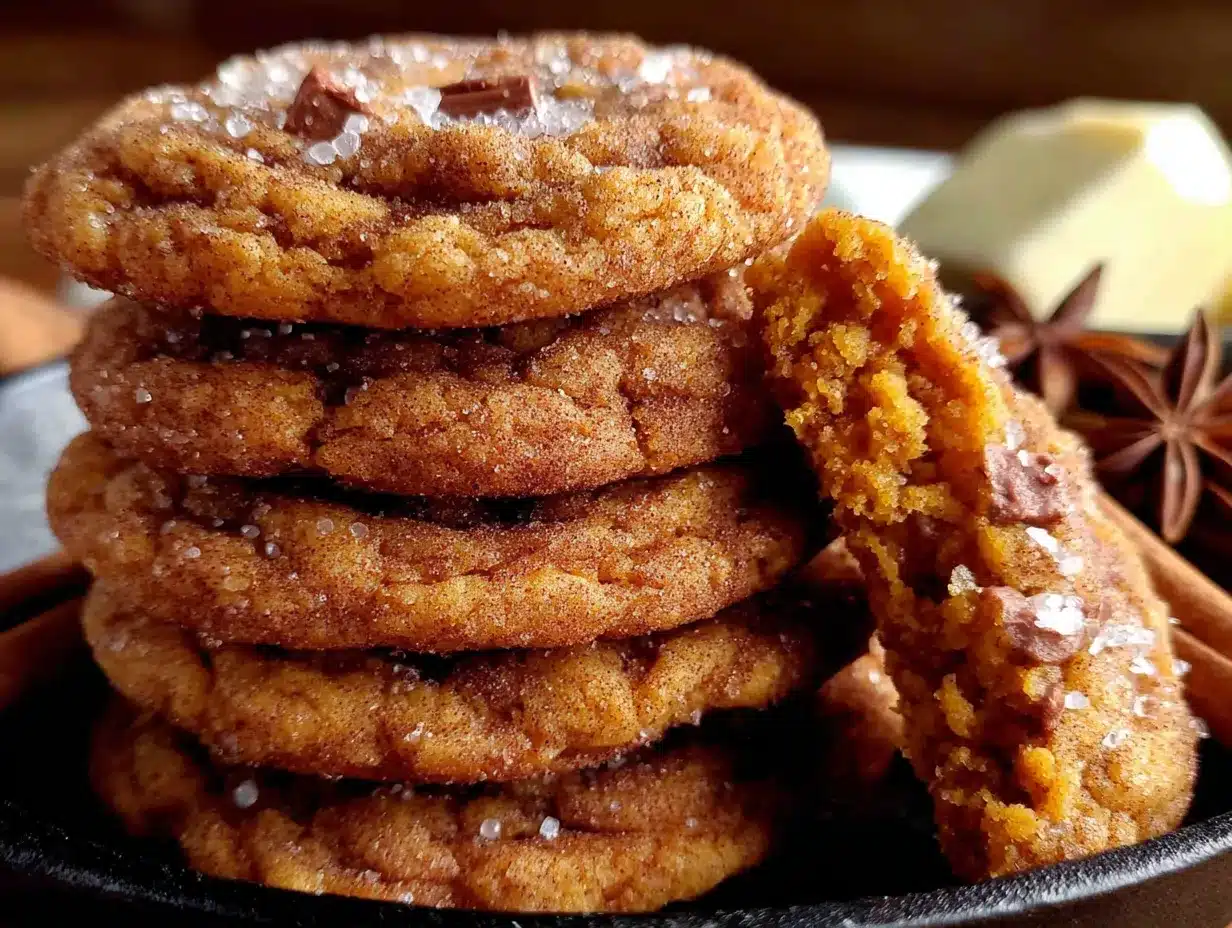
- Brown butter, browned and slightly cooled – This is your flavor foundation. Let it cool until it’s just warm to the touch, not hot, or it’ll melt the sugar too quickly.
- Granulated sugar, ¾ cup (150g) – Adds sweetness and helps create that crackly top when combined with the cinnamon sugar coating.
- Light brown sugar, ½ cup (100g), packed – Adds moisture and a hint of molasses flavor that pairs beautifully with pumpkin and cinnamon.
- Pumpkin puree, ½ cup (120g) – Use 100% pure pumpkin puree, not pumpkin pie filling. Libby’s is my go-to for consistent texture and flavor. Make sure to blot it with a paper towel to remove excess moisture—this is crucial for avoiding flat cookies.
- Large egg, 1, room temperature – Helps bind everything together. Room temperature egg incorporates more evenly into the brown butter.
- Vanilla extract, 1 teaspoon – Pure vanilla extract adds warmth and rounds out the spices. Avoid imitation vanilla here—it makes a difference.
- All-purpose flour, 2 cups (250g) – Provides structure. Spoon and level your flour for accuracy; scooping directly from the bag can pack in too much and make cookies dry.
- Baking soda, 1 teaspoon – Helps the cookies spread just enough and gives them a soft, chewy texture.
- Baking powder, ½ teaspoon – Adds a little lift for that perfect thickness.
- Cream of tartar, 1 teaspoon – This is the secret to the classic snickerdoodle tang and chew. Don’t skip it—it’s what makes a snickerdoodle a snickerdoodle.
- Salt, ½ teaspoon – Balances the sweetness and enhances all the flavors.
- Ground cinnamon, 1 teaspoon – Adds that warm, familiar spice we all associate with fall.
- Ground nutmeg, ¼ teaspoon – A tiny amount goes a long way. Freshly grated nutmeg is amazing here if you have it.
- Ground cloves, ⅛ teaspoon – Just a pinch for depth. Don’t overdo it—cloves are strong.
For the Cinnamon Sugar Coating
- Granulated sugar, ¼ cup (50g) – Creates that signature crackly, sparkly exterior.
- Ground cinnamon, 1 tablespoon – Use a generous amount here. This is the first thing you taste, so make it count.
Substitution Guidance
- Gluten-free option: Substitute all-purpose flour with a 1:1 gluten-free baking flour blend that contains xanthan gum. Bob’s Red Mill works well.
- Dairy-free option: Use vegan butter sticks for browning. Miyoko’s is my favorite for browning—it actually browns beautifully, unlike some other brands.
- Egg-free option: Replace the egg with a flax egg (1 tablespoon ground flaxseed mixed with 3 tablespoons water, let sit for 5 minutes). The texture will be slightly less tender but still delicious.
Equipment Needed
You don’t need a fancy bakery setup for these cookies. Here’s what you’ll need, plus a few tips I’ve learned from my own kitchen experiments.
- Light-colored saucepan or skillet – A light-colored pan makes it much easier to see when your butter turns amber. Dark pans hide the color change, and you might end up with burnt butter. I use a stainless steel saucepan and it works perfectly.
- Large mixing bowl – Any large bowl works for mixing your dough. Glass or stainless steel is fine.
- Electric hand mixer or stand mixer – You can mix by hand with a wooden spoon, but a mixer makes creaming the butter and sugars much easier and faster. I’ve done both—hand mixing works, but your arm will thank you for using a mixer.
- Baking sheets (2) – Standard half-sheet pans work great. Line them with parchment paper or silicone baking mats for easy cleanup and even baking.
- Parchment paper or silicone baking mats – These prevent sticking and help cookies bake evenly. I prefer silicone mats because they’re reusable and give a slightly softer bottom to the cookies.
- Cookie scoop (1.5-tablespoon size) – A scoop ensures uniform cookies that bake evenly. If you don’t have one, use two spoons to portion the dough.
- Cooling rack – Lets air circulate around the cookies so they cool properly without getting soggy bottoms.
- Small bowl for cinnamon sugar coating – Any small bowl works. I use a shallow one so I can easily roll each dough ball.
- Fine-mesh strainer (optional) – If you want to sift your flour and spices together for a smoother dough, this helps. Not strictly necessary, but I do it when I want to feel extra professional.
Preparation Method
Alright, let’s get baking! Follow these steps carefully, and you’ll have a batch of the most incredible brown butter pumpkin snickerdoodle cookies you’ve ever tasted.
- Brown the butter. Place the 1 cup of unsalted butter in a light-colored saucepan over medium heat. Let it melt completely, then continue cooking, swirling the pan occasionally. The butter will foam up, then subside, and you’ll see golden brown specks form at the bottom. This takes about 5-7 minutes. The moment it smells nutty and looks amber, remove it from the heat immediately. Pour it into a heat-safe bowl to stop the cooking process. Let it cool for 10-15 minutes until it’s warm but not hot to the touch. Tip: If you burn the butter, start over. Burnt butter tastes bitter and will ruin the cookies.
- Prep the pumpkin. While the butter cools, measure out ½ cup of pumpkin puree. Place it on a plate lined with a paper towel. Spread it out slightly and press another paper towel on top to blot away excess moisture. Let it sit for a few minutes. This step is non-negotiable—wet pumpkin will make your cookies spread into flat, sad puddles. I learned this the hard way with my first batch.
- Mix the wet ingredients. In a large mixing bowl, combine the cooled brown butter, ¾ cup granulated sugar, and ½ cup packed light brown sugar. Beat with an electric mixer on medium speed for 2-3 minutes until the mixture looks lighter and slightly fluffy. Add the blotted pumpkin puree, 1 room-temperature egg, and 1 teaspoon vanilla extract. Beat on low until just combined. Don’t overmix here—you don’t want to incorporate too much air.
- Combine the dry ingredients. In a separate medium bowl, whisk together 2 cups all-purpose flour, 1 teaspoon baking soda, ½ teaspoon baking powder, 1 teaspoon cream of tartar, ½ teaspoon salt, 1 teaspoon ground cinnamon, ¼ teaspoon ground nutmeg, and ⅛ teaspoon ground cloves. Whisk thoroughly to distribute the leavening agents and spices evenly. Sensory cue: The dry mix should smell warm and spicy, like autumn in a bowl.
- Combine wet and dry. Gradually add the dry ingredients to the wet mixture, mixing on low speed until just combined. You should see no dry streaks of flour, but stop as soon as the dough comes together. Overmixing at this stage develops gluten and makes cookies tough. The dough will be soft, slightly sticky, and very fragrant.
- Make the cinnamon sugar coating. In a small shallow bowl, mix ¼ cup granulated sugar with 1 tablespoon ground cinnamon. Stir until evenly combined.
- Chill the dough (optional but recommended). Cover the bowl of dough with plastic wrap and refrigerate for 15-20 minutes. This firms up the butter slightly, preventing the cookies from spreading too much in the oven. If you’re in a rush, you can skip this, but your cookies will be flatter. I always chill—it’s worth the extra wait.
- Preheat the oven. While the dough chills, preheat your oven to 350°F (175°C). Line two baking sheets with parchment paper or silicone mats.
- Shape and coat the cookies. Using a 1.5-tablespoon cookie scoop, portion out the dough. Roll each portion into a smooth ball between your palms. Drop each ball into the cinnamon sugar mixture and roll to coat completely. Place the coated dough balls on the prepared baking sheets, spacing them about 2 inches apart. You should get about 24 cookies.
- Bake. Bake one sheet at a time for 10-12 minutes. The cookies will look puffy and slightly cracked on top. The edges should be set and lightly golden, but the centers will still look soft and slightly underdone. Sensory cue: Your kitchen will smell like a fall candle factory—in the best way possible.
- Cool on the baking sheet. Let the cookies rest on the hot baking sheet for 3-4 minutes. This allows them to finish setting up without overbaking. After that, transfer them to a cooling rack to cool completely. The centers will continue to firm up as they cool.
- Repeat. Continue with the remaining dough, using fresh parchment or cooled baking sheets for each batch. Warm baking sheets cause cookies to spread too much.
Cooking Tips & Techniques
After making these cookies more times than I care to count, I’ve picked up a few tricks that make a real difference. Let me share what I’ve learned—including a few mistakes I’ve made so you don’t have to.
Master the brown butter. This is the most important skill for this recipe. Watch your butter like a hawk once it starts foaming. The transition from perfectly browned to burnt happens in seconds. I once got distracted by my phone and ended up with black butter that smelled like a campfire gone wrong. Swirl the pan constantly and trust your nose—when it smells nutty and toasty, it’s done. Pour it into a cool bowl immediately to stop the cooking process.
Blot that pumpkin. I cannot stress this enough. Pumpkin puree contains a lot of water, and excess moisture is the enemy of chewy cookies. I blot mine on a paper towel-lined plate and let it sit while I prepare the butter. You’ll be amazed at how much liquid comes out. Your cookies will thank you with perfect thickness and texture.
Don’t overmix the dough. Once you add the flour, mix only until you can’t see any more white streaks. Overmixing develops gluten, which makes cookies tough and bread-like instead of tender and chewy. I use the lowest speed on my mixer and stop the moment the flour disappears. A few gentle folds with a spatula at the end ensure everything is incorporated without overworking the dough.
Chill for better cookies. Even 15 minutes in the fridge makes a noticeable difference. The brown butter is soft at room temperature, and chilling firms it up so the cookies hold their shape better. If you skip this step, expect thinner, wider cookies. They’ll still taste good, but they won’t have that bakery-style thickness. I’ve done both—chilled wins every time.
Rotate your baking sheet halfway through. Halfway through the baking time, rotate the sheet 180 degrees. Ovens have hot spots, and this ensures even browning. I forgot to do this once and ended up with half a batch of perfectly golden cookies and half that were pale on one side. Lesson learned.
Variations & Adaptations
One of the best things about this recipe is how adaptable it is. Here are a few ways I’ve tweaked it depending on my mood, the season, or what I have on hand.
Pumpkin Spice Latte Version: Add 1 tablespoon of instant espresso powder to the dry ingredients. The coffee flavor enhances the brown butter and pumpkin beautifully, giving the cookies a subtle mocha-pumpkin vibe. I tried this on a whim one morning when I was craving a PSL but didn’t want to leave the house. It worked so well that it’s now my go-to fall variation.
Gluten-Free Adaptation: Substitute the all-purpose flour with a 1:1 gluten-free baking flour blend that contains xanthan gum. I’ve tested this with Bob’s Red Mill 1:1 Baking Flour, and the texture is remarkably close to the original. Add an extra tablespoon of flour if the dough feels too sticky. The cookies will be slightly more tender but just as delicious.
White Chocolate & Cranberry Twist: Fold in ½ cup of white chocolate chips and ¼ cup of dried cranberries after mixing the dough. The sweetness of the white chocolate pairs perfectly with the warm spices, and the cranberries add a tart pop that cuts through the richness. This is my favorite holiday variation—it feels festive without being over the top.
Vegan Version: Use vegan butter sticks for browning (Miyoko’s works best), replace the egg with a flax egg, and ensure your sugar is vegan-friendly. The texture will be slightly less tender, but the flavor is still incredible. I made these for a vegan friend’s birthday, and she ate four before anyone else could get to them.
Extra Chewy Version: Replace the granulated sugar in the dough with an equal amount of light brown sugar. Brown sugar contains more moisture and molasses, which creates a chewier cookie. The flavor will be richer and more caramel-like. I tried this accidentally when I ran out of white sugar, and it was a happy mistake.
Serving & Storage Suggestions
These cookies are best enjoyed slightly warm, when the edges are still a little crisp and the center is soft and gooey. But they’re also fantastic at room temperature—honestly, I’ve eaten them straight from the cooling rack and they’re perfect.
Serving temperature: Serve at room temperature or slightly warm. If you’re reheating, pop a cookie in the microwave for 8-10 seconds. It’ll soften the center and make the edges chewy again. For a fun presentation, serve them on a rustic wooden board with a glass of cold milk or a warm chai latte.
Complementary dishes: These cookies pair beautifully with a scoop of vanilla bean ice cream for an easy dessert. They also work great alongside a cup of hot apple cider or a cozy pumpkin spice latte. If you’re building a fall dessert board, add these next to some moist lemon raspberry pound cake for a beautiful contrast of flavors.
Storage instructions: Store baked cookies in an airtight container at room temperature for up to 5 days. Place a slice of bread in the container to keep them soft—the bread absorbs excess air and releases moisture. Replace the bread slice every couple of days. I’ve kept cookies fresh for nearly a week using this trick.
Freezer instructions: You can freeze both baked cookies and unbaked dough. For baked cookies, layer them between sheets of parchment paper in a freezer-safe container. They’ll keep for up to 3 months. Thaw at room temperature for about 30 minutes. For unbaked dough, scoop and roll the dough balls, then freeze them on a baking sheet until solid. Transfer to a freezer bag. Bake from frozen, adding 2-3 minutes to the baking time. This is my secret for having fresh cookies on demand—just bake what you need.
Reheating tips: To reheat frozen baked cookies, place them on a baking sheet in a 300°F (150°C) oven for 5-7 minutes. They’ll taste almost as good as fresh. For a single cookie, the microwave works fine—just don’t overdo it or they’ll become tough.
Nutritional Information & Benefits
Let’s be real—these are cookies, not health food. But they do have a few redeeming qualities worth mentioning. Here’s the estimated nutritional breakdown per cookie (based on 24 cookies):
| Nutrient | Amount per Cookie |
|---|---|
| Calories | 165 |
| Total Fat | 9g |
| Saturated Fat | 5.5g |
| Carbohydrates | 21g |
| Sugar | 13g |
| Protein | 2g |
| Fiber | 1g |
| Sodium | 95mg |
Health benefits of key ingredients: Pumpkin puree is packed with vitamin A and fiber, which supports eye health and digestion. Cinnamon has anti-inflammatory properties and can help regulate blood sugar levels. Brown butter, while indulgent, contains butyrate, a fatty acid that supports gut health. So there’s that!
Dietary considerations: This recipe contains gluten, dairy, and eggs. For gluten-free and vegan adaptations, see the variations section above. These cookies are not low-carb or keto-friendly due to the sugar and flour content. But for an occasional treat, they’re absolutely worth it.
Allergen note: Contains wheat, dairy, and eggs. If you’re serving a crowd, consider making a batch of the vegan version to accommodate different dietary needs. I’ve done this for holiday parties, and no one could tell the difference.
Personal wellness perspective: I believe in balance. These cookies are a celebration of fall flavors and cozy moments. Enjoy them with a cup of tea, share them with people you love, and don’t stress about the numbers. Food is meant to bring joy, and these cookies do exactly that.
Conclusion
These cozy brown butter pumpkin snickerdoodle cookies are everything I want in a fall dessert—warm, spiced, and deeply satisfying. The nutty brown butter, the tender pumpkin center, and that crackly cinnamon-sugar coating come together to create something truly special. They’re the kind of cookies that make you slow down and actually taste what you’re eating.
I’ve made these for Thanksgiving dinners, lazy Sunday afternoons, and midnight cravings. Every single time, they deliver. The recipe is forgiving enough for beginners but impressive enough to serve to guests. And honestly, the hardest part is waiting for the butter to brown—after that, it’s smooth sailing.
I’d love to hear how these turn out for you. Did you try any of the variations? Did your neighbor ask for the recipe too? Drop a comment below and let me know. And if you’re looking for more cozy fall recipes, don’t miss our cozy honey bourbon baked beans or decadent chocolate espresso bundt cake for more seasonal inspiration.
Happy baking, friends. May your kitchen smell like brown butter and cinnamon, and may your cookies disappear as fast as mine did.
Frequently Asked Questions
Can I use pumpkin pie filling instead of pumpkin puree?
No, please don’t. Pumpkin pie filling is pre-sweetened and spiced, which will throw off the sugar and spice balance in this recipe. Stick with 100% pure pumpkin puree. Libby’s is my go-to brand because it has a consistent texture and isn’t too watery.
Why did my cookies spread too much?
This usually happens for one of three reasons: your butter was too warm when you mixed it, you didn’t blot the pumpkin puree enough, or you skipped the chilling step. Make sure your brown butter is only warm to the touch, not hot. Blot that pumpkin well, and give the dough at least 15 minutes in the fridge. These three steps are your insurance against flat cookies.
Can I make the dough ahead of time?
Absolutely. You can prepare the dough, shape it into balls, and refrigerate it for up to 48 hours before baking. The flavor actually deepens as it sits. You can also freeze the dough balls for up to 3 months—just bake from frozen, adding 2-3 minutes to the baking time. This is my favorite meal prep trick for having fresh cookies on demand.
What can I use instead of cream of tartar?
Cream of tartar is what gives snickerdoodles their signature tangy flavor and chewy texture. If you don’t have it, you can substitute with 2 teaspoons of lemon juice or white vinegar added to the wet ingredients. However, the flavor won’t be quite the same. I recommend picking up cream of tartar—it’s cheap and lasts forever in your pantry.
How do I know when the cookies are done baking?
Look for edges that are set and lightly golden, with centers that still look soft and slightly underdone. The cookies will continue to bake on the hot sheet for a few minutes after you pull them out of the oven. If you wait until the centers look fully set, they’ll be overbaked and dry. Trust the visual cue: puffy, cracked tops with soft centers. That’s your sweet spot.
Pin This Recipe!
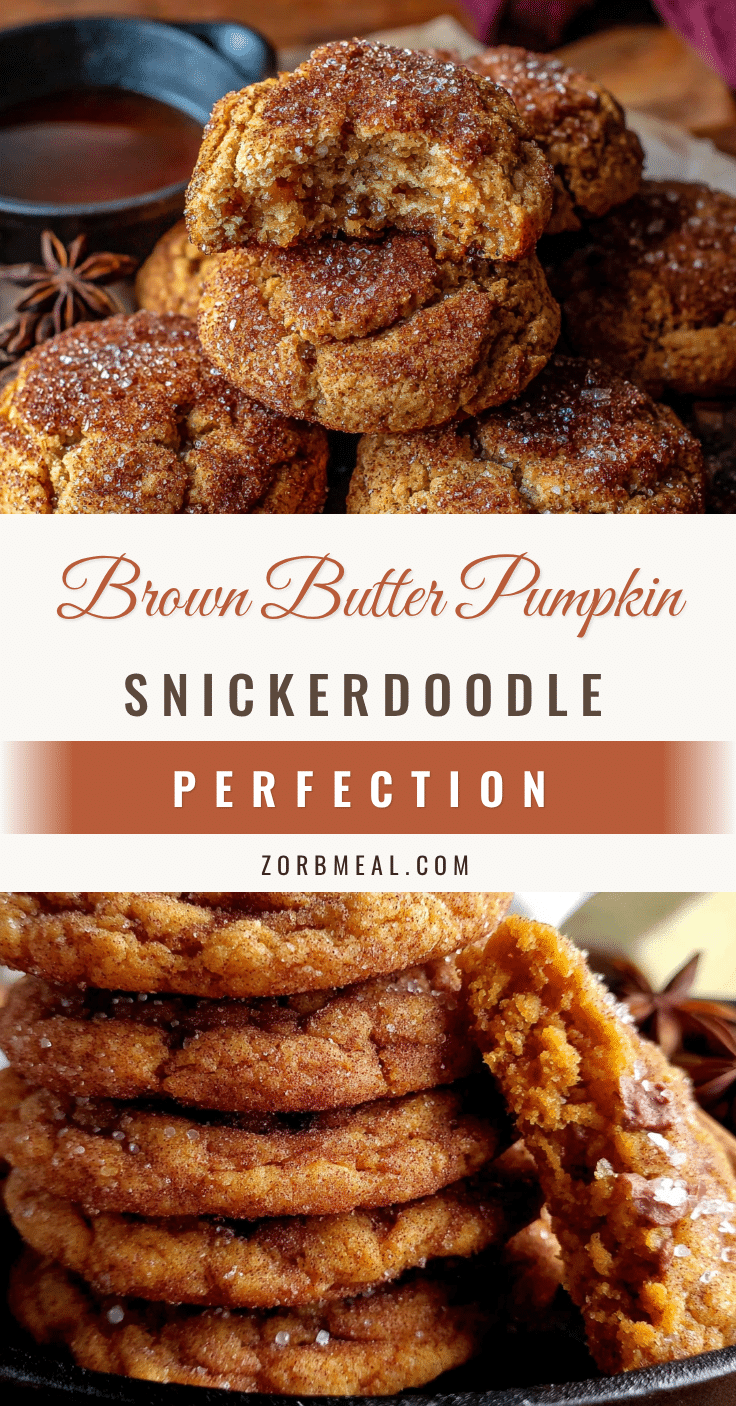
Cozy Brown Butter Pumpkin Snickerdoodle Cookies
These brown butter pumpkin snickerdoodle cookies combine the cozy warmth of pumpkin season with a classic cinnamon-sugar crunch. The nutty brown butter adds deep flavor, while the pumpkin puree keeps the centers soft and tender.
- Prep Time: 15 minutes
- Cook Time: 12 minutes
- Total Time: 27 minutes
- Yield: 24 cookies 1x
- Category: Dessert
- Cuisine: American
Ingredients
- 1 cup (2 sticks / 226g) unsalted butter
- ¾ cup (150g) granulated sugar
- ½ cup (100g) light brown sugar, packed
- ½ cup (120g) pumpkin puree, blotted
- 1 large egg, room temperature
- 1 teaspoon vanilla extract
- 2 cups (250g) all-purpose flour
- 1 teaspoon baking soda
- ½ teaspoon baking powder
- 1 teaspoon cream of tartar
- ½ teaspoon salt
- 1 teaspoon ground cinnamon
- ¼ teaspoon ground nutmeg
- ⅛ teaspoon ground cloves
- ¼ cup (50g) granulated sugar (for coating)
- 1 tablespoon ground cinnamon (for coating)
Instructions
- Brown the butter: Place 1 cup unsalted butter in a light-colored saucepan over medium heat. Melt completely, then continue cooking, swirling occasionally, until it foams, subsides, and golden brown specks form (about 5-7 minutes). Remove from heat immediately and pour into a heat-safe bowl to stop cooking. Let cool 10-15 minutes until warm but not hot.
- Prep the pumpkin: Measure ½ cup pumpkin puree onto a paper towel-lined plate. Spread slightly and press another paper towel on top to blot excess moisture. Let sit a few minutes.
- Mix wet ingredients: In a large bowl, combine cooled brown butter, ¾ cup granulated sugar, and ½ cup packed light brown sugar. Beat with an electric mixer on medium speed for 2-3 minutes until lighter and fluffy. Add blotted pumpkin puree, 1 room-temperature egg, and 1 teaspoon vanilla extract. Beat on low until just combined.
- Combine dry ingredients: In a separate bowl, whisk together 2 cups all-purpose flour, 1 teaspoon baking soda, ½ teaspoon baking powder, 1 teaspoon cream of tartar, ½ teaspoon salt, 1 teaspoon ground cinnamon, ¼ teaspoon ground nutmeg, and ⅛ teaspoon ground cloves.
- Combine wet and dry: Gradually add dry ingredients to wet mixture, mixing on low until just combined. No dry streaks should remain. Dough will be soft, slightly sticky, and fragrant.
- Make cinnamon sugar coating: In a small shallow bowl, mix ¼ cup granulated sugar with 1 tablespoon ground cinnamon.
- Chill dough (optional but recommended): Cover bowl with plastic wrap and refrigerate for 15-20 minutes.
- Preheat oven to 350°F (175°C). Line two baking sheets with parchment paper or silicone mats.
- Shape and coat cookies: Using a 1.5-tablespoon cookie scoop, portion dough. Roll each into a smooth ball, then roll in cinnamon sugar mixture to coat completely. Place on prepared baking sheets, spacing 2 inches apart. Makes about 24 cookies.
- Bake one sheet at a time for 10-12 minutes. Cookies will look puffy and slightly cracked on top; edges should be set and lightly golden, centers still soft.
- Cool on baking sheet for 3-4 minutes, then transfer to a cooling rack to cool completely.
- Repeat with remaining dough, using fresh parchment or cooled baking sheets.
Notes
Blot pumpkin puree well to remove excess moisture. Chill dough for at least 15 minutes to prevent spreading. Watch brown butter carefully to avoid burning. For gluten-free, use a 1:1 gluten-free baking flour blend. For dairy-free, use vegan butter sticks (Miyoko’s recommended). For egg-free, use a flax egg.
Nutrition
- Serving Size: 1 cookie
- Calories: 165
- Sugar: 13
- Sodium: 95
- Fat: 9
- Saturated Fat: 5.5
- Carbohydrates: 21
- Fiber: 1
- Protein: 2
Keywords: brown butter, pumpkin, snickerdoodle, cookies, fall baking, cinnamon sugar


