“These taste like little pumpkin pies, but I can eat them for breakfast, right?” My sister texted me that at 7:32 AM on a Saturday last October, and honestly, she wasn’t wrong. I had just pulled a batch of these baked pumpkin pie oatmeal cups out of the oven, and the whole kitchen smelled like Thanksgiving morning—cinnamon, nutmeg, and that warm, earthy sweetness only pumpkin brings.
I wasn’t trying to invent anything fancy that day. I just had half a can of pumpkin puree sitting in the fridge from a pie I’d made two days prior, and I was tired of my usual bowl of plain oats. You know how it is—you buy a can of pumpkin for one recipe, and then you’re left staring at it like, “What now?” So I threw some oats, milk, an egg, and all those cozy spices into a bowl, scooped it into a muffin tin, and hoped for the best. What came out of the oven was something I honestly didn’t expect: a perfectly portable, softly spiced, satisfyingly chewy little breakfast cake that made me actually look forward to Monday morning.
These oatmeal cups have that perfect texture—firm enough to hold their shape, but tender and moist on the inside. They’re not too sweet, which means you can absolutely justify one (or two) for breakfast. The pumpkin keeps them incredibly moist without being heavy, and the warm spices hit you in all the right ways. I’ve made them at least a dozen times since that first accidental batch, tweaking little things here and there until I got them just right. And now, I’m pretty sure I’ll never look at a can of pumpkin the same way again.
Why You’ll Love This Recipe
Let me tell you why these little cups have earned a permanent spot in my fall breakfast rotation. First off, they’re ridiculously easy to make—we’re talking one bowl, a whisk, and a muffin tin. No stand mixer, no complicated steps, no fussing with dough. You can have the batter mixed in under ten minutes, and while they bake, you can sip your coffee and enjoy that incredible pumpkin spice aroma filling your house.
Here’s what makes these oatmeal cups stand out:
- Quick & Easy: From start to finish, you’re looking at about 30 minutes. Mix the batter in one bowl, scoop it into a greased muffin tin, and bake. That’s it. Perfect for busy weekday mornings when you want something homemade but don’t have time to stand over the stove.
- Simple Ingredients: You probably already have most of these in your pantry. Oats, pumpkin puree, eggs, milk, brown sugar, and basic spices—nothing weird or hard to find. No trips to specialty stores required.
- Perfect for Meal Prep: These cups are a meal prepper’s dream. Make a batch on Sunday, and you’ve got breakfast ready for the whole week. They reheat beautifully in the microwave or toaster oven, so you can grab one and go.
- Crowd-Pleaser: I’ve served these to kids, adults, picky eaters, and breakfast skeptics, and they always disappear. They’re sweet enough to feel like a treat but wholesome enough to feel good about eating.
- Unbelievably Delicious: The texture is what gets everyone. The edges get slightly crispy and golden, while the centers stay soft and tender. Every bite tastes like a mini pumpkin pie, but without the guilt or the heavy crust.
What makes this recipe different from all the other baked oatmeal recipes out there? It’s the ratio of oats to pumpkin to egg. I tested this more times than I care to admit, trying to get that perfect balance where the cups hold their shape without being dry or rubbery. The secret is letting the batter sit for about five minutes before baking, which gives the oats time to absorb some of the liquid and plump up. It’s a small step, but it makes a huge difference in the final texture.
This is the kind of breakfast that makes you close your eyes after the first bite. It’s comfort food, reimagined for busy mornings—healthier than a muffin, faster than a frittata, and way more satisfying than a bowl of cold cereal.
What Ingredients You Will Need
This recipe uses simple, wholesome ingredients to deliver big flavor and satisfying texture without any fuss. Most of these are pantry staples, which is exactly what you want when a fall breakfast craving hits unexpectedly.
- Rolled Oats (2 cups): Not quick oats, not steel-cut—rolled oats are the sweet spot here. They give the cups structure while staying tender. Quick oats will make them mushy, and steel-cut won’t soften enough. Stick with old-fashioned rolled oats for the best texture. I personally recommend Quaker or Bob’s Red Mill for consistent results.
- Pumpkin Puree (1 cup): Make sure you’re grabbing 100% pure pumpkin puree, not pumpkin pie filling. The pie filling has added sugar and spices that will throw off the balance of this recipe. Libby’s is my go-to brand, but any pure pumpkin puree works. Just shake the can before opening—it helps loosen things up.
- Milk (1 cup): Whole milk gives the creamiest result, but 2% works just fine. I’ve also made these with unsweetened almond milk and oat milk, and both worked well. Avoid skim milk—it makes the cups a bit too dense and dry.
- Eggs (2 large): Eggs are the binder here. They help the cups hold their shape and give them a nice lift. If you need an egg substitute, flax eggs work reasonably well, but the texture will be slightly denser.
- Brown Sugar (1/3 cup, packed): Brown sugar adds moisture and that deep, molasses-y sweetness that pairs so perfectly with pumpkin. You can use light or dark brown sugar. Dark brown sugar will give a more intense, almost caramel-like flavor. If you’re out of brown sugar, you can substitute with coconut sugar or maple syrup, but reduce the milk slightly if using maple syrup.
- Pumpkin Pie Spice (2 teaspoons): This is your shortcut to that classic pumpkin pie flavor. If you don’t have pumpkin pie spice, you can make your own: 1 teaspoon cinnamon, 1/2 teaspoon ginger, 1/4 teaspoon nutmeg, and 1/4 teaspoon cloves. I always double-check my spice jar before starting—there’s nothing worse than realizing you’re out halfway through.
- Cinnamon (1 teaspoon): Because you can never have too much cinnamon in a pumpkin recipe. It adds warmth and depth that pumpkin pie spice alone doesn’t quite achieve.
- Vanilla Extract (1 teaspoon): A little vanilla rounds out all the flavors and makes everything taste more balanced. Use pure vanilla extract if you have it—it really does make a difference.
- Baking Powder (1 teaspoon): This gives the oatmeal cups a little lift so they’re not flat and dense. Make sure your baking powder is fresh—if it’s been sitting in your cabinet for over a year, it might not work as well.
- Salt (1/4 teaspoon): Don’t skip this. Salt doesn’t make the cups salty; it enhances all the other flavors and keeps them from tasting flat. A tiny pinch makes a big difference.
- Optional Add-Ins: I love throwing in 1/2 cup of chopped pecans or walnuts for crunch, or 1/3 cup of dark chocolate chips if I’m feeling indulgent. Dried cranberries are also fantastic—they add little bursts of tartness that play beautifully with the sweet pumpkin.
Equipment Needed
You don’t need any fancy kitchen gadgets for this recipe, which is one of the reasons I love it. Here’s what you’ll need:
- Standard 12-Cup Muffin Tin: This is your main vessel. I use a non-stick muffin tin, and I still always grease it well with butter or cooking spray. Trust me on this—pumpkin oatmeal loves to stick.
- Mixing Bowls: One large bowl for the wet ingredients and one medium bowl for the dry ingredients. Or just one bowl if you’re lazy like me and don’t mind mixing everything together.
- Whisk: A good whisk makes combining the wet ingredients effortless. A fork works in a pinch, but a whisk is better for getting the eggs fully incorporated.
- Measuring Cups and Spoons: Accurate measurements matter in baking, even for something as forgiving as baked oatmeal. Use dry measuring cups for the oats and sugar, and a liquid measuring cup for the milk and pumpkin.
- Rubber Spatula: For scraping every last bit of batter into the muffin cups. Waste not, want not.
- Ice Cream Scoop or Cookie Scoop: This is my secret weapon for evenly portioned oatmeal cups. A 1/4-cup scoop gives you perfectly uniform cups that all bake at the same rate. If you don’t have one, use a regular spoon and eyeball it.
- Cooling Rack: Letting the cups cool in the pan for a few minutes, then transferring them to a wire rack, prevents the bottoms from getting soggy.
If you don’t have a muffin tin, you can bake this in an 8×8 baking dish and serve it like a bar. Just increase the baking time by about 10 minutes and let it cool completely before cutting.
Preparation Method
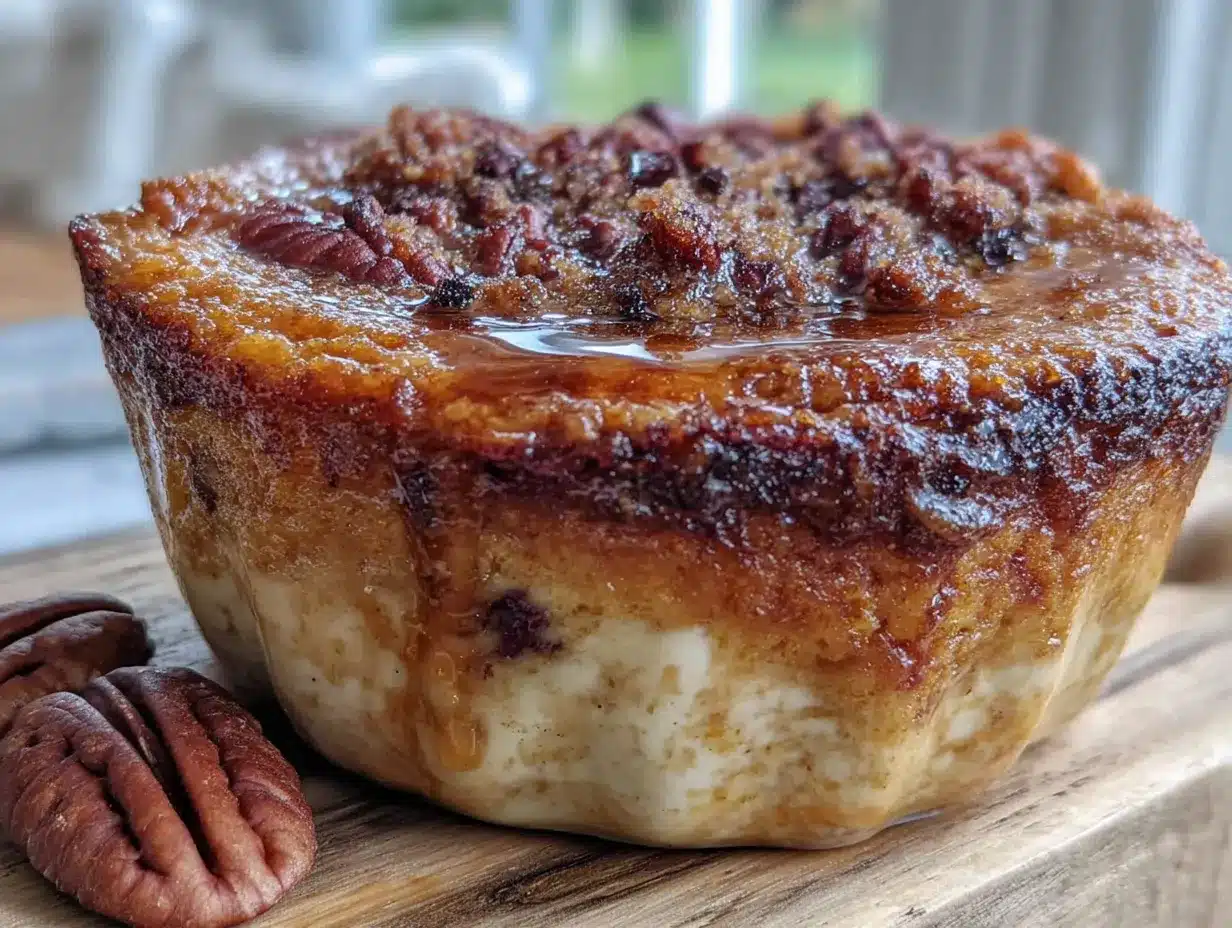
Alright, let’s get to the good part. Here’s how to make these cozy baked pumpkin pie oatmeal cups from start to finish. I’ll walk you through every step, including the little tricks I’ve learned along the way.
- Preheat your oven to 350°F (175°C). While it’s heating up, generously grease a 12-cup muffin tin with butter or non-stick cooking spray. I cannot stress this enough—grease every nook and cranny, including the top rim of each cup. Pumpkin oatmeal has a tendency to stick, and you don’t want to lose half your breakfast to the pan.
- In a large mixing bowl, whisk together the eggs, pumpkin puree, milk, brown sugar, and vanilla extract. Whisk until everything is smooth and well combined. The mixture should be a deep orange color and smell amazing already. If your pumpkin puree seems watery, don’t worry—that’s normal. Just give it a good stir.
- In a separate medium bowl, combine the rolled oats, pumpkin pie spice, cinnamon, baking powder, and salt. Stir with a fork or whisk until the spices are evenly distributed throughout the oats. This step is important—you don’t want one oatmeal cup to get all the cinnamon while another gets none.
- Pour the dry ingredients into the wet ingredients and stir until just combined. Don’t overmix! A few streaks of flour are fine. Overmixing will make the oatmeal cups tough, and nobody wants that. If you’re adding pecans, chocolate chips, or dried cranberries, fold them in now.
- Let the batter sit for 5 minutes. This is my non-negotiable step. Letting the oats rest allows them to absorb some of the liquid, which means your oatmeal cups will be tender and moist instead of crunchy and dry. Use this time to clean up a few dishes or pour yourself a cup of coffee.
- Scoop the batter evenly into the prepared muffin cups. Fill each cup almost to the top—about 3/4 full. The oatmeal cups won’t rise dramatically like muffins, so you can fill them generously. A 1/4-cup scoop works perfectly here. You should get exactly 12 cups.
- Bake for 18-22 minutes, or until the tops are set and the edges are golden brown. The centers should feel firm to the touch but still slightly springy. A toothpick inserted into the center should come out clean or with a few moist crumbs. Every oven is different, so start checking at 18 minutes. My oven runs hot, so 19 minutes is usually my sweet spot.
- Let the oatmeal cups cool in the pan for 5 minutes. This allows them to set up and makes them easier to remove. After 5 minutes, run a butter knife around the edges of each cup to loosen them, then transfer them to a wire cooling rack. If any stick, don’t force them—let them cool a few more minutes and try again.
- Serve warm or at room temperature. These are absolutely delicious right out of the oven, but they’re also great once they’ve cooled down. I like to drizzle a little maple syrup over the top or add a dollop of Greek yogurt for extra creaminess.
A quick note: if your oatmeal cups come out a little flat, your baking powder might be old. And if they’re too dry, you probably overbaked them or used quick oats instead of rolled oats. Don’t worry—even imperfect ones are still delicious.
Cooking Tips & Techniques
After making these oatmeal cups more times than I can count, I’ve picked up a few tricks that make the process smoother and the results more consistent. Here’s what I’ve learned the hard way so you don’t have to.
Don’t skip the resting time. I know it’s tempting to just scoop and bake, but that five-minute rest is crucial. The oats need time to hydrate, and if you skip this step, you’ll end up with oatmeal cups that have a slightly crunchy texture from the dry oats. Let them sit, and you’ll be rewarded with perfectly tender cups every time.
Use a cookie scoop for even portions. This is one of those small kitchen tools that makes a huge difference. A 1/4-cup scoop ensures every oatmeal cup is the same size, which means they all bake evenly. No more burnt edges on the small ones and undercooked centers on the big ones.
Grease the pan generously. I cannot say this enough. Pumpkin and oats are a sticky combination, and nothing is more frustrating than pulling out beautiful oatmeal cups only to have them crumble apart because they stuck to the pan. I use butter for flavor, but non-stick spray works too. Just be thorough.
Check for doneness with your finger, not just a toothpick. The toothpick test is helpful, but I’ve found that gently pressing the center of an oatmeal cup with my fingertip tells me more. If it springs back, it’s done. If it leaves an indent, give it another minute or two. This works because oatmeal cups are denser than muffins, and the toothpick can sometimes give a false reading.
Let them cool in the pan before removing. I know you’re hungry, and I know they smell incredible, but patience pays off here. The oatmeal cups need those five minutes to firm up so they hold their shape. If you try to remove them too soon, they’ll fall apart. Trust me on this—I’ve made that mistake more than once.
Double the batch and freeze half. These oatmeal cups freeze beautifully, so I always make a double batch. Once they’re completely cool, I pop them in a freezer-safe bag and grab one whenever I need a quick breakfast. They thaw in about 30 minutes at room temperature, or you can microwave them for 30 seconds.
Variations & Adaptations
One of the best things about this recipe is how adaptable it is. I’ve tried quite a few variations over the years, and here are my favorites:
Gluten-Free Version: Use certified gluten-free rolled oats, and you’re good to go. The recipe is naturally gluten-free as long as your oats are. I’ve made these for friends with celiac disease, and they couldn’t tell the difference. Just make sure your oats are labeled gluten-free to avoid cross-contamination.
Dairy-Free Version: Swap the milk for unsweetened almond milk, oat milk, or coconut milk. I’ve tested all three, and oat milk gives the creamiest results. Coconut milk adds a subtle tropical flavor that actually pairs nicely with the pumpkin, but it’s not for everyone. Use coconut oil or a dairy-free butter alternative to grease the pan.
Vegan Version: Replace the eggs with flax eggs (1 tablespoon ground flaxseed mixed with 3 tablespoons water per egg) and use a plant-based milk. The texture will be slightly denser, but they’re still delicious. I’ve also tried using chia eggs, and they work well too. Just let the flax or chia mixture sit for 5 minutes to gel before adding it to the wet ingredients.
Maple Pecan Version: This is my personal favorite. Replace the brown sugar with 1/4 cup maple syrup, reduce the milk to 3/4 cup, and fold in 1/2 cup chopped pecans. Drizzle a little extra maple syrup over the top before serving. The maple and pecan combination is absolutely divine with the pumpkin spice.
Chocolate Chip Version: Fold in 1/3 cup dark chocolate chips or semi-sweet chocolate chips. The chocolate melts into little pockets of richness throughout the oatmeal cups. My kids go crazy for this version, and honestly, so do I. It feels like you’re eating dessert for breakfast, but you’re really just eating oats and pumpkin.
Savory-Sweet Version: This might sound weird, but trust me—add 1/4 teaspoon of black pepper and a pinch of cayenne pepper to the spice mix. The heat brings out the sweetness of the pumpkin and adds a surprising depth of flavor. It’s not spicy at all, just warm and complex. I discovered this by accident when I grabbed the wrong jar, and now it’s my secret ingredient.
If you’re looking for more cozy breakfast ideas, you might also love our cozy sausage and egg breakfast casserole for those mornings when you want something hearty and savory. And if you’re in the mood for something sweet and fruity, our fluffy buttermilk pancakes with sweet berry compote are always a crowd-pleaser.
Serving & Storage Suggestions
These baked pumpkin pie oatmeal cups are versatile when it comes to serving. Here’s how I like to enjoy them and how to store them so they stay fresh.
Serving Suggestions: Serve these warm or at room temperature. I love drizzling a little maple syrup or honey over the top for extra sweetness. A dollop of Greek yogurt or a spoonful of whipped cream turns them into a more indulgent breakfast. For a complete meal, pair them with a side of scrambled eggs or a piece of fruit. They’re also fantastic crumbled over a bowl of yogurt with some fresh berries for a quick parfait.
Complementary Dishes: These oatmeal cups pair beautifully with a hot cup of coffee or a chai latte. If you’re serving them for brunch, they go great alongside our creamy blueberry cream cheese stuffed French toast for a spread that covers all the breakfast bases.
Storage Instructions: Store leftover oatmeal cups in an airtight container in the refrigerator for up to 5 days. Place a paper towel in the bottom of the container to absorb any excess moisture, and another on top to keep them from getting soggy. I’ve found that they actually taste better on day two—the flavors have more time to meld together.
Freezing Instructions: These freeze beautifully. Let the oatmeal cups cool completely, then place them in a single layer on a baking sheet and freeze for 1 hour. Once frozen, transfer them to a freezer-safe bag or container. They’ll keep for up to 3 months. To thaw, leave them in the refrigerator overnight or microwave them for 30-45 seconds.
Reheating Methods: The microwave is the fastest option—30 seconds on high will bring them back to warm and tender. For a slightly crisper exterior, reheat them in a toaster oven at 350°F for 5-7 minutes. If you’re reheating from frozen, add an extra minute to either method.
Flavor Development: One thing I’ve noticed is that the flavors continue to develop over time. The spices become more pronounced, and the pumpkin flavor deepens. So if you can resist eating them all on day one, you’re in for a treat on day three.
Nutritional Information & Benefits
These baked pumpkin pie oatmeal cups are a breakfast that actually makes you feel good. Here’s a breakdown of what you’re getting in each cup:
Estimated Nutritional Values (per cup, without add-ins):
- Calories: 180
- Protein: 6g
- Carbohydrates: 28g
- Fiber: 4g
- Sugar: 10g
- Fat: 5g
- Saturated Fat: 1.5g
- Cholesterol: 35mg
- Sodium: 150mg
Health Benefits: Pumpkin is packed with vitamin A, which is great for your eyes and immune system. It’s also rich in fiber, which helps keep you full and satisfied until lunch. Oats are a whole grain that provides steady energy without the crash you get from sugary cereals. The eggs add high-quality protein, and the spices—cinnamon, nutmeg, ginger—have anti-inflammatory properties. It’s a breakfast that fuels your body and tastes like a treat.
Dietary Considerations: This recipe is easily adaptable for gluten-free and dairy-free diets. It’s naturally low in added sugar compared to most baked goods, and you can reduce the sugar even further if you prefer. The fiber and protein content make it a great option for anyone watching their blood sugar or trying to stay full longer.
Potential Allergens: This recipe contains eggs, milk, and oats (which may contain traces of gluten). If you have allergies, use the substitutions mentioned in the variations section.
Personal Wellness Perspective: I love that I can eat these for breakfast and feel energized, not sluggish. They’re satisfying without being heavy, and they don’t leave me craving sugar an hour later. It’s the kind of breakfast that supports a busy, active day without requiring a lot of effort to prepare.
Conclusion
These cozy baked pumpkin pie oatmeal cups have become a fall staple in my kitchen, and I have a feeling they’re about to become one in yours too. They’re simple, forgiving, and endlessly adaptable—the kind of recipe that works whether you’re a seasoned cook or someone who’s just starting to find their way around the kitchen.
What I love most about this recipe is how it makes a busy morning feel a little more special. There’s something about the smell of pumpkin and cinnamon baking in the oven that just makes everything feel right. And knowing that I have a batch of these ready to go in the fridge makes even the most chaotic weekday morning feel manageable.
I’d love to hear how these turn out for you. Did you add any fun mix-ins? Did you try one of the variations? Drop a comment below and let me know—I read every single one, and I love seeing how you make this recipe your own. And if you’re looking for more easy, cozy breakfast ideas, don’t forget to check out our easy garlic butter chicken with asparagus for a quick dinner that pairs beautifully with a cozy fall morning.
Happy baking, friends. Here’s to warm kitchens, full bellies, and mornings that feel a little bit like a hug.
Frequently Asked Questions
Can I use quick oats instead of rolled oats?
I wouldn’t recommend it. Quick oats are more finely processed and will absorb liquid too quickly, resulting in oatmeal cups that are mushy and dense. Rolled oats give you that perfect chewy texture that makes these cups so satisfying. If you only have quick oats on hand, you can use them, but reduce the milk to 3/4 cup and expect a softer, less structured cup.
Can I make these ahead of time for meal prep?
Absolutely! In fact, that’s one of the best things about this recipe. You can make a batch on Sunday and enjoy them all week. Store them in an airtight container in the refrigerator for up to 5 days, or freeze them for up to 3 months. They reheat beautifully in the microwave or toaster oven, so you can grab one and go on busy mornings.
Why did my oatmeal cups turn out dry?
Dry oatmeal cups usually come from one of three issues: overbaking, using quick oats, or not letting the batter rest before baking. Make sure you’re using rolled oats, let the batter sit for 5 minutes, and check for doneness at 18 minutes. Every oven is different, so start checking early. Also, make sure you’re measuring your ingredients accurately—too many oats or not enough pumpkin can throw off the moisture balance.
Can I make these without eggs?
Yes, you can make a vegan version by using flax eggs. Mix 2 tablespoons of ground flaxseed with 6 tablespoons of water and let it sit for 5 minutes to gel. The texture will be slightly denser and less fluffy, but they’ll still be delicious. I’ve also tried using chia seeds the same way, and it works well. Just don’t skip the resting time for the flax or chia mixture—it needs to gel to properly bind the oatmeal cups.
Can I add protein powder to these?
You can, but you’ll need to adjust the liquid ratio. If you add protein powder, reduce the oats by 1/4 cup and increase the milk by 2-3 tablespoons. Protein powder tends to absorb moisture, so you don’t want your oatmeal cups to turn out dry. Vanilla or unflavored protein powder works best. I’ve also tried collagen powder, which dissolves more easily and doesn’t affect the texture as much.
Pin This Recipe!

Cozy Baked Pumpkin Pie Oatmeal Cups – Easy Fall Breakfast

These baked pumpkin pie oatmeal cups are a portable, softly spiced, and satisfyingly chewy breakfast that tastes like mini pumpkin pies. Made with simple ingredients in one bowl, they’re perfect for meal prep and busy fall mornings.
- Prep Time: 10 minutes
- Cook Time: 20 minutes
- Total Time: 30 minutes
- Yield: 12 servings 1x
- Category: Breakfast
- Cuisine: American
Ingredients
- 2 cups rolled oats
- 1 cup pumpkin puree (100% pure, not pumpkin pie filling)
- 1 cup milk (whole milk preferred, or 2%, almond, or oat milk)
- 2 large eggs
- 1/3 cup brown sugar, packed
- 2 teaspoons pumpkin pie spice
- 1 teaspoon ground cinnamon
- 1 teaspoon vanilla extract
- 1 teaspoon baking powder
- 1/4 teaspoon salt
- Optional: 1/2 cup chopped pecans or walnuts, 1/3 cup dark chocolate chips, or 1/3 cup dried cranberries
Instructions
- Preheat your oven to 350°F (175°C). Generously grease a 12-cup muffin tin with butter or non-stick cooking spray, including the top rim of each cup.
- In a large mixing bowl, whisk together the eggs, pumpkin puree, milk, brown sugar, and vanilla extract until smooth and well combined.
- In a separate medium bowl, combine the rolled oats, pumpkin pie spice, cinnamon, baking powder, and salt. Stir until the spices are evenly distributed.
- Pour the dry ingredients into the wet ingredients and stir until just combined. Do not overmix. If using optional add-ins, fold them in now.
- Let the batter sit for 5 minutes to allow the oats to absorb some liquid.
- Scoop the batter evenly into the prepared muffin cups, filling each about 3/4 full. A 1/4-cup scoop works perfectly.
- Bake for 18-22 minutes, or until the tops are set and the edges are golden brown. The centers should feel firm but slightly springy. A toothpick inserted into the center should come out clean or with a few moist crumbs.
- Let the oatmeal cups cool in the pan for 5 minutes. Run a butter knife around the edges to loosen them, then transfer to a wire cooling rack.
- Serve warm or at room temperature. Optionally, drizzle with maple syrup or add a dollop of Greek yogurt.
Notes
Let the batter rest for 5 minutes before baking to ensure tender oatmeal cups. Grease the muffin tin generously to prevent sticking. For best results, use rolled oats, not quick oats or steel-cut oats. Oatmeal cups can be stored in an airtight container in the refrigerator for up to 5 days or frozen for up to 3 months.
Nutrition
- Serving Size: 1 oatmeal cup
- Calories: 180
- Sugar: 10
- Sodium: 150
- Fat: 5
- Saturated Fat: 1.5
- Carbohydrates: 28
- Fiber: 4
- Protein: 6
Keywords: pumpkin oatmeal cups, baked oatmeal, fall breakfast, pumpkin spice, meal prep breakfast, healthy breakfast, easy oatmeal recipe


