“You’re telling me the filling is mostly water?” That’s exactly what my skeptical aunt said the first time I brought this pie to a family potluck. Honestly, I couldn’t blame her — it sounded borderline absurd. But that classic creamy Depression Era water pie recipe has a way of sneaking up on you. I first stumbled across it when rummaging through an old cookbook that belonged to my great-grandmother, a woman who somehow managed to feed her family during times when fresh ingredients were scarce and budgets tighter than ever.
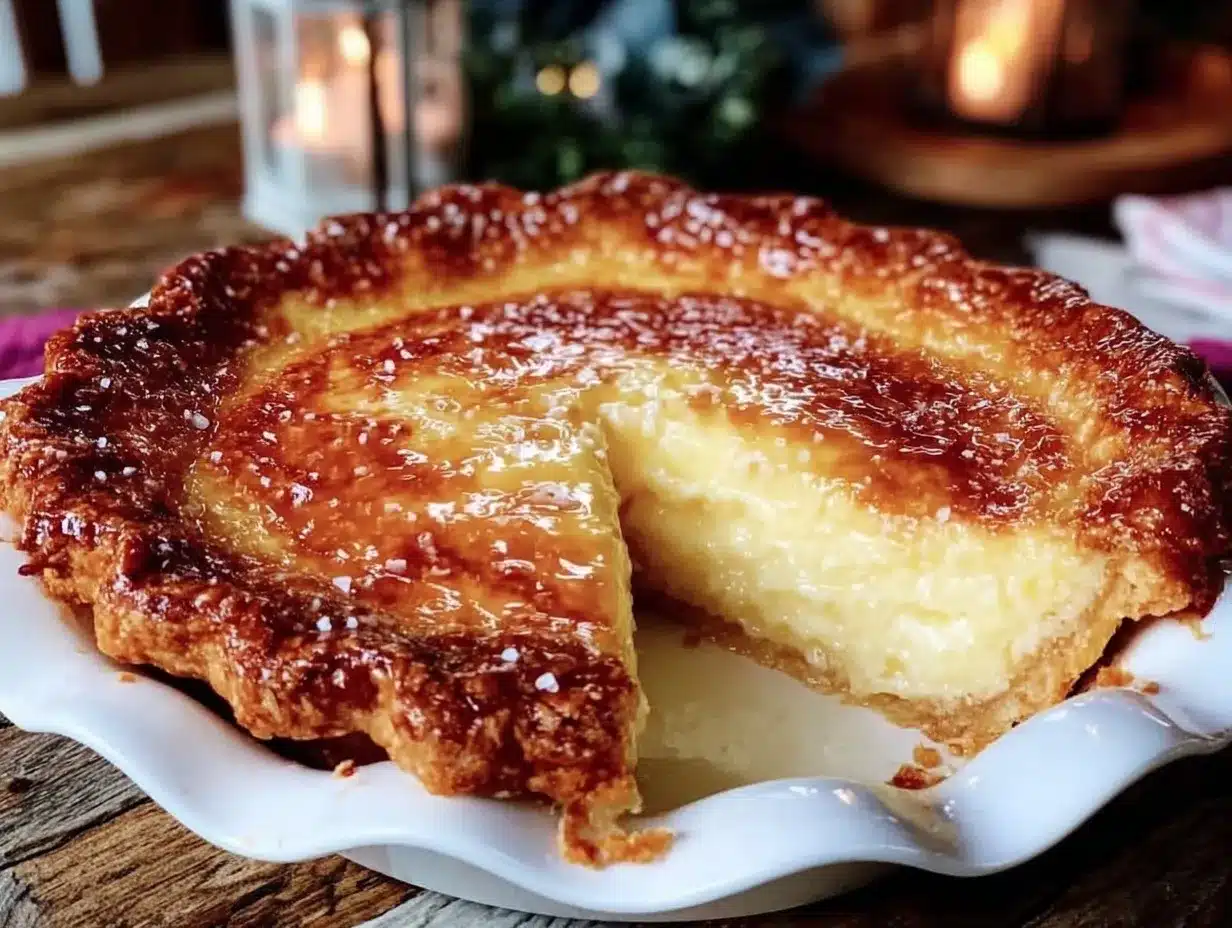
One rainy afternoon, with only a handful of pantry staples and a stubborn craving for something sweet, I decided to give this humble pie a shot. It was a bit of a gamble — just water, sugar, eggs, and a pinch of flour? But the moment that warm, custardy slice hit my tongue, I was hooked. The texture was smooth and luscious, the flavor surprisingly rich and comforting. It’s like the pantry whispered a secret, turning the simplest ingredients into a soothing treat.
Making this pie became a quiet ritual in my kitchen, especially on those evenings when I wanted something easy but satisfying, without running to the store. It’s funny how a recipe born from necessity can feel so indulgent. Over time, it’s become one of those desserts that friends ask for again and again — the kind that sparks conversations and a few nostalgic smiles.
There’s something about the creamy balance of sweet and subtle egginess that keeps me coming back. Maybe it’s the idea of making something with what you have, or just the simple pleasure of a slice of pie that doesn’t complicate life. Either way, this classic creamy Depression Era water pie recipe stuck with me, and I have a feeling it might do the same for you.
Why You’ll Love This Recipe
This classic creamy Depression Era water pie recipe is one of those kitchen treasures that feels like a warm hug. I’ve made it several times, tweaking a bit here and there, and every time it delivers that perfect creamy texture that’s hard to find in other pies. Here’s why it’s such a winner:
- Quick & Easy: You can whip this up in under 45 minutes — perfect when you want dessert but don’t have much time or ingredients.
- Simple Ingredients: No fancy shopping needed. Most of what you need is probably already in your pantry or fridge.
- Historical Soul: This pie carries a story — it’s a reminder of times when cooking was creative survival, not just fun.
- Surprisingly Creamy: The water, combined with eggs and sugar, creates a custard-like filling that’s silky and smooth.
- Comfort Food Classic: It’s that kind of dessert that makes you pause and savor, whether after a hectic day or a casual family dinner.
What sets this recipe apart is the simple magic of its ingredients working together — the slight nutmeg spice, the flaky crust, and the delicate custard from just eggs, sugar, and water. It’s not just another custard pie; it’s a nod to resilience, thrift, and comfort all rolled into one. Honestly, it’s the kind of pie that makes you close your eyes after the first bite and just relax.
And if you’re someone who loves easy homemade desserts like the creamy key lime pie bars I shared recently, or you appreciate recipes that don’t require a dozen ingredients, this water pie fits right in. It’s a timeless dessert, perfect for when you want something sweet without fuss.
What Ingredients You Will Need
This recipe uses simple, wholesome ingredients to deliver bold flavor and satisfying texture without the fuss. Here’s what you’ll need—mostly pantry staples that don’t require a special trip to the store:
- Pie crust: One 9-inch (23 cm) unbaked pie crust, homemade or store-bought (I like using a flaky, all-butter crust for the best texture)
- Water: 2 cups (475 ml), the base of this pie’s surprisingly creamy filling
- Granulated sugar: 1 cup (200 g), for sweetness
- All-purpose flour: 2 tablespoons (16 g), to help thicken the custard gently
- Eggs: 3 large, beaten (room temperature is best for smooth texture)
- Salt: 1/4 teaspoon, to balance the sweetness
- Ground nutmeg: 1/2 teaspoon, for that warm, classic spice note (freshly grated if possible)
- Vanilla extract: 1 teaspoon, adds depth to the flavor
- Butter: 1 tablespoon (14 g), melted, brushed on top for a golden finish (optional but highly recommended)
If you want a gluten-free option, you can swap the all-purpose flour with a gluten-free flour blend or cornstarch (about 1 tablespoon). For dairy-free bakers, use a vegan pie crust and omit the butter or replace it with a plant-based alternative. When I make this pie in summer, I sometimes sprinkle a few fresh berries on top before baking, which adds a fresh twist without overpowering the original charm.
Equipment Needed
- 9-inch (23 cm) pie dish: glass or ceramic works well for even baking
- Mixing bowls: a medium bowl for beating eggs and a small one for mixing dry ingredients
- Whisk or fork: for beating eggs and mixing the filling
- Measuring cups and spoons: for precise ingredient amounts
- Pastry brush: optional, to brush melted butter on top for that glossy finish
- Oven: preheated to 350°F (175°C) — no fancy gadgets needed
For those on a budget or without a pastry brush, you can use the back of a spoon to spread the melted butter or skip it altogether. I’ve tried this recipe with both homemade and frozen pie crusts; homemade gives a flakier, tastier result, but frozen crusts work fine when time is tight. Just be sure to thaw the crust before filling to avoid sogginess.
Preparation Method
- Preheat your oven to 350°F (175°C). Set your 9-inch pie dish aside.
- Prepare the pie crust: If using homemade, roll it out to fit the pie dish, gently crimping the edges. If using store-bought, place the thawed crust directly into the dish. Prick the bottom a few times with a fork to prevent bubbling.
- Mix dry ingredients: In a medium bowl, whisk together 1 cup (200 g) sugar, 2 tablespoons (16 g) all-purpose flour, 1/4 teaspoon salt, and 1/2 teaspoon ground nutmeg until evenly combined.
- Beat eggs: In a separate bowl, lightly beat 3 large eggs (room temperature helps). Add 2 cups (475 ml) water and 1 teaspoon vanilla extract to the eggs. Mix gently but thoroughly.
- Combine wet and dry: Slowly pour the wet egg mixture into the dry ingredients, whisking continuously to avoid lumps. The filling will be quite thin at this point — that’s normal.
- Pour filling into crust: Carefully pour the mixture into the prepared pie crust.
- Optional butter brush: Melt 1 tablespoon (14 g) butter and gently brush it over the top of the filling. This helps create a golden, slightly crisp top.
- Bake: Place the pie on the middle rack of your oven. Bake for 45–50 minutes, or until the filling is set but still slightly jiggly in the center. The edges should be golden brown.
- Cool: Remove from oven and let the pie cool for at least 2 hours at room temperature. This allows the filling to fully set and develop its creamy texture.
- Serve: Slice and enjoy as is, or with a dollop of whipped cream or a dusting of cinnamon for extra comfort.
Quick tip: If the filling cracks during baking, it’s usually a sign of overbaking. Keep an eye on the pie around the 40-minute mark and test with a gentle shake — a slight wobble means it’s perfect. Also, using room temperature eggs makes a noticeable difference in smoothness, so don’t skip that step if you can help it.
Cooking Tips & Techniques
Making classic creamy Depression Era water pie is surprisingly straightforward, but a few tricks help get that perfect silky custard every time.
- Don’t rush the cooling: The filling looks fragile right out of the oven, but it firms up beautifully as it cools. Patience here pays off.
- Use fresh nutmeg: It makes a big flavor difference compared to pre-ground versions. Honestly, it brings that warm, comforting note that defines this pie.
- Whisk gently: Over-beating eggs can cause bubbles that create holes in the custard. Mix just until combined for a smooth surface.
- Keep an eye on crust edges: If your crust browns too fast, tuck some foil or a crust shield around the edges partway through baking.
- Room temperature ingredients: Using eggs and water at room temperature helps everything blend smoothly, giving you that creamy texture.
- Experiment with pie crusts: I once tried a graham cracker crust for a richer flavor twist — it was a hit, but the classic flaky crust is my go-to.
One time, I accidentally left the oven on a little too high and the pie’s surface cracked. Instead of tossing it, I served it with whipped cream and cinnamon — the cracks just added character, and everyone loved it. Cooking is sometimes about embracing imperfections and making them work for you.
Variations & Adaptations
This recipe is a canvas for creativity while holding onto its Depression Era roots. Here are some ways to mix it up:
- Spiced Water Pie: Add a pinch of cinnamon or ground cloves along with nutmeg for a warmer, spicier profile.
- Chocolate Water Pie: Stir in 2 tablespoons (15 g) of cocoa powder into the dry ingredients for a subtle chocolate twist. I tried this once for a holiday gathering and it vanished fast.
- Gluten-Free: Swap the all-purpose flour for cornstarch or a gluten-free blend. Use a gluten-free pie crust to keep it safe for celiac diets.
- Dairy-Free: Use a vegan crust and skip the butter glaze or replace it with coconut oil brushed on top.
- Fresh Fruit Top: Scatter fresh blueberries or thinly sliced apples on top before baking for a seasonal flair.
One personal favorite variation is adding a teaspoon of almond extract along with vanilla — it gives the pie a cozy, nutty aroma that feels just right on a chilly evening.
Serving & Storage Suggestions
Serve your classic creamy Depression Era water pie at room temperature or slightly chilled, depending on your mood. It pairs beautifully with a dollop of whipped cream or a scoop of vanilla ice cream for extra indulgence.
For a simple presentation, sprinkle a little extra nutmeg or cinnamon on top just before serving. I like to slice it into modest wedges because the custard is rich and satisfying — one slice usually does the trick.
Store any leftovers covered in the fridge for up to 3 days. The pie filling thickens a bit more overnight, which some folks prefer. If you want to reheat it, pop a slice in the microwave for about 15 seconds to take the chill off without losing that creamy texture.
This pie also travels well — I once packed a slice for a picnic alongside a fresh spinach salad and some buttery bread rolls. It was a surprisingly delightful combo, like mixing nostalgia with a fresh twist.
Nutritional Information & Benefits
While water pie is a sweet treat, it’s lighter than many custard pies because water replaces milk or cream. Here’s an approximate breakdown per slice (1/8 of pie):
| Calories | 190 |
|---|---|
| Fat | 7 g |
| Carbohydrates | 28 g |
| Protein | 4 g |
| Sugar | 18 g |
Key ingredients like eggs provide protein and essential nutrients, while the nutmeg adds a dash of antioxidants. The recipe is naturally gluten-containing unless you swap the crust, but it’s low in fat compared to cream-based pies.
From a wellness standpoint, this pie fits well for those who want a nostalgic dessert without overwhelming richness. And if you’re mindful about sugar, you can reduce it slightly without losing the pie’s signature sweetness.
Conclusion
This classic creamy Depression Era water pie recipe is proof that sometimes the simplest ingredients can make the most comforting desserts. It’s a little piece of history that tastes like warmth, thrift, and a touch of magic all baked into one flaky crust.
Feel free to tweak the spices or crust to suit your tastes — I love hearing how people adapt this old recipe for modern kitchens. I hope it finds a spot in your rotation for easy, heartwarming desserts that remind you what cooking is really about.
If you enjoy simple, satisfying treats, you might appreciate recipes like the creamy key lime pie bars or the fresh chia seed pudding parfait for a healthier twist on creamy textures.
Give this pie a try — I’m betting it’ll become a quiet favorite in your kitchen, just like it did in mine.
FAQs about Classic Creamy Depression Era Water Pie
What does water pie taste like?
It tastes like a smooth, sweet custard with a delicate nutmeg aroma. The texture is creamy and silky, surprisingly rich despite using water as the base.
Can I make water pie without a pie crust?
You can bake the filling in a buttered baking dish and serve it like a custard, but the crust adds essential texture and flavor that complements the creamy filling.
Is this recipe dairy-free?
Traditional recipes use butter in the crust and on top, but you can make it dairy-free by using a vegan crust and skipping or substituting the butter with coconut oil.
How long does water pie keep in the fridge?
Stored covered, it keeps well for up to 3 days. The filling firms up after chilling but remains delicious.
Can I add flavors or spices to water pie?
Absolutely! Nutmeg is classic, but cinnamon, cloves, or almond extract all make great additions to customize the flavor.
Pin This Recipe!
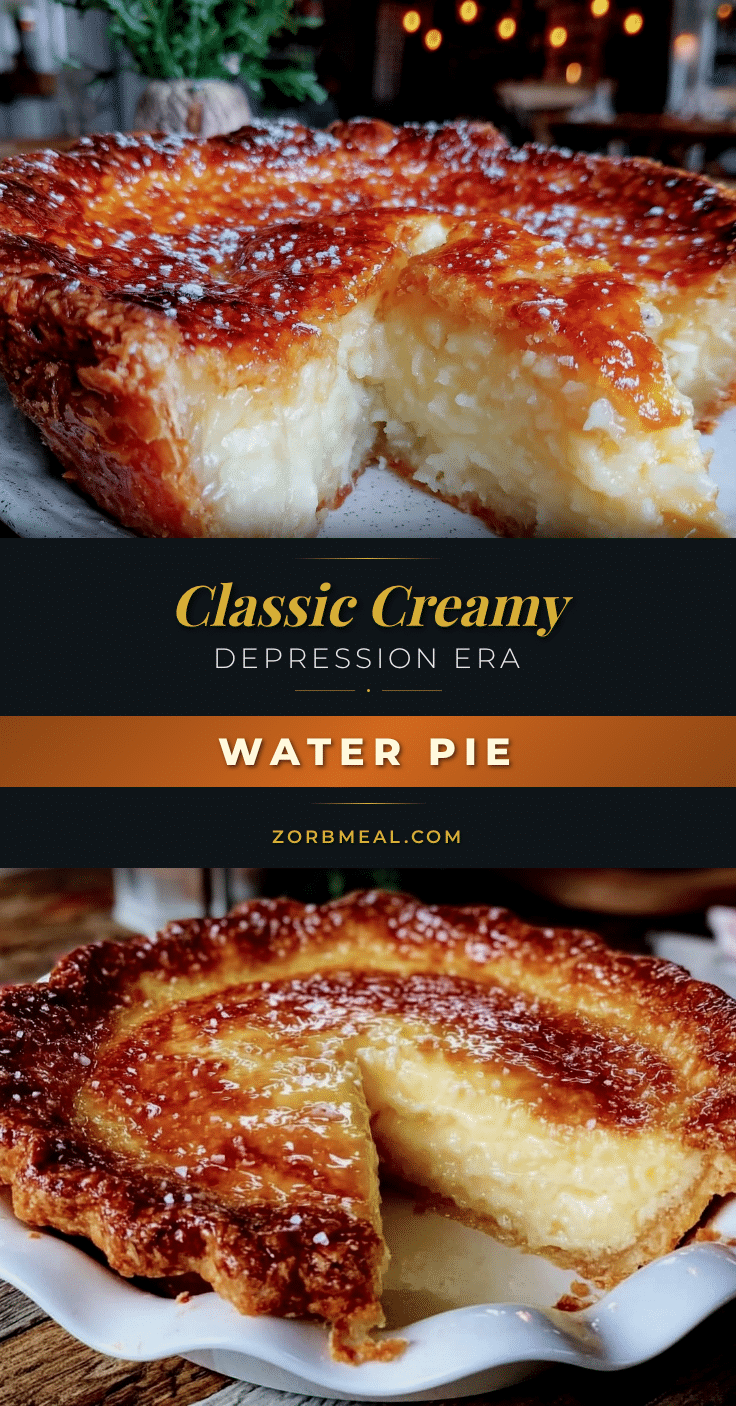
Classic Creamy Depression Era Water Pie

A nostalgic and surprisingly creamy custard pie made primarily with water, eggs, sugar, and a flaky crust. This easy homemade dessert delivers a smooth, luscious texture and comforting flavor with minimal ingredients.
- Prep Time: 15 minutes
- Cook Time: 45 minutes
- Total Time: 1 hour
- Yield: 8 servings 1x
- Category: Dessert
- Cuisine: American
Ingredients
- 1 9-inch unbaked pie crust (homemade or store-bought)
- 2 cups water
- 1 cup granulated sugar
- 2 tablespoons all-purpose flour
- 3 large eggs, beaten
- 1/4 teaspoon salt
- 1/2 teaspoon ground nutmeg
- 1 teaspoon vanilla extract
- 1 tablespoon butter, melted (optional, for brushing on top)
Instructions
- Preheat your oven to 350°F (175°C). Set your 9-inch pie dish aside.
- Prepare the pie crust: roll out if homemade and fit into pie dish, crimp edges; if store-bought, place thawed crust into dish. Prick bottom a few times with a fork.
- In a medium bowl, whisk together sugar, flour, salt, and nutmeg until combined.
- In a separate bowl, lightly beat eggs. Add water and vanilla extract to eggs and mix gently.
- Slowly pour the wet egg mixture into the dry ingredients, whisking continuously to avoid lumps.
- Pour the filling into the prepared pie crust.
- Optional: Brush melted butter over the top of the filling for a golden finish.
- Bake on the middle rack for 45–50 minutes until the filling is set but slightly jiggly in the center and edges are golden brown.
- Remove from oven and let cool at room temperature for at least 2 hours to fully set the filling.
- Slice and serve as is or with whipped cream or cinnamon if desired.
Notes
Use room temperature eggs for a smoother texture. Avoid over-beating eggs to prevent bubbles in the custard. If crust edges brown too quickly, shield with foil. Let the pie cool completely to allow the filling to set properly. Freshly grated nutmeg enhances flavor. Butter brushing on top is optional but recommended for a golden finish. Variations include adding cinnamon, cloves, cocoa powder, or almond extract. Gluten-free and dairy-free adaptations are possible by substituting crust and flour.
Nutrition
- Serving Size: 1 slice (1/8 of pie)
- Calories: 190
- Sugar: 18
- Fat: 7
- Carbohydrates: 28
- Protein: 4
Keywords: water pie, depression era recipe, creamy custard pie, easy dessert, vintage pie, simple ingredients, nostalgic dessert