The last cookie from the batch had been sitting on the counter for nearly an hour. My husband walked in, saw it, and instead of grabbing it, he just stood there looking at it. Then he said, “I’m saving this one for after dinner. Don’t touch it.” That’s when I knew I had finally done it. I had cracked the code on truly chewy brown butter chocolate chip cookies that stayed soft for days, not hours.
Look, I’ve made a lot of cookies in my life. Like, a lot a lot. I’ve followed every famous recipe out there, chilled dough for 72 hours, tried every ratio of brown to white sugar you can imagine. And honestly? Most of them were good. But this one? This one is different. The brown butter adds this nutty, almost caramel-like depth that regular butter just can’t touch. It’s the kind of flavor that makes people close their eyes when they take a bite. Not because they’re being dramatic, but because it genuinely catches them off guard.
These cookies have a crisp, golden edge that gives way to a dense, chewy center. They’re not cakey, they’re not flat, they’re just right. And the best part? You don’t need any fancy ingredients or a stand mixer. Just a pan, a bowl, and a little patience. I’ve made these for potlucks, for tired Tuesday nights, and for when I just needed something warm and familiar. Every single time, someone asks for the recipe. So here it is—the one I keep coming back to, the one that finally made my husband pause mid-bite and say, “Okay, these are the best ones yet.”
Why You’ll Love This Recipe
Let me tell you why these cookies are worth every bit of effort. I’ve tested this recipe more times than I care to count, tweaking the butter temperature, the flour amount, the resting time. What I landed on is a cookie that hits every note just right.
- Incredibly Chewy Texture: The combination of melted brown butter and an extra egg yolk gives these cookies a dense, fudge-like chew that lasts for days. No dry, crumbly cookies here.
- Deep, Nutty Flavor: Browning the butter is a game-changer. It takes about 5 minutes but adds a toasty, caramelized flavor that makes these taste like they came from a fancy bakery.
- Simple Pantry Ingredients: You probably have everything you need right now. Butter, sugar, eggs, flour, chocolate chips. No weird additives or hard-to-find items.
- No Chill Time Required: I know, I know. Some recipes insist on chilling the dough overnight. But these cookies bake up perfectly chewy straight from the mixing bowl. If you want to chill them, go for it, but it’s not necessary.
- Perfect for Any Occasion: These are my go-to for last-minute guests, bake sales, holiday cookie exchanges, or just because it’s Tuesday. They travel well, they freeze beautifully, and they always impress.
What sets this recipe apart is the technique. I’m not just throwing browned butter into a standard cookie dough. I’ve adjusted the sugar ratio, added an extra yolk, and nailed the baking time so the edges are set but the centers stay soft. It’s the kind of recipe you’ll memorize and make for years. Honestly, after one batch, you might never go back to regular chocolate chip cookies again.
What Ingredients You Will Need
This recipe uses simple ingredients, but each one plays a specific role in creating that perfect chewy texture and rich flavor. Here’s what you’ll need and why each ingredient matters.
For the Cookie Dough
- 1 cup (2 sticks) unsalted butter: You’ll brown this, so don’t use salted butter or the salt concentration will be off. I like using Land O’Lakes or Kerrygold for the best flavor.
- 1 ¾ cups (220g) all-purpose flour: Spoon and level your flour, don’t scoop it straight from the bag. Too much flour makes dry cookies. I prefer Gold Medal or King Arthur for consistent results.
- ½ teaspoon baking soda: This helps the cookies spread just enough and gives them a little lift.
- ½ teaspoon salt: Use fine sea salt or table salt. If you’re using kosher salt, increase it to ¾ teaspoon.
- ¾ cup (150g) packed light brown sugar: Brown sugar adds moisture and that deep molasses flavor that pairs so well with browned butter. Don’t skip it.
- ¼ cup (50g) granulated sugar: White sugar helps the cookies spread and adds a bit of crispness to the edges.
- 1 large egg + 1 large egg yolk: The extra yolk is the secret to chewiness. It adds richness and tenderness without making the dough too wet.
- 2 teaspoons vanilla extract: Use pure vanilla extract, not imitation. It makes a real difference in the overall flavor.
- 1 ½ cups (270g) semisweet chocolate chips: I prefer Ghirardelli 60% cacao chips for a good balance of sweetness and deep chocolate flavor. You can also use chopped chocolate bars for bigger puddles of chocolate.
Ingredient Tips & Substitutions
- Butter: You can use salted butter, just reduce the added salt to ¼ teaspoon. The flavor might be slightly less controlled, but it works in a pinch.
- Flour: For a gluten-free option, use a 1:1 gluten-free baking flour blend that contains xanthan gum. I’ve had good luck with Bob’s Red Mill.
- Sugar: You can use all brown sugar for even chewier cookies, but they’ll be darker and slightly more molasses-forward. All white sugar will make them crispier.
- Chocolate Chips: Dark chocolate, milk chocolate, white chocolate, or even butterscotch chips all work. I’ve made these with chopped dark chocolate bars and the puddles of melted chocolate are incredible.
- Egg: For a vegan version, you can try a flax egg (1 tablespoon ground flaxseed + 3 tablespoons water), but the texture will be less chewy. It’s a decent alternative, just not the same.
When I first started making these, I used whatever butter I had in the fridge and scooped flour directly from the bag. The cookies were okay, but not great. Taking the time to brown the butter and measure the flour correctly completely changed the outcome. Trust me on this one.
Equipment Needed
- Medium saucepan: For browning the butter. A light-colored pan is best so you can see the butter change color.
- Large mixing bowl: For combining the wet and dry ingredients.
- Whisk: For mixing the sugars and eggs. A wooden spoon or rubber spatula works too.
- Rubber spatula: For folding in the chocolate chips and scraping the bowl.
- Baking sheets: I use two rimmed baking sheets so I can rotate them in the oven.
- Parchment paper or silicone baking mat: Prevents sticking and helps the cookies bake evenly. I prefer parchment for easy cleanup.
- Cookie scoop or tablespoon: For uniform cookies. I use a 1.5-tablespoon scoop for perfectly sized cookies that bake evenly.
- Cooling rack: Lets the cookies cool without getting soggy on the bottom.
If you don’t have a cookie scoop, just use two spoons to portion the dough. The cookies won’t be perfectly round, but they’ll taste just as good. I’ve used the same cheap baking sheets for years, and they work fine. You don’t need fancy equipment, just a little patience.
Preparation Method
Let’s get to the good part. Follow these steps carefully, and you’ll have the best chewy brown butter chocolate chip cookies of your life.
- Brown the butter: Place the 1 cup of unsalted butter in a medium saucepan over medium heat. Stir occasionally as it melts. The butter will foam, then bubble, then start to turn golden. Watch closely—it goes from browned to burnt quickly. Once you see brown specks forming at the bottom and smell a nutty aroma, remove it from the heat immediately. Pour it into a large mixing bowl to stop the cooking process. Let it cool for 5-10 minutes. It should be warm but not hot when you add the sugars.
- Preheat the oven: Set your oven to 350°F (175°C). Line two baking sheets with parchment paper or silicone mats.
- Mix the dry ingredients: In a small bowl, whisk together 1 ¾ cups all-purpose flour, ½ teaspoon baking soda, and ½ teaspoon salt. Set aside.
- Combine the sugars and butter: Add ¾ cup packed light brown sugar and ¼ cup granulated sugar to the cooled browned butter. Whisk vigorously for about 1 minute until the mixture looks like wet sand and is slightly thickened. No clumps of sugar should remain.
- Add the eggs and vanilla: Crack in 1 large egg and 1 large egg yolk, then add 2 teaspoons vanilla extract. Whisk until the mixture is smooth, pale, and slightly fluffy. This should take about 30 seconds. The mixture will look glossy and have a light caramel color.
- Fold in the dry ingredients: Pour the flour mixture into the wet ingredients. Use a rubber spatula to fold gently until just combined. A few streaks of flour are okay. Overmixing will make the cookies tough.
- Add the chocolate chips: Fold in 1 ½ cups semisweet chocolate chips until evenly distributed. The dough will be thick, slightly sticky, and smell amazing. Don’t eat it all before baking.
- Portion the dough: Use a 1.5-tablespoon cookie scoop or a tablespoon to drop rounded balls of dough onto the prepared baking sheets. Space them about 2 inches apart. You should get about 18-20 cookies. If you want bakery-style cookies, use a 3-tablespoon scoop for larger cookies and bake for 12-14 minutes.
- Bake: Bake one sheet at a time on the middle rack for 10-12 minutes. The edges should be golden brown and set, but the centers will look slightly puffy and underdone. That’s exactly what you want. The cookies will continue to set as they cool.
- Cool: Let the cookies rest on the baking sheet for 5 minutes. This allows them to firm up without becoming hard. Then transfer them to a wire rack to cool completely. Or, you know, eat one warm. I won’t tell.
One thing I learned the hard way: don’t overbake these. The first time I made them, I left them in an extra minute because they looked too soft. They turned out crispy, not chewy. Trust the visual cues—golden edges, puffy centers—and pull them out. They’ll be perfect.
Cooking Tips & Techniques
I’ve made this recipe more times than I can count, and I’ve learned a few things along the way. Here are my best tips for getting perfect chewy brown butter chocolate chip cookies every single time.
Don’t rush the brown butter. I know it’s tempting to crank up the heat to get it done faster, but medium heat is your friend. High heat burns the milk solids, and then you have to start over. I did that once, and the kitchen smelled like burnt popcorn for hours. Keep it on medium, stir occasionally, and watch for that amber color and nutty smell.
Let the butter cool properly. If you add the sugars to hot butter, the sugar will melt and your cookies will spread into flat, greasy puddles. If you add them to cold butter, the mixture won’t combine well. Aim for warm but not hot—about 5-10 minutes of cooling after browning. You should be able to touch the bowl comfortably.
Measure flour correctly. This is the number one mistake people make. Scooping flour directly from the bag packs it down, and you end up with up to 25% more flour than the recipe calls for. Use a spoon to fluff the flour, then spoon it into your measuring cup and level it off with a knife. It takes an extra 10 seconds and makes a huge difference.
Use room temperature eggs. Cold eggs can seize the butter and make the dough lumpy. If you forgot to take them out of the fridge, place them in a bowl of warm water for 5 minutes. That’s enough to bring them to room temperature.
Chill if you have time, but it’s optional. I said this recipe doesn’t require chilling, and it doesn’t. But if you chill the dough for 30 minutes to an hour, the cookies will be slightly thicker and have a more developed flavor. I often make the dough, scoop it onto a baking sheet, and pop it in the fridge while the oven preheats. It’s a happy medium.
Rotate your baking sheet halfway through. Ovens have hot spots, and rotating the sheet ensures even baking. I rotate mine at the 6-minute mark. It’s a small step that prevents burnt edges and underdone centers.
Flatten the dough balls slightly. If you prefer slightly flatter cookies, press down on the dough balls with your palm before baking. I like a thicker cookie, so I leave them as is. It’s totally up to you.
Variations & Adaptations
One of the best things about this recipe is how versatile it is. I’ve tried several variations over the years, and they’ve all been delicious. Here are some of my favorites.
Chocolate Lover’s Dream: Swap half the semisweet chips for dark chocolate chunks and add 2 tablespoons of cocoa powder to the flour mixture. The cookies will be darker, richer, and intensely chocolatey. I made this version for a friend who claims to be a chocolate snob, and she asked for the recipe immediately.
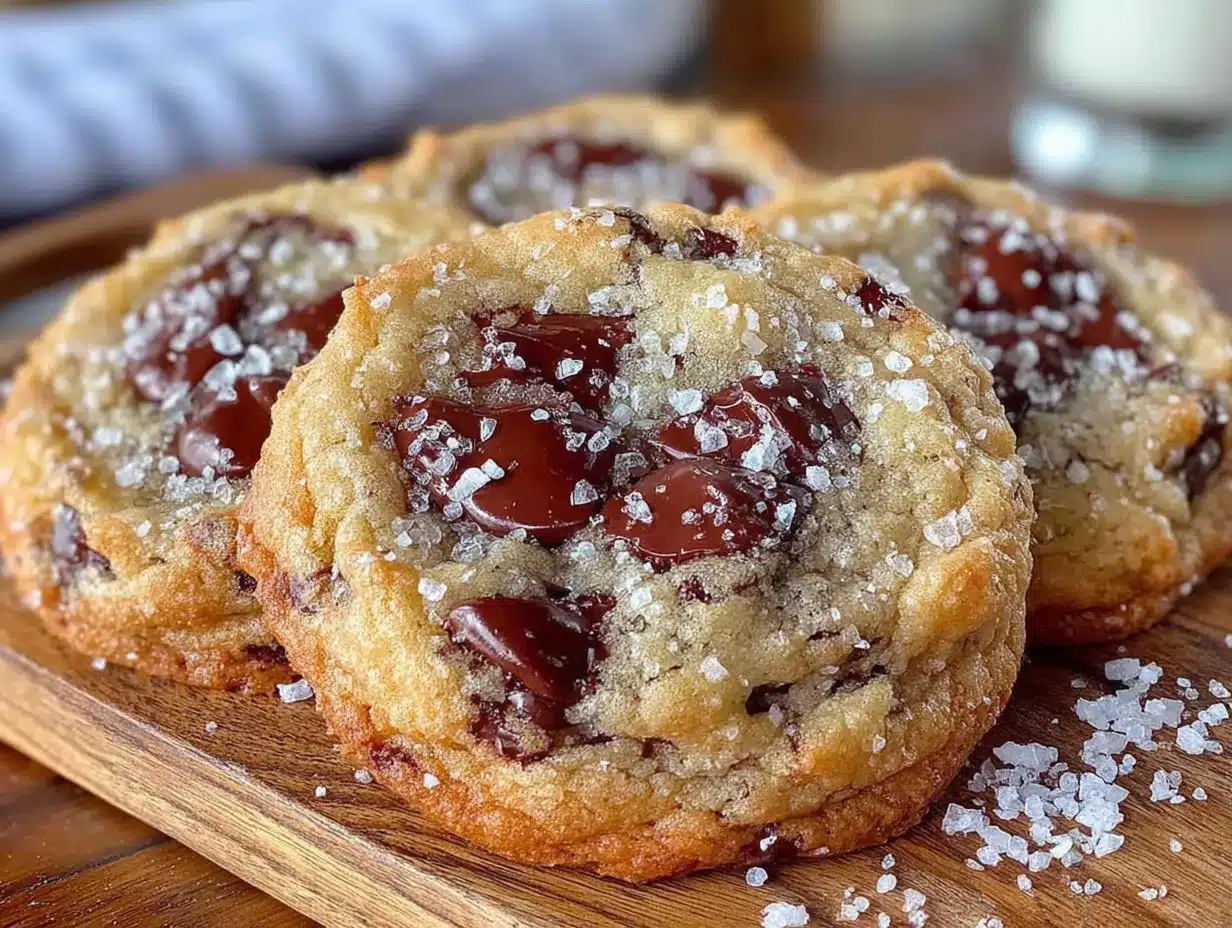
Sea Salt Finish: Sprinkle a pinch of flaky sea salt on top of each cookie right after they come out of the oven. The salt cuts through the sweetness and enhances the nutty brown butter flavor. It’s a simple trick that makes these cookies taste like they came from a high-end bakery. I use Maldon sea salt for this.
Nutty Crunch: Add ½ cup of toasted pecans or walnuts along with the chocolate chips. Toast the nuts in a dry pan for 3-4 minutes until fragrant, then chop them roughly. The crunch adds a lovely texture contrast to the chewy cookie. I prefer pecans because they’re buttery and pair well with the brown butter.
Gluten-Free Version: Substitute the all-purpose flour with a 1:1 gluten-free baking flour blend. I’ve used Bob’s Red Mill 1:1 Baking Flour and King Arthur Measure for Measure with great results. The cookies will be slightly more delicate, but still chewy and delicious. Just don’t overmix the dough.
Double Chocolate Chip: Use white chocolate chips and dark chocolate chips together. The combination of sweet white chocolate and rich dark chocolate is irresistible. I made these for a holiday party, and they disappeared faster than anything else on the table.
Mint Chocolate Chip: Add ½ teaspoon of peppermint extract along with the vanilla extract. Use dark chocolate chips for a refreshing, after-dinner style cookie. This is perfect for the holiday season or whenever you’re craving something cool and minty.
Serving & Storage Suggestions
These cookies are best served warm, when the chocolate is still slightly melty and the edges are crisp. But they’re also fantastic at room temperature, and they stay chewy for days if stored properly.
Serving Temperature: Serve warm for the ultimate experience. Pop a cooled cookie in the microwave for 10-15 seconds, and it’ll taste fresh from the oven. For a special treat, serve with a glass of cold milk, a scoop of vanilla ice cream, or a cup of strong coffee.
Presentation Ideas: Stack the cookies on a rustic wooden board or a white platter for a beautiful presentation. Dust with a little powdered sugar or drizzle with melted chocolate for extra flair. I like to arrange them on a cake stand for parties—they look impressive with almost no effort.
Complementary Dishes: These cookies pair beautifully with a variety of desserts and drinks. Serve them alongside a creamy vanilla bean layer cake for a dessert spread, or offer them with a strawberry shortcake layer cake for a fruity contrast. For a simpler option, a bowl of fresh berries and whipped cream is always a hit. If you’re hosting a summer party, these cookies are fantastic alongside a watermelon feta mint salad for a sweet-savory balance.
Storage Instructions: Store the cookies in an airtight container at room temperature for up to 5 days. Place a slice of bread in the container—it absorbs excess moisture and keeps the cookies soft. Replace the bread every other day if you’re storing them for longer.
Freezing Instructions: You can freeze the baked cookies or the raw dough. For baked cookies, let them cool completely, then layer them between sheets of parchment paper in a freezer-safe container. They’ll keep for up to 3 months. Thaw at room temperature or warm in the microwave. For raw dough, scoop the dough balls onto a baking sheet and freeze until solid, then transfer to a freezer bag. Bake directly from frozen, adding 1-2 minutes to the baking time.
Flavor Development: These cookies actually taste better the next day. The flavors meld together, and the texture becomes even chewier. I often make a batch the night before I need them, and they’re always a hit. Just store them properly, and they’ll stay fresh and delicious.
Nutritional Information & Benefits
I’m not going to pretend these cookies are health food, but they’re made with real ingredients, and that counts for something. Here’s a rough estimate of the nutritional values per cookie (based on 20 cookies).
| Nutrient | Amount per Cookie |
|---|---|
| Calories | 185 |
| Total Fat | 11g |
| Saturated Fat | 7g |
| Cholesterol | 35mg |
| Sodium | 115mg |
| Total Carbohydrates | 22g |
| Dietary Fiber | 1g |
| Sugars | 14g |
| Protein | 2g |
Health Benefits: While these cookies are a treat, they do offer some nutritional value. The brown butter provides vitamin A and healthy fats, while the dark chocolate contains antioxidants and flavonoids that support heart health. The eggs add protein and essential amino acids. Of course, these benefits are best enjoyed in moderation.
Dietary Considerations: This recipe contains gluten, dairy, and eggs, so it’s not suitable for those with celiac disease, lactose intolerance, or egg allergies. For a gluten-free version, use a high-quality 1:1 gluten-free flour blend. For a dairy-free version, substitute the butter with a plant-based butter that’s suitable for browning, like Miyoko’s or Country Crock Plant Butter. For an egg-free version, use a flax egg, but the texture will be less chewy.
Allergen Information: This recipe contains wheat (gluten), dairy (butter), and eggs. It may also contain traces of nuts if you use the nutty variation. Always check your chocolate chips for potential cross-contamination if you have severe allergies.
Personal Wellness Perspective: I believe in enjoying food without guilt. These cookies are a celebration of simple, real ingredients. I make them when I want to feel cozy, when I want to share something special with friends, or when I just need a little sweetness in my day. Life is too short to skip dessert, and these cookies are worth every single calorie.
Conclusion
These chewy brown butter chocolate chip cookies are everything I want in a cookie—rich, nutty, perfectly chewy, and loaded with melty chocolate. They’re the kind of cookies that make you close your eyes after the first bite, the kind that disappear before you even sit down, the kind that people text you about the next day asking for the recipe.
I’ve made dozens of cookie recipes over the years, and this one is my absolute favorite. It’s simple enough for a beginner, but the brown butter technique adds a layer of sophistication that impresses even the most experienced bakers. Whether you’re baking for a holiday party, a bake sale, or just because it’s Tuesday, these cookies never disappoint.
I’d love to hear how they turn out for you. Did you try any of the variations? Did you add a sprinkle of sea salt? Did you eat three before they even cooled? (No judgment here.) Drop a comment below and let me know. And if you’re looking for more dessert inspiration, you might enjoy my chocolate espresso bundt cake or my lemon raspberry pound cake for another sweet treat.
Happy baking, friends. I hope these cookies bring you as much joy as they’ve brought me.
Frequently Asked Questions
Why are my cookies flat?
Flat cookies usually mean the butter was too warm when you added the sugars, or you didn’t use enough flour. Make sure your browned butter has cooled for at least 5-10 minutes before mixing. Also, check your flour measurement—spoon and level it, don’t scoop directly from the bag.
Can I use salted butter instead of unsalted?
Yes, you can. Just reduce the added salt in the recipe to ¼ teaspoon. The cookies will still be delicious, though the salt level might be slightly less controlled. I prefer unsalted butter so I can control the salt myself, but salted works in a pinch.
How do I get evenly sized cookies?
Use a cookie scoop. I use a 1.5-tablespoon scoop for standard cookies and a 3-tablespoon scoop for larger, bakery-style cookies. If you don’t have a scoop, use two spoons to portion the dough, then roll the dough balls in your hands to make them round and uniform.
Can I make the dough ahead of time?
Absolutely. You can refrigerate the dough for up to 3 days or freeze it for up to 3 months. If refrigerating, let the dough sit at room temperature for 10-15 minutes before scooping and baking. If freezing, scoop the dough into balls, freeze them on a baking sheet, then transfer to a freezer bag. Bake directly from frozen, adding 1-2 minutes to the baking time.
Why did my brown butter burn?
Brown butter burns when the heat is too high or you leave it unattended. Always use medium heat and stir constantly once the butter starts to foam. The process takes about 5-8 minutes from start to finish. As soon as you see brown specks and smell a nutty aroma, remove it from the heat immediately. If it smells burnt or looks dark brown, it’s overdone, and you’ll need to start over.
Pin This Recipe!
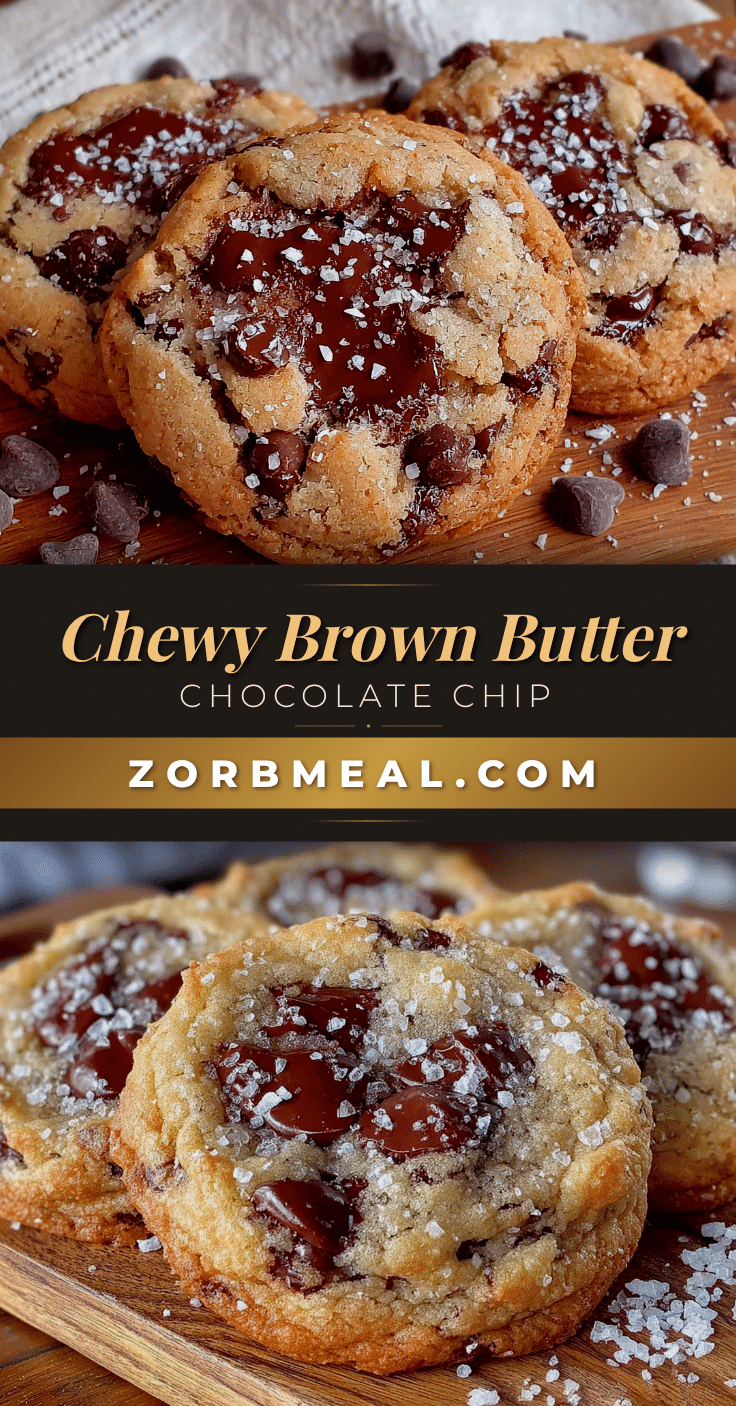
Chewy Brown Butter Chocolate Chip Cookies: Easy Homemade Recipe
These chewy brown butter chocolate chip cookies have a crisp, golden edge and a dense, fudge-like center. The brown butter adds a nutty, caramel-like depth that makes them irresistible, and they stay soft for days without any chilling required.
- Prep Time: 15 minutes
- Cook Time: 10-12 minutes
- Total Time: 25-27 minutes
- Yield: 18-20 cookies 1x
- Category: Dessert
- Cuisine: American
Ingredients
- 1 cup (2 sticks) unsalted butter
- 1 ¾ cups (220g) all-purpose flour
- ½ teaspoon baking soda
- ½ teaspoon salt
- ¾ cup (150g) packed light brown sugar
- ¼ cup (50g) granulated sugar
- 1 large egg + 1 large egg yolk
- 2 teaspoons vanilla extract
- 1 ½ cups (270g) semisweet chocolate chips
Instructions
- Brown the butter: Place the 1 cup of unsalted butter in a medium saucepan over medium heat. Stir occasionally as it melts. The butter will foam, then bubble, then start to turn golden. Watch closely—it goes from browned to burnt quickly. Once you see brown specks forming at the bottom and smell a nutty aroma, remove it from the heat immediately. Pour it into a large mixing bowl to stop the cooking process. Let it cool for 5-10 minutes. It should be warm but not hot when you add the sugars.
- Preheat the oven: Set your oven to 350°F (175°C). Line two baking sheets with parchment paper or silicone mats.
- Mix the dry ingredients: In a small bowl, whisk together 1 ¾ cups all-purpose flour, ½ teaspoon baking soda, and ½ teaspoon salt. Set aside.
- Combine the sugars and butter: Add ¾ cup packed light brown sugar and ¼ cup granulated sugar to the cooled browned butter. Whisk vigorously for about 1 minute until the mixture looks like wet sand and is slightly thickened. No clumps of sugar should remain.
- Add the eggs and vanilla: Crack in 1 large egg and 1 large egg yolk, then add 2 teaspoons vanilla extract. Whisk until the mixture is smooth, pale, and slightly fluffy. This should take about 30 seconds. The mixture will look glossy and have a light caramel color.
- Fold in the dry ingredients: Pour the flour mixture into the wet ingredients. Use a rubber spatula to fold gently until just combined. A few streaks of flour are okay. Overmixing will make the cookies tough.
- Add the chocolate chips: Fold in 1 ½ cups semisweet chocolate chips until evenly distributed. The dough will be thick, slightly sticky, and smell amazing.
- Portion the dough: Use a 1.5-tablespoon cookie scoop or a tablespoon to drop rounded balls of dough onto the prepared baking sheets. Space them about 2 inches apart. You should get about 18-20 cookies. If you want bakery-style cookies, use a 3-tablespoon scoop for larger cookies and bake for 12-14 minutes.
- Bake: Bake one sheet at a time on the middle rack for 10-12 minutes. The edges should be golden brown and set, but the centers will look slightly puffy and underdone. That’s exactly what you want. The cookies will continue to set as they cool.
- Cool: Let the cookies rest on the baking sheet for 5 minutes. This allows them to firm up without becoming hard. Then transfer them to a wire rack to cool completely.
Notes
Don’t overbake the cookies; pull them out when edges are golden and centers are puffy. For best results, let the browned butter cool for 5-10 minutes before adding sugars. Measure flour by spooning and leveling to avoid dry cookies. The dough can be refrigerated for up to 3 days or frozen for up to 3 months.
Nutrition
- Serving Size: 1 cookie
- Calories: 185
- Sugar: 14
- Sodium: 115
- Fat: 11
- Saturated Fat: 7
- Carbohydrates: 22
- Fiber: 1
- Protein: 2
Keywords: chewy chocolate chip cookies, brown butter cookies, easy cookie recipe, homemade cookies, no chill cookies


