My sister-in-law, Jen, wasn’t trying to throw a party that Tuesday afternoon. I’d stopped by to drop off a casserole dish she’d borrowed, and the smell of fresh dill hit me before I even got through the back door. She was standing at her kitchen counter, half-listening to a podcast, casually arranging cucumber slices into what I’d soon learn were meant to be monster teeth. “Oh, it’s just for the kids’ soccer snack,” she said when I asked, waving her knife like it was no big deal. Meanwhile, I was staring at this incredible spread—a veggie tray that looked like it had crawled straight out of a mildly terrifying, very delicious garden. She didn’t even have a recipe written down.
Honestly, that moment stuck with me. Here was someone making a snack that was both genuinely spooky and genuinely healthy, without any fuss or stress. She wasn’t trying to impress anyone. She was just… making something fun for a Tuesday. I mean, maybe you’ve been there—you want to bring something to a potluck or a Halloween party, but you’re tired of the same old bags of chips and store-bought cookies. You want to offer something that shows you care, but you also don’t want to spend three days in the kitchen. This veggie tray, with its creepy-crawly veggie “fingers” and “guts,” was the answer. It looked like a masterpiece, but Jen made it like it was nothing. And that’s the kind of recipe you keep coming back to.
So, I asked if I could watch. She laughed, handed me a head of cauliflower, and said, “Just break it into pieces that look like brains.” And that was that. Since that afternoon, I’ve made this Best Spooky Halloween Veggie Tray with Ranch Dip for every fall gathering, every spooky movie night, and every time I need a dish that disappears before the main course even hits the table. It’s the perfect centerpiece for a Halloween party—it’s colorful, it’s fun, and it gets people talking. Plus, you can prep most of it the day before, which, let’s be honest, is the real magic of hosting.
Why You’ll Love This Recipe
This isn’t just another veggie platter. This is the veggie tray that steals the show at any Halloween gathering, from a kid’s classroom party to a grown-up costume bash. I’ve tested this recipe at family dinners, neighborhood potlucks, and even a work Halloween contest (we won, by the way). Here’s why it’s become my go-to:
- No Cooking Required: You don’t even need to turn on the oven. This is a completely no-bake, no-stove recipe. Perfect for busy hosts or when the kitchen is already chaotic with other dishes.
- Simple, Real Ingredients: We’re using fresh vegetables and a homemade ranch dip made from scratch. No weird preservatives, no mystery powders. Just good, honest food that tastes amazing.
- Perfect for a Crowd: This tray is designed to feed a hungry group of ghosts and goblins. It’s easy to double or triple the recipe for a big party, and it scales down just as nicely for a small family movie night.
- Incredibly Customizable: You can swap out veggies based on what’s in season or what your family likes. The “spooky” shapes are easy to adapt—think skeleton bones, monster claws, or witch’s broomsticks.
- Always a Crowd-Pleaser: I have never, and I mean never, brought this anywhere without it being completely devoured. Even the pickiest eaters can’t resist dipping a “severed finger” into creamy ranch.
- Stress-Free Hosting: You can prep everything the night before. Just assemble the tray right before your guests arrive. It takes ten minutes, tops, and you look like a Halloween hero.
What makes this recipe different from every other veggie tray you’ve seen? It’s the attention to detail in the presentation. We’re not just throwing carrots and celery on a plate. We’re creating little scenes—a “graveyard” of broccoli trees, a “pond” of spinach dip, “worms” made from zucchini ribbons. It’s the kind of thing that makes guests stop and take a picture before they even grab a plate. And that homemade ranch? It’s so much better than the bottled stuff. It’s creamy, tangy, and packed with fresh herbs. Once you make it yourself, you’ll never go back.
What Ingredients You Will Need
This recipe uses simple, fresh ingredients to create a show-stopping platter that’s as fun to look at as it is to eat. Most of these are pantry staples or easy to find at any grocery store. The key is to choose firm, colorful vegetables for the best visual impact.
For the Spooky Veggie Tray
- 1 large head of broccoli (cut into small florets; these become “trees” or “monster brains”)
- 1 large head of cauliflower (cut into florets; perfect for “ghostly clouds” or “skeleton bones”)
- 1 bunch of celery (cut into 4-inch sticks; these make excellent “skeleton fingers” or “witch’s broomsticks”)
- 1 pound of baby carrots (or regular carrots, peeled and cut into sticks; they look like “orange monster claws”)
- 1 large red bell pepper (sliced into strips; use for “bloodshot veins” or “devil’s tongues”)
- 1 large yellow bell pepper (sliced into strips; adds a pop of color, like “zombie skin”)
- 1 English cucumber (sliced into rounds or cut into spears; cucumber rounds look like “monster eyes” if you add a dab of cream cheese and an olive slice)
- 1 pint of cherry or grape tomatoes (these are perfect for “goblin noses” or “spider eggs”)
- 1 cup of snap peas or snow peas (these look like “little green claws” or “alien fingers”)
- Optional for extra spookiness: Black olives (for “spider bodies”), radishes (carved into “little teeth”), and purple cabbage leaves (for a “witch’s hair” effect)
For the Easy Homemade Ranch Dip
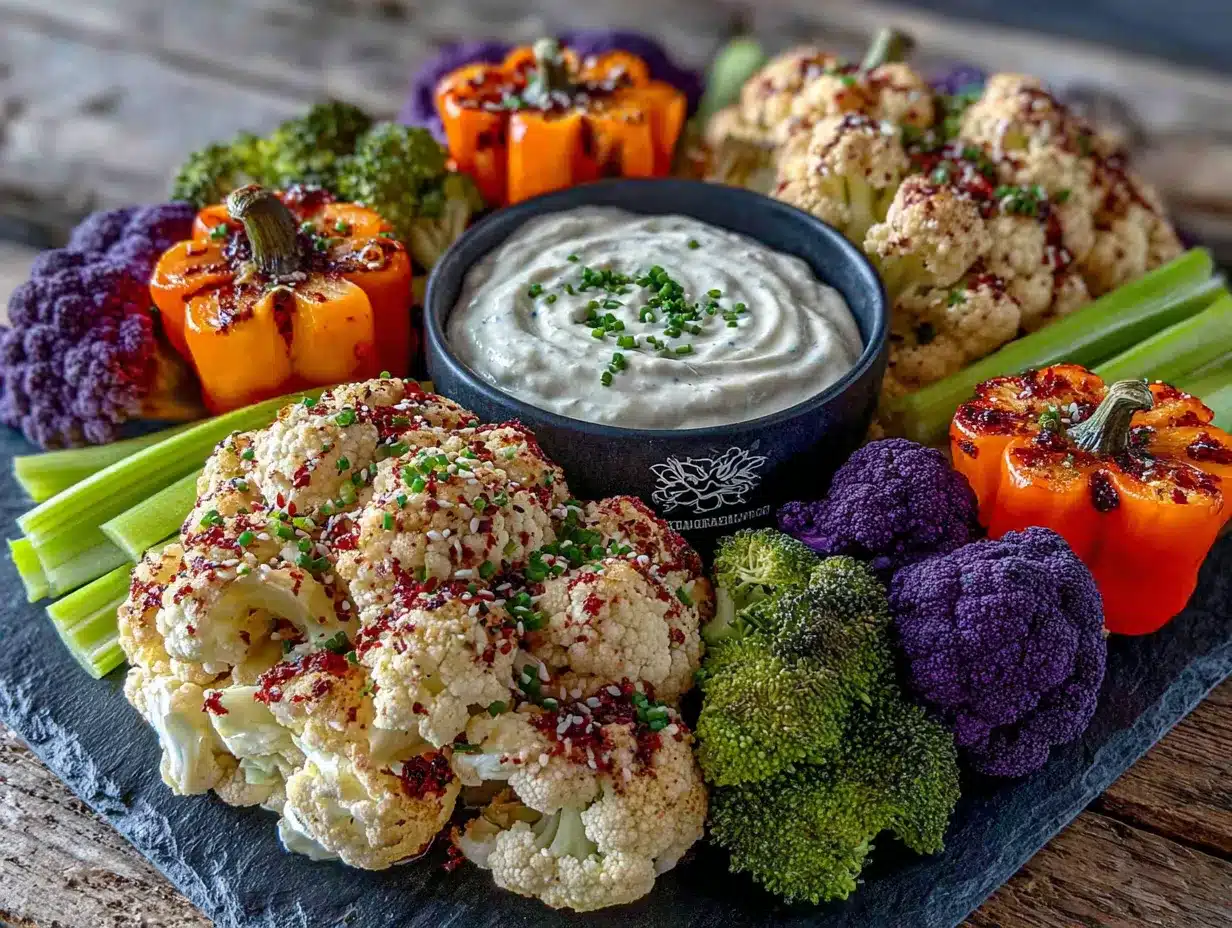
- 1 cup of full-fat sour cream (I prefer Daisy brand for its thick, creamy texture; Greek yogurt works as a lighter substitute, but the dip won’t be as rich)
- 1/2 cup of mayonnaise (Hellmann’s or Duke’s are my go-to; this adds the classic ranch creaminess)
- 1/2 cup of buttermilk (this is the secret to authentic ranch flavor; if you don’t have buttermilk, add 1 tablespoon of lemon juice to 1/2 cup of regular milk and let it sit for 5 minutes)
- 1 tablespoon of fresh dill (finely chopped; this is non-negotiable for the best flavor. Dried dill works in a pinch, but fresh is miles better)
- 1 tablespoon of fresh parsley (finely chopped; adds a fresh, grassy note)
- 1 teaspoon of fresh chives (finely chopped; or use 1/2 teaspoon of dried chives)
- 1 teaspoon of garlic powder (not garlic salt; we’ll add salt separately)
- 1 teaspoon of onion powder (this gives the dip that classic savory depth)
- 1/2 teaspoon of salt (or to taste; I use fine sea salt)
- 1/4 teaspoon of black pepper (freshly ground is best)
- 1/2 teaspoon of sugar (optional, but it balances the tanginess perfectly)
Ingredient Selection Tips: For the vegetables, look for ones that are firm and brightly colored. Avoid any that are limp or have soft spots. For the dip, using full-fat dairy products makes a huge difference in texture. If you’re dairy-free, you can use a plant-based sour cream and mayonnaise, but the flavor will be slightly different. I’ve tested this with Kite Hill’s sour cream and it works well, just add an extra pinch of salt.
Equipment Needed
You don’t need any fancy gadgets for this recipe, which is part of its charm. Here’s what you’ll need to pull this together:
- A large serving platter or cutting board (at least 16 inches wide, to give your spooky scene room to breathe. A wooden board or a white platter works best for contrast)
- A sharp chef’s knife (for cutting vegetables cleanly; a dull knife will crush them)
- A cutting board (dedicated for veggies)
- A small mixing bowl (for the ranch dip)
- A whisk or a fork (for mixing the dip)
- A small serving bowl or a hollowed-out pumpkin (for the dip; a mini pumpkin looks adorable and festive)
- Measuring cups and spoons
- Paper towels (for drying the veggies after washing; wet veggies make the dip watery)
Budget-Friendly Options: Don’t have a fancy wooden board? A large baking sheet covered in parchment paper works perfectly. No mini pumpkin? Any small bowl will do. You can even use a hollowed-out bell pepper as a dip bowl for extra color. I once used a clean, empty sour cream container and wrapped it in black construction paper—it looked like a little cauldron!
Preparation Method
This is the fun part. We’re going to turn ordinary vegetables into a Halloween masterpiece. Take your time with the shapes—they don’t need to be perfect. In fact, the slightly uneven, creepy-looking ones are the best.
- Make the Ranch Dip (5 minutes): In your small mixing bowl, combine the sour cream, mayonnaise, and buttermilk. Whisk until smooth. Add the fresh dill, parsley, chives, garlic powder, onion powder, salt, pepper, and sugar (if using). Whisk again until everything is well incorporated. Taste it. Does it need more salt? More dill? Adjust to your liking. Cover the bowl with plastic wrap and refrigerate for at least 30 minutes. This resting time is crucial—it lets the flavors meld together. The dip will thicken slightly as it chills.
- Prep the Vegetables (15-20 minutes): Wash all your vegetables thoroughly under cold running water. Pat them completely dry with paper towels. Wet veggies will make your dip watery and your tray soggy. Now, let’s get creative with the cuts:
- For “Monster Fingers”: Cut the celery into 4-inch sticks. Using a small knife, carve a shallow indent near one end of each stick to look like a knuckle. You can even add a sliver of almond or a small piece of red pepper at the tip to look like a fingernail.
- For “Skeleton Bones”: Cut the cauliflower into large florets. They naturally look like little bones or skulls. Leave them as is.
- For “Spider Eggs”: Leave the cherry tomatoes whole. If you want to be extra creepy, use a straw to poke a small hole in each one and insert a sliver of black olive to look like a spider leg.
- For “Witch’s Broomsticks”: Cut the cucumber into spears. Make small, shallow cuts along one end to create a bristle effect.
- For “Bloodshot Eyes”: Cut the cucumber into thick rounds. Use a small spoon to scoop out a tiny divot in the center of each round. Fill the divot with a dab of cream cheese, then press a slice of black olive on top to create the “pupil.”
- For “Monster Claws”: Leave the baby carrots whole, or cut regular carrots into 3-inch sticks. They already look a bit claw-like.
- Assemble the Tray (10 minutes): Take your large platter or cutting board. Place your small bowl of ranch dip in the center. This is the “cauldron” or the “center of the graveyard.” Now, start arranging your vegetables around it. Don’t just pile them on—create little scenes. Arrange the broccoli florets in a cluster to look like a haunted forest. Place the cauliflower “bones” in a line to look like a skeleton. Group the “monster fingers” together, pointing towards the dip. I like to leave a little empty space here and there, like a path through the graveyard. It makes the tray look intentional and artistic.
- Add the Final Spooky Touches (5 minutes): This is where you go from “veggie tray” to “Halloween centerpiece.” Scatter the cherry tomato “spider eggs” around the edges. Tuck the snap peas in between the broccoli trees. If you’re using the black olives, place a few on the tray to look like spiders. You can even use a toothpick to attach two olive halves to a single grape tomato to make a tiny spider body. For an extra creepy effect, use a small, clean paintbrush to lightly dust the edges of the cauliflower with a mixture of paprika and a pinch of black pepper—it gives them a “dirty bone” look.
- Serve Immediately or Refrigerate: If you’re serving right away, great! If not, cover the entire tray loosely with plastic wrap and refrigerate for up to 4 hours. Do not add the dip to the tray until just before serving, or it will get watery. When you’re ready to serve, give the dip a quick stir and place it back in the center.
Cooking Tips & Techniques
I’ve made this tray about a dozen times now, and I’ve learned a few things the hard way. Here are my best tips for making yours look like a pro did it:
- Dry Your Veggies: I cannot stress this enough. If your vegetables are wet, the dip will become watery and the tray will look sad. After washing, lay them out on a clean kitchen towel and let them air dry for a few minutes. Then pat them down with paper towels.
- Use a “Dip Well”: Instead of just putting the bowl in the center, try using a small, hollowed-out pumpkin or a bell pepper as your dip bowl. It adds height and visual interest to the tray. Just make sure the pumpkin is stable and won’t tip over.
- Prep the Night Before: This is a lifesaver for parties. You can wash, cut, and store all the vegetables in separate zip-top bags in the refrigerator. Make the ranch dip and store it in a jar. The next day, all you have to do is arrange everything on the platter. It takes ten minutes, tops.
- Don’t Overcrowd the Tray: It’s tempting to pile everything on, but a crowded tray looks messy. Leave a little negative space around your vegetable clusters. It makes the tray look more intentional and elegant.
- My Biggest Failure: The first time I made this, I used pre-cut, bagged vegetables to save time. They were soggy and limp. The carrots were dry, and the broccoli was already starting to turn yellow. Never again. Fresh, whole vegetables are non-negotiable for this recipe. They have the best texture and the brightest color.
- Keep the Dip Cold: If you’re serving this outdoors or at a party that lasts a few hours, place the dip bowl in a smaller bowl filled with ice. This keeps the ranch at a safe temperature and prevents it from separating.
Variations & Adaptations
One of the best things about this recipe is how easy it is to change up. Here are a few ways I’ve adapted it for different occasions and dietary needs:
- The “Nightmare Before Christmas” Twist: For a holiday party, I swap the red and yellow peppers for green and white ones. I add pomegranate seeds as “blood drops” and use star-shaped cookie cutters to cut cucumber slices into stars. It’s festive and creepy at the same time.
- The “Dairy-Free” Version: My cousin is lactose intolerant, so I’ve made this for her using a dairy-free sour cream (Kite Hill is my favorite) and a vegan mayonnaise (Follow Your Heart). The dip is still creamy, but it’s a bit thinner. To thicken it up, I add an extra tablespoon of the dairy-free sour cream and let it sit in the fridge for an hour.
- The “Low-Carb” Adaptation: If you’re watching your carbs, swap the carrots for more cucumber and bell pepper. You can also add jicama sticks, which are crunchy and have a very mild flavor. They look great as “alien bones.”
- The “Kid-Friendly” Version: For a classroom party, I skip the “bloodshot eyes” and the “monster fingers” (some kids find them too realistic). Instead, I use cookie cutters to cut bell peppers into bat and ghost shapes. I also add a small bowl of pretzel sticks for dipping.
- The “Spicy” Ranch Dip: If you like a kick, add 1/2 teaspoon of cayenne pepper or a minced jalapeño to the ranch dip. It gives the dip a nice, slow burn that pairs perfectly with the cool, crisp vegetables.
Serving & Storage Suggestions
This tray is best served cold, straight from the refrigerator. The vegetables are at their crispiest, and the dip is thick and flavorful. When you’re ready to serve, take the tray out of the fridge and let it sit at room temperature for about 10 minutes. This takes the chill off the vegetables without making them limp.
What to Serve Alongside: This veggie tray is a star on its own, but it pairs beautifully with other finger foods. I love to serve it next to a bowl of popcorn “spider webs” (popcorn drizzled with white chocolate) and a plate of “mummy” hot dogs (pigs in a blanket with little mustard eyes). For a heartier spread, add a batch of my loaded potato skins—they’re always a hit at Halloween parties.
Storage: If you have leftovers (which is rare, but it happens), separate the vegetables from the dip. Store the vegetables in an airtight container in the refrigerator for up to 2 days. They will lose some of their crunch, but they’re still good for snacking. Store the ranch dip in a sealed jar in the refrigerator for up to 5 days. The flavor actually gets better after a day or two.
Reheating: You don’t reheat a veggie tray! If the dip has been sitting out for more than 2 hours, discard it. The vegetables can be refreshed by soaking them in ice water for 10 minutes, then patting them dry again.
Nutritional Information & Benefits
Let’s be real—this is a vegetable platter with a creamy dip, so it’s a healthier option for a Halloween party. But here’s a rough estimate per serving (about 1 cup of veggies with 2 tablespoons of dip):
- Calories: ~150-180
- Fat: 10-12g (mostly from the dip)
- Carbohydrates: 12-15g
- Fiber: 4-5g
- Protein: 3-4g
- Vitamin A: 120% of your daily value (thanks to the carrots!)
- Vitamin C: 80% of your daily value (from the bell peppers and broccoli)
Health Benefits: This tray is packed with fiber, which is great for digestion. The broccoli and cauliflower are cruciferous vegetables, known for their cancer-fighting properties. The bell peppers are loaded with vitamin C, which supports your immune system (perfect for cold and flu season). And the homemade ranch dip, while indulgent, uses real ingredients without the preservatives found in store-bought dressings.
Dietary Considerations: This recipe is naturally gluten-free and nut-free. For a dairy-free version, use the substitutions I mentioned above. It’s also vegetarian and can be made vegan with a few swaps.
Conclusion
This Best Spooky Halloween Veggie Tray with Ranch Dip has become my secret weapon for fall entertaining. It’s the dish that makes people stop, laugh, and then reach for another “monster finger.” It’s healthy enough that you don’t feel guilty going back for seconds, and it’s fun enough that even the kids forget they’re eating vegetables. I love that it takes the pressure off—you don’t have to be a master chef or a skilled artist to make something that looks incredible. You just need a sharp knife, a little bit of imagination, and a willingness to have fun with your food.
I hope you give this a try for your next Halloween gathering. Don’t be afraid to make it your own—swap in your favorite veggies, change up the dip, or create a whole new spooky scene. If you do make it, I’d love to see it! Leave a comment below and tell me what your favorite “spooky” vegetable shape was. Did you go for the skeleton bones? The spider eggs? Or did you come up with something completely new? Share your photos and tag me—I can’t wait to see what you create. Happy Halloween, and happy snacking!
Frequently Asked Questions
Can I make this veggie tray a day ahead of time?
Absolutely! In fact, I recommend it. You can wash, cut, and store all the vegetables in separate zip-top bags in the refrigerator. Make the ranch dip and keep it in a sealed jar. The next day, just arrange everything on the platter. It takes less than 15 minutes to assemble.
How do I keep the vegetables from getting soggy?
The key is to dry them thoroughly after washing. Use a salad spinner or pat them dry with paper towels. Also, don’t add the dip to the tray until just before serving. If you’re prepping ahead, store the vegetables in bags with a paper towel inside to absorb excess moisture.
Can I use a different dip instead of ranch?
Of course! This recipe is very flexible. A creamy blue cheese dip, a spicy chipotle dip, or even a simple hummus would work beautifully. For a Halloween twist, you could make a “green slime” dip by blending avocado, sour cream, and lime juice.
How long will the leftovers last?
The vegetables will last for about 2 days in an airtight container in the refrigerator. The ranch dip will keep for up to 5 days. Just make sure to separate them before storing. If the dip has been sitting out at room temperature for more than 2 hours, it’s best to discard it.
Can I add fruit to this tray?
Yes, and it looks amazing! Blackberries look like little “spider eggs,” and green grapes can be used as “monster eyeballs.” Just be careful not to mix fruit and vegetables too closely on the tray, as the fruit’s moisture can make the veggies soggy. I like to cluster the fruit in a separate corner of the platter.
Pin This Recipe!

Best Spooky Halloween Veggie Tray Easy Homemade Ranch Dip
A fun and healthy Halloween veggie tray with creepy-crawly vegetable shapes and a creamy homemade ranch dip. Perfect for parties, potlucks, or spooky movie nights, this no-cook recipe is easy to customize and always a crowd-pleaser.
- Prep Time: 20 minutes
- Cook Time: 0 minutes
- Total Time: 20 minutes
- Yield: 8 servings 1x
- Category: Appetizer
- Cuisine: American
Ingredients
- 1 large head of broccoli, cut into small florets
- 1 large head of cauliflower, cut into florets
- 1 bunch of celery, cut into 4-inch sticks
- 1 pound baby carrots
- 1 large red bell pepper, sliced into strips
- 1 large yellow bell pepper, sliced into strips
- 1 English cucumber, sliced into rounds or spears
- 1 pint cherry or grape tomatoes
- 1 cup snap peas or snow peas
- Optional: black olives, radishes, purple cabbage leaves
- 1 cup full-fat sour cream
- 1/2 cup mayonnaise
- 1/2 cup buttermilk
- 1 tablespoon fresh dill, finely chopped
- 1 tablespoon fresh parsley, finely chopped
- 1 teaspoon fresh chives, finely chopped
- 1 teaspoon garlic powder
- 1 teaspoon onion powder
- 1/2 teaspoon salt
- 1/4 teaspoon black pepper
- 1/2 teaspoon sugar (optional)
Instructions
- Make the Ranch Dip: In a small mixing bowl, combine sour cream, mayonnaise, and buttermilk. Whisk until smooth. Add fresh dill, parsley, chives, garlic powder, onion powder, salt, pepper, and sugar (if using). Whisk until well incorporated. Cover and refrigerate for at least 30 minutes to let flavors meld.
- Prep the Vegetables: Wash all vegetables thoroughly and pat completely dry with paper towels. For ‘Monster Fingers’, cut celery into 4-inch sticks and carve a shallow indent near one end for a knuckle. For ‘Skeleton Bones’, cut cauliflower into large florets. For ‘Spider Eggs’, leave cherry tomatoes whole or poke a hole and insert a sliver of black olive. For ‘Witch’s Broomsticks’, cut cucumber into spears and make small cuts along one end. For ‘Bloodshot Eyes’, cut cucumber into thick rounds, s…
- Assemble the Tray: Place a small bowl of ranch dip in the center of a large platter or cutting board. Arrange vegetables around the dip in clusters to create scenes (e.g., broccoli as a haunted forest, cauliflower bones, monster fingers pointing toward the dip). Leave some empty space for an artistic look.
- Add Final Spooky Touches: Scatter cherry tomato ‘spider eggs’ and snap peas around the tray. Add black olives as spiders. Optionally, dust cauliflower edges with a mixture of paprika and black pepper for a ‘dirty bone’ effect.
- Serve Immediately or Refrigerate: If serving later, cover the tray loosely with plastic wrap and refrigerate for up to 4 hours. Add the dip just before serving. Stir the dip before placing it back in the center.
Notes
Dry vegetables thoroughly after washing to prevent soggy dip. Prep vegetables and dip the night before for stress-free hosting. Keep dip cold by placing the bowl in a larger bowl of ice if serving outdoors. For dairy-free, use plant-based sour cream and mayonnaise. For a spicy kick, add 1/2 teaspoon cayenne pepper to the dip.
Nutrition
- Serving Size: 1 cup of vegetables
- Calories: 165
- Sugar: 6
- Sodium: 320
- Fat: 11
- Saturated Fat: 3.5
- Carbohydrates: 14
- Fiber: 4
- Protein: 3.5
Keywords: Halloween, veggie tray, ranch dip, spooky, party appetizer, healthy snack, no-cook


