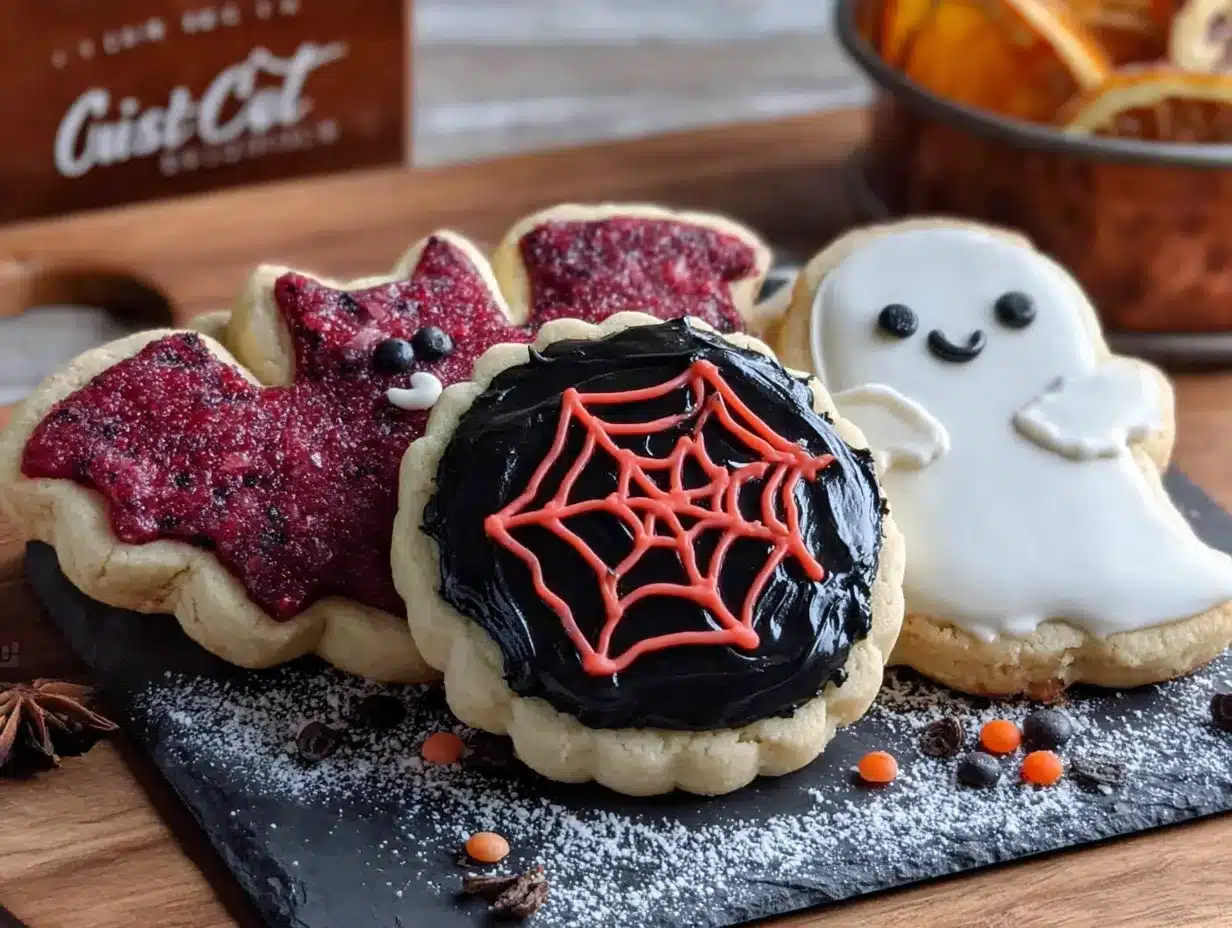
I was standing in line at the post office—honestly, the last place you expect to find culinary inspiration—when the woman ahead of me started describing the cookies she was shipping to her granddaughter. She was maybe seventy, wearing a coat with a missing button, and she had a stack of flat-rate boxes balanced on one hip. “They’re just sugar cookies,” she said, almost apologetically, when she noticed me eavesdropping. But then she described the royal icing, the way she thinned it to the perfect consistency, how she’d spent the whole weekend piping tiny ghost faces and spider webs onto rounds of buttery dough. She told me her granddaughter called them “spooky cute,” and I swear, that phrase stuck in my head for weeks.
I mean, Halloween baking can get so intense, right? There’s all that fondant work and the complicated molds and the recipes that take three days. But this woman at the post office—she wasn’t a professional baker. She was just a grandma who wanted to send something special. And her approach was so simple, so doable, that I had to try it myself. So I went home, dug out my cookie cutters, and spent a Tuesday evening covered in powdered sugar, trying to recreate the magic she’d described so casually.
Let me tell you, those first batches were a mess. My icing was too thin, then too thick, then somehow both at once. I flooded a ghost cookie so badly it looked more like a puddle. But I kept at it, and eventually, I figured out the rhythm. Now these spooky cute Halloween sugar cookies with royal icing have become my go-to for October. They’re the kind of cookies that make people smile—not because they’re perfect, but because they’re fun. And honestly? That’s exactly what Halloween should be.
Why You’ll Love This Recipe
These spooky cute Halloween sugar cookies with royal icing have earned a permanent spot in my fall baking rotation, and I think they’ll earn one in yours too. After testing this recipe about six times (someone had to eat all those imperfect ghosts), I can confidently say this version delivers the best balance of flavor, texture, and decorating ease.
- Simple Ingredients : Butter, sugar, flour, eggs—you probably have most of this in your pantry right now. No weird specialty items here.
- Perfect for Halloween Fun : Whether you’re hosting a spooky party, sending treats to school, or just want a cozy baking project, these cookies fit the bill.
- Holds Its Shape : The dough doesn’t spread in the oven, so your cute ghost and pumpkin cutouts actually look like ghosts and pumpkins when they come out.
- Royal Icing That Actually Works : I’ve included all my hard-learned tips for getting that perfect consistency—no more runny messes or clogged piping tips.
- Kid-Friendly Decorating : The decorating part is forgiving enough that little hands can help without frustration.
- Make-Ahead Friendly : The dough freezes beautifully, and baked cookies stay fresh for days.
What makes these different from every other sugar cookie recipe out there? It’s the texture, honestly. The combination of powdered sugar and granulated sugar gives them this tender, almost melt-in-your-mouth quality that’s hard to beat. And the royal icing—I use a touch of almond extract in mine, which somehow makes the whole thing taste more like a bakery cookie than something from my home kitchen.
These are the cookies that make you close your eyes after the first bite. They’re buttery, they’re sweet, and they have that slight snap on the outside with a soft interior. Plus, decorating them is genuinely relaxing. There’s something meditative about piping those little faces and waiting for the icing to set. It’s the kind of baking project that makes you forget about your to-do list for a few hours.
What Ingredients You Will Need
This recipe uses straightforward ingredients to create cookies that taste as good as they look. I’ve tested several combinations, and this specific lineup gives you the best results for both taste and decorating.
For the Sugar Cookies
- Unsalted butter, 1 cup (226g), softened to room temperature (I use Kerrygold for the best flavor)
- Granulated sugar, 1 cup (200g)
- Powdered sugar, 1/2 cup (60g) (this is my secret for tender cookies)
- Large egg, 1, room temperature
- Vanilla extract, 2 teaspoons (use pure, not imitation)
- Almond extract, 1/2 teaspoon (optional but recommended—it adds that bakery flavor)
- All-purpose flour, 2 and 3/4 cups (344g), spooned and leveled
- Baking powder, 1 teaspoon
- Salt, 1/2 teaspoon
For the Royal Icing
- Powdered sugar, 4 cups (480g), sifted
- Meringue powder, 3 tablespoons (I recommend Wilton brand for consistency)
- Warm water, about 6-7 tablespoons (start with less, add more as needed)
- Vanilla extract, 1 teaspoon (clear vanilla keeps the icing bright white)
- Gel food coloring in orange, black, purple, and green (Americolor or Wilton brands work well)
For Decorating
- Piping bags or zip-top bags with corners snipped
- Piping tips #2 or #3 for detail work
- Toothpicks for spreading icing and popping air bubbles
- Edible glitter or sanding sugar (optional, for extra sparkle)
- Black decorating gel for easy faces (great shortcut for beginners)
A quick note on ingredients: the meringue powder is important here. It stabilizes the royal icing and gives it that professional, smooth finish. You can find it in the baking aisle or online, and one container lasts forever. I’ve tried making royal icing with just egg whites, and honestly, the meringue powder version is more forgiving and safer for kids to help with.
For the food coloring, gel is non-negotiable. Liquid food coloring will thin out your icing and mess with the consistency. I keep a little set of Halloween colors in my baking drawer, and they last for years.
Equipment Needed
You don’t need a professional bakery setup for these, but having the right tools makes the process so much smoother. Here’s what I use:
- Stand mixer or hand mixer – Either works. I use my KitchenAid for the cookie dough and a hand mixer for the royal icing (less splashing).
- Rolling pin – A standard rolling pin is fine. If you have adjustable rings, they help get even thickness, but I’ve rolled plenty of dough without them.
- Cookie cutters – Halloween shapes like ghosts, pumpkins, bats, and cats. I found a set of 12 on Amazon for like 15 bucks, and they’ve lasted through several seasons.
- Baking sheets – Two or three, preferably light-colored metal (dark sheets can over-brown the bottoms).
- Parchment paper or silicone baking mats – Silpat mats are my favorite because the cookies slide right off and cleanup is instant.
- Piping bags – Disposable ones are easiest. I keep a box of 12-inch bags in my drawer at all times.
- Piping tips – A #2 tip for outline work and a #3 for flooding. You can get a basic set for under 10 dollars.
- Cooling rack – Essential for letting cookies cool completely before decorating.
- Small bowls or ramekins – For dividing and coloring your icing.
One tip I learned the hard way: don’t skip the parchment paper. Even with non-stick baking sheets, sugar cookies can stick if you’re not careful. And parchment makes cleanup a breeze, which means more time for the fun part—decorating.
Preparation Method
This process looks long when you read it, but I promise it’s straightforward. I’ve broken it down so you can follow along without feeling lost.
Make the Cookie Dough
- In a large bowl, beat the softened butter with both sugars until light and fluffy, about 3 minutes. Scrape down the sides halfway through.
- Add the egg, vanilla extract, and almond extract. Beat until combined, about 30 seconds. The mixture might look slightly curdled—that’s okay.
- In a separate bowl, whisk together the flour, baking powder, and salt.
- Gradually add the dry ingredients to the wet mixture, mixing on low speed until just combined. Stop when you no longer see streaks of flour. Overmixing makes tough cookies.
- Divide the dough in half, flatten each half into a disc, wrap in plastic wrap, and refrigerate for at least 2 hours. Overnight is even better.
Bake the Cookies
- Preheat your oven to 350°F (175°C). Line your baking sheets with parchment paper or silicone mats.
- On a lightly floured surface, roll one disc of dough to about 1/4-inch thickness. I use a ruler to check—it matters for even baking.
- Cut out your shapes and transfer them to the prepared baking sheets, spacing them about 2 inches apart. Gather the scraps, re-roll, and cut more cookies.
- Chill the cut cookies on the baking sheet for 10 minutes before baking. This step is crucial—it prevents spreading and keeps those cute shapes intact.
- Bake for 8-10 minutes, rotating the pan halfway through. The edges should be just barely golden. The centers will look slightly underdone—that’s perfect.
- Let the cookies cool on the baking sheet for 5 minutes, then transfer to a wire rack to cool completely. Don’t rush this. Warm cookies will ruin your royal icing.
Make the Royal Icing
- In a large bowl, combine the sifted powdered sugar and meringue powder. Whisk to break up any clumps.
- Add 6 tablespoons of warm water and the vanilla extract. Beat on low speed until combined, then increase to medium-high and beat for 4-5 minutes. The icing should be thick, glossy, and hold stiff peaks.
- To make the flooding consistency, remove about 1/3 of the icing to a separate bowl. Add water, 1 teaspoon at a time, until the icing flows like thick honey. It should settle into a smooth surface within 10 seconds when you drizzle a ribbon back into the bowl.
- Divide the remaining icing into small bowls and color with gel food coloring. Cover each bowl with a damp paper towel to prevent drying.
Decorate the Cookies
- Fit a piping bag with a #2 tip and fill with the stiff consistency icing. Outline each cookie shape.
- Let the outlines dry for about 10 minutes. This creates a little dam for the flooding icing.
- Switch to the flooding consistency icing in a bag with a #3 tip. Fill in the outlined areas, using a toothpick to guide the icing into corners and pop any air bubbles.
- While the flooding icing is still wet, add details like dots for eyes, stripes, or sprinkles. If you’re adding multiple colors, let the base layer dry for 30 minutes first.
- Allow the decorated cookies to dry completely, ideally overnight. The icing should be hard to the touch before you stack or store them.
Cooking Tips & Techniques
I’ve made plenty of mistakes with these cookies so you don’t have to. Here are the things I wish someone had told me when I started.
Chill the dough, then chill it again. I cannot overstate this. Warm dough spreads, and spread cookies lose their shape. I refrigerate my dough discs for at least 2 hours, then chill the cut shapes for another 10 minutes before baking. If your kitchen is warm, pop the baking sheet in the fridge while the oven preheats.
The flour scoop trick. When you measure flour, spoon it into your measuring cup and level it off with a knife. Scooping directly from the bag packs the flour down, and you’ll end up with dry, crumbly dough. I learned this after a batch of cookies that tasted like cardboard.
Royal icing consistency is everything. Too thick and it won’t spread. Too thin and it runs off the cookie. The test I use: lift your spatula and let the icing drizzle back into the bowl. If the ribbon sits on top for a few seconds before disappearing, you’re good. If it disappears immediately, add more powdered sugar. If it doesn’t disappear at all, add more water.
Work in batches. Don’t try to decorate all 40 cookies at once. I outline 6-8 cookies, flood them, add details, and then move to the next batch. The icing starts to crust over after about 15 minutes, so working in small groups keeps everything looking fresh.
Keep your icing covered. Royal icing dries out fast. I keep a damp paper towel over each bowl, and if I’m taking a break, I cover the piping tips with a damp cloth too. Nothing is more frustrating than a clogged tip in the middle of piping a ghost face.
Embrace imperfection. My first batch of decorated cookies looked like a horror movie—in a bad way. But you know what? They still tasted amazing. The more you practice, the better you’ll get. And honestly, slightly wonky cookies have more personality.
Variations & Adaptations
One of the best things about this recipe is how easy it is to make it your own. Here are some variations I’ve tried and loved.
Gluten-Free Version: Substitute the all-purpose flour with a 1:1 gluten-free baking flour blend. I’ve used Bob’s Red Mill with great results. Add an extra tablespoon of flour to account for the different absorption rate. The texture will be slightly more delicate, but the flavor is still fantastic.
Vegan Adaptation: Use vegan butter (I like Miyoko’s) and replace the egg with a flax egg (1 tablespoon ground flaxseed mixed with 3 tablespoons water, let sit for 5 minutes). For the royal icing, skip the meringue powder and use aquafaba (the liquid from a can of chickpeas). Whip it until frothy before adding the powdered sugar. It works surprisingly well.
Different Flavor Twists: Add 1 teaspoon of cinnamon and 1/2 teaspoon of nutmeg to the dough for a warm, spiced cookie that pairs perfectly with fall. Or swap the vanilla for peppermint extract and use red and black icing for a creepy-cute candy cane vibe. I once made a batch with orange zest in the dough and used chocolate royal icing—they tasted like a dream.
No-Cutter Option: Don’t have Halloween cookie cutters? No problem. Roll the dough into a log, chill it, and slice into rounds. Decorate them as jack-o-lantern faces using orange icing and black details. It’s simpler, but just as cute.
Quick Version with Pre-Made Icing: If you’re short on time, use store-bought royal icing mix or even canned frosting thinned with a little milk. The texture won’t be as professional, but it’s still delicious and way faster.
Serving & Storage Suggestions
These cookies are best served at room temperature, and they actually taste even better the day after baking—the flavors have time to meld. I like to arrange them on a platter with some mini pumpkins and fake spider webs for a Halloween vibe. They’re perfect for parties, classroom treats, or just snacking while watching scary movies.
Storage: Once the royal icing is completely dry (usually after 8-12 hours), stack the cookies between layers of parchment paper in an airtight container. They’ll stay fresh at room temperature for up to 2 weeks. Don’t refrigerate them—the moisture will soften the icing and make the cookies lose their snap.
Freezing: You can freeze the baked, undecorated cookies for up to 3 months. Wrap them tightly in plastic wrap and then foil. When you’re ready to decorate, thaw them at room temperature and proceed with the royal icing. I do this all the time when I want to spread the baking over several days.
Reheating: If you somehow have leftover cookies that have gone a bit soft, pop them in a 300°F (150°C) oven for 3-4 minutes. They’ll crisp right back up. Just let them cool before eating.
Gifting: These cookies make amazing Halloween gifts. I pack them in clear cellophane bags tied with orange ribbon, or in small treat boxes lined with tissue paper. People always appreciate homemade treats, and the spooky cute designs make them extra special.
Nutritional Information & Benefits
Let’s be honest—these are a treat, not a health food. But here’s the estimated breakdown per cookie (based on a 3-inch ghost shape with royal icing, makes about 30 cookies):
| Nutrient | Amount per Cookie |
|---|---|
| Calories | 165 |
| Total Fat | 7g |
| Saturated Fat | 4g |
| Cholesterol | 25mg |
| Sodium | 75mg |
| Total Carbohydrates | 25g |
| Sugars | 17g |
| Protein | 2g |
On the positive side, these cookies are made with real butter and eggs, so you’re getting some protein and fat that helps with satiety. The almond extract adds flavor without extra sugar. And honestly, there’s something to be said for the mental health benefits of a relaxing baking project. Decorating these cookies is genuinely meditative—it forces you to slow down and focus on something small and beautiful.
If you’re looking to lighten them up, you can reduce the sugar in the dough by 1/4 cup without affecting the texture too much. And using less icing on the decorations cuts down on the sugar content significantly.
Conclusion
These spooky cute Halloween sugar cookies with royal icing have become a tradition in my kitchen, and I hope they become one in yours too. They’re not complicated—they just take a little patience and a willingness to have fun with it. The dough comes together in minutes, the baking is straightforward, and the decorating is where the magic happens.
What I love most about this recipe is how it brings people together. I’ve made them with my niece, who insisted on giving every ghost a different expression. I’ve brought them to potlucks where they disappeared before the main course. And I’ve mailed them to friends across the country, packed carefully in boxes, just like that woman at the post office did for her granddaughter.
So grab your cookie cutters, put on a Halloween playlist, and give these a try. Don’t worry if your first ghost looks a little lopsided—that’s part of the charm. And when you make them, I’d love to hear about it. Drop a comment below and tell me what shapes you chose, or share a photo of your decorated cookies. Happy Halloween, and happy baking!
Frequently Asked Questions
Can I make the dough ahead of time?
Absolutely. The dough can be refrigerated for up to 3 days or frozen for up to 3 months. Just wrap it tightly in plastic wrap and then foil. Thaw frozen dough in the refrigerator overnight before rolling.
Why did my cookies spread in the oven?
This usually happens when the dough isn’t chilled enough. Make sure you chill the cut cookies on the baking sheet for at least 10 minutes before baking. Also, check that your butter wasn’t too soft when you started—it should be softened but still cool to the touch.
How do I get the royal icing to be perfectly smooth?
The key is getting the right consistency. Your flooding icing should be thin enough to settle into a smooth surface within 10 seconds. Use a toothpick to guide it into corners and pop any air bubbles. And work quickly—the icing starts to set after about 15 minutes.
Can I use a different type of icing?
Yes, you can use a simple glaze made from powdered sugar and milk, or even canned frosting thinned with a little milk. The finish won’t be as smooth or hard as royal icing, but it’s faster and still delicious. Just keep in mind that softer icings won’t hold detailed designs as well.
How long do these cookies stay fresh?
Stored in an airtight container at room temperature, they’ll stay fresh for up to 2 weeks. The royal icing helps seal in moisture and keeps the cookies from going stale. Don’t refrigerate them, as that can make the icing soften and the cookies lose their texture.
Pin This Recipe!

Best Easy Spooky Cute Halloween Sugar Cookies with Royal Icing

These spooky cute Halloween sugar cookies with royal icing are buttery, tender, and perfect for decorating. With simple ingredients and easy-to-follow instructions, they’re a fun Halloween baking project that yields delicious, adorable cookies.
- Prep Time: 30 minutes
- Cook Time: 10 minutes
- Total Time: 2 hours 40 minutes (includes chilling and decorating time)
- Yield: 30 cookies 1x
- Category: Dessert
- Cuisine: American
Ingredients
- 1 cup (226g) unsalted butter, softened to room temperature
- 1 cup (200g) granulated sugar
- 1/2 cup (60g) powdered sugar
- 1 large egg, room temperature
- 2 teaspoons vanilla extract (pure, not imitation)
- 1/2 teaspoon almond extract (optional but recommended)
- 2 and 3/4 cups (344g) all-purpose flour, spooned and leveled
- 1 teaspoon baking powder
- 1/2 teaspoon salt
- 4 cups (480g) powdered sugar, sifted (for royal icing)
- 3 tablespoons meringue powder (Wilton brand recommended)
- 6–7 tablespoons warm water (for royal icing)
- 1 teaspoon vanilla extract (clear vanilla keeps icing bright white)
- Gel food coloring in orange, black, purple, and green (Americolor or Wilton)
- Piping bags or zip-top bags with corners snipped
- Piping tips #2 or #3 for detail work
- Toothpicks for spreading icing and popping air bubbles
- Edible glitter or sanding sugar (optional)
- Black decorating gel (optional, for easy faces)
Instructions
- In a large bowl, beat the softened butter with both sugars until light and fluffy, about 3 minutes. Scrape down the sides halfway through.
- Add the egg, vanilla extract, and almond extract. Beat until combined, about 30 seconds. The mixture might look slightly curdled—that’s okay.
- In a separate bowl, whisk together the flour, baking powder, and salt.
- Gradually add the dry ingredients to the wet mixture, mixing on low speed until just combined. Stop when you no longer see streaks of flour. Overmixing makes tough cookies.
- Divide the dough in half, flatten each half into a disc, wrap in plastic wrap, and refrigerate for at least 2 hours. Overnight is even better.
- Preheat your oven to 350°F (175°C). Line your baking sheets with parchment paper or silicone mats.
- On a lightly floured surface, roll one disc of dough to about 1/4-inch thickness. Use a ruler to check for even baking.
- Cut out your shapes and transfer them to the prepared baking sheets, spacing them about 2 inches apart. Gather the scraps, re-roll, and cut more cookies.
- Chill the cut cookies on the baking sheet for 10 minutes before baking. This step is crucial—it prevents spreading and keeps those cute shapes intact.
- Bake for 8-10 minutes, rotating the pan halfway through. The edges should be just barely golden. The centers will look slightly underdone—that’s perfect.
- Let the cookies cool on the baking sheet for 5 minutes, then transfer to a wire rack to cool completely. Don’t rush this. Warm cookies will ruin your royal icing.
- In a large bowl, combine the sifted powdered sugar and meringue powder. Whisk to break up any clumps.
- Add 6 tablespoons of warm water and the vanilla extract. Beat on low speed until combined, then increase to medium-high and beat for 4-5 minutes. The icing should be thick, glossy, and hold stiff peaks.
- To make the flooding consistency, remove about 1/3 of the icing to a separate bowl. Add water, 1 teaspoon at a time, until the icing flows like thick honey. It should settle into a smooth surface within 10 seconds when you drizzle a ribbon back into the bowl.
- Divide the remaining icing into small bowls and color with gel food coloring. Cover each bowl with a damp paper towel to prevent drying.
- Fit a piping bag with a #2 tip and fill with the stiff consistency icing. Outline each cookie shape.
- Let the outlines dry for about 10 minutes. This creates a little dam for the flooding icing.
- Switch to the flooding consistency icing in a bag with a #3 tip. Fill in the outlined areas, using a toothpick to guide the icing into corners and pop any air bubbles.
- While the flooding icing is still wet, add details like dots for eyes, stripes, or sprinkles. If you’re adding multiple colors, let the base layer dry for 30 minutes first.
- Allow the decorated cookies to dry completely, ideally overnight. The icing should be hard to the touch before you stack or store them.
Notes
Chill the dough thoroughly to prevent spreading. For royal icing, use gel food coloring to avoid thinning. Work in small batches to keep icing from drying out. Embrace imperfection—wonky cookies have personality!
Nutrition
- Serving Size: 1 cookie
- Calories: 165
- Sugar: 17
- Sodium: 75
- Fat: 7
- Saturated Fat: 4
- Carbohydrates: 25
- Protein: 2
Keywords: Halloween sugar cookies, royal icing, spooky cookies, cute Halloween cookies, sugar cookie recipe, decorated cookies, ghost cookies, pumpkin cookies


