I was at the grocery store last October, standing in the baking aisle, when a kid ran past me clutching a bag of candy corn. The crinkle of that plastic, mixed with the faint smell of vanilla from a nearby display—and suddenly I was seven years old, standing on a step stool in my neighbor Mrs. Gable’s kitchen. She was pulling a tray of ghost-shaped meringues out of her ancient oven, the little peaks browned perfectly at the tips, and I remember thinking they looked like actual tiny ghosts rising from a foggy graveyard. That was thirty years ago, and Mrs. Gable moved to Florida a long time back. But every Halloween since, I’ve tried to get those cookies right. Honestly? It took me more attempts than I’d like to admit.
The first batch I made on my own came out flat and chewy—not ghostly at all. The second batch? Let’s just say I learned the hard way that humidity is meringue’s mortal enemy. But somewhere around batch number five, I finally cracked it. The oven door swung open, and there they were: little white ghosts with perfect peaks, looking like they’d floated right out of a Halloween storybook. I may have actually squealed. My husband thought I’d lost my mind, but you know that feeling when a recipe finally clicks? That was it.
These Halloween Ghost Meringue Cookies are more than just a spooky sweet treat—they’re a little piece of my childhood made edible. And maybe you’ve been there too, chasing a taste from your past that you can’t quite describe but know the second you find it. That’s what these cookies are for me. They’re the reason I keep baking, even after the flops and the flat batches.
Why You’ll Love This Recipe
Let me tell you why these ghost meringues have become my go-to Halloween treat. I’ve tested this recipe more times than I can count, and I’ve learned every trick to get them right. These cookies are genuinely foolproof once you know the secrets I’m sharing with you.
- Quick & Easy : Comes together in under 30 minutes of active prep time. The oven does most of the work while you get on with your Halloween decorating.
- Simple Ingredients : You only need four basic ingredients—egg whites, sugar, vanilla, and cream of tartar. No fancy grocery trips required.
- Perfect for Halloween Parties : These cookies are the star of any spooky spread. Kids love them, adults sneak them, and they look incredible on a dessert table.
- Crowd-Pleaser : They’re naturally gluten-free and low-fat, so almost everyone can enjoy them. I’ve never met a person who didn’t smile at a ghost-shaped cookie.
- Unbelievably Delicious : The texture is pure magic—crisp on the outside, light as air on the inside, with a sweet vanilla flavor that melts in your mouth.
What makes my version different from all the others? It’s the technique. I spent years perfecting the right way to whip egg whites for maximum stability, and I’m sharing every single detail. No weeping meringues, no collapsed ghosts—just perfect little spirits every time.
These cookies are the kind that make you close your eyes after the first bite. They’re comfort food reimagined—healthier, faster, but with the same soul-soothing satisfaction. Perfect for impressing Halloween guests without stress, or turning a simple October afternoon into something memorable.
What Ingredients You Will Need
This recipe uses simple, wholesome ingredients to deliver that perfect meringue texture and ghostly appearance. Most of these are probably already in your pantry, which makes these cookies perfect for last-minute Halloween baking.
- 4 large egg whites, room temperature (this is crucial—cold eggs won’t whip properly. Let them sit out for 30 minutes before starting)
- 1 cup (200g) granulated sugar (I prefer regular white sugar for the cleanest flavor. Avoid powdered sugar—it changes the texture)
- 1/2 teaspoon cream of tartar (this stabilizes the egg whites and helps them hold their shape. Don’t skip it!)
- 1 teaspoon vanilla extract (use pure vanilla if you can—it makes a real difference in flavor. I’m partial to Nielsen-Massey for baking)
- Pinch of salt (just a tiny bit to balance the sweetness)
- Mini chocolate chips or black gel food coloring (for the ghost faces—optional but highly recommended for the spooky effect)
A few ingredient notes from my years of testing: If you’re using farm-fresh eggs, they actually whip up better than store-bought because they have more protein. But store-bought works perfectly fine too. Just make sure your bowl is absolutely clean and grease-free—any fat will ruin your meringue.
For a fun twist, you can add a drop of peppermint extract instead of vanilla for a holiday version. Or try a tiny bit of orange extract for a Halloween-themed flavor. Just don’t go overboard—a little goes a long way with extracts.
If you’re worried about wasting egg yolks, save them for making lemon curd or a rich carbonara later in the week. I always plan my baking around using up both parts of the egg.
Equipment Needed
You don’t need fancy equipment for these ghost meringues, but a few key tools make all the difference.
- Electric mixer (stand mixer or hand mixer—either works. I’ve used both, and honestly, a hand mixer is fine if you have patience)
- Large mixing bowl (glass or metal—avoid plastic as it can hold onto grease)
- Baking sheets (two large ones, lined with parchment paper)
- Piping bag with a round tip (or a zip-top bag with the corner snipped off—I’ve done it both ways)
- Cooling rack (for letting the meringues cool completely)
- Kitchen scale (optional but helpful for measuring sugar accurately)
If you don’t have a piping bag, don’t panic. I’ve used a sturdy zip-top bag for years with great results. Just fill it, snip about half an inch off the corner, and pipe away. The ghosts won’t look as uniform, but honestly, imperfect ghosts are even cuter.
One tip: make sure your bowl and beaters are spotless. I wipe mine down with a little lemon juice or vinegar before starting to remove any trace of grease. It sounds fussy, but it’s the difference between fluffy meringue and flat disappointment.
Preparation Method
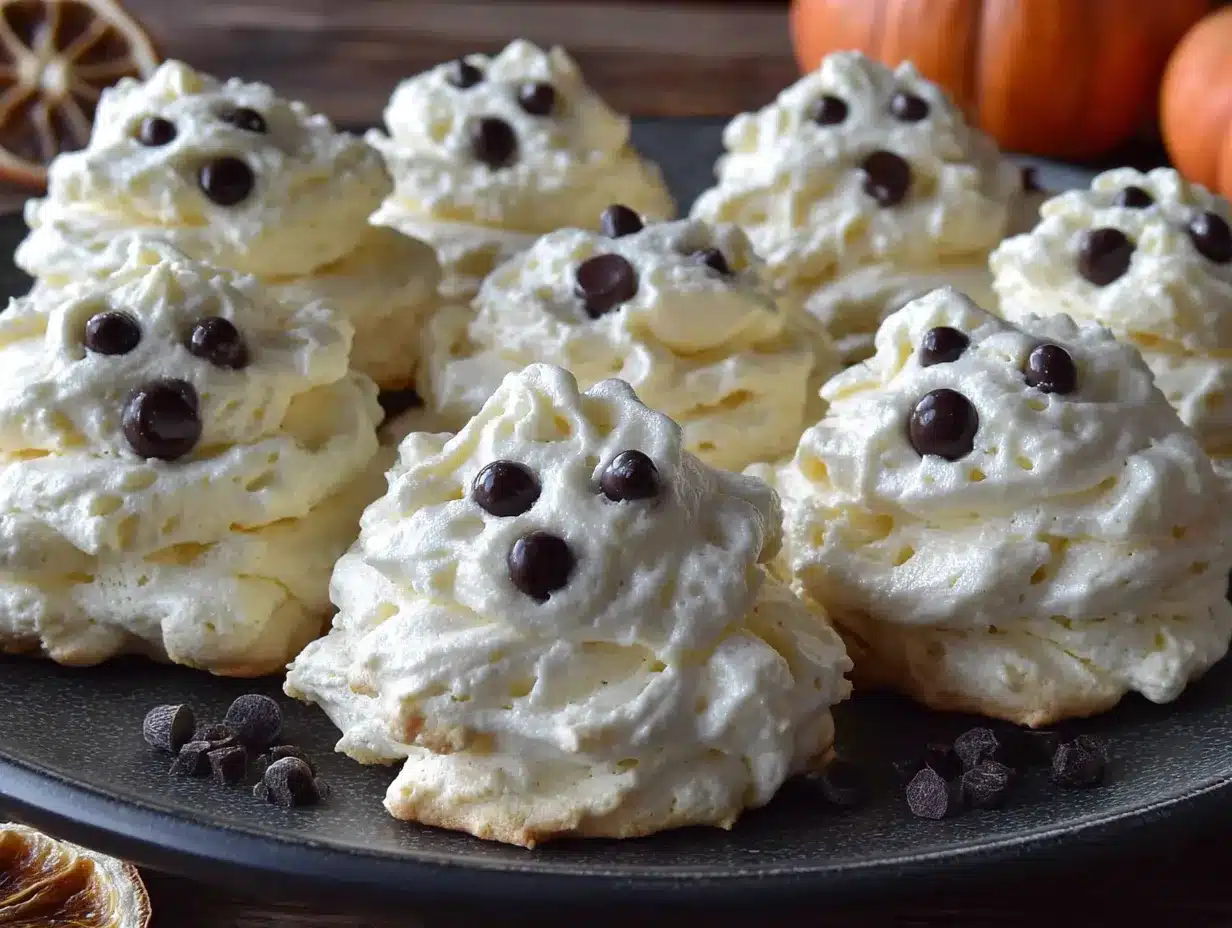
Making these ghost meringues is easier than you think. Follow these steps, and you’ll have a tray of spooky treats in no time.
- Preheat your oven to 200°F (95°C). Line two baking sheets with parchment paper. The low temperature is key—we’re drying the meringues, not baking them.
- Separate your eggs carefully. Make sure no yolk gets into the whites—even a tiny bit will prevent them from whipping. I crack each egg into a small bowl first, then add the white to my mixing bowl. This way, if one yolk breaks, you haven’t ruined the whole batch.
- Start whipping the egg whites on medium speed until they become foamy and bubbly—about 1 minute. You’ll see lots of tiny bubbles form. This is normal.
- Add the cream of tartar and salt. Continue whipping on medium-high speed until soft peaks form. The whites should look white and fluffy, and when you lift the beaters, the peaks should droop slightly. This takes about 2-3 minutes.
- Start adding the sugar, one tablespoon at a time. This is the most important step. Add it slowly—about 10 seconds between each spoonful—with the mixer running on medium speed. Rushing this step can cause your meringue to collapse. The whole process should take about 5 minutes.
- Add the vanilla extract once all the sugar is incorporated. Whip for another 30 seconds.
- Check for stiff peaks. The meringue should be glossy and thick. When you lift the beaters, the peaks should stand straight up without drooping. Rub a tiny bit between your fingers—if it feels gritty, keep whipping. If it’s smooth, you’re done.
- Transfer the meringue to your piping bag. If using a zip-top bag, stand it up in a tall glass to make filling easier. Cut off the corner.
- Pipe ghost shapes onto the parchment paper. Hold the bag straight up and pipe a round base, then pull upward to create a tall peak. Release pressure and pull away quickly. Leave about 1 inch between ghosts—they don’t spread, but you want air circulation.
- Add faces if desired. Gently press mini chocolate chips into the meringue for eyes and a mouth, or use a toothpick dipped in black gel food coloring to paint faces. I prefer chocolate chips because they stay put better.
- Bake for 60-90 minutes. The meringues are done when they’re dry and can be lifted easily off the parchment. They should be crisp on the outside but still white—not browned.
- Turn off the oven and let them cool inside. Leave the door slightly ajar with a wooden spoon. Let them cool completely—at least 1 hour. This prevents cracking.
A few sensory cues: During whipping, you’ll hear the mixer change pitch as the meringue thickens. The mixture should look like marshmallow fluff—glossy and white. When you pipe, you should feel resistance but not struggle. And when they’re done baking, they’ll smell faintly sweet and vanilla-y, like a cloud of sugar.
If your meringue starts to look grainy or weepy, you’ve overwhipped or added sugar too quickly. Don’t toss it—just add another egg white and gently fold it in. It’s not perfect, but it’ll still work.
Cooking Tips & Techniques
After more failed batches than I care to count, I’ve learned a few things the hard way. Let me save you the trouble.
Humidity is your enemy. Meringue absorbs moisture from the air, which makes it sticky and prevents it from drying properly. Only make these on a dry day. If it’s raining or humid, save this recipe for another time. I learned this lesson on a muggy September afternoon—my ghosts came out flat and sticky, looking more like sad pancakes than spooky spirits.
Don’t rush the sugar addition. I know it’s tempting to dump it all in at once, but please don’t. Adding sugar too quickly deflates the egg whites and creates a grainy texture. Each tablespoon needs time to dissolve completely. Set a timer if you have to—I do.
Room temperature eggs are non-negotiable. Cold eggs won’t whip to their full volume. Set them out 30 minutes before you start. If you’re in a hurry, place them in a bowl of warm water for 5 minutes.
Pipe quickly but carefully. The meringue starts to set as soon as it’s piped, so work efficiently. But don’t rush so much that your ghosts look messy. Imperfect is fine—actually, it’s better. Real ghosts aren’t perfect either.
Let them cool completely in the oven. This is the step most people skip, and it’s the one that causes cracking. The slow cooling allows the meringue to stabilize. Leave them in the turned-off oven with the door cracked for at least an hour. I usually make these at night and leave them in the oven overnight.
Variations & Adaptations
Once you’ve mastered the basic ghost, the possibilities are endless. Here are a few variations I’ve tried and loved.
Chocolate Ghosts : Replace 2 tablespoons of sugar with cocoa powder. Sift it in with the sugar to avoid clumps. The ghosts will be a pale brown, which looks spooky in a different way.
Pumpkin Spice Ghosts : Add 1 teaspoon pumpkin pie spice with the sugar. These smell amazing and taste like fall in cookie form. I made these for a Halloween party last year and they disappeared first.
Vegan Meringue Ghosts : Use aquafaba (the liquid from a can of chickpeas) instead of egg whites. Whip it exactly the same way—it works surprisingly well. You’ll need about 1/2 cup of aquafaba for this recipe. The texture is slightly different but still delicious.
Colored Ghosts : Add a drop of gel food coloring at the end of whipping for colored ghosts. Black or purple for Halloween, pink for Valentine’s Day, green for St. Patrick’s Day. Just don’t use liquid food coloring—it adds too much moisture.
Mini Ghosts : Pipe smaller ghosts for bite-sized treats. Reduce baking time to 45-60 minutes. These are perfect for party favors or lunchbox surprises.
Serving & Storage Suggestions
These ghost meringues are best served at room temperature, right after they’ve cooled. They’re delicate and crisp, and they practically melt on your tongue.
For a Halloween party, arrange them on a platter with some fake spiderwebs and plastic spiders. They look incredible next to pumpkin-shaped cheese ball and other savory snacks. Kids go wild for them, and adults appreciate the nostalgia.
You can also use them as decorations. Stick them on top of cupcakes, float them in punch bowls (they’ll bob around spookily), or hang them from strings for a ghostly garland. They’re sturdy enough to handle gentle handling once fully cooled.
For storage, keep them in an airtight container at room temperature. Don’t refrigerate—the moisture will ruin them. They’ll stay fresh for up to 2 weeks, though they rarely last that long in my house. If they start to get sticky, pop them back in a 200°F oven for 10 minutes to re-crisp.
You can freeze them too. Place them in a single layer in a freezer-safe container with parchment between layers. They’ll keep for 3 months. Thaw at room temperature for 30 minutes before serving.
One thing I love about these cookies is that they actually get better after a day or two. The flavors meld, and the texture becomes even more delicate. So don’t stress about making them the day of your party—they’re perfect make-ahead treats.
Nutritional Information & Benefits
Per ghost meringue (based on 24 cookies):
- Calories: 35
- Fat: 0g
- Carbohydrates: 8g
- Sugar: 8g
- Protein: 1g
- Sodium: 15mg
These cookies are naturally fat-free and gluten-free, making them a great option for people with dietary restrictions. They’re also low in calories compared to most Halloween treats, so you can enjoy a few without guilt.
Egg whites are a good source of protein and contain no cholesterol. They’re also rich in riboflavin and selenium. While these aren’t health food by any stretch, they’re certainly better for you than a candy bar.
If you’re watching your sugar intake, you can reduce the sugar to 3/4 cup. The texture will be slightly less stable, but they’ll still work. I’ve done this for friends with diabetes, and they turned out fine.
As always, if you have allergies, check your ingredients carefully. These cookies contain eggs, so they’re not suitable for people with egg allergies. The vegan version using aquafaba works well as a substitute.
Conclusion
These Halloween Ghost Meringue Cookies are more than just a recipe—they’re a little piece of my childhood that I get to share with you. Every time I pipe those little ghosts and watch them bake into perfect, spooky shapes, I think of Mrs. Gable and her ancient oven and that kid running through the grocery store aisle. It’s funny how food can do that—transport you right back to a moment you thought you’d forgotten.
I hope you’ll try these cookies and make them your own. Maybe you’ll add chocolate chips for faces, or skip them entirely for pure white ghosts. Maybe you’ll make them with your kids and start your own Halloween tradition. That’s the beauty of cooking—every batch is a little different, and every batch tells a story.
I’d love to hear how yours turn out. Drop a comment below and let me know if your ghosts came out perfect, or if you had a funny mishap along the way. And if you share them on social media, tag me—I want to see your spooky creations. Happy Halloween, and happy baking!
Frequently Asked Questions
Can I make these ghost meringues ahead of time?
Absolutely! In fact, they’re perfect for making ahead. Store them in an airtight container at room temperature for up to 2 weeks. Just keep them away from humidity.
Why did my meringue turn out flat?
Flat meringue usually means there was grease in your bowl or on your beaters, or the egg whites weren’t at room temperature. Wipe everything down with lemon juice or vinegar before starting, and let your eggs sit out for 30 minutes.
Can I use liquid egg whites from a carton?
You can, but they don’t whip as well as fresh egg whites. If you use carton whites, add an extra tablespoon and whip them a bit longer. The texture won’t be quite as fluffy, but they’ll still work.
How do I know when the meringues are done baking?
They’re done when they lift easily off the parchment paper and feel dry to the touch. The outside should be crisp, but the inside should still be light and airy. They shouldn’t be browned at all—just white.
Can I double this recipe?
Yes, but don’t try to whip more than 6 egg whites at once in a standard mixer. Make two separate batches if you need more. The meringue won’t whip properly if there’s too much volume in the bowl.
Pin This Recipe!
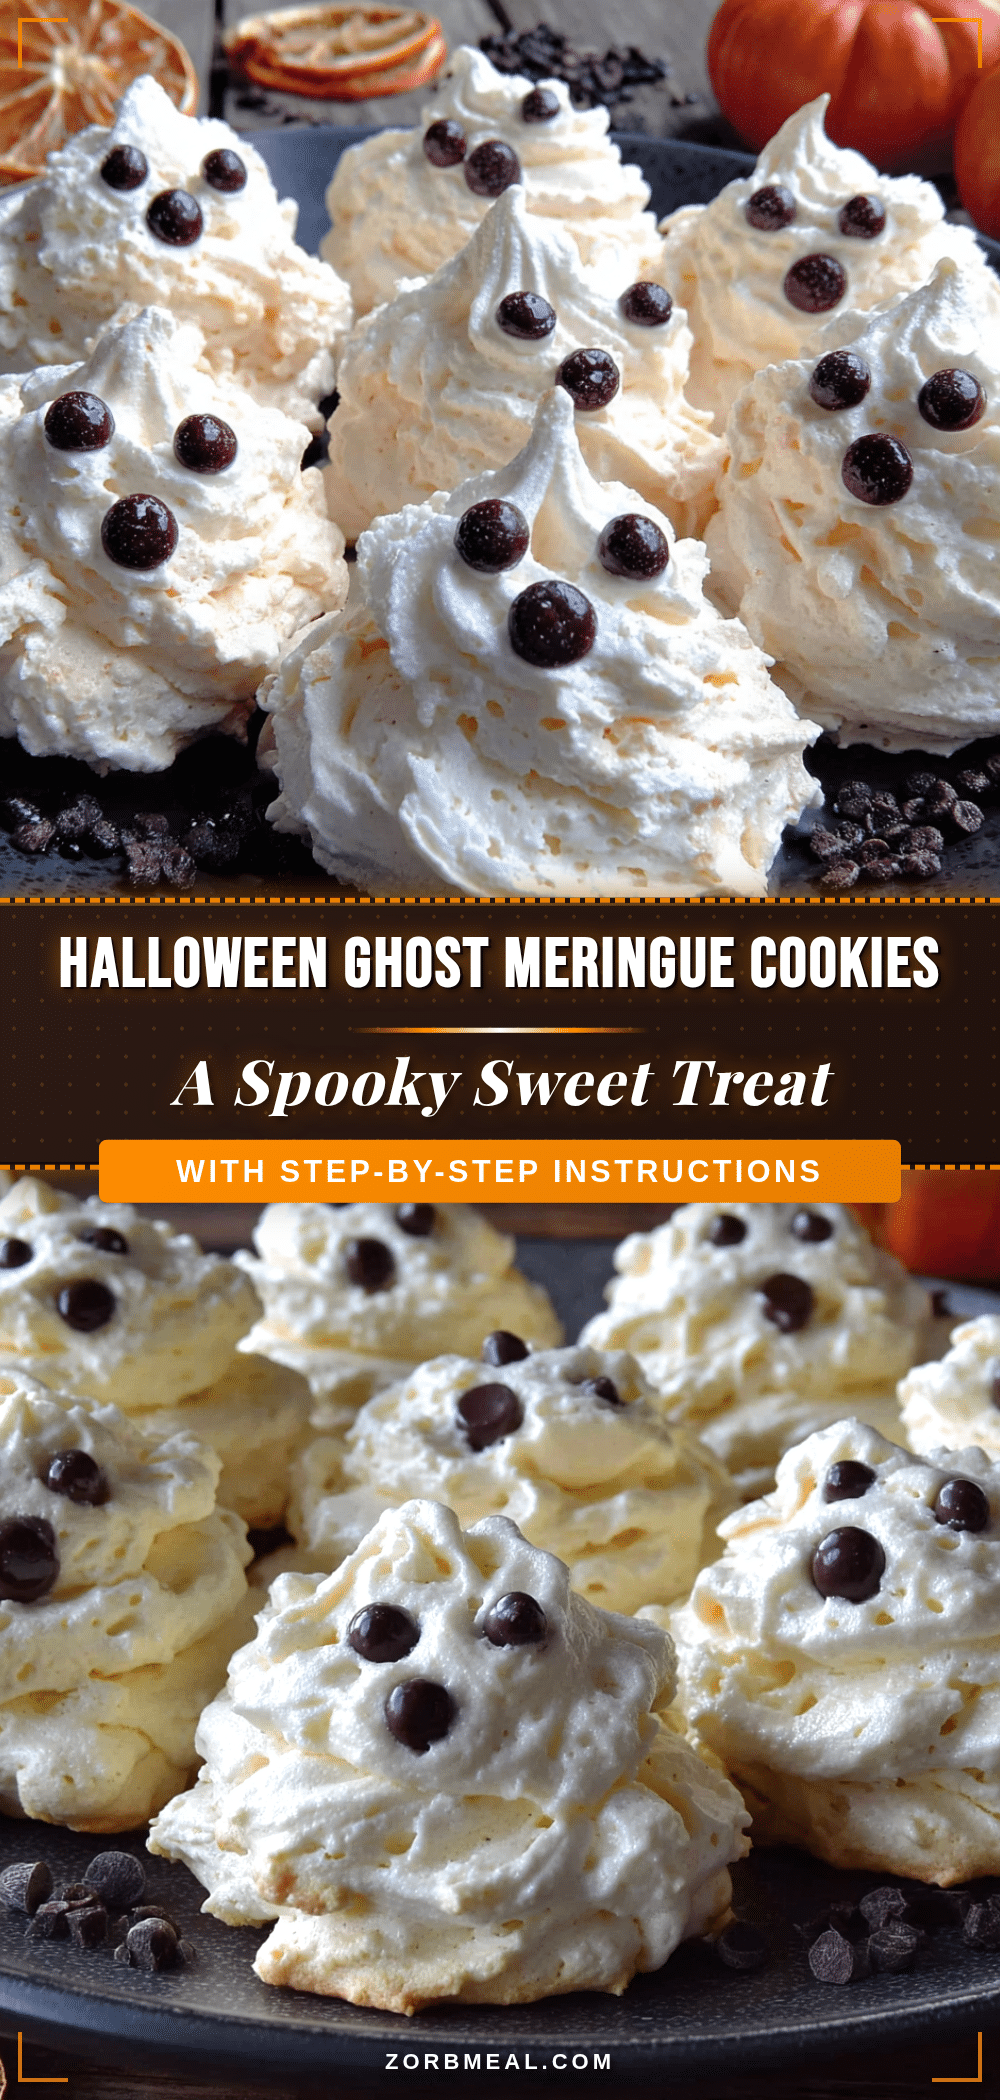
Best Easy Halloween Ghost Meringue Cookies Recipe
These Halloween Ghost Meringue Cookies are a spooky sweet treat that brings back childhood memories. Made with just four simple ingredients, they’re naturally gluten-free and low-fat, with a crisp exterior and light-as-air interior that melts in your mouth.
- Prep Time: 30 minutes
- Cook Time: 60-90 minutes
- Total Time: 2 hours 30 minutes
- Yield: 24 cookies 1x
- Category: Dessert
- Cuisine: American
Ingredients
- 4 large egg whites, room temperature
- 1 cup (200g) granulated sugar
- 1/2 teaspoon cream of tartar
- 1 teaspoon vanilla extract
- Pinch of salt
- Mini chocolate chips or black gel food coloring (for ghost faces, optional)
Instructions
- Preheat your oven to 200°F (95°C). Line two baking sheets with parchment paper.
- Separate your eggs carefully, ensuring no yolk gets into the whites.
- Start whipping the egg whites on medium speed until foamy and bubbly, about 1 minute.
- Add the cream of tartar and salt. Continue whipping on medium-high speed until soft peaks form, about 2-3 minutes.
- Add the sugar one tablespoon at a time, about 10 seconds between each spoonful, with the mixer running on medium speed. This should take about 5 minutes.
- Add the vanilla extract once all sugar is incorporated. Whip for another 30 seconds.
- Check for stiff peaks. The meringue should be glossy and thick, with peaks that stand straight up.
- Transfer the meringue to a piping bag or zip-top bag with the corner snipped off.
- Pipe ghost shapes onto the parchment paper: pipe a round base, then pull upward to create a tall peak. Leave about 1 inch between ghosts.
- Add faces if desired by gently pressing mini chocolate chips into the meringue for eyes and a mouth, or use a toothpick dipped in black gel food coloring.
- Bake for 60-90 minutes until dry and easily lifted off the parchment.
- Turn off the oven and let them cool inside with the door slightly ajar for at least 1 hour.
Notes
Humidity is meringue’s enemy—only make on dry days. Ensure bowl and beaters are completely grease-free; wipe with lemon juice or vinegar before starting. Room temperature eggs are crucial. Don’t rush adding sugar. Let meringues cool completely in the oven to prevent cracking. Store in airtight container at room temperature for up to 2 weeks.
Nutrition
- Serving Size: 1 ghost meringue coo
- Calories: 35
- Sugar: 8
- Sodium: 15
- Carbohydrates: 8
- Protein: 1
Keywords: Halloween cookies, ghost meringues, meringue cookies, spooky treats, gluten-free cookies, low-fat cookies, easy Halloween recipe


