The knuckles. That was the part I couldn’t stop staring at. They had to be just right—slightly swollen-looking, with deep creases that caught the shadow just so. My first batch looked like sad, pale breadsticks with toenails. Not exactly the Halloween nightmare I was going for. But after three attempts, some strategic chilling, and a moment where I actually startled myself reaching into the cookie jar, I knew I had cracked it. These creepy witch finger cookies with almond nails aren’t just a recipe—they’re a commitment to the bit. And honestly, they’re the most fun I’ve ever had with a batch of sugar cookies.
It started as a joke at a Halloween party planning meeting. Someone said we needed something “gross but delicious,” and my brain immediately went to those witch finger cookies I’d seen floating around Pinterest for years. But every version I tried felt like a prop, not a cookie. They were either too dry to actually enjoy eating, or they looked more like oddly-shaped shortbread than severed digits. I wanted something that would make people do a double-take, then reach for a second one. So I went back to my kitchen and started tweaking. The texture obsession here is real—the slight give of the almond “nail” against the buttery cookie, the way the tip darkens in the oven just enough to look suspicious, the subtle crackle at the knuckle joints. This is the version that finally worked.
And let me tell you, watching someone’s face cycle through confusion, horror, and delight in about three seconds flat? That’s the whole point of Halloween baking. These cookies deliver every time.
Why You’ll Love This Recipe
I’ve tested this recipe more times than I care to admit, and here’s what makes it stand out from every other version floating around the internet. These aren’t just cookies that look creepy—they actually taste incredible.
- Surprisingly Simple: The dough comes together in about 15 minutes. No fancy equipment, no weird ingredients. If you’ve made sugar cookies before, you can absolutely nail these.
- Perfectly Buttery: The texture is soft but sturdy—crisp on the edges with a tender center. They hold their shape during baking without turning into hockey pucks.
- Naturally Creepy: The almond nails look disturbingly real, especially after a light egg wash that gives them that slightly translucent, almost-waxy sheen. It’s unsettling in the best way.
- Make-Ahead Friendly: The dough chills for at least an hour, but you can prep everything the night before and bake fresh the day of your party.
- Customizable Creep Factor: Want them more gory? Add red gel coloring at the “cuticle” area. Prefer subtle spooky? Keep them pale and knobby. You control the horror level.
What really sets these apart is the technique. Most recipes skip the step of actually shaping the knuckles, which is what makes these look like real fingers instead of lumpy logs. I spent an embarrassing amount of time studying my own hand while shaping the first batch, and that attention to detail makes all the difference. These are the kind of cookies that make people text photos to their friends before they even take a bite.
What Ingredients You Will Need
This recipe uses simple pantry staples, but a few key choices make the difference between cookies that look like fingers and cookies that look like, well, cookies shaped vaguely like fingers. Let me walk you through each ingredient and why it matters.
For the Cookie Dough
- 1 cup (226g) unsalted butter, softened — Use good quality butter here. European-style butter with higher fat content gives a richer flavor and better texture. I prefer Kerrygold or Plugrà for baking.
- 1 cup (200g) granulated sugar — Regular white sugar keeps the cookies pale, which is essential for the creepy look. Brown sugar would make them too dark.
- 1 large egg, room temperature — Room temperature egg incorporates more evenly into the creamed butter and sugar, giving you a smoother dough.
- 1 teaspoon vanilla extract — Pure vanilla, not imitation. It adds warmth and depth that balances the buttery flavor.
- ½ teaspoon almond extract — This is the secret weapon. It echoes the almond nails and gives the cookies a subtle marzipan-like undertone that’s absolutely addictive.
- 2 ½ cups (312g) all-purpose flour — Spoon and level your flour. Scooping directly from the bag packs in too much flour and makes dry cookies.
- 1 teaspoon baking powder — Just enough lift to keep the cookies tender without puffing up and losing their finger shape.
- ½ teaspoon salt — Fine sea salt works best. It balances the sweetness and enhances the buttery flavor.
For the Almond Nails
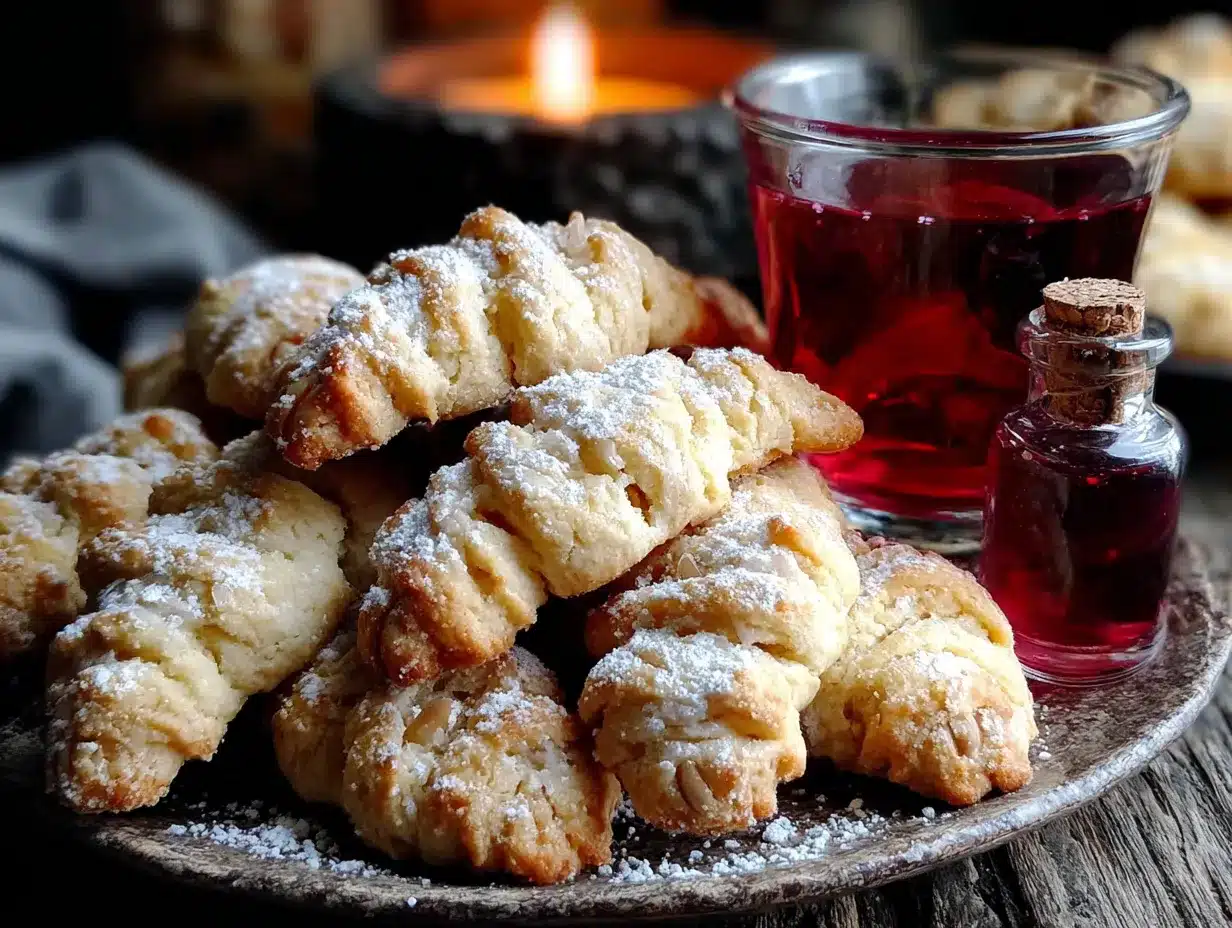
- 24-30 whole blanched almonds — Look for almonds that are uniform in size and shape. The slivered or sliced ones won’t give you that convincing nail look. I like Blue Diamond whole natural almonds—they’re consistently sized and easy to work with.
- 1 large egg yolk — For the egg wash that helps the almonds stick and gives them that unsettling sheen.
- 1 tablespoon water — To thin the egg wash slightly so it brushes on evenly.
For the Creepy Details
- Red gel food coloring — Optional, but highly recommended for adding “blood” at the cuticle line or tip. Gel coloring is thicker and more concentrated than liquid drops, so it won’t thin out your egg wash.
- Sliced almonds or slivered almonds — A few extras for creating “hangnails” or torn cuticle effects if you want to go full horror.
A quick note on substitutions: If you’re avoiding almonds, you can use whole cashews or even candy corn for the nails, though the look will be different. For a nut-free version, try using white chocolate chips that you’ve slightly softened and shaped—they won’t look quite as realistic, but they’ll still be delicious. And if you’re dairy-free, plant-based butter works, just chill the dough a bit longer since vegan butter tends to be softer.
Equipment Needed
You don’t need much for these cookies, which is part of why I love making them. Here’s what you’ll want on hand:
- Electric hand mixer or stand mixer — Creaming the butter and sugar properly is key to the texture. A whisk and some elbow grease works too, but your arm will thank you for using a mixer.
- Baking sheets — Two large sheets so you can bake a full batch without overcrowding. I use Nordic Ware aluminum sheets—they heat evenly and don’t warp.
- Parchment paper or silicone baking mats — Non-negotiable for easy cleanup and preventing the cookies from sticking. Silpat mats are my go-to.
- Small offset spatula — Great for transferring the shaped cookies to the baking sheet without distorting their shape.
- Pastry brush — For applying the egg wash. A silicone brush works well and is easier to clean than natural bristle.
- Plastic wrap — For chilling the dough. You’ll want it well-wrapped to prevent it from drying out.
- Sharp knife or bench scraper — For cutting the dough into finger-sized portions. A bench scraper gives you clean edges.
If you don’t have a pastry brush, you can use a clean fingertip to dab on the egg wash—it’s actually kind of fitting for this recipe. And if you don’t have a stand mixer, a large bowl and a sturdy whisk will absolutely get the job done. I’ve made these in a tiny apartment kitchen with nothing but a wooden spoon and determination. They still turned out perfectly creepy.
Preparation Method
Alright, let’s make some fingers. This process is more art than science, but I’ve broken it down so you can nail it on your first try. Take your time with the shaping—that’s where the magic happens.
Step 1: Make the Dough
In a large mixing bowl, beat the softened butter and granulated sugar together on medium speed until light and fluffy, about 3-4 minutes. You want it pale and airy, almost like a thick frosting. Scrape down the sides of the bowl halfway through. Add the egg, vanilla extract, and almond extract, then beat on low until just combined. Don’t overmix here—you just want everything incorporated.
Step 2: Add the Dry Ingredients
In a separate bowl, whisk together the flour, baking powder, and salt. Gradually add the dry mixture to the wet ingredients, mixing on low speed until a soft dough forms. It should come together into a cohesive ball that pulls away from the sides of the bowl. If it feels too sticky, add another tablespoon of flour. Too dry? Add a teaspoon of milk or water. I’ve had batches that needed a little extra moisture depending on the humidity and the brand of flour.
Step 3: Chill the Dough
Divide the dough into two equal portions. Flatten each into a disc about 1-inch thick, wrap tightly in plastic wrap, and refrigerate for at least 1 hour. Overnight works great too. Chilling is non-negotiable here—warm dough is impossible to shape into convincing fingers. Trust me, I learned this the hard way with my first batch of sad, melted blobs.
Step 4: Shape the Fingers
Preheat your oven to 175°C (350°F) and line two baking sheets with parchment paper. Remove one disc of dough from the refrigerator. Pinch off a piece roughly the size of a walnut, about 1 to 1.5 tablespoons. Roll it between your palms into a log shape, then taper one end slightly to mimic the fingertip. Place it on the prepared baking sheet. Using the back of a butter knife or your fingertip, press three horizontal creases into the dough to create knuckle lines. Don’t press too deep—you want them to remain visible after baking but not cut through the cookie. Repeat with the remaining dough, spacing the fingers about 2 inches apart on the baking sheets.
Step 5: Add the Almond Nails
Take a whole blanched almond and press it firmly into the tapered end of each finger, pointed side facing outward. The almond should sit about halfway into the dough, with the rounded end visible as the “nail bed.” Press gently but firmly—you want it to stay put during baking. In a small bowl, whisk together the egg yolk and water. Brush a thin layer of egg wash over each almond. This gives them that slightly shiny, realistic nail look. If you want to add “blood” at the cuticle line, dip a toothpick in red gel food coloring and draw a thin line where the almond meets the dough. A tiny dot at the tip of the almond creates a convincing “bloody nail” effect.
Step 6: Create Extra Details
For added realism, use a toothpick to draw tiny lines and wrinkles around the knuckles and joints. Press a sliced almond into the side of one or two fingers to look like a hangnail or torn cuticle. I like to make a few fingers look slightly mangled—bent at odd angles or with extra creases—to add variety to the batch. No two fingers should look exactly the same.
Step 7: Bake the Cookies
Bake for 12-15 minutes, rotating the baking sheets halfway through. The cookies should be just set around the edges and very lightly golden on the bottom. They will look pale on top—that’s what you want. Overbaking makes them dry and ruins the creepy pale complexion. Let them cool on the baking sheet for 5 minutes, then transfer to a wire rack to cool completely. The almond nails will firm up as they cool, becoming slightly more pronounced against the soft cookie.
Step 8: The Final Touch
Once completely cool, you can add a few more details if desired. A tiny smear of red gel at the tip of a nail, a subtle shadow under a knuckle, or a small crack in the cookie that looks like a “bone break.” I’ve also been known to dip the “stump” end of a few fingers in red-tinted white chocolate for a truly gruesome presentation. But honestly, they’re plenty creepy on their own.
Cooking Tips & Techniques
I’ve made about eight batches of these over the past few Halloweens, and I’ve collected a few hard-won lessons along the way. Here’s what I wish someone had told me before my first attempt.
Keep your hands cool. Warm hands will soften the dough as you shape it, making it sticky and hard to work with. If you feel the dough getting soft, pop the whole sheet pan in the fridge for 10 minutes before continuing. I keep a bowl of ice water nearby and dip my hands in it between shaping each finger—it makes a huge difference.
Don’t skip the almond extract. I know it’s a strong flavor, and some people are hesitant about it. But paired with the almond nails, it creates a cohesive flavor profile that makes the cookies taste intentional rather than just creepy for the sake of being creepy. If you really hate almond extract, use an extra teaspoon of vanilla instead, but the cookies won’t have that same haunting quality.
Vary your finger shapes. Real fingers aren’t all the same size or shape. Make some longer and thinner, others shorter and stubbier. Bend a few at slightly unnatural angles. Press a knuckle crease deeper on one side than the other. The variety is what makes the platter look genuinely unsettling rather than obviously cookie-shaped.
Watch the bake time carefully. My first batch came out looking like pale fingers but tasting like dry cardboard because I left them in two minutes too long. The cookies continue to set on the hot baking sheet after you pull them out, so take them out when they look just barely done. You want the bottoms to be lightly golden but the tops to remain pale. If you see any browning on the surface, they’re overbaked.
Test one before baking the whole batch. Bake a single test finger to check your shaping and timing. It sounds silly, but it saves you from ruining an entire sheet of cookies if your knuckle creases are too shallow or your almond placement is off. Plus, you get to eat the test cookie—quality control at its finest.
Variations & Adaptations
One of the best things about this recipe is how easily it adapts to different levels of spookiness and dietary needs. Here are a few variations I’ve tried and loved.
Gluten-Free Witch Fingers: Substitute the all-purpose flour with a 1:1 gluten-free baking flour blend. I’ve had great results with Bob’s Red Mill 1-to-1 Baking Flour. Add an extra tablespoon of butter to compensate for the dryness of gluten-free flour, and chill the dough for an extra 30 minutes. The texture will be slightly more crumbly, but the creepy factor remains intact.
Vegan Witch Fingers: Use plant-based butter (I like Miyoko’s for baking) and replace the egg with a flax egg (1 tablespoon ground flaxseed mixed with 3 tablespoons water, let sit for 5 minutes). For the egg wash, brush the almonds with a mixture of maple syrup and a splash of plant-based milk—it gives a similar sheen without the egg. The cookies will be slightly less tender but still delicious.
Chocolate Witch Fingers: Replace ¼ cup of the flour with ¼ cup of unsweetened cocoa powder. The chocolate version looks like dirt-caked witch fingers, which is a whole different kind of creepy. Use dark cocoa for an even more dramatic effect. The almond nails stand out beautifully against the dark cookie.
Extra Gory Version: After baking and cooling, dip the tips of the fingers in red-tinted white chocolate or strawberry jam. You can also pipe a thin line of red gel along the “cuticle” area for a bloody hangnail effect. I made these for a Halloween party last year and someone actually gagged—which I took as the highest compliment.
Spiced Version: Add 1 teaspoon of pumpkin pie spice or cinnamon to the dry ingredients for a fall-flavored twist. The warm spices pair surprisingly well with the almond extract and give the cookies a cozy undertone that balances the creepy presentation.
Serving & Storage Suggestions
These cookies are at their creepiest when served at room temperature, arranged on a platter in a way that maximizes the shock value. I like to pile them loosely, with some fingers pointing in different directions and a few partially hidden underneath others. The random arrangement makes it look more like a pile of actual severed digits.
For presentation, consider serving them on a black or dark purple platter to make the pale cookies stand out. A few strategically placed fake spider webs or plastic spiders add to the atmosphere without competing with the cookies themselves. I’ve also arranged them around a bowl of red punch for a truly gruesome centerpiece.
Storage: Store the cookies in an airtight container at room temperature for up to 5 days. Layer them between sheets of parchment paper to prevent the almonds from scratching the surface of other cookies. They actually taste better on day two—the flavors meld and the texture softens slightly.
Freezing: You can freeze the shaped, unbaked cookies on a baking sheet until solid, then transfer them to a freezer bag for up to 3 months. Bake directly from frozen, adding 2-3 minutes to the baking time. Or freeze the baked cookies in an airtight container for up to 2 months—just thaw at room temperature before serving.
Reheating: If you want to restore some of the fresh-baked texture, pop the cookies in a 150°C (300°F) oven for 3-4 minutes. Let them cool completely before serving. The almond nails will regain their sheen and the cookies will have that just-baked warmth.
One thing I love about these cookies is how the flavors develop over time. The almond extract becomes more pronounced after a day or two, and the butter flavor deepens. If you can resist eating them all immediately, they’re even better the next day—which is perfect for making them ahead of a Halloween party.
Nutritional Information & Benefits
Let’s be honest—these are Halloween treats, not health food. But here’s a rough breakdown so you know what you’re working with. Per cookie (based on 24 cookies from the recipe): approximately 180 calories, 10g fat, 21g carbohydrates, 3g protein, 9g sugar.
The almonds do bring some nutritional value to the table. They’re a good source of vitamin E, magnesium, and healthy monounsaturated fats. The butter provides vitamin A and a small amount of calcium. And the egg adds protein and choline, which is important for brain health. So there’s that—technically they’re not entirely devoid of nutritional merit.
For dietary considerations: this recipe contains dairy (butter), eggs, gluten (flour), and tree nuts (almonds). If you’re serving these at a party, make sure to label them clearly so guests with allergies can make informed choices. The gluten-free and vegan variations mentioned above work well for accommodating dietary restrictions without sacrificing the creepy factor.
My personal take? These are a once-a-year indulgence, and that’s perfectly fine. Halloween is about fun and creativity, and these cookies deliver on both fronts. One cookie won’t derail any healthy eating habits, and the joy they bring is worth every calorie. Just maybe don’t eat six in one sitting—unless you’re me, in which case, no judgment here.
Conclusion
These creepy witch finger cookies with almond nails have become a non-negotiable part of my Halloween tradition. They’re the recipe that makes people stop, stare, and then laugh nervously before reaching for another one. They’re proof that Halloween baking doesn’t have to be just about pumpkin spice and candy corn—sometimes it’s about creating something that genuinely unsettles people in the most delicious way possible.
What I love most about this recipe is how it brings people together. I’ve seen grown adults squeal with delight and horror at the same time. I’ve watched kids carefully examine each finger before choosing the “most realistic” one to eat first. I’ve had friends text me weeks after Halloween asking if I can make them for Thanksgiving (the answer is always yes, by the way).
So go ahead and get weird with it. Make your knuckles crooked. Add extra blood. Bend a finger at an impossible angle. The beauty of these cookies is that there’s no such thing as a mistake—every imperfection just makes them look more authentic. And if you come up with a variation I haven’t tried, I’d love to hear about it. Drop a comment below and tell me how your witch fingers turned out. Did anyone scream? Did anyone refuse to eat them? Did anyone ask for the recipe while still looking slightly horrified? I want to know all of it.
Happy Halloween, and happy baking. May your cookies be creepy, your almond nails stay intact, and your guests never look at a bowl of almonds the same way again.
Frequently Asked Questions
Can I make these cookies ahead of time for a party?
Absolutely. You can prepare the dough up to 48 hours in advance and keep it refrigerated. You can also shape the cookies and freeze them unbaked for up to 3 months. Just bake them directly from frozen, adding a couple extra minutes to the baking time. They’re perfect for stress-free party prep.
Why did my almond nails fall off during baking?
This usually happens when the almonds aren’t pressed firmly enough into the dough. Make sure you’re embedding them about halfway into the finger tip, and that the dough is well-chilled before baking. The egg wash also helps create a seal. If they’re still falling off, try pressing the almonds in after the cookies have baked for 5 minutes—the dough will be slightly set but still soft enough to hold them.
Can I use different nuts instead of almonds?
Yes! Whole cashews work well and have a slightly different shape that can look like thick, stubby nails. Pecan halves create a more jagged, monster-like nail. For a nut-free version, try white chocolate chips that you’ve slightly softened and shaped, or even candy corn for a colorful twist. Just keep in mind that different nuts will change both the look and the flavor profile.
How do I get the cookies to look more realistic?
Study your own hand before shaping. Notice how your knuckles aren’t perfectly straight lines—they curve slightly. Your fingers taper differently at the tips. Some are longer, some are shorter. Add tiny wrinkles with a toothpick around the knuckles and at the base of the almond nail. Press a few fingers at slightly bent angles. The imperfections are what make them look real.
Can I make these cookies without almond extract?
Absolutely. Substitute the almond extract with an extra teaspoon of vanilla extract or try a different flavor like maple or coconut. The cookies will still taste great—they just won’t have that subtle marzipan undertone that echoes the almond nails. If you’re serving these to kids who might be sensitive to strong flavors, vanilla is a safe and delicious choice.
Pin This Recipe!
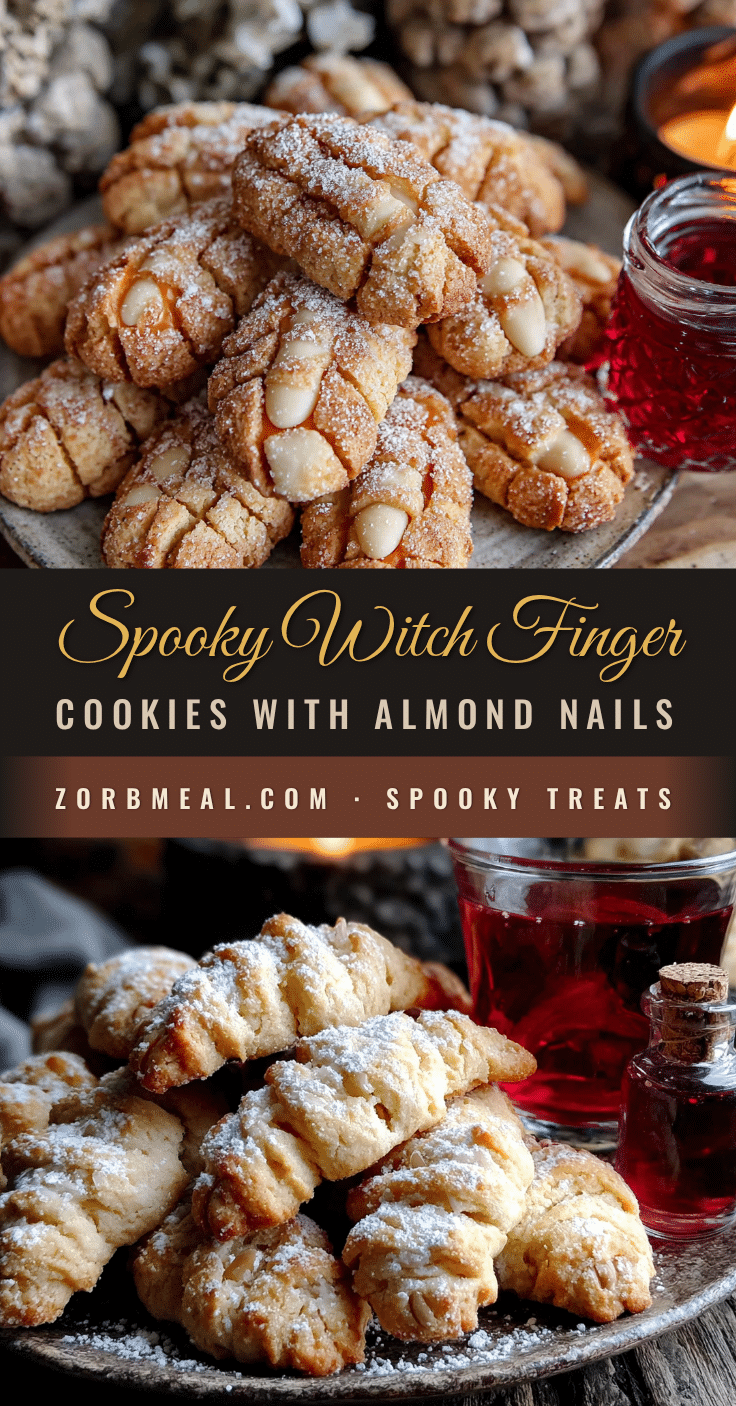
Best Easy Creepy Witch Finger Cookies with Almond Nails
These creepy witch finger cookies with almond nails are the ultimate Halloween treat—buttery, tender sugar cookies shaped like realistic severed digits with almond fingernails. Perfectly spooky and delicious, they’re guaranteed to shock and delight your party guests.
- Prep Time: 15 minutes
- Cook Time: 15 minutes
- Total Time: 1 hour 30 minutes (includes 1 hour chilling)
- Yield: 24-30 cookies 1x
- Category: Dessert
- Cuisine: American
Ingredients
- 1 cup (226g) unsalted butter, softened
- 1 cup (200g) granulated sugar
- 1 large egg, room temperature
- 1 teaspoon vanilla extract
- ½ teaspoon almond extract
- 2 ½ cups (312g) all-purpose flour
- 1 teaspoon baking powder
- ½ teaspoon salt
- 24–30 whole blanched almonds
- 1 large egg yolk
- 1 tablespoon water
- Red gel food coloring (optional)
- Sliced almonds or slivered almonds (optional)
Instructions
- In a large mixing bowl, beat the softened butter and granulated sugar together on medium speed until light and fluffy, about 3-4 minutes. Scrape down the sides of the bowl halfway through.
- Add the egg, vanilla extract, and almond extract, then beat on low until just combined.
- In a separate bowl, whisk together the flour, baking powder, and salt. Gradually add the dry mixture to the wet ingredients, mixing on low speed until a soft dough forms.
- Divide the dough into two equal portions. Flatten each into a disc about 1-inch thick, wrap tightly in plastic wrap, and refrigerate for at least 1 hour (overnight works too).
- Preheat your oven to 350°F (175°C) and line two baking sheets with parchment paper.
- Remove one disc of dough from the refrigerator. Pinch off a piece roughly the size of a walnut (about 1 to 1.5 tablespoons). Roll it between your palms into a log shape, then taper one end slightly to mimic the fingertip. Place on the prepared baking sheet.
- Using the back of a butter knife or your fingertip, press three horizontal creases into the dough to create knuckle lines. Don’t press too deep.
- Take a whole blanched almond and press it firmly into the tapered end of each finger, pointed side facing outward. The almond should sit about halfway into the dough.
- In a small bowl, whisk together the egg yolk and water. Brush a thin layer of egg wash over each almond.
- For added realism, use a toothpick to draw tiny lines and wrinkles around the knuckles and joints. Press a sliced almond into the side of one or two fingers to look like a hangnail (optional).
- If desired, dip a toothpick in red gel food coloring and draw a thin line where the almond meets the dough for a ‘bloody’ effect.
- Bake for 12-15 minutes, rotating the baking sheets halfway through. Cookies should be just set around the edges and very lightly golden on the bottom.
- Let cool on the baking sheet for 5 minutes, then transfer to a wire rack to cool completely.
- Once completely cool, add additional details if desired (e.g., more red gel coloring, or dip the ‘stump’ end in red-tinted white chocolate).
Notes
Keep your hands cool while shaping the dough—dip them in ice water between fingers if needed. Don’t skip the almond extract; it creates a cohesive flavor with the almond nails. Vary finger shapes for realism. Watch bake time carefully; cookies continue to set on the hot sheet after removal. Bake a test finger first to check shaping and timing.
Nutrition
- Serving Size: 1 cookie
- Calories: 180
- Sugar: 9
- Sodium: 95
- Fat: 10
- Saturated Fat: 6
- Carbohydrates: 21
- Fiber: 1
- Protein: 3
Keywords: Halloween cookies, witch finger cookies, creepy cookies, almond nails, sugar cookies, Halloween baking, spooky treats


