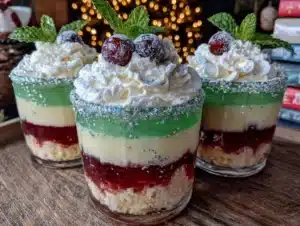
My neighbor Rosa watched me trying to wrangle three sugar-high kids at a block party last December, and she didn’t say anything at first. Then she disappeared into her house and came back holding a tray of the most glittering, jewel-toned desserts I had ever seen. The kids went completely silent, and honestly, I almost did too. Rosa just smiled and said, “They’re just Jello cups. But they’re Christmas magic.”
She was right, of course. Those little cups of shimmering red and green Jello with their creamy topping became the absolute hit of the party. I begged her for the recipe, and she laughed, telling me it was her grandmother’s trick for keeping children entertained during Christmas Eve dinner. “You layer it,” she said, “and you let the kids help. That’s the whole secret.”
I’ve made these Best Christmas Sparkle Jello Cups for Kids at least a dozen times since that evening. I’ve tweaked the layering, tried different flavors, and even messed up the timing once (let me tell you, melted Jello is not a good look). But every single time, the reaction is the same — wide eyes, sticky fingers, and requests for “just one more.” Maybe you’ve been there, scrambling for a dessert that feels special without requiring hours in the kitchen. These cups are that answer. They’re simple enough for a Tuesday, but festive enough for the fanciest Christmas gathering.
What I love most is how they bring people together. Rosa and I now make them side by side every December, our kitchen counters lined with cups at various stages of setting. It’s become our little tradition. And honestly, that’s what the holidays are about, right? Not perfection, but presence. These sparkly little cups just happen to taste amazing too.
Why You’ll Love This Recipe
Let me tell you why these Christmas Sparkle Jello Cups have earned a permanent spot in my holiday rotation. They check every box a host could want, especially when you’re cooking to impress friends and family at a gathering.
- Kid-Approved Magic : The sparkle factor is real. Kids see these shimmering layers and instantly think they’re getting something fancy. Little do they know, it takes about 20 minutes of active work.
- Stress-Free Hosting : You make these the day before your party. That’s right — one less thing to worry about when guests arrive. Just pull them from the fridge and watch them disappear.
- Budget-Friendly Showstopper : A few boxes of Jello, some whipped topping, and clear cups. That’s it. No expensive ingredients, yet they look like you spent hours.
- Perfect for Gatherings : Individual servings mean no slicing, no serving utensils, no mess. Guests grab one and go. Ideal for potlucks, Christmas parties, or family dinners.
- Completely Customizable : You can switch flavors, add fruit, or change the topping. I’ve made versions with vanilla pudding, cream cheese, and even coconut cream. They all work.
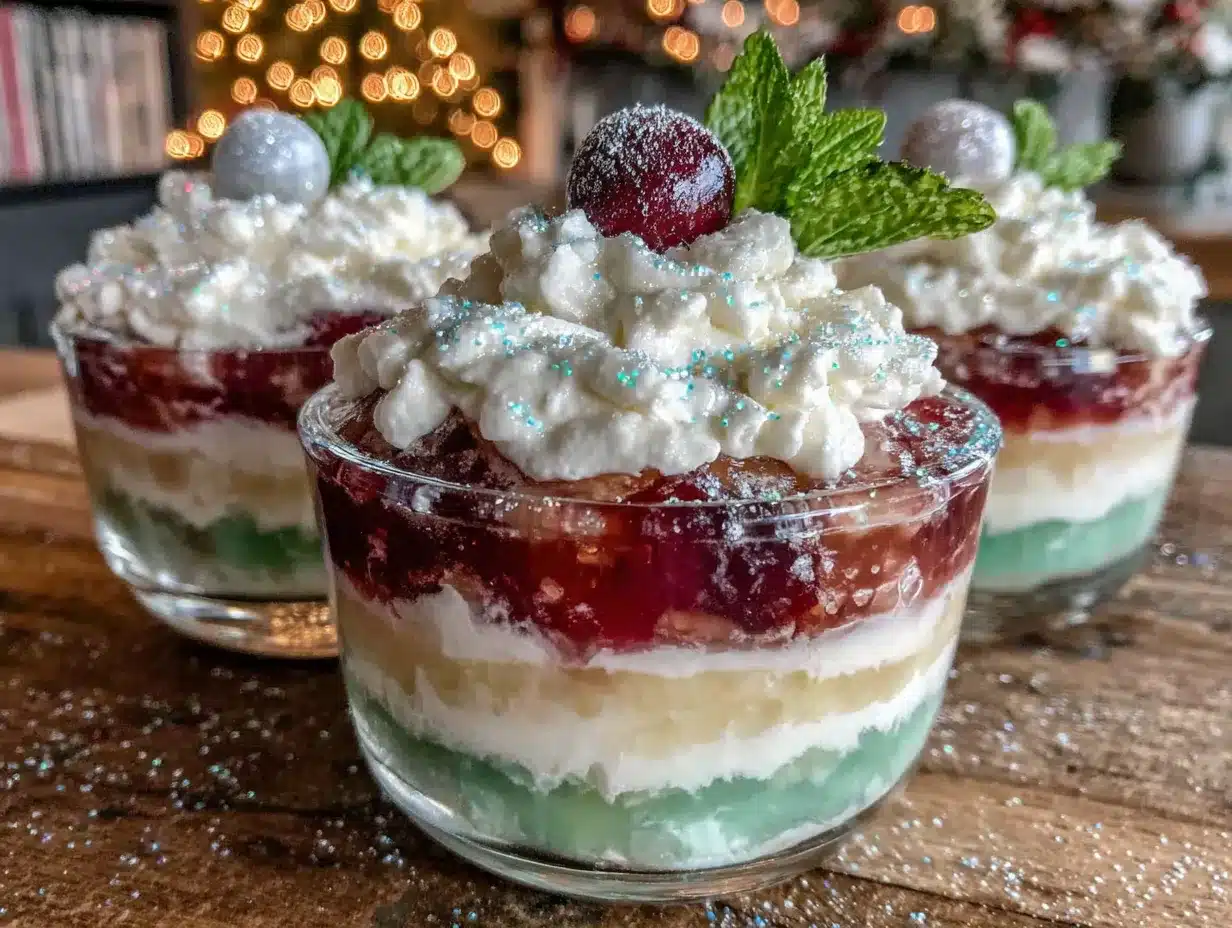
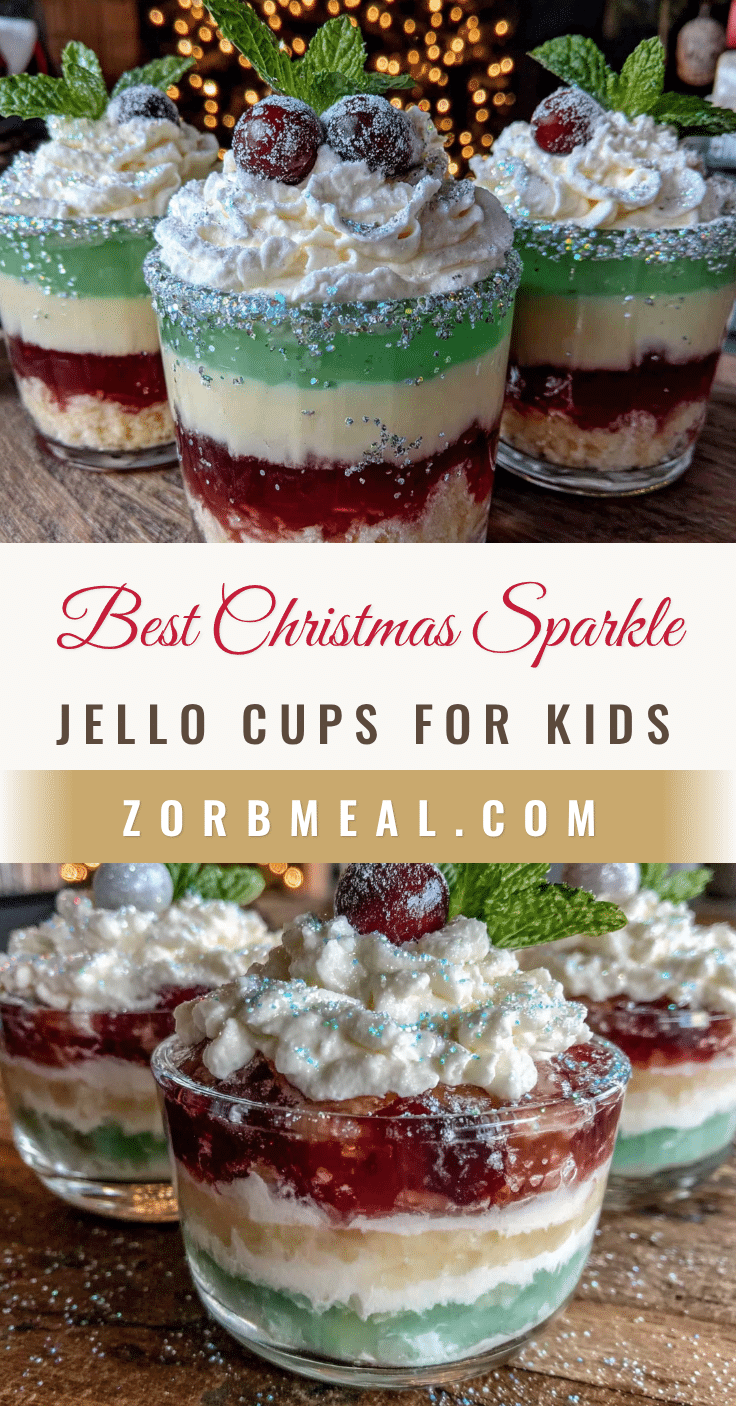
What makes this recipe different from every other Jello cup out there? It’s the technique. Most recipes just dump Jello into cups and call it a day. But Rosa’s method — slightly under-setting the first layer, carefully pouring the creamy middle, and chilling each stage properly — creates those gorgeous, distinct stripes that look like stained glass. It’s not complicated, but it makes all the difference.
I’ve tested this with kids as young as three helping (messy but adorable) and served it to adults who swore they didn’t eat Jello anymore. Spoiler: they ate two. It’s the kind of recipe that makes you look like a holiday hero without breaking a sweat.
What Ingredients You Will Need
This recipe uses simple, store-bought ingredients to create something that looks far more impressive than it should. Most of these are probably already in your pantry, which is exactly what you want when hosting a crowd.
For the Red Layer (Strawberry or Raspberry)
- 1 box (3 oz) strawberry or raspberry Jello — I prefer strawberry for its classic Christmas red, but raspberry works beautifully too
- 1 cup boiling water
- 1/2 cup cold water
For the Green Layer (Lime or Green Apple)
- 1 box (3 oz) lime Jello — this gives that bright, festive green. Green apple works if you can find it, but lime is more reliable
- 1 cup boiling water
- 1/2 cup cold water
For the Creamy Middle Layer
- 1 package (3.4 oz) instant vanilla pudding mix — Jell-O brand works best for consistency
- 1 cup cold milk — whole milk gives a richer texture, but 2% works fine
- 1/2 cup whipped topping (like Cool Whip), thawed — or you can whip 1/2 cup heavy cream with 1 tablespoon powdered sugar
For the Sparkle Topping
- 1 cup whipped topping, thawed
- Edible glitter or sparkling sugar — look for “edible glitter” in the baking aisle; regular sprinkles work too, but the fine glitter gives that wow factor
- Optional: fresh raspberries or mint leaves for garnish
Ingredient Tips from My Kitchen
I’ve learned a few things the hard way. First, don’t use sugar-free Jello for this recipe. It sets softer and doesn’t hold those clean layers as well. Save it for other recipes. Second, the instant pudding mix is non-negotiable — cook-and-serve pudding won’t set fast enough for layering. I’ve tried it, and it was a soupy disaster.
For the whipped topping, I honestly prefer Cool Whip over homemade cream for this recipe. It holds its shape longer, which matters when you’re serving these at a party where they might sit out for a while. If you’re a homemade purist, go ahead and whip your own cream, just add a little gelatin to stabilize it.
You’ll also need 12 to 16 clear plastic cups (5 to 7 ounces each). The clear cups are essential — the whole point is seeing those beautiful layers. I get mine at the party supply store or online. They’re cheap and make cleanup a breeze.
Equipment Needed
You don’t need fancy equipment for these Christmas Sparkle Jello Cups, which is exactly why I love them. Here’s what you’ll need:
- Clear plastic cups (5-7 oz) — 12 to 16 cups. I prefer the ones with lids for easy transport to parties. The Solo brand works great, but any clear cup will do.
- Two medium mixing bowls — one for each Jello color. Glass bowls work best because you can see if the Jello is fully dissolved.
- One small mixing bowl — for the pudding layer.
- Measuring cups — a 1-cup measure for boiling water and a 1/2 cup for cold water.
- Whisk — for dissolving Jello and mixing pudding. A fork works in a pinch, but a whisk is smoother.
- Liquid measuring cup — for pouring Jello into cups. A spout makes this less messy.
- Small spoon or offset spatula — for spreading the creamy layer evenly.
- Refrigerator space — you need a flat spot in your fridge that can hold 12-16 cups without tipping. A baking sheet works perfectly.
If you don’t have clear cups, you can use small glass jars or even wine glasses for a fancier presentation. I’ve used mason jars before, and they look adorable. Just make sure whatever you use is see-through — the layers are the whole point.
A tip I learned from Rosa: write on the cups with a permanent marker to identify which layer is which if you’re making multiple batches. It saves you from guessing later.
Preparation Method
This recipe has a few waiting periods, so read through everything before you start. Trust me, I once got distracted and poured the second layer too soon. It was not pretty.
Step 1: Make the Red Layer
In a medium bowl, empty the strawberry Jello packet. Pour in 1 cup of boiling water and whisk for about 2 minutes until the powder is completely dissolved. You shouldn’t see any granules. Add 1/2 cup cold water and stir. Pour about 2 tablespoons of the red Jello into each clear cup. You want the layer to be about 1/2 inch deep. Place the cups on a baking sheet and refrigerate for 45 minutes to 1 hour, until the Jello is set but still slightly tacky on top. It should jiggle but not be liquid.
Step 2: Make the Creamy Middle Layer
While the red layer sets, make the pudding. In a small bowl, whisk the instant vanilla pudding mix with 1 cup cold milk for about 2 minutes until it thickens. It will be quite thick — that’s correct. Gently fold in 1/2 cup of thawed whipped topping until smooth. Set this aside at room temperature. Don’t refrigerate it yet, or it will get too stiff to spread.
Step 3: Add the Creamy Layer
Once the red layer is set (tacky but not liquid), take the cups out of the fridge. Spoon about 1 to 2 tablespoons of the creamy pudding mixture on top of the red layer. Use the back of a small spoon to spread it gently to the edges. Don’t press too hard, or you’ll mix the layers. Return the cups to the fridge for 20 minutes. This step is crucial — the creamy layer needs to firm up slightly before you add the green Jello.
Step 4: Make the Green Layer
While the creamy layer chills, prepare the lime Jello. In a medium bowl, empty the lime Jello packet. Add 1 cup boiling water and whisk until dissolved. Add 1/2 cup cold water. Let this sit at room temperature for about 10 minutes to cool slightly. You don’t want it hot when you pour it over the creamy layer, or it will melt the pudding.
Step 5: Add the Green Layer
Take the cups out of the fridge. Gently pour about 2 tablespoons of the green Jello over the creamy layer. Pour it over the back of a spoon to avoid disturbing the pudding underneath. The green layer should be about 1/2 inch deep. Return the cups to the fridge and chill for at least 2 hours, or until the green layer is fully set.
Step 6: Add the Topping
Once the green layer is firm, remove the cups from the fridge. Top each cup with a generous dollop of whipped topping — about 2 tablespoons. Use the back of a spoon to create little peaks or swirls. Sprinkle edible glitter or sparkling sugar over the top. If you’re feeling fancy, add a fresh raspberry or a tiny mint leaf on top for color contrast.
Step 7: Chill Until Serving
Refrigerate the finished cups for at least 30 minutes before serving. This allows the topping to set slightly and the flavors to meld. These cups are best served cold, straight from the fridge.
A quick note: if you’re making these for a party, I recommend making them the day before. The layers set perfectly overnight, and the flavors actually get better. Plus, it’s one less thing to do on party day. You’re welcome.
Cooking Tips & Techniques
I’ve made these Christmas Sparkle Jello Cups more times than I care to count, and I’ve collected a few tricks along the way. Some came from Rosa, some from my own kitchen disasters.
Temperature is everything. The biggest mistake people make is pouring hot Jello over a partially set layer. It melts everything into a muddy mess. Always let your Jello cool to room temperature before adding it to the cups. I set a timer for 10 minutes after dissolving it, and I don’t touch it until the timer goes off.
Patience with the layers. I know it’s tempting to rush, but each layer needs its full chilling time. The red layer needs at least 45 minutes. The creamy layer needs 20 minutes. The green layer needs 2 hours. I’ve tried cutting corners, and I ended up with pinkish-green swirls instead of distinct stripes. If you want that Instagram-worthy look, wait the full time.
Pouring technique matters. When adding any liquid layer over a set layer, pour it over the back of a spoon. This diffuses the liquid and prevents it from punching a hole through the layer below. It sounds fussy, but it takes two seconds and saves your layers.
Make extra. These cups disappear fast at parties. I always make at least 16 cups for a gathering of 10 people. Kids will eat two, and adults will sneak one when they think no one is looking. Trust me on this.
Prep ahead strategy. Here’s my hosting timeline: two days before the party, I make the red and green Jello layers (steps 1 and 4) and store them in separate containers in the fridge. The day before, I assemble the cups completely. This breaks the work into manageable chunks and leaves me free to focus on other dishes on party day.
What to do if things go wrong. If your layers start to blur, don’t panic. They’ll still taste amazing. If the Jello doesn’t set, you might have used too much water or not dissolved it fully. You can try re-dissolving it with a little hot water and re-chilling, but honestly, I’ve served “soft set” cups before and nobody complained. Kids especially don’t care about perfect layers.
Variations & Adaptations
One of the best things about this recipe is how flexible it is. Here are some variations I’ve tried and loved.
Christmas Morning Version : Swap the lime Jello for lemon and add a drop of green food coloring. Use strawberry for red. Top with a dollop of vanilla yogurt instead of whipped topping for a slightly healthier breakfast treat. My kids go crazy for this version on Christmas morning.
Berry Blast Variation : Instead of Jello, use fresh fruit puree mixed with unflavored gelatin. Blend 1 cup of strawberries with 2 tablespoons of sugar and 1 packet of gelatin. Heat gently until gelatin dissolves. This gives a more natural flavor and color. It’s a bit more work, but the taste is incredible.
Creamy Dreamy Version : Add a layer of cheesecake-style filling between the Jello layers. Beat 4 oz of cream cheese with 1/4 cup sugar until smooth. Fold in 1/2 cup whipped topping. Spread this over the first Jello layer before adding the second. It adds richness and makes these cups feel even more decadent.
Dairy-Free Adaptation : Use coconut milk or almond milk for the pudding layer. Coconut cream whipped topping works beautifully instead of dairy whipped topping. The flavor changes slightly, but it’s still delicious. I’ve made this for a friend with dairy allergies, and she almost cried (happy tears).
Adult-Only Sparkle Cups : For a grown-up gathering, replace the cold water in the Jello with champagne or sparkling wine. Use about 1/2 cup of champagne instead of water. The alcohol prevents the Jello from setting as firmly, so these need to be served in cups and eaten with a spoon. They’re bubbly, festive, and very popular at New Year’s parties.
Serving & Storage Suggestions
These Christmas Sparkle Jello Cups are designed for parties, and they serve beautifully with minimal fuss.
Serving Temperature : Serve these cups cold, straight from the fridge. They lose their structure if they sit at room temperature for more than 30 minutes. If you’re hosting a party, keep them in the fridge until serving time, and only put out a few at a time. Replenish as needed.
Presentation Ideas : Arrange the cups on a large platter or tray. If you have a cake stand, use it — the height makes the layers more visible. Add some fresh cranberries and sprigs of rosemary around the base for a festive touch. I sometimes tie a small ribbon around each cup for extra holiday flair. It takes 10 minutes and makes them look like party favors.
What to Serve Alongside : These cups pair beautifully with other light desserts. I often serve them alongside Christmas cookies, a cheese board, or fresh fruit. They’re also perfect after a heavy meal — the lightness of the Jello balances out richer dishes like roasted meats and creamy casseroles.
Storage Instructions : Store leftover cups in the refrigerator, covered, for up to 5 days. The layers will stay distinct for about 3 days. After that, the creamy layer may start to absorb into the Jello, but they’ll still taste good. Do not freeze these cups — the texture becomes watery and unappealing.
Transporting to a Party : If you’re bringing these to a gathering, use cups with lids. Place them on a baking sheet with raised edges (to prevent sliding) and cover the whole thing with plastic wrap. Keep them level during transport. I’ve carried them in a cooler before, and they survived just fine.
Flavor Development : Interestingly, these cups taste better after 24 hours in the fridge. The flavors meld together, and the layers become slightly softer and more cohesive. So don’t worry if you make them a day ahead — they’ll be even better.
Nutritional Information & Benefits
Let’s be honest — these are a treat, not a health food. But here’s what you need to know.
Estimated Nutritional Values (per cup) : Approximately 120 calories, 3g fat, 22g carbohydrates, 18g sugar, 1g protein. These numbers vary based on your specific ingredients and portion sizes. The sugar content comes primarily from the Jello and pudding mix.
Health Considerations : You can make a lower-sugar version using sugar-free Jello and sugar-free pudding mix. The texture will be slightly different — sugar-free Jello sets a bit softer — but the taste is still good. I’ve made this version for diabetic family members, and they appreciated having a festive option.
Allergen Information : This recipe contains dairy (milk, whipped topping). It does not contain nuts, eggs, or gluten in its standard form. However, always check your specific ingredient labels for potential cross-contamination warnings, especially with the Jello and pudding mixes.
Ingredient Benefits : On the bright side, Jello contains collagen (from gelatin), which is good for skin and joints. The milk in the pudding layer provides calcium and vitamin D. And the fruit-flavored Jello does have a tiny amount of vitamin C. But honestly, I make these because they make people happy, not because they’re a superfood.
My Wellness Perspective : I believe in balance. These cups are a special treat for the holidays, not an everyday snack. I serve them alongside healthier options, and I don’t stress about the sugar content. The joy they bring to a gathering is worth more than the calories. Life is too short to skip Christmas sparkle.
Conclusion
These Best Christmas Sparkle Jello Cups for Kids are more than just a dessert — they’re a little piece of holiday magic that anyone can make. Rosa taught me that the best recipes aren’t complicated; they’re the ones that bring people together and make them smile. These cups do exactly that.
I love that they’re forgiving enough for beginners, impressive enough for parties, and customizable enough to fit any dietary need. Whether you’re hosting a big family dinner or bringing a dish to a potluck, these cups will earn you compliments without hours of work. And honestly, watching a child’s face light up when they see those shimmering layers is worth every minute of chilling time.
I hope you make these for your next Christmas gathering. I hope you get a little messy with the layers, let the kids help sprinkle the glitter, and enjoy every single bite. And when someone asks for the recipe — because they will — you can smile and say it came from a neighbor who knew exactly what the holidays needed.
If you try this recipe, I’d love to hear about it. Drop a comment below, share a photo, or tell me how you customized it. Happy holidays, and happy cooking!
Frequently Asked Questions
Can I make these Christmas Sparkle Jello Cups ahead of time?
Absolutely! In fact, they’re better when made a day ahead. The layers set perfectly overnight, and the flavors meld together beautifully. Just keep them covered in the refrigerator until you’re ready to serve.
Why did my layers mix together?
This usually happens when the first layer isn’t fully set or when you pour the second layer too quickly. Make sure each layer chills for the full recommended time. Also, pour the liquid Jello over the back of a spoon to diffuse it gently over the creamy layer.
Can I use sugar-free Jello for this recipe?
Yes, but expect slightly softer layers. Sugar-free Jello doesn’t set as firmly as regular Jello. You can compensate by adding an extra 1/4 teaspoon of unflavored gelatin to the water when dissolving the Jello. The taste is still great, and it works well for those watching their sugar intake.
How long do these cups last in the fridge?
These cups will keep for up to 5 days in the refrigerator when covered. The layers stay most distinct for the first 3 days. After that, the creamy layer may start to blend with the Jello, but they’ll still be safe to eat and delicious.
Can I use different Jello flavors for Christmas?
Definitely! For a Christmas theme, stick with red and green. But you can use any red flavor (cherry, raspberry, strawberry) and any green flavor (lime, green apple). For other holidays, try blue and white for Hanukkah, or red and blue for the Fourth of July. The technique works with any flavor combination.
Pin This Recipe!
Best Christmas Sparkle Jello Cups: Easy Kid-Friendly Recipe
These shimmering red and green Jello cups with a creamy middle layer are a festive, kid-approved dessert that’s simple to make and perfect for holiday gatherings.
- Prep Time: 20 minutes
- Cook Time: 0 minutes
- Total Time: 3 hours 50 minutes (includes chilling)
- Yield: 12-16 servings 1x
- Category: Dessert
- Cuisine: American
Ingredients
- 1 box (3 oz) strawberry or raspberry Jello
- 1 cup boiling water
- 1/2 cup cold water
- 1 box (3 oz) lime Jello
- 1 cup boiling water
- 1/2 cup cold water
- 1 package (3.4 oz) instant vanilla pudding mix
- 1 cup cold milk
- 1/2 cup whipped topping (like Cool Whip), thawed
- 1 cup whipped topping, thawed
- Edible glitter or sparkling sugar
- Optional: fresh raspberries or mint leaves for garnish
Instructions
- In a medium bowl, empty the strawberry Jello packet. Pour in 1 cup of boiling water and whisk for about 2 minutes until the powder is completely dissolved. Add 1/2 cup cold water and stir. Pour about 2 tablespoons of the red Jello into each clear cup, about 1/2 inch deep. Place the cups on a baking sheet and refrigerate for 45 minutes to 1 hour, until the Jello is set but still slightly tacky on top.
- While the red layer sets, make the pudding. In a small bowl, whisk the instant vanilla pudding mix with 1 cup cold milk for about 2 minutes until it thickens. Gently fold in 1/2 cup of thawed whipped topping until smooth. Set aside at room temperature.
- Once the red layer is set, take the cups out of the fridge. Spoon about 1 to 2 tablespoons of the creamy pudding mixture on top of the red layer. Use the back of a small spoon to spread it gently to the edges. Return the cups to the fridge for 20 minutes.
- While the creamy layer chills, prepare the lime Jello. In a medium bowl, empty the lime Jello packet. Add 1 cup boiling water and whisk until dissolved. Add 1/2 cup cold water. Let this sit at room temperature for about 10 minutes to cool slightly.
- Take the cups out of the fridge. Gently pour about 2 tablespoons of the green Jello over the creamy layer, pouring it over the back of a spoon to avoid disturbing the pudding underneath. The green layer should be about 1/2 inch deep. Return the cups to the fridge and chill for at least 2 hours, or until the green layer is fully set.
- Once the green layer is firm, remove the cups from the fridge. Top each cup with a generous dollop of whipped topping — about 2 tablespoons. Use the back of a spoon to create little peaks or swirls. Sprinkle edible glitter or sparkling sugar over the top. If desired, add a fresh raspberry or a tiny mint leaf on top.
- Refrigerate the finished cups for at least 30 minutes before serving. Serve cold, straight from the fridge.
Notes
Temperature is everything: let Jello cool to room temperature before adding to cups. Patience with layers is key for distinct stripes. Pour liquid over the back of a spoon to avoid disturbing set layers. Make extra as these disappear fast. Can be made a day ahead for best flavor.
Nutrition
- Serving Size: 1 cup
- Calories: 120
- Sugar: 18
- Sodium: 150
- Fat: 3
- Saturated Fat: 2
- Carbohydrates: 22
- Protein: 1
Keywords: Christmas Jello cups, kid-friendly dessert, holiday dessert, layered Jello, sparkle Jello