Juggling three hungry kids, a ringing phone, and a half-empty pantry when I realized the dessert was missing from our holiday spread. The clock was ticking, and honestly, the thought of baking anything complicated felt like a cruel joke. But these Festive Red White and Blue Layered Jello Cups popped into my head—simple, colorful, and just what the chaos called for.
There’s something oddly soothing about layering those bright, translucent jello colors in clear cups while the kids chatter around me, throwing random questions and occasionally sneaking spoonfuls before the layers set. The vibrant reds and blues contrasted with the creamy white layer always make me smile—like a little celebration in each cup, even when the kitchen feels like a tornado just passed.
This recipe stuck because it’s a no-fuss answer to those last-minute dessert emergencies. Plus, it’s perfect for getting the kids involved without risking a sugar-fueled mess (too much). Each spoonful reminds me that sometimes the simplest things—layered colors and a little patience—can bring a moment of calm and joy. So yeah, these jello cups aren’t just a pretty red, white, and blue treat; they’re a little slice of holiday magic I trust to deliver every time.
Why You’ll Love This Recipe
Honestly, I’ve made plenty of jello desserts over the years, but this one keeps landing on my holiday menu. Here’s why it’s become a reliable favorite:
- Quick & Easy: Comes together in under 30 minutes, with chilling time mostly hands-off—perfect for busy holiday nights or spontaneous gatherings.
- Simple Ingredients: No fancy grocery runs; you probably already have the flavored gelatin packets and cream cheese on hand.
- Perfect for Holidays: The patriotic colors make it a standout for Fourth of July, Memorial Day, or any red-white-and-blue-themed event.
- Crowd-Pleaser: Kids love the fun layers, and adults appreciate the nostalgic, creamy twist with the white layer.
- Unbelievably Delicious: The sweet, tart, and creamy layers complement each other beautifully; it’s not just eye candy.
What sets this recipe apart? The creamy white layer isn’t just plain jello—it’s a smooth mixture of cream cheese and whipped topping that gives the cups a luscious texture and balances the fruity flavors perfectly. I’ve tried other versions with plain gelatin or pudding, but this combo wins every time. Plus, layering the jellos carefully to keep those clean stripes? There’s a little technique there that I’ve honed so it looks professional without the stress.
This recipe isn’t just dessert—it’s a small celebration in a cup, the kind that makes you pause, smile, and savor a simple moment during the holiday hustle.
What Ingredients You Will Need
This recipe uses simple, wholesome ingredients to deliver bold color and satisfying texture without the fuss. Everything is easy to find and pantry-friendly, with options for substitutions if needed.
- Red Layer: 1 package (3 oz / 85 g) strawberry or cherry flavored gelatin (I like Jell-O for consistent flavor and color)
- Blue Layer: 1 package (3 oz / 85 g) blue raspberry flavored gelatin (blueberry works too, but blue raspberry is classic)
- White Layer:
- 1 package (8 oz / 226 g) cream cheese, softened (use full-fat for best creaminess)
- 1 cup (240 ml) cold water
- 1 package (3 oz / 85 g) unflavored gelatin powder
- 1 ½ cups (360 ml) heavy whipping cream or whipped topping (cool whip works well)
- ½ cup (100 g) granulated sugar
- 1 teaspoon vanilla extract
- Optional Garnishes: Fresh blueberries, sliced strawberries, or whipped cream to top off
Ingredient tips: Look for small-curd cream cheese for the smoothest texture. If you want a dairy-free option, swap cream cheese with a plant-based version and use coconut whipped cream instead of heavy cream. For a gluten-free treat, all ingredients here are naturally gluten-free, just double-check labels.
Equipment Needed
- Measuring cups and spoons for accurate ingredient amounts
- Mixing bowls — medium and large sizes
- Electric mixer or hand whisk — I use a hand mixer for the white layer to get it perfectly fluffy
- Clear plastic or glass cups — small dessert cups or mason jars work great for serving and showing off the layers
- Small saucepan for dissolving gelatin
- Spatula for folding in whipped cream
- Refrigerator space — you’ll need to chill the cups for at least 1 hour between layers
If you don’t have an electric mixer, a sturdy whisk and some elbow grease will do just fine—takes a little longer but is doable. For budget-friendly cups, disposable clear plastic ones work well and make cleanup easier after a big holiday party.
Preparation Method
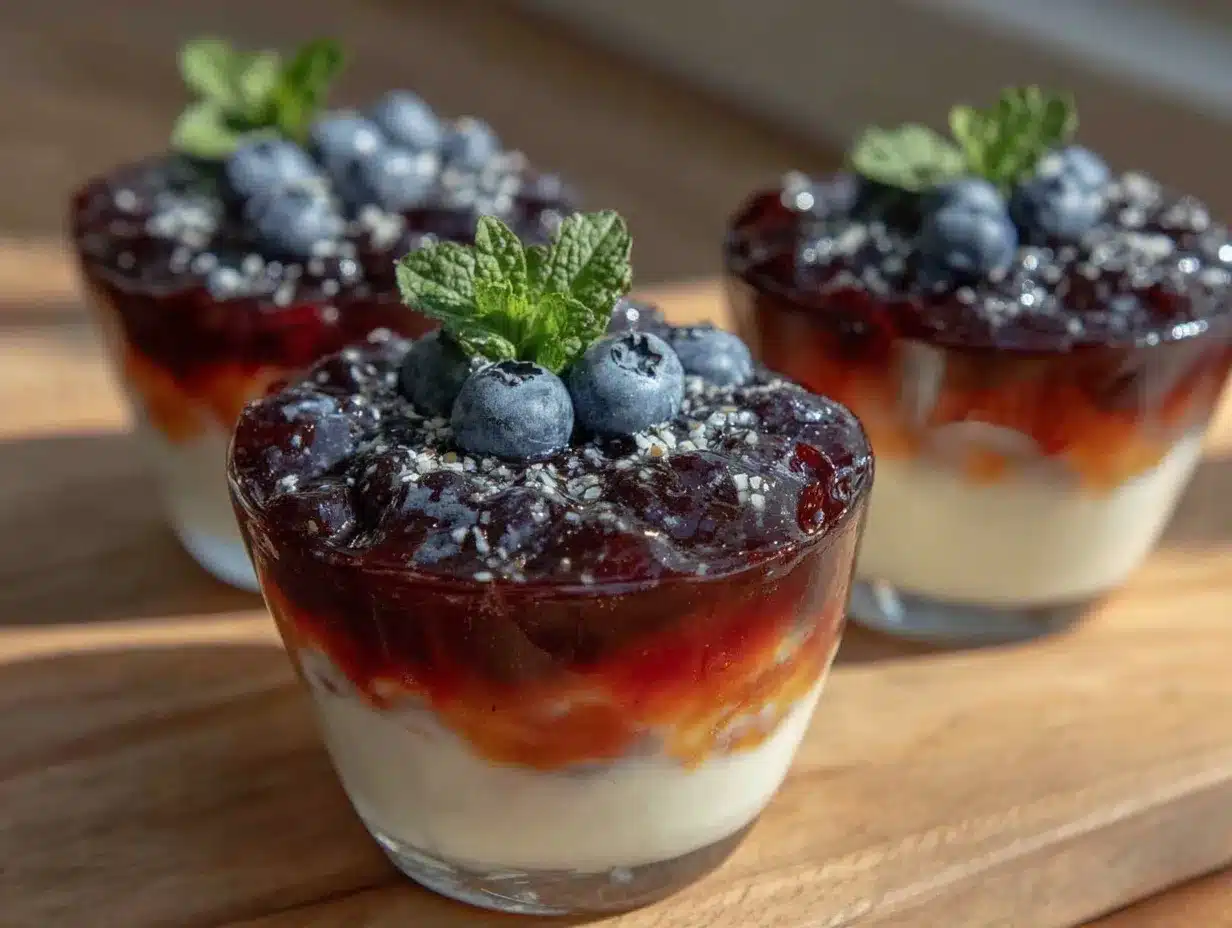
- Prepare the Red Layer: Boil 1 cup (240 ml) of water. Pour over the red gelatin powder in a bowl and stir until completely dissolved (about 2 minutes). Add 1 cup (240 ml) cold water and mix. Pour about ¼ cup (60 ml) into each cup, then refrigerate for 30 minutes or until just set but still tacky to the touch.
- Make the White Layer Base: While the red layer chills, sprinkle unflavored gelatin over ½ cup (120 ml) cold water and let it bloom for 5 minutes. In a small saucepan over low heat, dissolve the bloomed gelatin until clear, about 2 minutes—don’t boil! In a large bowl, beat softened cream cheese with sugar until smooth. Slowly whisk in the dissolved gelatin mixture and vanilla extract.
- Whip and Fold: In a separate bowl, whip heavy cream to soft peaks. Gently fold the whipped cream into the cream cheese mixture until combined and fluffy. This creates the creamy white layer that contrasts beautifully with the fruity gelatin layers.
- Add the White Layer: Spoon about ¼ cup (60 ml) of the white mixture on top of the red layer in each cup. Return cups to the fridge for 30 minutes or until firm.
- Prepare the Blue Layer: Repeat the gelatin dissolving process with the blue gelatin flavor: boil 1 cup (240 ml) water, stir in powder, add 1 cup cold water, and mix. Let cool to room temperature but don’t let it set.
- Add the Blue Layer: Carefully pour ¼ cup (60 ml) blue gelatin on top of the set white layer. Refrigerate for at least 1 hour or until fully set.
- Final Touches: Before serving, garnish with fresh berries or a dollop of whipped cream if you like. The layers should be clean and distinct, showcasing the festive red, white, and blue.
Tips: Make sure each layer is mostly set before adding the next to avoid color bleeding. Cooling the blue gelatin to room temperature prevents it from melting the white layer. If you accidentally pour too quickly, use a spoon to slow the flow for neat layers.
Cooking Tips & Techniques
Layered jello cups look simple but have a few key details that make or break them. I’ve learned the hard way!
- Patience is key: Let each layer chill until just firm—not fully rock hard—so the next layer sticks without mixing but still sets smoothly.
- Temperature control: Pour the next gelatin layer only when it’s cooled to about room temp. Hot gelatin will melt the layer beneath and cause colors to run.
- Perfect white layer: Softened cream cheese is a must. If it’s too cold, you’ll get lumps. Beat it until silky before folding in whipped cream gently to keep air in the mixture.
- Layer pouring: Pour slowly over the back of a spoon held just above the previous layer to avoid splashes and mixing.
- Timing multitasking: Use chilling time to prep other dishes like a quick lemon garlic shrimp pasta (great to serve alongside these cups) or get your main course ready.
Once, I skipped cooling the blue gelatin and ended up with a sad purple mess instead of clean stripes—lesson learned! Also, if you don’t have whipped cream on hand, whipped topping works fine but might be slightly sweeter.
Variations & Adaptations
This recipe is flexible and invites creativity based on your holiday, dietary needs, or flavor preferences.
- Dietary swaps: Use sugar-free gelatin packets and substitute heavy cream with coconut cream for a dairy-free, lower sugar treat.
- Seasonal flavors: Swap the red layer for raspberry gelatin and add fresh raspberries between layers for extra texture and tang.
- Flavor twist: Add a splash of lemon juice to the white layer for a subtle citrus note that cuts the richness beautifully.
- Cooking method: Instead of individual cups, use a clear glass dish to make a layered jello cake, then slice into squares for a festive presentation.
- Personal variation: I once tried adding crushed graham crackers between layers for a fun crunch—surprisingly good and kids loved it!
Serving & Storage Suggestions
Serve these jello cups chilled for the best texture. They look fantastic on a dessert table, especially paired with other festive dishes like creamy patriotic cheesecake bars or classic grilled hot dogs with homemade chili for a casual BBQ vibe.
Store leftovers covered tightly in the fridge for up to 3 days. The layers hold up well but might release a little liquid after a day or so—just give a gentle stir before serving again.
To reheat? Actually, these are best cold, but if you want to soften them slightly, let cups sit at room temperature for 10 minutes before serving. The flavors meld nicely over time, especially if you add fresh berries just before serving.
Nutritional Information & Benefits
Each cup offers a light, refreshing dessert option with roughly 150-200 calories depending on portion size and toppings. The gelatin provides a protein boost, and the cream cheese adds calcium and healthy fats.
Key ingredients like cream cheese and heavy cream contribute richness but also provide vitamins A and D. Using fresh berries as garnish adds antioxidants and fiber. This dessert is gluten-free naturally, and with ingredient swaps, it can be made dairy-free or low-sugar.
From a wellness perspective, it’s a fun way to enjoy a sweet treat without the heaviness of cakes or pies, especially during festive meals that tend to be rich.
Conclusion
These Festive Red White and Blue Layered Jello Cups are proof that you don’t need complicated desserts to impress. They’re colorful, quick, and fun—perfect for bringing a little lightness and joy to your holiday table.
Feel free to tweak the flavors or presentation to suit your style. I love how this recipe feels like a little holiday tradition in a cup, one that’s as comforting as it is cheerful.
Give it a try and see how these simple layers can brighten up your next celebration. And hey, if you’re looking for other easy and festive dishes, you might enjoy the flavorful Caprese stuffed chicken breast or the quick lemon garlic shrimp pasta that I often serve alongside for a full festive meal.
FAQs
Can I make these jello cups ahead of time?
Yes! They keep well in the fridge for up to 3 days. Just cover them tightly to prevent drying out.
What if I don’t have cream cheese for the white layer?
You can substitute with a mixture of vanilla pudding and whipped cream, but the texture will be less tangy and creamy.
Can I use different flavors for the red and blue layers?
Absolutely! Feel free to swap flavors to your liking—raspberry and blueberry work well too.
How do I prevent the layers from mixing?
Make sure each layer is mostly set and the next gelatin is cooled to room temperature before pouring gently over the back of a spoon.
Is this recipe suitable for kids?
Yes, it’s kid-friendly and a fun way to get little ones involved in holiday dessert prep.
Pin This Recipe!
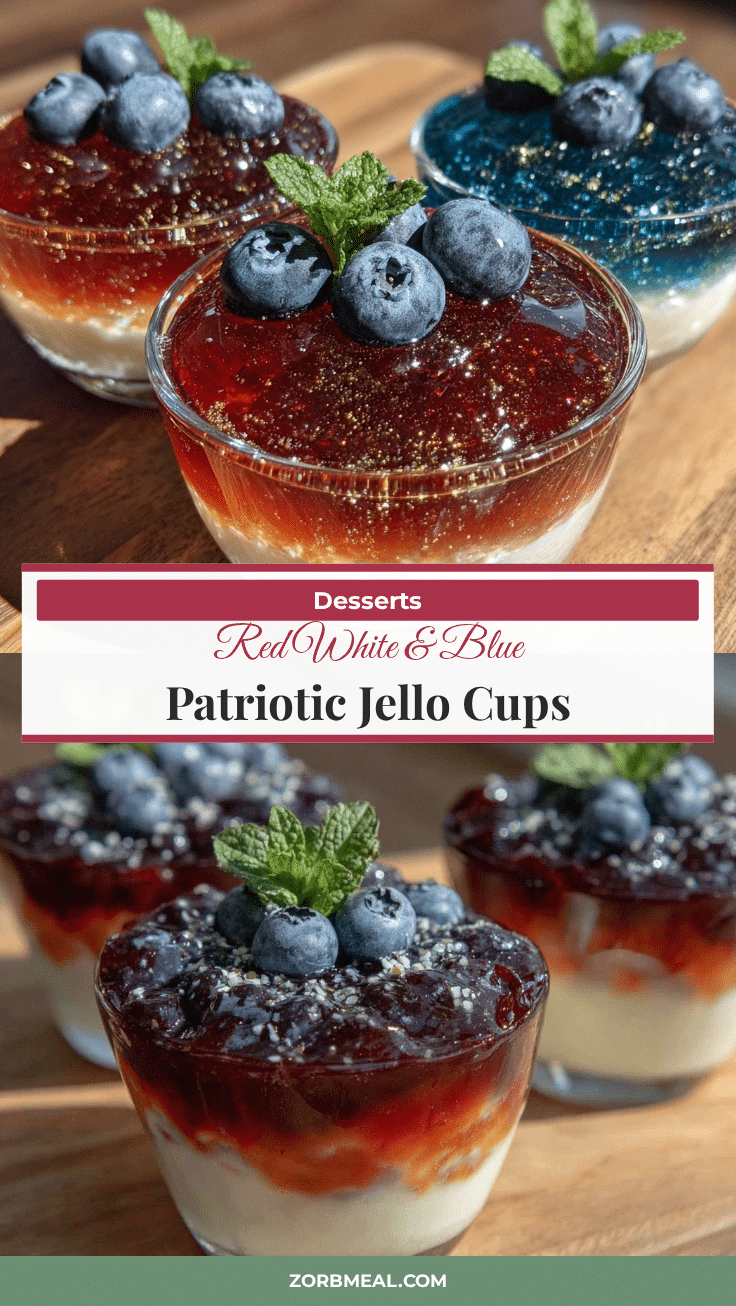
Festive Red White and Blue Layered Jello Cups
A quick and easy 4-layer jello dessert perfect for holidays, featuring vibrant red and blue gelatin layers with a creamy white layer made from cream cheese and whipped topping.
- Prep Time: 15 minutes
- Cook Time: 0 minutes
- Total Time: 2 hours 15 minutes
- Yield: 8 servings 1x
- Category: Dessert
- Cuisine: American
Ingredients
- 1 package (3 oz / 85 g) strawberry or cherry flavored gelatin
- 1 package (3 oz / 85 g) blue raspberry flavored gelatin
- 1 package (8 oz / 226 g) cream cheese, softened
- 1 cup (240 ml) cold water
- 1 package (3 oz / 85 g) unflavored gelatin powder
- 1 ½ cups (360 ml) heavy whipping cream or whipped topping
- ½ cup (100 g) granulated sugar
- 1 teaspoon vanilla extract
- Optional garnishes: fresh blueberries, sliced strawberries, or whipped cream
Instructions
- Prepare the Red Layer: Boil 1 cup (240 ml) of water. Pour over the red gelatin powder in a bowl and stir until completely dissolved (about 2 minutes). Add 1 cup (240 ml) cold water and mix. Pour about ¼ cup (60 ml) into each cup, then refrigerate for 30 minutes or until just set but still tacky to the touch.
- Make the White Layer Base: While the red layer chills, sprinkle unflavored gelatin over ½ cup (120 ml) cold water and let it bloom for 5 minutes. In a small saucepan over low heat, dissolve the bloomed gelatin until clear, about 2 minutes—don’t boil! In a large bowl, beat softened cream cheese with sugar until smooth. Slowly whisk in the dissolved gelatin mixture and vanilla extract.
- Whip and Fold: In a separate bowl, whip heavy cream to soft peaks. Gently fold the whipped cream into the cream cheese mixture until combined and fluffy.
- Add the White Layer: Spoon about ¼ cup (60 ml) of the white mixture on top of the red layer in each cup. Return cups to the fridge for 30 minutes or until firm.
- Prepare the Blue Layer: Repeat the gelatin dissolving process with the blue gelatin flavor: boil 1 cup (240 ml) water, stir in powder, add 1 cup cold water, and mix. Let cool to room temperature but don’t let it set.
- Add the Blue Layer: Carefully pour ¼ cup (60 ml) blue gelatin on top of the set white layer. Refrigerate for at least 1 hour or until fully set.
- Final Touches: Before serving, garnish with fresh berries or a dollop of whipped cream if desired.
Notes
Let each layer chill until just firm before adding the next to avoid mixing. Cool gelatin to room temperature before pouring over the previous layer to prevent melting. Use a spoon to slow the flow when pouring layers for neat stripes. Softened cream cheese is essential for a smooth white layer. Can substitute dairy ingredients for dairy-free options.
Nutrition
- Serving Size: 1 cup (approximate)
- Calories: 175
- Sugar: 16
- Sodium: 120
- Fat: 11
- Saturated Fat: 6
- Carbohydrates: 18
- Protein: 3
Keywords: jello cups, layered jello, holiday dessert, red white and blue dessert, easy jello recipe, patriotic dessert, no bake dessert


