This was supposed to be a completely different dish. I had this grand vision of a classic green bean casserole, the kind my mom used to make every Thanksgiving, with the crispy fried onions on top and that creamy mushroom soup base. I was already running late for a family dinner, my toddler was clinging to my leg, and I grabbed the wrong butter from the fridge. It wasn’t the regular unsalted stick I usually reach for. It was the browned butter I had made earlier that week for a batch of cookies. I didn’t realize my mistake until the butter was already sizzling in the pan, and that nutty, toasty smell filled the kitchen. I stood there for a second, honestly ready to just toss it all out and start over. The pressure was on — the kids were hungry, the in-laws were on their way, and I had just messed up the one thing I was supposed to bring.
But you know what? I didn’t start over. I just went with it. I poured that browned butter right into the green beans, added the cream of mushroom soup, and threw the whole thing in the oven. I figured if it was terrible, I’d just blame it on a new recipe I was “testing.” When I pulled it out, it looked different. The top was a little darker, a little more golden, and the smell was absolutely ridiculous. My husband walked in and asked if I was making something fancy. I told him it was just green bean casserole, and he looked at me like I had three heads. Then the kids tried it. My picky five-year-old, who usually pushes vegetables around her plate until they get cold, asked for seconds. Seconds! I nearly fell off my chair. That night, I learned that sometimes the best recipes come from the biggest mess-ups. This one has stayed with me ever since, and I keep making it because it actually works — especially for those nights when you need everyone at the table to actually eat their veggies without a fight.
Why You’ll Love This Recipe
Let me tell you, I have tested this recipe more times than I can count. I’ve made it for Thanksgiving, for random Tuesday dinners, and even for a potluck where I was terrified the kids would hate it. Every single time, it gets the same reaction — people are surprised by how good it is. This isn’t just another green bean casserole. The browned butter adds this deep, nutty flavor that makes the whole dish feel a little more special without any extra effort. Honestly, it’s the kind of recipe that makes you look like a hero in the kitchen with almost zero work.
- Budget-Friendly: You probably already have most of these ingredients in your pantry. No fancy trips to a specialty store needed.
- Kid-Approved: I’ve served this to my own kids and their friends. They go back for seconds every time. The browned butter makes it taste almost like a treat.
- Quick & Easy: From start to finish, this comes together in about 30 minutes. Perfect for those busy weeknights when you need a side dish fast.
- Perfect for Holidays: It fits right in on the Thanksgiving table, but it’s simple enough for a regular dinner too.
- Great for Leftovers: This reheats beautifully. The flavors actually get better after a day in the fridge.
What makes this recipe different from all the others? It’s the browned butter. That one simple step changes everything. It takes a classic, creamy casserole and gives it this warm, almost caramel-like depth that you just don’t get from regular butter. Plus, I’ve tweaked the ingredient ratios to make sure it’s not too soupy or too dry. It’s just right — creamy, crunchy on top, and packed with flavor that even the pickiest eaters will love. This isn’t just a side dish; it’s the one that gets asked for by name.
What Ingredients You Will Need
This recipe uses simple, everyday ingredients that come together to create something truly special. The browned butter is the star here, but everything else works together to make a creamy, comforting casserole that the whole family will enjoy.
- Fresh or frozen green beans (1.5 pounds or 680 grams) — Trimmed and cut into 2-inch pieces. I prefer fresh green beans when they’re in season, but frozen works just fine. Just make sure to thaw and drain them well so the casserole isn’t watery.
- Unsalted butter (4 tablespoons or 56 grams) — This is for browning. I recommend using a good-quality butter like Kerrygold for the best flavor, but any unsalted butter will work. The browning process brings out the nutty notes.
- Cream of mushroom soup (1 can, 10.5 ounces or 298 grams) — This is the classic base. I’ve tried making my own from scratch, but honestly, the canned version works perfectly here and saves so much time. Campbell’s is my go-to.
- Milk (1/2 cup or 120 milliliters) — Whole milk gives the creamiest texture, but 2% works too. If you need a dairy-free option, unsweetened almond milk is a decent substitute, though the casserole will be a bit thinner.
- French fried onions (1.5 cups or about 85 grams) — These go on top for that signature crunch. I’ve tried making my own, but the store-bought ones are just easier and more consistent. French’s is the brand I always grab.
- Garlic powder (1 teaspoon) — Adds a subtle savory note that complements the browned butter beautifully. Don’t skip this — it makes a difference.
- Salt (1/2 teaspoon) — Just enough to bring out the flavors. You can adjust this based on your taste.
- Black pepper (1/4 teaspoon) — Freshly ground is best, but pre-ground works in a pinch.
- Optional: Fresh thyme (1 teaspoon, chopped) — I sometimes add this for a little herby freshness. It’s not necessary, but it’s a nice touch if you have it on hand.
For the green beans, I usually grab a bag of frozen cut green beans from the store. They’re already trimmed and cut, which saves me a ton of prep time. If you’re using fresh, just make sure to blanch them quickly in boiling water for about 2 minutes before adding them to the casserole. This keeps them bright green and tender-crisp. You can also use canned green beans in a pinch, but drain them really well and expect a softer texture.
Equipment Needed
You don’t need a lot of fancy equipment for this recipe, which is part of why I love it. Here’s what you’ll need:
- Large skillet or saucepan — For browning the butter and sautéing the green beans. A light-colored skillet is best so you can see the butter change color.
- 9×13-inch baking dish (or similar size) — This is what you’ll bake the casserole in. A 2-quart casserole dish works too.
- Mixing bowl — For combining the soup, milk, and seasonings.
- Wooden spoon or spatula — For stirring the butter while it browns. A silicone spatula works great too.
- Measuring cups and spoons — For accuracy. I’ve learned the hard way that eyeballing ingredients in a casserole can lead to a soupy mess.
- Oven mitts — Because hot dishes are no joke.
If you don’t have a 9×13-inch dish, you can use a 10-inch cast iron skillet. Just make sure it’s oven-safe. I’ve used my cast iron many times, and it gives the casserole a nice crispy edge. For the butter browning, a stainless steel pan is ideal because you can see the color change clearly, but nonstick works too — just keep a close eye on it.
Preparation Method
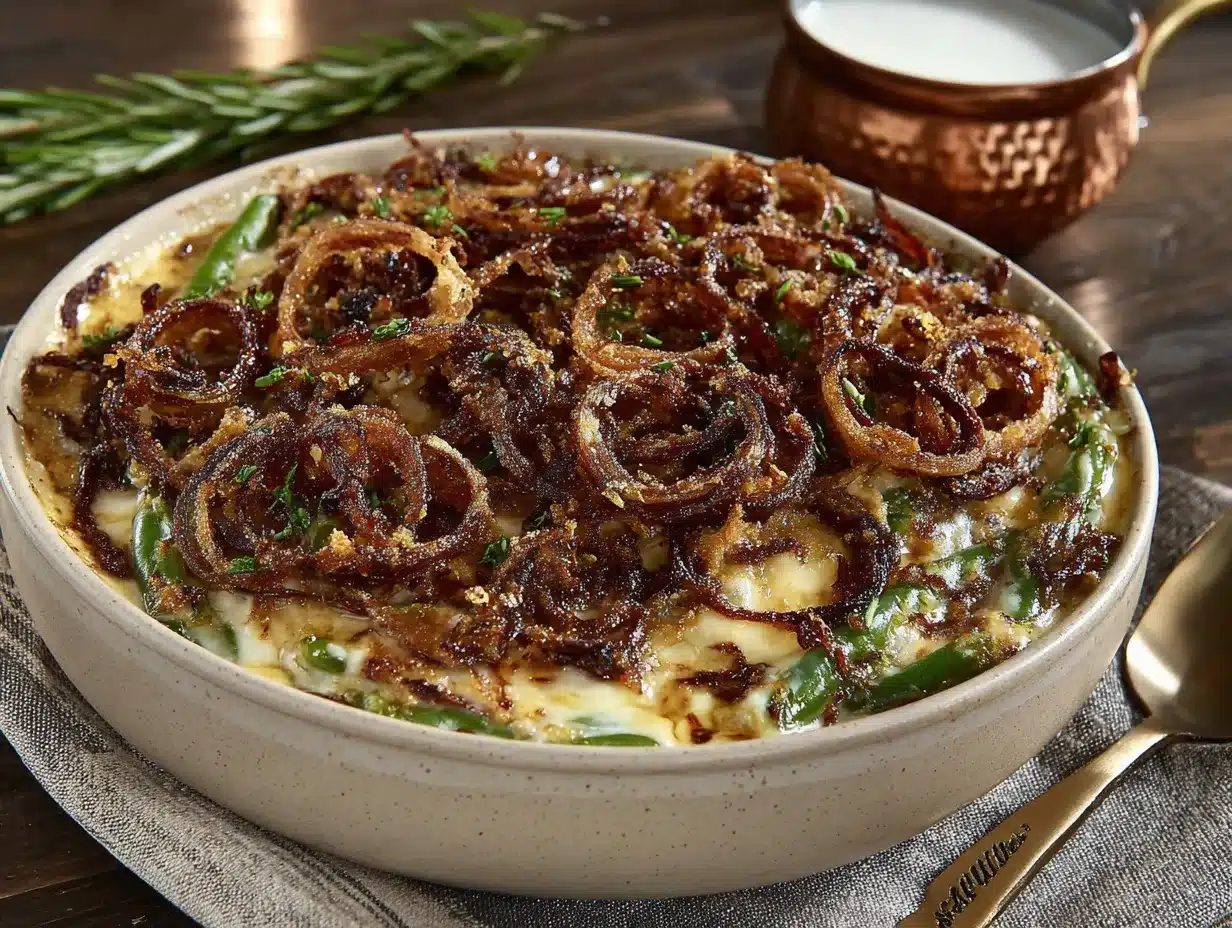
Let’s get cooking! This recipe comes together quickly, so have all your ingredients prepped and ready to go before you start. Trust me, it makes everything smoother.
- Preheat your oven to 375°F (190°C). This gives it time to come to temperature while you prep the other ingredients.
- Brown the butter. Place the 4 tablespoons of unsalted butter in a large skillet over medium heat. Let it melt completely, then continue cooking. Swirl the pan occasionally. You’ll see the butter foam up, then the foam will subside, and small brown specks will start to form at the bottom. This takes about 3-4 minutes. The butter should smell nutty and toasty. Once it’s a golden brown color, remove the pan from the heat immediately to prevent burning. Pour the browned butter into a small bowl to stop the cooking process.
- Blanch the green beans (if using fresh). Bring a large pot of salted water to a boil. Add the green beans and cook for 2 minutes. Drain them and immediately transfer to a bowl of ice water to stop the cooking. This keeps them bright green and crisp. If you’re using frozen green beans, just thaw them and pat them dry with a paper towel.
- Combine the sauce. In a mixing bowl, whisk together the cream of mushroom soup, milk, garlic powder, salt, and pepper. Stir in 1/2 cup of the French fried onions. This adds flavor to the sauce itself, not just the topping.
- Mix everything together. Add the green beans to the skillet (or a large bowl) and pour the browned butter over them. Toss to coat. Then pour the soup mixture over the green beans and stir until everything is well combined.
- Transfer to the baking dish. Pour the green bean mixture into your greased 9×13-inch baking dish. Spread it out evenly with a spatula.
- Add the topping. Sprinkle the remaining 1 cup of French fried onions evenly over the top. Don’t press them down — you want them to stay crunchy.
- Bake. Place the dish in the preheated oven and bake for 20-25 minutes, or until the casserole is bubbly around the edges and the topping is golden brown. If the topping starts to get too dark, you can tent the dish with foil for the last 5 minutes.
- Rest and serve. Let the casserole sit for about 5 minutes before serving. This helps it set up a bit so it’s not too runny. The sauce will thicken as it cools.
One thing I’ve learned the hard way — don’t overmix the green beans with the sauce. You want them to be coated, but if you stir too much, the beans can break apart and get mushy. Just a gentle fold until everything is combined is perfect. Also, if you’re using frozen green beans, make sure they’re really well-drained. Excess water will make the casserole watery, and nobody wants that.
Cooking Tips & Techniques
I’ve made this casserole more times than I can count, and I’ve definitely had my share of mishaps. Here are some tips I’ve picked up along the way to help you get it right the first time.
Watch the butter closely. Browning butter is easy, but it can go from perfect to burnt in seconds. Once you see those brown specks form and smell that nutty aroma, take it off the heat right away. I once got distracted by my kids arguing and ended up with black butter. It was a sad day. The smell is your best clue — it should smell like toasted nuts, not burnt popcorn.
Don’t skip the blanching step. If you’re using fresh green beans, blanching them for 2 minutes is crucial. It sets their color and keeps them from turning into a mushy mess in the oven. I’ve tried skipping this step when I was in a hurry, and the beans came out dull and limp. Not worth it.
Use a light-colored pan for browning. This is a small thing, but it makes a big difference. A dark pan makes it hard to see the color change, and you’re more likely to burn the butter. I use my stainless steel skillet for this, and it works perfectly.
Let it rest before serving. I know it’s tempting to dig in right away, but letting the casserole sit for 5 minutes allows the sauce to thicken. If you serve it immediately, it will be runny. I learned this the hard way when I served it to guests and it looked like green bean soup on the plate.
Make ahead tip. You can assemble the casserole up to a day in advance. Just prepare everything, cover the dish with foil, and store it in the refrigerator. When you’re ready to bake, add about 10 minutes to the cooking time since it’s starting from cold. This is a lifesaver for holidays.
Variations & Adaptations
This recipe is pretty forgiving, so feel free to play around with it. Here are some variations I’ve tried that turned out great.
Dairy-Free Version: Swap the butter for a plant-based butter that’s good for browning (I like Miyoko’s). Use a dairy-free cream of mushroom soup and unsweetened almond milk instead of regular milk. The texture will be slightly thinner, but the flavor is still fantastic. I made this for a friend with a dairy allergy, and she couldn’t tell the difference.
Gluten-Free Option: Use a gluten-free cream of mushroom soup (Pacific Foods makes a good one) and gluten-free French fried onions. I’ve found that the gluten-free fried onions are actually crunchier than the regular ones, which is a nice bonus. Just check the labels to make sure everything is certified gluten-free if that’s a concern.
Add Some Protein: For a heartier dish, toss in some cooked, crumbled bacon or diced ham before baking. I did this once when I had leftover ham from Easter, and it turned into a full meal. My kids loved it, and it made great leftovers for lunch the next day.
Seasonal Twist: In the fall, I like to add a handful of sliced mushrooms and a sprinkle of fresh sage to the green beans before adding the sauce. It gives the casserole a more earthy, cozy flavor that’s perfect for Thanksgiving. In the summer, I use fresh green beans from the farmer’s market and add a squeeze of lemon juice at the end for brightness.
Spicy Kick: If your family likes a little heat, add a pinch of red pepper flakes to the sauce. I tried this on a whim one night, and it was surprisingly good. The heat cuts through the creaminess and adds a nice warmth without being overwhelming.
Serving & Storage Suggestions
This casserole is best served warm, right out of the oven. The topping is at its crunchiest, and the sauce is perfectly creamy. I like to serve it in a nice baking dish right on the table so everyone can help themselves. It pairs beautifully with roasted turkey, ham, or even a simple roast chicken. For a weeknight dinner, I’ll serve it alongside some grilled chicken or pork chops, and it’s always a hit.
For leftovers, let the casserole cool completely, then transfer it to an airtight container. It will keep in the refrigerator for up to 4 days. The fried onions on top will lose their crunch, but the flavor is still great. To reheat, I recommend using the oven. Place the casserole in a 350°F (175°C) oven for about 15 minutes, or until heated through. You can also use the microwave, but the topping will get soft. If you want to refresh the crunch, sprinkle a few extra fried onions on top before reheating.
This casserole also freezes well. Assemble the dish completely, but don’t bake it. Wrap it tightly in plastic wrap and then foil, and freeze for up to 3 months. When you’re ready to bake, thaw it in the refrigerator overnight, then bake as directed, adding about 10 minutes to the cooking time. I’ve done this for holiday prep, and it’s a total game-changer.
One thing I’ve noticed — the flavors actually get better after a day in the fridge. The browned butter flavor melds with the soup and the beans, and everything becomes more cohesive. So don’t be afraid to make it ahead. It’s one of those dishes that tastes even better the next day.
Nutritional Information & Benefits
Here’s a rough estimate of the nutritional content per serving (based on 8 servings):
| Nutrient | Amount per Serving |
|---|---|
| Calories | 185 |
| Total Fat | 12g |
| Saturated Fat | 6g |
| Cholesterol | 20mg |
| Sodium | 520mg |
| Carbohydrates | 16g |
| Fiber | 3g |
| Sugar | 4g |
| Protein | 3g |
Green beans are a great source of vitamins A, C, and K, as well as fiber, which is good for digestion. The browned butter adds healthy fats that help your body absorb the fat-soluble vitamins in the green beans. This casserole is also relatively low in carbs compared to many other side dishes, making it a good option for those watching their carbohydrate intake. If you’re concerned about sodium, you can use a low-sodium cream of mushroom soup and reduce the added salt. I’ve done this before, and it still tastes great — just make sure to season to taste at the end.
For a lighter version, you can use a reduced-fat cream of mushroom soup and skim milk. The texture will be slightly less creamy, but it still works. Personally, I prefer the full-fat version for special occasions, but the lighter version is fine for a regular weeknight dinner.
Conclusion
This kid-approved brown butter green bean casserole has become a staple in my kitchen, and I honestly don’t see that changing anytime soon. It started as a happy accident — a mistake that turned into something way better than I ever planned. That’s the thing about cooking, right? Sometimes the best recipes come from the moments when things don’t go as expected. This casserole is proof that you don’t need fancy ingredients or complicated techniques to make something truly delicious. It’s simple, it’s affordable, and it makes everyone at the table happy — even the picky eaters.
I hope you give this recipe a try. Don’t be afraid to make it your own — add some bacon, throw in extra mushrooms, or skip the fried onions if that’s your thing. The beauty of this dish is that it’s forgiving and flexible. And if you mess up the butter the first time? Just try again. It’s worth it, I promise. Let me know in the comments how it turns out for you. I’d love to hear about your own kitchen accidents that turned into something amazing. Happy cooking!
Frequently Asked Questions
Can I use canned green beans instead of fresh or frozen?
Yes, you can use canned green beans in a pinch. Just make sure to drain them really well and pat them dry with a paper towel. The texture will be softer than fresh or frozen, but the flavor will still be good. I’d recommend reducing the baking time by about 5 minutes since canned beans are already cooked.
How do I keep the fried onions crunchy on top?
The key is to not press them into the casserole. Just sprinkle them evenly over the top and let them bake. If you notice they’re getting too dark, tent the dish with foil for the last 5 minutes of baking. Also, don’t stir the topping into the casserole before baking — that’s a surefire way to make them soggy.
Can I make this casserole ahead of time for a holiday?
Absolutely! You can assemble the entire casserole (without baking) up to 24 hours in advance. Cover it tightly with foil and store it in the refrigerator. When you’re ready to bake, add about 10 minutes to the cooking time since it’s starting from cold. This is a huge time-saver for Thanksgiving or Christmas.
What can I use instead of cream of mushroom soup?
If you don’t have cream of mushroom soup, you can use cream of chicken soup or even a homemade béchamel sauce. For a homemade version, melt 2 tablespoons of butter, whisk in 2 tablespoons of flour, then slowly add 1 cup of milk and cook until thickened. Season with salt, pepper, and a pinch of garlic powder. It’s a bit more work, but it’s delicious.
How do I reheat leftovers without making them soggy?
The best way to reheat is in the oven. Preheat to 350°F (175°C), place the casserole in an oven-safe dish, and heat for about 15 minutes. If you want to restore some crunch, sprinkle a few extra fried onions on top before reheating. The microwave works in a pinch, but the topping will get soft and the texture won’t be as good.
Pin This Recipe!

Kid-Approved Brown Butter Green Bean Casserole (Easy Side Dish Recipe)

A classic green bean casserole gets a nutty upgrade with browned butter. This easy, kid-approved side dish is creamy, crunchy, and perfect for holidays or weeknight dinners.
- Prep Time: 15 minutes
- Cook Time: 25 minutes
- Total Time: 40 minutes
- Yield: 8 servings 1x
- Category: Side Dish
- Cuisine: American
Ingredients
- 1.5 pounds (680 grams) fresh or frozen green beans, trimmed and cut into 2-inch pieces
- 4 tablespoons (56 grams) unsalted butter
- 1 can (10.5 ounces / 298 grams) cream of mushroom soup
- 1/2 cup (120 milliliters) milk
- 1.5 cups (about 85 grams) French fried onions, divided
- 1 teaspoon garlic powder
- 1/2 teaspoon salt
- 1/4 teaspoon black pepper
- 1 teaspoon fresh thyme, chopped (optional)
Instructions
- Preheat your oven to 375°F (190°C).
- Brown the butter: Place 4 tablespoons unsalted butter in a large skillet over medium heat. Melt completely, then continue cooking, swirling occasionally, until the butter foams, the foam subsides, and small brown specks form at the bottom (about 3-4 minutes). Remove from heat immediately and pour into a small bowl to stop cooking.
- Blanch the green beans (if using fresh): Bring a large pot of salted water to a boil. Add green beans and cook for 2 minutes. Drain and transfer to a bowl of ice water to stop cooking. If using frozen green beans, thaw and pat dry.
- Combine the sauce: In a mixing bowl, whisk together cream of mushroom soup, milk, garlic powder, salt, and pepper. Stir in 1/2 cup of the French fried onions.
- Mix everything together: Add the green beans to the skillet (or a large bowl) and pour the browned butter over them. Toss to coat. Pour the soup mixture over the green beans and stir until well combined.
- Transfer to the baking dish: Pour the green bean mixture into a greased 9×13-inch baking dish. Spread evenly.
- Add the topping: Sprinkle the remaining 1 cup of French fried onions evenly over the top. Do not press them down.
- Bake: Place the dish in the preheated oven and bake for 20-25 minutes, or until bubbly around the edges and the topping is golden brown. If the topping gets too dark, tent with foil for the last 5 minutes.
- Rest and serve: Let the casserole sit for about 5 minutes before serving.
Notes
Watch the butter closely when browning; it can go from perfect to burnt in seconds. For make-ahead, assemble the casserole up to 24 hours in advance, cover with foil, and refrigerate. Add about 10 minutes to the baking time if starting from cold. Leftovers keep in the refrigerator for up to 4 days and freeze well for up to 3 months.
Nutrition
- Serving Size: 1 serving (about 1 c
- Calories: 185
- Sugar: 4
- Sodium: 520
- Fat: 12
- Saturated Fat: 6
- Carbohydrates: 16
- Fiber: 3
- Protein: 3
Keywords: green bean casserole, brown butter, kid-friendly, Thanksgiving side dish, easy side dish, holiday recipe


