My niece asked me why I couldn’t just bake the cheesecake filling right inside the mini pumpkin instead of making a separate crust. I started to explain why that wouldn’t work—something about moisture and structural integrity and the whole thing turning into a soggy mess. Then I stopped. Honestly, I had no good reason. I’d just never tried it.
So we did it. We scooped out those little pumpkins, mixed up a simple cheesecake batter, and poured it right in. I was fully prepared to salvage the situation with a backup batch of graham crackers and butter. But when they came out of the oven, set and creamy, with that faint roasted pumpkin scent clinging to the edges—I had to admit she was right. They were perfect. The pumpkin acts as its own little bowl, edible and festive, and the cheesecake bakes up silky and rich. No crust drama, no fuss.
That moment of being wrong has turned into one of my favorite Halloween traditions. These mini pumpkin cheesecakes are now the thing my family requests every October, and I make them without a single complaint. Maybe you’ve had a moment like that—where the simpler idea turned out to be the better one. That’s this recipe. It’s the shortcut that actually works, the kid-friendly project that looks impressive, and the dessert that makes everyone at the table feel like they’re getting something special.
Why You’ll Love This Recipe
These mini pumpkin cheesecakes are a Halloween game-changer, and I say that with zero exaggeration. They combine the cozy flavor of pumpkin pie with the creamy tang of cheesecake, all baked inside a real pumpkin shell. Here’s why they’ll become a staple in your kitchen:
- Kid-Friendly Fun: Kids love scooping out the pumpkins and watching them bake. It’s a hands-on Halloween activity that doubles as dessert.
- Simple Ingredients: You need cream cheese, pumpkin puree, sugar, eggs, and a few spices. Nothing fancy, nothing expensive.
- Perfect for Halloween Parties: Each person gets their own little pumpkin. No slicing, no serving, no mess.
- Crowd-Pleaser: Picky eaters who won’t touch a slice of pumpkin pie will happily eat an entire mini pumpkin cheesecake. I’ve seen it happen.
- Unbelievably Delicious: The pumpkin shell roasts gently as the cheesecake bakes, adding a subtle earthy sweetness that you just can’t get from a regular crust.
What makes this recipe different from the rest is the method. Baking the cheesecake inside the pumpkin means you skip the water bath, skip the crust, and skip the stress. The pumpkin itself regulates the moisture, so you get a perfectly creamy filling every time. It’s comfort food reimagined—simpler, faster, but with the same soul-soothing satisfaction. Perfect for impressing guests without stress, or turning a simple family dinner into something memorable.
What Ingredients You Will Need
This recipe uses simple, wholesome ingredients to deliver bold flavor and satisfying texture without the fuss. Most of these are pantry staples, especially during fall baking season.
- 6-8 small pumpkins (about 2-3 inches tall) — Look for sugar pumpkins or pie pumpkins. They’re sweeter and have thinner skins than carving pumpkins. I usually grab a bag from the farmers market or grocery store in early October.
- 16 ounces cream cheese, softened — Full-fat cream cheese gives the richest texture. I recommend Philadelphia brand for consistent results. Let it sit on the counter for at least 30 minutes before mixing.
- 1/2 cup granulated sugar — Regular white sugar works perfectly. You can reduce it to 1/3 cup if you prefer a less sweet cheesecake.
- 1/2 cup pumpkin puree — Not pumpkin pie filling. Pure pumpkin puree is just pumpkin. Libby’s is my go-to brand, but any canned puree works. You can also use homemade roasted pumpkin puree if you have it.
- 1 large egg, room temperature — Room temperature egg blends more smoothly into the cream cheese. If you forget to take it out early, place it in a bowl of warm water for 5 minutes.
- 1 teaspoon vanilla extract — Pure vanilla extract adds warmth. Imitation vanilla is fine in a pinch.
- 1/2 teaspoon pumpkin pie spice — You can buy it pre-mixed or make your own with cinnamon, nutmeg, ginger, and cloves. I prefer the homemade version because I can adjust the cinnamon ratio.
- 1/4 teaspoon salt — A pinch of salt balances the sweetness and enhances the pumpkin flavor.
- Whipped cream, for topping (optional) — Homemade or store-bought. My kids like the canned stuff, but I prefer a dollop of lightly sweetened whipped cream.
- Caramel sauce, for drizzling (optional) — A drizzle of caramel makes these feel extra indulgent. Use store-bought or make your own with brown sugar and butter.
Substitution Guidance: Use dairy-free cream cheese and a plant-based egg substitute for a vegan version. For a gluten-free option, these are naturally gluten-free since there’s no crust. If you can’t find small pumpkins, you can use large clementines or oranges as edible bowls—just adjust the baking time down to 20-25 minutes.
Equipment Needed
You don’t need much for this recipe, which is part of its charm. Here’s what you’ll need:
- Baking sheet — A rimmed baking sheet works best to catch any drips. I use a half-sheet pan (18×13 inches) that fits 6-8 mini pumpkins comfortably.
- Sharp knife — For cutting the tops off the pumpkins. A serrated knife works well because it grips the pumpkin skin without slipping.
- Small spoon or melon baller — For scooping out the seeds and stringy pulp. A melon baller is my favorite tool for this job because it’s the perfect size.
- Mixing bowl — Any medium-sized bowl works. I use a glass bowl because I can see if the cream cheese is fully blended.
- Hand mixer or stand mixer — A hand mixer is easiest for this small batch. A whisk and some elbow grease work too, but your arm will thank you for the mixer.
- Parchment paper (optional) — Lining the baking sheet makes cleanup easier, but it’s not essential.
- Cooling rack — Lets the pumpkins cool evenly after baking. If you don’t have one, just let them cool on the baking sheet for 10 minutes, then transfer to a plate.
Budget-friendly tip: Skip the melon baller and use a teaspoon. Skip the cooling rack and use a wire oven rack turned upside down. You really only need the baking sheet, knife, and a bowl to make this recipe work.
Preparation Method
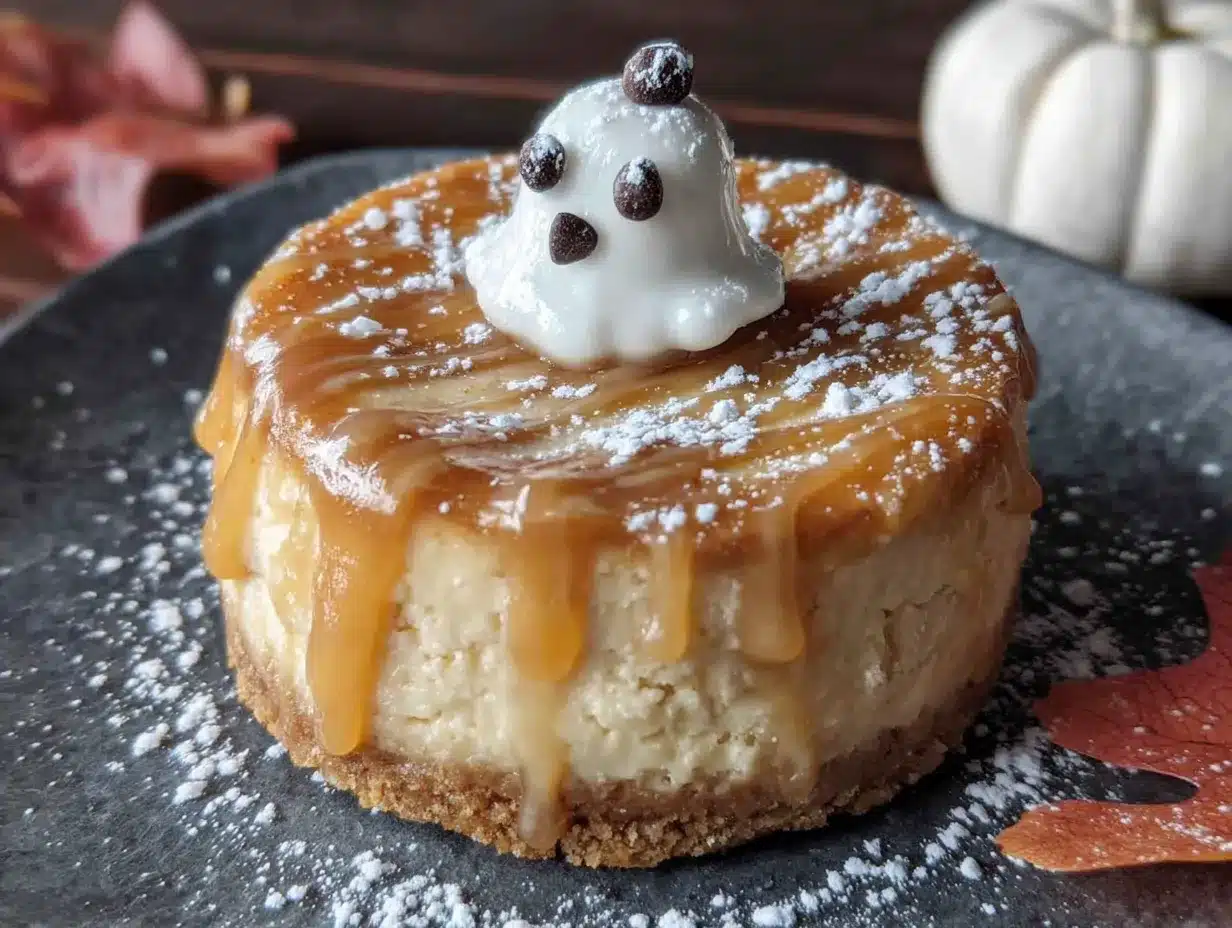
Let’s get to the fun part. Here’s how to make these adorable mini pumpkin cheesecakes, step by step.
- Preheat your oven to 350°F (175°C). Position the rack in the center of the oven. While it’s heating, line a baking sheet with parchment paper if you’re using it.
- Prepare the pumpkins. Wash and dry each mini pumpkin. Using a sharp knife, carefully cut off the top 1/2 inch of each pumpkin, just like you’re making a jack-o’-lantern lid. Set the tops aside. Use a small spoon or melon baller to scoop out the seeds and stringy pulp from the inside. Scrape the walls clean, but don’t scrape too hard—you want the pumpkin shell to stay intact. Discard the seeds or save them for roasting later.
- Make the cheesecake filling. In a medium mixing bowl, beat the softened cream cheese with a hand mixer on medium speed until smooth and creamy, about 1 minute. Add the granulated sugar and beat until combined, another 30 seconds. Scrape down the sides of the bowl with a spatula.
- Add the pumpkin and egg. Add the pumpkin puree, room temperature egg, vanilla extract, pumpkin pie spice, and salt. Beat on low speed until everything is fully incorporated and the mixture is smooth. Don’t overmix—you don’t want to incorporate too much air into the batter. The filling should be thick and creamy, like a soft pudding.
- Fill the pumpkins. Arrange the hollowed-out pumpkins on the prepared baking sheet. Using a small spoon or a piping bag (I just use a zip-top bag with the corner snipped off), divide the cheesecake filling evenly among the pumpkins. Fill each one almost to the top, leaving about 1/4 inch of space. The filling will puff up slightly as it bakes, so don’t overfill.
- Bake the cheesecakes. Place the baking sheet in the preheated oven and bake for 25-30 minutes. The cheesecake should be set around the edges but still slightly jiggly in the center. The pumpkins will look slightly wrinkled and will have released some moisture—that’s normal. If you’re unsure, insert a toothpick into the center of one cheesecake; it should come out mostly clean with a few moist crumbs.
- Cool completely. Remove the baking sheet from the oven and let the pumpkins cool on the sheet for 10 minutes. Then transfer them to a cooling rack and let them cool completely, about 1 hour. Don’t skip this step—the cheesecake needs time to set.
- Chill before serving. Once the pumpkins are completely cool, transfer them to the refrigerator and chill for at least 2 hours, or overnight. Chilling firms up the cheesecake and makes it easier to handle. The flavor also improves as it sits—the pumpkin and spices meld together beautifully.
- Serve and enjoy. Just before serving, top each mini pumpkin cheesecake with a dollop of whipped cream and a drizzle of caramel sauce if desired. Place the little pumpkin tops back on at a jaunty angle for a festive look. Serve cold or at room temperature—both are delicious.
Troubleshooting Tip: If your cheesecake filling cracks during baking, don’t panic. It’s usually because the oven was too hot or the cheesecake was overbaked. A dollop of whipped cream covers any imperfections beautifully. Also, if the pumpkins leak a bit of liquid onto the baking sheet, that’s just the pumpkin’s natural moisture—it won’t affect the cheesecake.
Cooking Tips & Techniques
I’ve made these mini pumpkin cheesecakes about a dozen times now, and I’ve learned a few things the hard way. Here are my best tips for success:
Don’t overmix the batter. I learned this after a batch of cheesecakes came out with a weird, almost spongy texture. Overmixing incorporates too much air, which causes the cheesecake to puff up and then collapse, leaving cracks. Mix just until the ingredients are combined—no more.
Use room temperature ingredients. Cold cream cheese creates lumps that are nearly impossible to smooth out. Take the cream cheese out of the fridge 30 minutes before you start. Same goes for the egg. If you’re in a hurry, cut the cream cheese into small cubes and let it sit for 10 minutes—it’ll soften faster.
Don’t skip the salt. I know it seems like a small detail, but salt is crucial in cheesecake. It balances the sweetness and enhances the pumpkin and spice flavors. Without it, the cheesecake tastes flat. Trust me on this one.
Bake on a preheated baking sheet. For even baking, place the baking sheet in the oven while it preheats. Then carefully place the filled pumpkins on the hot sheet. This gives the bottoms a head start and helps them cook evenly.
Watch the time carefully. Ovens vary, so start checking at the 25-minute mark. The cheesecake should be set around the edges but still have a slight wobble in the center. It will continue to set as it cools. Overbaking is the most common mistake—it leads to dry, crumbly cheesecake.
Let them cool slowly. After baking, let the pumpkins sit on the baking sheet for a full 10 minutes before transferring them to a rack. This gradual cooling helps prevent the tops from cracking. If you move them too soon, the sudden temperature change can cause stress cracks.
Chill overnight for best flavor. I know it’s hard to wait, but the cheesecake truly tastes better the next day. The pumpkin flavor deepens, the spices mellow, and the texture becomes perfectly creamy. Make these a day ahead if you can.
Variations & Adaptations
One of the best things about this recipe is how easy it is to customize. Here are some variations I’ve tried and loved:
Chocolate Pumpkin Cheesecake: Add 2 tablespoons of cocoa powder to the cheesecake filling along with the pumpkin puree. The chocolate and pumpkin pairing is surprisingly good—it’s like a healthier version of a chocolate pumpkin muffin. My kids went crazy for this version.
Vegan Mini Pumpkin Cheesecakes: Use dairy-free cream cheese (I like Kite Hill brand) and replace the egg with 2 tablespoons of cornstarch mixed with 3 tablespoons of water. The texture is slightly less creamy but still delicious. Bake for the same amount of time.
Spiced Maple Version: Replace the granulated sugar with maple syrup and add an extra 1/4 teaspoon of cinnamon. The maple flavor pairs beautifully with the roasted pumpkin. Just note that the filling will be slightly softer, so chill thoroughly before serving.
No-Bake Version: If you don’t want to turn on the oven, you can make a no-bake version. Mix the cream cheese, sugar, pumpkin puree, and spices as directed, then fold in 1 cup of whipped cream. Spoon into the pumpkins and chill for 4 hours or until firm. The texture is lighter and mousse-like.
Gluten-Free and Allergy-Friendly: This recipe is naturally gluten-free since there’s no crust. For a nut-free version, skip any nut-based toppings. For a lower-sugar option, use a sugar substitute like monk fruit sweetener—just note that the texture may be slightly different.
Personal Variation I Love: I once added a pinch of cayenne pepper to the filling for a spicy-sweet kick. It sounds weird, but the heat cuts through the richness of the cheesecake and makes the pumpkin flavor pop. Start with 1/8 teaspoon and adjust from there. My husband still talks about that batch.
Serving & Storage Suggestions
These mini pumpkin cheesecakes are best served cold or at room temperature. Here’s how to make them shine:
Serving Temperature: Take them out of the fridge about 15 minutes before serving to take the chill off. This allows the flavors to open up. If you’re serving them at a Halloween party, arrange them on a platter with the little pumpkin tops set at a jaunty angle. Add a few fall leaves or mini gourds around the edges for a festive touch.
Toppings and Pairings: A dollop of whipped cream is classic, but you can also add a sprinkle of cinnamon, a drizzle of caramel sauce, or a few toasted pumpkin seeds for crunch. For a drink pairing, these go beautifully with hot apple cider, pumpkin spice lattes, or even a glass of cold milk. They’re also fantastic with a scoop of vanilla ice cream on the side.
Storage Instructions: Store any leftover mini pumpkin cheesecakes in an airtight container in the refrigerator for up to 5 days. The pumpkins will soften slightly over time, but the cheesecake stays creamy. I’ve found that they actually taste better on day two or three, as the flavors continue to meld.
Freezing Instructions: You can freeze these for up to 2 months. Place the cooled, unbaked pumpkins on a baking sheet and freeze until solid, about 2 hours. Then wrap each one tightly in plastic wrap and place them in a freezer bag. To serve, thaw overnight in the refrigerator and bake as directed. Or, you can freeze the fully baked and cooled cheesecakes—just thaw in the fridge and serve cold.
Reheating Tips: These are best served cold, but if you prefer them warm, microwave one for 10-15 seconds. The cheesecake will soften slightly, and the pumpkin will warm through. Don’t overheat, or the cheesecake can become runny.
How Flavors Develop: The pumpkin flavor becomes more pronounced after a day or two in the fridge. The spices also mellow and blend together, creating a more harmonious taste. If you’re planning ahead, make these a day or two before your Halloween party for the best flavor.
Nutritional Information & Benefits
Here’s the estimated nutritional breakdown for one mini pumpkin cheesecake (based on 8 servings, without toppings):
| Nutrient | Amount Per Serving |
|---|---|
| Calories | 210 |
| Total Fat | 14g |
| Saturated Fat | 8g |
| Cholesterol | 65mg |
| Sodium | 220mg |
| Total Carbohydrates | 18g |
| Dietary Fiber | 2g |
| Sugars | 14g |
| Protein | 5g |
| Vitamin A | 120% DV |
| Calcium | 8% DV |
| Iron | 4% DV |
Health Benefits: Pumpkin is packed with vitamin A, which supports eye health and immune function. The cream cheese provides calcium and protein, making this a more balanced dessert than you might think. Plus, the portion control is built right in—each mini pumpkin is a single serving.
Dietary Considerations: This recipe is naturally gluten-free and can be made vegetarian. For a lower-calorie option, use reduced-fat cream cheese and skip the whipped cream. The sugar can be reduced to 1/3 cup without affecting the texture too much.
Potential Allergens: This recipe contains dairy and eggs. For dairy-free, use plant-based cream cheese and a dairy-free egg substitute. For egg-free, use the cornstarch slurry mentioned in the variations section.
Personal Wellness Perspective: I love that this dessert feels indulgent but is actually pretty reasonable portion-wise. You get all the satisfaction of cheesecake without the temptation to eat a whole slice. Plus, the pumpkin adds real nutritional value—it’s not just empty calories.
Conclusion
These mini pumpkin cheesecakes are proof that sometimes the simplest ideas are the best ones. They’re festive enough for a Halloween party, easy enough for a weeknight treat, and fun enough that kids actually want to help make them. The fact that they’re budget-friendly and use real pumpkin shells instead of disposable cups is just a bonus.
I love this recipe because it brings people together. There’s something magical about handing each person their own little pumpkin filled with creamy cheesecake. It feels special without being complicated. And honestly, it’s the kind of dessert that makes you feel like a rockstar parent or host with almost no effort.
So go ahead—grab some mini pumpkins, make a batch, and watch everyone’s face light up. And if you come up with your own twist on this recipe, I’d love to hear about it. Leave a comment below and tell me how it went. Happy Halloween, and happy baking!
Frequently Asked Questions
Can I use large pumpkins instead of mini ones?
Technically yes, but the baking time changes significantly. For a standard 4-5 inch pumpkin, you’d need to bake for 45-55 minutes. The filling might also be harder to set evenly because the walls are thicker. I recommend sticking with mini pumpkins for the best results.
Do I need to pre-bake the pumpkins?
No, you don’t. The pumpkins bake at the same time as the cheesecake filling. The heat from the oven roasts the pumpkin walls while gently cooking the cheesecake. It’s a one-step process that saves time and keeps things simple.
Can I make these without cream cheese?
You can substitute Greek yogurt or a dairy-free cream cheese alternative, but the texture will be different. Greek yogurt makes a tangier, lighter filling. If you go that route, add 2 tablespoons of cornstarch to help the filling set. The result won’t be as creamy, but it’s still delicious.
How do I prevent the cheesecake from cracking?
Cracking usually happens from overbaking or sudden temperature changes. Bake just until the edges are set and the center is slightly jiggly. Let them cool slowly on the baking sheet before moving them. If cracks do appear, a dollop of whipped cream covers them perfectly—nobody will know.
Can I use canned pumpkin pie filling instead of pure pumpkin puree?
I wouldn’t recommend it. Pumpkin pie filling already has sugar and spices added, so it will throw off the sweetness and texture of the cheesecake. Stick with pure pumpkin puree for the best control over the final flavor. If you only have pie filling, reduce the sugar in the recipe to 2 tablespoons and skip the pumpkin pie spice.
Pin This Recipe!
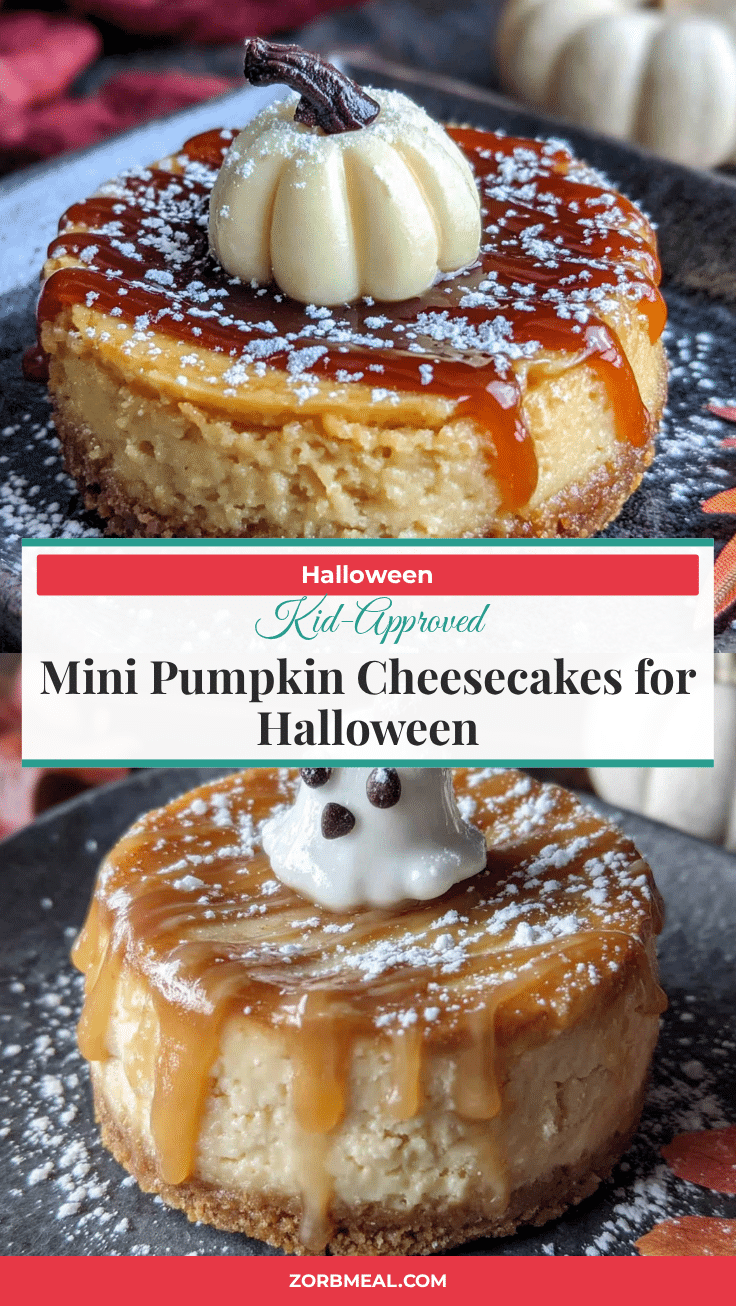
Best Mini Pumpkin Cheesecakes for Halloween
These mini pumpkin cheesecakes are baked inside real mini pumpkins for a festive, no-crust dessert that’s creamy, rich, and perfect for Halloween parties. A kid-friendly, simple recipe that’s as fun to make as it is to eat.
- Prep Time: 20 minutes
- Cook Time: 30 minutes
- Total Time: 3 hours 50 minutes (includes cooling and chilling)
- Yield: 6-8 servings 1x
- Category: Dessert
- Cuisine: American
Ingredients
- 6–8 small pumpkins (about 2–3 inches tall)
- 16 ounces cream cheese, softened
- 1/2 cup granulated sugar
- 1/2 cup pumpkin puree
- 1 large egg, room temperature
- 1 teaspoon vanilla extract
- 1/2 teaspoon pumpkin pie spice
- 1/4 teaspoon salt
- Whipped cream, for topping (optional)
- Caramel sauce, for drizzling (optional)
Instructions
- Preheat your oven to 350°F (175°C). Position the rack in the center of the oven. Line a baking sheet with parchment paper if desired.
- Wash and dry each mini pumpkin. Using a sharp knife, carefully cut off the top 1/2 inch of each pumpkin. Set the tops aside. Use a small spoon or melon baller to scoop out the seeds and stringy pulp from the inside. Scrape the walls clean but keep the shell intact.
- In a medium mixing bowl, beat the softened cream cheese with a hand mixer on medium speed until smooth and creamy, about 1 minute. Add the granulated sugar and beat until combined, about 30 seconds. Scrape down the sides of the bowl.
- Add the pumpkin puree, room temperature egg, vanilla extract, pumpkin pie spice, and salt. Beat on low speed until fully incorporated and smooth. Do not overmix.
- Arrange the hollowed-out pumpkins on the prepared baking sheet. Divide the cheesecake filling evenly among the pumpkins, filling each almost to the top, leaving about 1/4 inch of space.
- Bake for 25-30 minutes. The cheesecake should be set around the edges but still slightly jiggly in the center. The pumpkins will look slightly wrinkled and may release some moisture.
- Remove from the oven and let the pumpkins cool on the baking sheet for 10 minutes. Then transfer to a cooling rack and cool completely, about 1 hour.
- Once completely cool, transfer to the refrigerator and chill for at least 2 hours, or overnight.
- Just before serving, top each mini pumpkin cheesecake with a dollop of whipped cream and a drizzle of caramel sauce if desired. Place the pumpkin tops back on at a jaunty angle for a festive look. Serve cold or at room temperature.
Notes
Don’t overmix the batter to avoid cracks. Use room temperature ingredients for a smooth filling. Bake on a preheated baking sheet for even cooking. Chill overnight for best flavor. If cracks appear, cover with whipped cream.
Nutrition
- Serving Size: 1 mini pumpkin chees
- Calories: 210
- Sugar: 14
- Sodium: 220
- Fat: 14
- Saturated Fat: 8
- Carbohydrates: 18
- Fiber: 2
- Protein: 5
Keywords: mini pumpkin cheesecakes, Halloween dessert, pumpkin cheesecake, no-crust cheesecake, fall dessert, kid-friendly dessert


