This was supposed to be a teriyaki night. I had the soy sauce out, the ginger ready, and I was feeling pretty good about myself for planning ahead on a Tuesday. Then my youngest walked into the kitchen, took one look at the bottle of honey on the counter, and asked if we could have “the sticky chicken” instead. I told her there was no such thing, and she pointed at the honey and said, “Yes there is, that’s the sticky part.” So I put the ginger away, grabbed a few more things from the pantry, and just started winging it. The power went out halfway through — classic Tuesday, right? — so I finished everything by the light of my phone flashlight, convinced I was making a disaster. What came out of that dim, slightly panicked oven was nothing like the plan. It was better.
The sauce caramelized into this glossy, almost candied coating that clung to every piece of chicken. The thighs came out so tender they practically fell apart when I touched them with a fork. And the smell — even with no power, the whole kitchen smelled like someone had bottled up comfort and poured it into a baking dish. I stood there in the dark, eating a piece straight from the pan, and honestly, I couldn’t believe it worked. My daughter took one bite and said, “See? Sticky chicken.” She was right.
I’ve made this easy honey garlic chicken thighs recipe at least a dozen times since that night, and it’s never let me down. It’s the kind of dinner that feels special but takes almost no effort — which, let’s face it, is exactly what a busy weeknight calls for. Maybe you’ve been there, standing in your kitchen with a half-baked plan and a hungry family, wondering if you can pull something together without a trip to the store. This recipe is for those nights.
Why You’ll Love This Recipe
I’ve tested this recipe in every possible scenario — busy weeknights, lazy Sundays, even once when I was multitasking between helping with homework and answering work emails. It passed every test. Here’s why I keep coming back to it, and why I think you will too:
- Quick & Easy: From start to table in about 30 minutes. No marinating, no complicated steps, just simple cooking that works.
- Simple Ingredients: You probably have everything in your kitchen right now. Honey, soy sauce, garlic, chicken thighs — that’s it. No fancy grocery runs required.
- Perfect for Family Dinners: This is the kind of meal that pleases everyone. The kids love the sweetness, and adults appreciate the savory balance. It’s a crowd-pleaser without the stress.
- Budget-Friendly: Chicken thighs are one of the most affordable cuts of meat, and the pantry staples in this recipe cost pennies. You get a restaurant-quality dinner for a fraction of the price.
- Unbelievably Delicious: The honey garlic glaze is next-level. It’s sticky, savory, slightly caramelized, and absolutely addictive. I’ve had friends ask for the recipe after just one bite.
What makes this recipe different from all the other honey chicken recipes out there? It’s the balance. I spent several batches getting the ratio of honey to soy sauce just right — not too sweet, not too salty, with enough garlic to make it interesting. The technique of pan-searing the thighs before baking gives you that golden, crispy skin while the inside stays juicy. It’s not just another version of honey chicken. It’s the version.
This recipe isn’t just good — it’s the kind that makes you close your eyes after the first bite. It’s comfort food reimagined: faster, simpler, but with the same soul-soothing satisfaction. Perfect for impressing guests without stress, or turning a simple Tuesday into something memorable.
What Ingredients You Will Need
This recipe uses simple, wholesome ingredients to deliver bold flavor and satisfying texture without the fuss. Most of these are pantry staples, which means you can whip this up anytime without a special trip to the store.
- Chicken Thighs: 6 bone-in, skin-on chicken thighs (about 2 lbs or 900g). I prefer bone-in for maximum flavor and juiciness, but boneless works too (just reduce cooking time). Look for thighs with the skin still attached — that crispy skin is where the magic happens.
- Honey: ⅓ cup (110g) of good-quality honey. I recommend a local honey if you can find one — it’s usually thinner and blends more easily. If your honey is crystallized, warm it gently before using.
- Soy Sauce: ¼ cup (60ml) low-sodium soy sauce. Regular soy sauce works too, but the low-sodium version gives you more control over the saltiness. For a gluten-free option, use tamari or coconut aminos.
- Garlic: 4 cloves, minced. Fresh garlic is non-negotiable here — the pre-minced stuff in a jar just doesn’t deliver the same punch. I’ve tried both, and fresh makes a noticeable difference.
- Olive Oil: 2 tablespoons (30ml) for searing. Any neutral oil with a high smoke point works, but olive oil adds a nice subtle flavor.
- Salt and Pepper: To taste. I use about ½ teaspoon of salt and ¼ teaspoon of black pepper. Go easy on the salt since the soy sauce already adds plenty.
- Optional Garnishes: Sesame seeds and sliced green onions for serving. These aren’t essential, but they add a nice pop of color and a little extra texture.
I recommend using a brand like Nature Nate’s for honey — it’s consistently good quality and has a clean, pure flavor. For soy sauce, Kikkoman is my go-to for its balanced taste. If you’re watching your sodium intake, San-J Tamari is a great gluten-free alternative that still delivers that savory umami punch.
For seasonal variations, you can add a squeeze of fresh orange juice in summer for a citrusy twist, or a pinch of red pepper flakes in winter for some warmth. The base recipe is forgiving enough to handle these tweaks without throwing anything off balance.
Equipment Needed
You don’t need a fancy kitchen to make this recipe. Here’s what you’ll need:
- Large Oven-Safe Skillet: A 12-inch cast iron skillet is ideal, but any oven-safe pan works. I’ve used my trusty Lodge cast iron for years — it distributes heat evenly and gives you that perfect sear. If you don’t have an oven-safe skillet, you can sear the chicken in a regular pan and transfer it to a baking dish.
- Small Bowl: For mixing the honey garlic sauce. Any small bowl will do.
- Measuring Cups and Spoons: For accurate ingredient measurements. I’ve learned the hard way that eyeballing honey leads to sticky disasters.
- Tongs: For flipping the chicken thighs without tearing the skin. Silicone-tipped tongs are gentle on the pan’s surface.
- Meat Thermometer: Highly recommended for ensuring the chicken reaches 165°F (74°C) without overcooking. A simple instant-read thermometer costs about $10 and takes the guesswork out of cooking meat.
- Cutting Board and Knife: For mincing garlic and slicing green onions.
If you don’t have a cast iron skillet, don’t worry. I’ve made this in a stainless steel pan and even a non-stick skillet — just adjust the heat to prevent sticking. The key is using something that can go from stovetop to oven without complaining.
Preparation Method
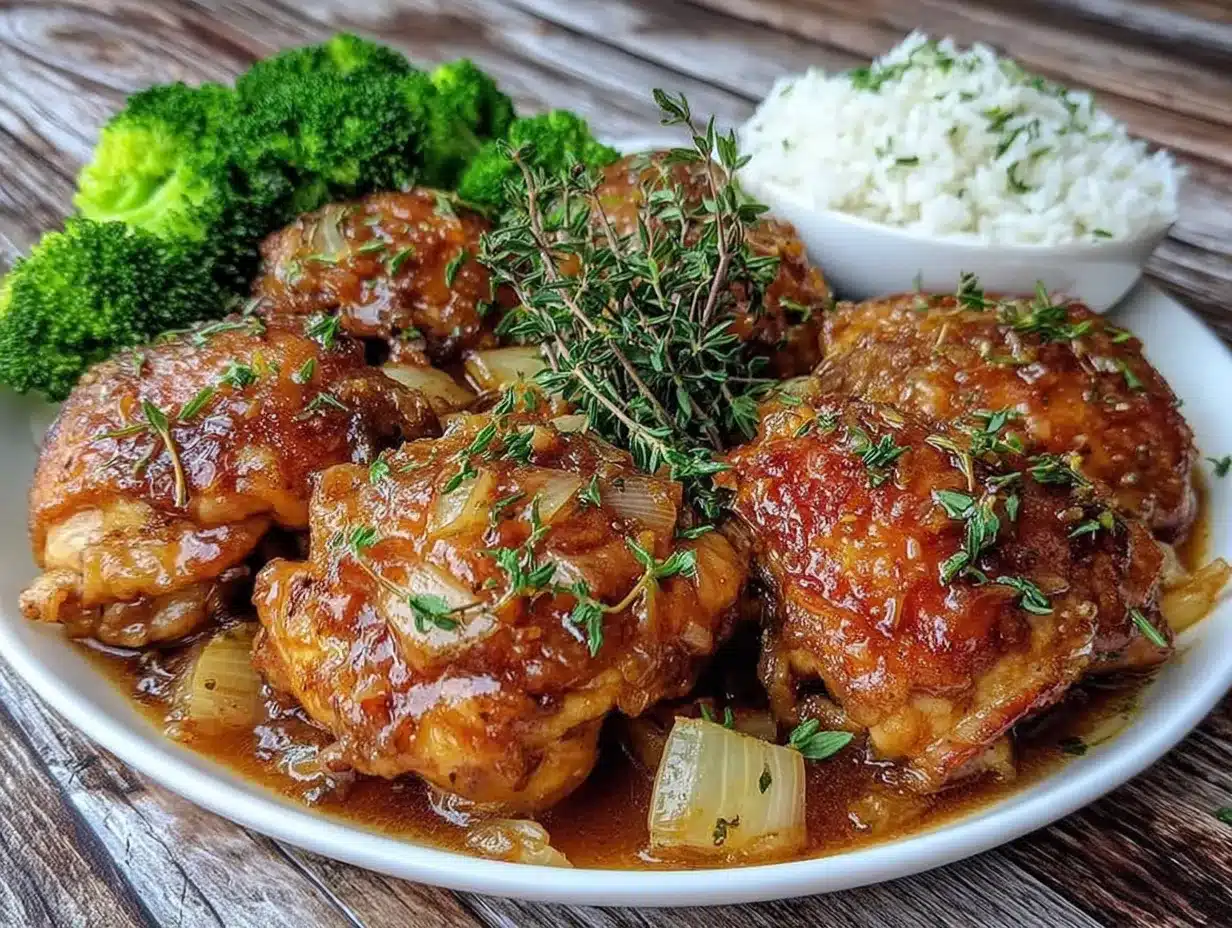
Let me walk you through this step by step. I’ve included all the little details I wish someone had told me the first time I made this.
- Preheat and Prep: Preheat your oven to 400°F (200°C). While it’s heating, pat the chicken thighs dry with paper towels. This is important — dry skin means crispy skin. Season both sides generously with salt and pepper.
- Mix the Sauce: In a small bowl, whisk together the honey, soy sauce, and minced garlic. Set it aside. Give it a good stir right before you use it, because honey tends to settle at the bottom.
- Sear the Chicken: Heat the olive oil in your oven-safe skillet over medium-high heat. When the oil is shimmering (about 2 minutes), carefully place the chicken thighs skin-side down. Don’t overcrowd the pan — if your skillet is small, do this in batches. Let them cook undisturbed for 5-6 minutes. The skin should turn golden brown and crispy. I know it’s tempting to peek, but leave them alone. That’s how you get that beautiful crust.
- Flip and Brush: Using tongs, flip the chicken thighs over. Cook for another 2-3 minutes on the other side. Then, pour the honey garlic sauce over the chicken, making sure each piece gets coated. Use a brush or spoon to spread it evenly.
- Bake to Perfection: Transfer the skillet to the preheated oven. Bake for 15-20 minutes, or until the internal temperature reaches 165°F (74°C). The sauce will bubble and thicken into a gorgeous glaze. Halfway through, you can baste the chicken with the pan juices for extra flavor.
- Rest and Serve: Remove the skillet from the oven and let the chicken rest for 5 minutes. This lets the juices redistribute so every bite is tender. Spoon any remaining glaze from the pan over the chicken before serving. Garnish with sesame seeds and sliced green onions if you’re feeling fancy.
Pro tip from my kitchen: The first time I made this, I skipped the searing step because I was in a hurry. Big mistake. The skin came out rubbery and sad. Trust me — that 5-minute sear is worth every second. It’s the difference between good chicken and unforgettable chicken.
If you notice the sauce getting too thick in the oven, don’t panic. Just add a tablespoon of water to the pan and stir it in. The glaze will loosen up without losing flavor.
Cooking Tips & Techniques
After making this recipe more times than I can count, I’ve picked up a few tricks that make a real difference. Here are my best tips:
- Don’t skip the pat-dry step: Moisture is the enemy of crispy skin. Take an extra 30 seconds to really dry those chicken thighs. I learned this the hard way after a batch of soggy, steamed chicken that tasted more like boiled than baked.
- Use a meat thermometer: Chicken thighs are forgiving, but they can still dry out if overcooked. The sweet spot is 165°F (74°C). I once pulled mine out at 160°F because I was impatient, and while it was safe to eat, it wasn’t as juicy. Trust the thermometer.
- Watch the honey: Honey burns faster than you think. If your oven runs hot, check the chicken at the 12-minute mark. The glaze should be golden and sticky, not dark and bitter. One time I got distracted by a phone call and ended up with a pan of charcoal. Not my finest moment.
- Let it rest: I know you’re hungry, and the kids are probably circling the kitchen like sharks. But that 5-minute rest is crucial. The juices need time to settle. Cut into it too soon, and you’ll have a pool of liquid on the plate instead of juicy meat.
- Double the sauce: If you’re serving this with rice or vegetables, consider making extra sauce. Just whisk together another batch and simmer it on the stovetop while the chicken bakes. It’s amazing drizzled over steamed broccoli or jasmine rice.
Variations & Adaptations
This recipe is incredibly versatile. Here are some ways I’ve adapted it over the years:
- Spicy Honey Garlic Chicken: Add ½ teaspoon of red pepper flakes or a squeeze of sriracha to the sauce. My husband loves this version — it gives the sweetness a little kick without overwhelming the dish.
- Slow Cooker Version: Sear the chicken as directed, then transfer everything to a slow cooker. Cook on low for 4-5 hours or high for 2-3 hours. The meat will be fall-apart tender. I do this on days when I know I’ll be running around and won’t have time to monitor the oven.
- Air Fryer Adaptation: Sear the chicken in a skillet, then transfer to an air fryer basket. Cook at 375°F (190°C) for 10-12 minutes, flipping halfway. The skin gets incredibly crispy in the air fryer — it’s my go-to method when I’m craving extra crunch.
- Gluten-Free Option: Swap the soy sauce for tamari or coconut aminos. The flavor is slightly different but still delicious. I’ve served this to gluten-sensitive friends without anyone noticing the swap.
- Honey Garlic Chicken Thighs with Vegetables: Add halved Brussels sprouts or broccoli florets to the pan during the last 10 minutes of baking. They soak up the glaze and become caramelized and tender. It turns the dish into a one-pan meal — less cleanup, more flavor.
Personally, I love the spicy version with a side of steamed rice and a simple cucumber salad. The cool crunch of the salad balances the heat and sweetness perfectly.
Serving & Storage Suggestions
This honey garlic chicken thighs recipe pairs beautifully with so many sides. Here’s how I like to serve it:
- Serving Temperature: Serve the chicken hot, straight from the oven. The glaze is at its best when it’s warm and glossy. Let it cool for just 5 minutes — any longer and the sauce starts to set.
- Perfect Pairings: Jasmine rice or steamed white rice is the classic choice — it soaks up all that extra glaze. For a low-carb option, try cauliflower rice. Steamed broccoli, roasted green beans, or a fresh garden salad also work wonderfully. I often make a quick cucumber salad with rice vinegar and sesame oil to cut through the richness.
- Beverage Suggestions: A crisp white wine like Sauvignon Blanc or a light lager pairs beautifully with the sweet-savory flavors. For a non-alcoholic option, iced green tea with a splash of honey complements the dish perfectly.
- Storage Instructions: Leftovers can be stored in an airtight container in the refrigerator for up to 4 days. The flavors actually deepen overnight — I’ve been known to make extra just for next-day lunch.
- Freezing: This recipe freezes well. Let the chicken cool completely, then place it in a freezer-safe container with the glaze. It will keep for up to 3 months. Thaw overnight in the refrigerator before reheating.
- Reheating: The best way to reheat is in a skillet over medium heat with a splash of water or chicken broth. This helps the glaze loosen up without drying out the chicken. You can also use the microwave, but the skin won’t be as crispy. If using the oven, reheat at 350°F (175°C) for about 10 minutes.
- Flavor Development: The glaze thickens as it cools, so leftovers have an even more concentrated flavor. I actually prefer the cold chicken sliced over a salad the next day — it’s like a fancy chicken salad without the effort.
Nutritional Information & Benefits
Here’s the approximate nutritional breakdown for one serving (one chicken thigh with glaze):
- Calories: 320
- Protein: 24g
- Fat: 18g
- Carbohydrates: 18g
- Sugar: 16g
- Sodium: 520mg
Chicken thighs are a fantastic source of protein, iron, and B vitamins, which support energy metabolism and overall health. The honey provides natural sweetness with antioxidants, while garlic offers immune-boosting properties. This recipe is naturally gluten-free if you use tamari, and can be made dairy-free without any substitutions.
I appreciate that this dish fits into a balanced diet without feeling like a compromise. It’s satisfying enough to feel like a treat but uses whole, real ingredients. If you’re watching your sugar intake, you can reduce the honey to ¼ cup — the dish will still be delicious, just slightly less sticky.
Potential allergens include soy (if using traditional soy sauce) and honey (which some people avoid for dietary reasons). Always check your ingredient labels if cooking for someone with allergies.
Conclusion
This easy honey garlic chicken thighs recipe has become a staple in my kitchen for good reason. It’s simple enough for a hectic Tuesday but impressive enough for company. The balance of sweet and savory, the crispy skin, the tender meat — every element works together to create something truly special.
I love that this recipe doesn’t demand perfection. It forgives a forgotten step, adapts to whatever you have on hand, and still delivers a meal that makes everyone at the table happy. It’s the kind of recipe you’ll memorize after making it twice, and the kind you’ll pass along to friends who ask, “What’s for dinner?”
I’d love to hear how it turns out for you. Did you try a variation? Did your kids love it as much as mine did? Drop a comment below and share your experience. And if you have a favorite side dish that pairs perfectly with this, I’m always looking for new ideas. Happy cooking!
Frequently Asked Questions
Can I use boneless, skinless chicken thighs instead?
Absolutely. Boneless, skinless thighs will cook faster — about 12-15 minutes in the oven. The skin won’t be crispy since there’s no skin, but the meat will still be tender and flavorful. Just reduce the searing time to 3-4 minutes per side.
How do I prevent the honey from burning?
Keep an eye on your oven temperature. If your oven runs hot, reduce the temperature to 375°F (190°C) and check the chicken at the 12-minute mark. You can also add a tablespoon of water to the sauce to thin it out slightly, which helps prevent burning.
Can I make this recipe ahead of time?
Yes! You can prepare the sauce and season the chicken up to 24 hours in advance. Store them separately in the refrigerator. When you’re ready to cook, just sear and bake as directed. The flavors will be even more developed.
What can I substitute for honey?
Maple syrup or agave nectar work well as substitutes. Keep in mind that maple syrup has a stronger, more distinct flavor, while agave is milder. The texture and sweetness will be slightly different, but both are delicious options.
How do I get the glaze extra thick and sticky?
After baking, transfer the pan juices to a small saucepan and simmer over medium heat for 3-5 minutes until reduced. This concentrates the flavor and creates a thicker, stickier glaze. Just watch it closely so it doesn’t burn.
Pin This Recipe!

Easy Honey Garlic Chicken Thighs: Best Kid-Approved Dinner

This easy honey garlic chicken thighs recipe features a glossy, caramelized glaze and tender, juicy meat. It’s a quick, family-friendly dinner that comes together in about 30 minutes with simple pantry ingredients.
- Prep Time: 10 minutes
- Cook Time: 25 minutes
- Total Time: 35 minutes
- Yield: 6 servings 1x
- Category: Main Course
- Cuisine: American
Ingredients
- 6 bone-in, skin-on chicken thighs (about 2 lbs or 900g)
- ⅓ cup (110g) honey
- ¼ cup (60ml) low-sodium soy sauce
- 4 cloves garlic, minced
- 2 tablespoons (30ml) olive oil
- ½ teaspoon salt
- ¼ teaspoon black pepper
- Optional: sesame seeds and sliced green onions for garnish
Instructions
- Preheat your oven to 400°F (200°C). Pat the chicken thighs dry with paper towels and season both sides with salt and pepper.
- In a small bowl, whisk together the honey, soy sauce, and minced garlic. Set aside.
- Heat the olive oil in a large oven-safe skillet over medium-high heat. When the oil is shimmering, place the chicken thighs skin-side down. Cook undisturbed for 5-6 minutes until golden brown and crispy.
- Flip the chicken thighs using tongs and cook for another 2-3 minutes. Pour the honey garlic sauce over the chicken, making sure each piece is coated.
- Transfer the skillet to the preheated oven and bake for 15-20 minutes, or until the internal temperature reaches 165°F (74°C). Halfway through, baste the chicken with pan juices.
- Remove from the oven and let the chicken rest for 5 minutes. Spoon any remaining glaze from the pan over the chicken before serving. Garnish with sesame seeds and sliced green onions if desired.
Notes
Don’t skip the searing step for crispy skin. Use a meat thermometer to ensure chicken reaches 165°F. Watch the honey to prevent burning; if your oven runs hot, reduce temperature to 375°F. Let the chicken rest for 5 minutes before serving. For extra thick glaze, simmer pan juices on the stovetop for 3-5 minutes.
Nutrition
- Serving Size: 1 chicken thigh with
- Calories: 320
- Sugar: 16
- Sodium: 520
- Fat: 18
- Saturated Fat: 5
- Carbohydrates: 18
- Protein: 24
Keywords: honey garlic chicken, chicken thighs, easy dinner, kid-friendly, weeknight dinner, sticky chicken, honey soy chicken


