It was 11:47 PM on a random Thursday, and I was wide awake with a gnawing craving for something sticky, savory, and ridiculously satisfying. I’d spent the evening scrolling through dinner party photos on my phone, mentally planning a menu for a get-together I was hosting that weekend. The problem? Every recipe I had bookmarked required a trip to three different stores and about four hours of active cooking time. I didn’t have the energy for that kind of ambition at nearly midnight. But I did have a pack of chicken breasts in the fridge, a jar of honey that was almost empty, and a bottle of soy sauce that had seen better days.
Honestly, the idea felt a little desperate at first. Honey and soy sauce on chicken? It sounded like something a college student would throw together, not something you’d serve to impress your friends. But there I was, standing in my kitchen in my pajamas, mixing together a sauce that smelled so good I knew I was onto something. I mean, the garlic alone—I minced about six cloves because, let’s face it, you can never have too much garlic when you’re cooking for a crowd. I poured the mixture over the chicken, popped it in the oven, and waited. And when I pulled it out, golden and glistening, I knew this was the dish that would steal the show at my dinner party.
That late-night experiment turned into my go-to recipe for every gathering since. It’s the kind of dish that makes people close their eyes after the first bite, and it’s embarrassingly easy to pull off. Maybe you’ve been there—staring at your fridge at an ungodly hour, wondering if you can actually make something amazing with what you’ve got. Trust me, you can. This honey garlic baked chicken is proof that the best recipes often come from those weird, impulsive moments when you just go for it.
Why You’ll Love This Recipe
Let me tell you why this recipe has become my secret weapon for hosting. I’ve tested it at countless gatherings, from casual backyard barbecues to more formal dinner parties, and it never fails to deliver. Here’s what makes it stand out:
- Incredibly Easy: You don’t need any fancy techniques or hours of prep. The sauce comes together in about five minutes, and the oven does all the hard work. It’s perfect for those days when you want to impress without the stress.
- Simple Ingredients: Chances are you already have most of these staples in your pantry. No need for a specialty grocery run—just honey, soy sauce, garlic, and a few other basics.
- Perfect for Hosting: This dish was made for gatherings. It scales beautifully, so you can easily double or triple the recipe for a crowd. Plus, it looks stunning on a platter, which is half the battle when you’re trying to impress guests.
- Guaranteed Crowd-Pleaser: I’ve served this to picky eaters, foodie friends, and even my aunt who claims she doesn’t like chicken. Every single person has asked for the recipe. It’s that good.
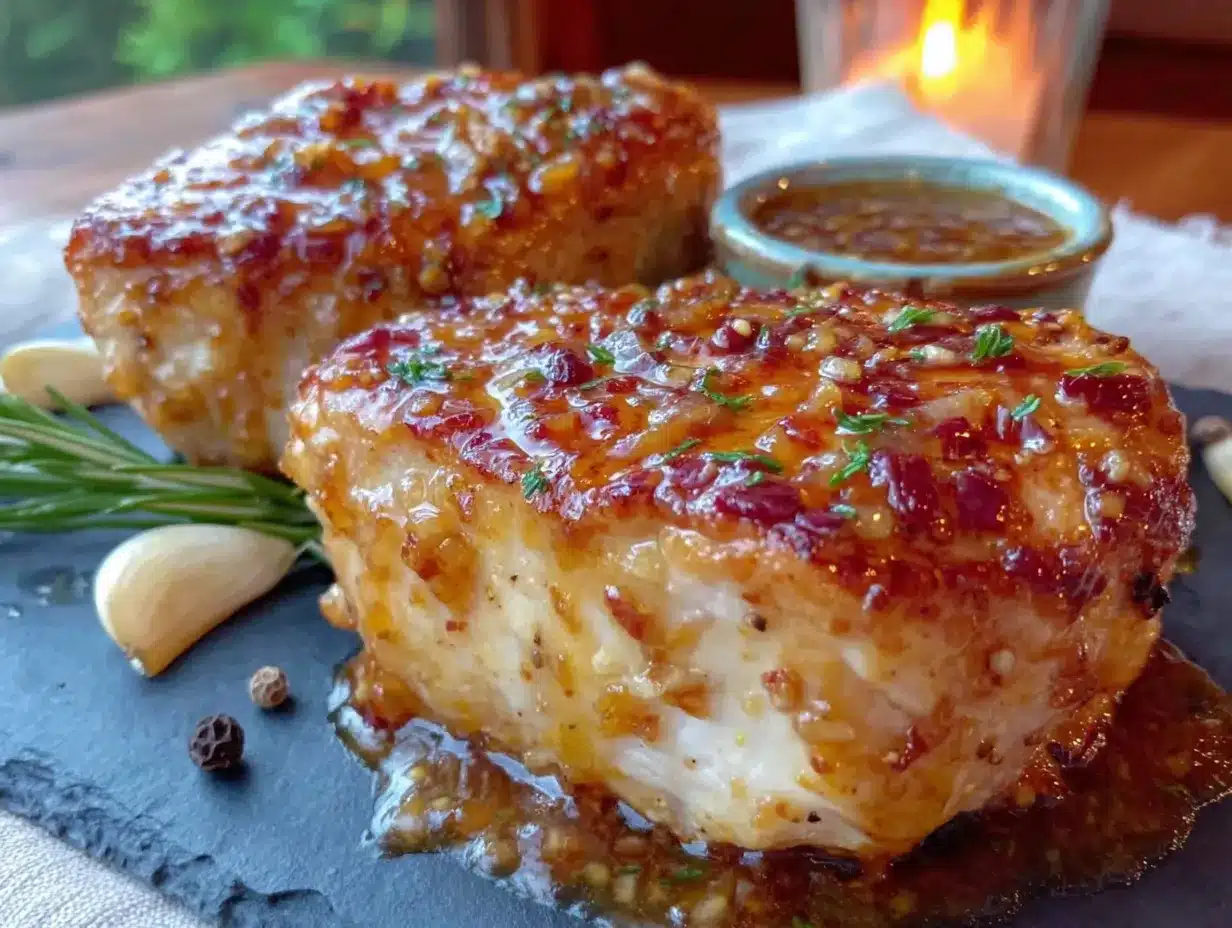
- Unbelievably Delicious: The balance of sweet honey, savory soy sauce, and punchy garlic is absolutely addictive. The chicken comes out tender and juicy, with a glaze that caramelizes to perfection in the oven. It’s comfort food at its finest.
What really sets this recipe apart is the technique. Instead of just brushing the sauce on top, I let the chicken marinate in it for at least 30 minutes (or up to overnight if you’re planning ahead). This ensures the flavor penetrates every bite, not just the surface. And the high-heat roasting method? That’s the secret to getting that gorgeous, sticky glaze without drying out the meat. I’ve tried dozens of honey garlic chicken recipes over the years, and this is hands-down the best version I’ve ever made.
What Ingredients You Will Need
This recipe relies on simple, pantry-friendly ingredients that come together to create something truly special. Each component plays a crucial role in building that signature sweet-savory flavor and tender texture. Here’s what you’ll need:
For the Chicken
- 4 boneless, skinless chicken breasts (about 6-8 ounces each) — Look for breasts that are similar in size so they cook evenly. I prefer organic or free-range chicken for better flavor and texture.
- Salt and black pepper — For seasoning the chicken before adding the sauce. Don’t skip this step; it builds the foundation of flavor.
- 1 tablespoon olive oil — Helps the seasoning stick and promotes browning. You can use avocado oil if that’s what you have on hand.
For the Honey Garlic Sauce
- 1/3 cup honey — The star of the show. Use a good quality honey for the best flavor. I like local wildflower honey, but any variety works. If your honey is crystallized, just warm it slightly to liquefy it.
- 1/4 cup low-sodium soy sauce — Provides that essential savory umami flavor. Low-sodium is important here because the sauce reduces and concentrates during cooking. You can use tamari or coconut aminos for a gluten-free option.
- 6 cloves garlic, minced — Don’t skimp on this! Fresh garlic is non-negotiable for the best flavor. Pre-minced garlic from a jar won’t give you the same punch.
- 2 tablespoons rice vinegar — Adds a subtle tang that balances the sweetness of the honey. Apple cider vinegar or white wine vinegar work well as substitutes.
- 1 tablespoon sesame oil — This brings a nutty, aromatic depth to the sauce. Toasted sesame oil is ideal. If you don’t have it, you can use an extra tablespoon of olive oil, but you’ll miss that distinct flavor.
- 1 tablespoon cornstarch — Mixed with 2 tablespoons cold water to create a slurry. This thickens the sauce to that perfect glossy consistency. You can use arrowroot powder as a substitute.
- 1 teaspoon red pepper flakes (optional) — For a hint of heat. I usually add this when I’m serving a crowd that likes a little kick. Feel free to omit it if you prefer a milder dish.
For Garnish (Optional but Recommended)
- 2 tablespoons chopped fresh parsley or cilantro — Adds a pop of color and freshness. I prefer parsley for a more neutral flavor that complements the sauce.
- 1 tablespoon sesame seeds — For that classic finishing touch. Toasted sesame seeds add a nice crunch and visual appeal.
One thing I’ve learned from making this recipe dozens of times is that ingredient quality matters. The honey and soy sauce are the backbone of this dish, so use ones you actually enjoy eating. I once made this with a cheap soy sauce, and the difference was noticeable—the sauce was much saltier and less complex. Stick with brands you trust, and you’ll be rewarded with a dish that tastes like it came from a restaurant kitchen.
Equipment Needed
The beauty of this recipe is that it doesn’t require any fancy equipment. Here’s what you’ll need:
- 9×13-inch baking dish — This size is perfect for four chicken breasts without overcrowding. If you’re doubling the recipe, use two dishes or a larger roasting pan. I prefer glass or ceramic dishes because they distribute heat evenly and make cleanup easier.
- Mixing bowl — For whisking together the sauce ingredients. A medium-sized bowl works well.
- Whisk or fork — To combine the sauce until smooth. A fork works fine if you don’t have a whisk handy.
- Measuring cups and spoons — For accurate measurements. I cannot stress this enough—baking and cooking with precise measurements makes a difference, especially with the cornstarch slurry.
- Chef’s knife and cutting board — For mincing the garlic and chopping the garnish. A sharp knife makes the job much easier and safer.
- Small bowl — For mixing the cornstarch slurry. A ramekin or small cup works perfectly.
- Meat thermometer — This is optional but highly recommended. It takes the guesswork out of cooking chicken and ensures it’s perfectly done every time. I use an instant-read thermometer, and it’s been a game-changer for my cooking.
- Tongs — For flipping the chicken halfway through cooking. They’re much easier and cleaner than using a fork.
If you don’t have a 9×13-inch dish, you can use a similar-sized casserole dish or even a rimmed baking sheet. Just make sure the chicken fits in a single layer with a little space between each piece. Overcrowding will prevent the sauce from caramelizing properly, and you’ll end up with steamed chicken instead of beautifully glazed chicken.
Preparation Method
Now, let’s get to the fun part—making this incredible dish! Follow these steps carefully, and you’ll have a show-stopping meal that will have your guests asking for seconds.
- Preheat your oven to 400°F (200°C). This high temperature is key for getting that beautiful caramelized glaze without drying out the chicken. While the oven is heating, take your chicken breasts out of the fridge and let them sit at room temperature for about 15 minutes. This helps them cook more evenly.
- Season the chicken. Pat the chicken breasts dry with paper towels—this is crucial for good browning. Season both sides generously with salt and black pepper. Drizzle with the olive oil and rub it all over to coat. Set the chicken aside while you make the sauce.
- Make the honey garlic sauce. In a medium mixing bowl, whisk together the honey, low-sodium soy sauce, minced garlic, rice vinegar, and sesame oil. If you’re using red pepper flakes, add them now. Whisk until everything is well combined. Take a moment to smell this mixture—it’s incredible, right? That’s what your kitchen is about to smell like for the next hour.
- Prepare the cornstarch slurry. In a small bowl, mix the cornstarch with 2 tablespoons of cold water. Stir until the cornstarch is completely dissolved and the mixture is smooth. This will thicken the sauce as it cooks, giving it that gorgeous glossy finish.
- Combine the sauce and chicken. Place the seasoned chicken breasts in your 9×13-inch baking dish in a single layer. Pour the honey garlic sauce over the chicken, making sure each piece is well coated. Use your hands or tongs to flip the chicken a few times so the sauce gets underneath as well. Let it sit for 10 minutes at room temperature—this is a quick marinade that makes a big difference.
- Bake the chicken. Place the baking dish in the preheated oven and bake for 20 minutes. After 20 minutes, remove the dish from the oven and carefully flip each chicken breast using tongs. This ensures even cooking and allows the sauce to coat both sides. Return the dish to the oven and bake for another 15-20 minutes.
- Check for doneness. The chicken is done when it reaches an internal temperature of 165°F (74°C) in the thickest part. If you don’t have a meat thermometer, cut into the thickest part of a breast—the juices should run clear, and there should be no pinkness. Be careful not to overcook, as chicken breasts can dry out quickly.
- Make the glaze. Once the chicken is cooked, carefully pour the pan juices into a small saucepan. Place the saucepan over medium-high heat and bring the liquid to a simmer. Whisk in the cornstarch slurry and cook for 1-2 minutes, stirring constantly, until the sauce thickens to a syrupy consistency. Taste and adjust seasoning if needed—you might want a pinch more salt or a squeeze of lemon juice to brighten it up.
- Glaze and serve. Pour the thickened sauce back over the chicken breasts, or brush it on for a more polished look. Sprinkle with chopped parsley or cilantro and sesame seeds. Let the chicken rest for 5 minutes before serving—this allows the juices to redistribute, ensuring every bite is tender and moist.
One thing I’ve learned the hard way: don’t skip the step of making the slurry. The first time I made this, I just poured the pan juices over the chicken without thickening them, and the sauce was way too thin. It was still tasty, but it didn’t have that gorgeous, sticky glaze that makes this dish so special. Trust me, that extra two minutes on the stove is worth it.
Cooking Tips & Techniques
After making this recipe more times than I can count, I’ve picked up a few tricks that make a real difference. Here are my best tips for perfect honey garlic baked chicken every time:
Pound the chicken for even thickness. If your chicken breasts are unevenly thick (which they often are), place them between two sheets of plastic wrap and gently pound them to an even thickness of about 1 inch. This ensures they cook at the same rate, so you don’t end up with dry edges and a raw center. I learned this lesson after serving a dinner party where half the chicken was perfect and the other half was… not so much.
Don’t overcrowd the pan. Leave a little space between each chicken breast. If they’re touching, they’ll steam instead of roast, and you won’t get that beautiful caramelization. If you’re cooking for a crowd, it’s better to use two baking dishes than to cram everything into one.
Baste halfway through. When you flip the chicken at the 20-minute mark, use a spoon to drizzle some of the pan juices over the top. This keeps the chicken moist and builds up that gorgeous glaze layer by layer.
Let it rest. I know it’s tempting to serve immediately, especially when guests are waiting, but letting the chicken rest for 5 minutes makes a huge difference. The juices settle back into the meat, and the glaze sets up nicely. Your patience will be rewarded.
Watch the sauce. When you’re thickening the pan juices on the stove, keep a close eye on it. It can go from perfectly syrupy to overly thick in a matter of seconds. As soon as it coats the back of a spoon, take it off the heat.
Adjust the sweetness. Everyone’s palate is different. If you prefer a less sweet sauce, reduce the honey to 1/4 cup and add an extra tablespoon of soy sauce. If you like it sweeter, go ahead and add a little more honey. This recipe is forgiving that way.
One of my biggest failures with this recipe happened when I was rushing. I forgot to flip the chicken at the 20-minute mark, and the tops came out pale and unappetizing while the bottoms were almost burnt. Now I set a timer on my phone specifically for that flip step. It’s a small thing, but it makes all the difference in the final presentation.
Variations & Adaptations
This recipe is incredibly versatile, and I’ve experimented with several variations over the years. Here are some of my favorites:
Spicy Honey Garlic Chicken: Add 1-2 tablespoons of sriracha or sambal oelek to the sauce for a fiery kick. I made this version for a group of friends who love spicy food, and it was gone in minutes. The heat pairs beautifully with the sweetness of the honey.
Lemon Honey Garlic Chicken: Swap the rice vinegar for fresh lemon juice and add a teaspoon of lemon zest to the sauce. The citrus brightens up the dish and adds a lovely freshness. This is my go-to version for spring gatherings.
Baked Honey Garlic Chicken Thighs: If you prefer dark meat, this recipe works beautifully with bone-in, skin-on chicken thighs. Increase the baking time to 35-40 minutes, and you’ll get incredibly juicy, flavorful chicken with crispy skin. I actually prefer this version for casual potlucks because the thighs stay moist even if they sit out for a while.
Slow Cooker Version: Place the seasoned chicken and sauce (minus the cornstarch slurry) in a slow cooker. Cook on low for 4-5 hours or on high for 2-3 hours. Remove the chicken, thicken the sauce on the stove with the slurry, and pour it back over. This is perfect for busy days when you want dinner ready when you walk in the door.
Gluten-Free Adaptation: Simply use tamari or coconut aminos instead of soy sauce. Everything else in the recipe is naturally gluten-free. I’ve served this to friends with celiac disease, and they couldn’t tell the difference.
Keto-Friendly Version: Replace the honey with a sugar-free honey substitute or use a combination of monk fruit sweetener and a little brown sugar substitute. The texture will be slightly different, but the flavor is still fantastic. I’ve tested this for a friend on a keto diet, and it was a hit.
The variation I keep coming back to is the lemon version. There’s something about that bright, citrusy note that cuts through the richness of the glaze and makes the dish feel lighter. I served it at a summer barbecue last year, and people were literally hovering around the platter, waiting for seconds.
Serving & Storage Suggestions
This dish is incredibly versatile when it comes to serving. Here’s how I like to present it and what to do with leftovers.
Serving Temperature: Serve the chicken hot, right out of the oven, with the glaze spooned over the top. It’s also delicious at room temperature, which makes it perfect for buffets and potlucks. I’ve even served it cold, sliced over a salad, and it was fantastic.
Presentation Tips: For a dinner party, I arrange the chicken breasts on a large white platter, drizzle the remaining glaze over the top, and sprinkle generously with sesame seeds and fresh parsley. It’s a beautiful, restaurant-worthy presentation that takes less than two minutes. For a more casual gathering, I serve it straight from the baking dish—it’s rustic and homey.
What to Serve Alongside: This chicken pairs beautifully with steamed rice or coconut rice to soak up all that delicious sauce. For a low-carb option, serve it with roasted vegetables like broccoli, asparagus, or green beans. A simple cucumber salad with rice vinegar and sesame oil is also a wonderful accompaniment—it adds a refreshing crunch that balances the richness of the chicken.
Storage Instructions: Store leftover chicken in an airtight container in the refrigerator for up to 4 days. The flavors actually deepen and meld together overnight, so leftovers taste even better the next day. I often make a double batch just so I can have leftovers for lunch.
Freezing: This chicken freezes beautifully. Place cooled chicken and sauce in a freezer-safe container or zip-top bag. It will keep for up to 3 months. To reheat, thaw overnight in the refrigerator, then warm in a 350°F oven until heated through, about 15-20 minutes. You can also reheat individual portions in the microwave, but the texture won’t be quite as good.
Reheating Tips: The best way to reheat this chicken is in the oven. Place it in a baking dish with a splash of water or chicken broth, cover with foil, and warm at 350°F for 10-15 minutes. This prevents the chicken from drying out. If you’re in a hurry, the microwave works, but be careful not to overheat it.
One thing I love about this recipe is how the flavors develop over time. I actually prefer the leftovers to the freshly made dish—the garlic mellows out, and the honey and soy sauce meld into something truly special. It’s the kind of recipe that rewards you for making it ahead.
Nutritional Information & Benefits
Here’s the estimated nutritional breakdown for one serving (one chicken breast with sauce):
- Calories: 380
- Protein: 42g
- Fat: 12g
- Saturated Fat: 2g
- Carbohydrates: 28g
- Fiber: 0g
- Sugar: 24g
- Sodium: 680mg
Please note that these values are estimates and can vary based on the specific ingredients you use. If you’re watching your sodium intake, use low-sodium soy sauce and reduce the added salt.
This dish offers several health benefits thanks to its key ingredients. Chicken breast is an excellent source of lean protein, which is essential for muscle repair and overall health. Garlic is known for its immune-boosting properties and contains compounds that may help reduce inflammation. Honey provides natural energy and contains antioxidants, though it should be enjoyed in moderation due to its sugar content.
For those with dietary restrictions, this recipe can easily be adapted. It’s naturally dairy-free and can be made gluten-free with a simple swap. If you’re following a low-carb or keto diet, the sugar content is something to be mindful of, but the keto-friendly variation I mentioned earlier is a great alternative.
From my perspective, this recipe strikes a wonderful balance between indulgence and nutrition. It’s not a health food by any means, but it’s made with real, whole ingredients that you can feel good about serving to your family and friends. And honestly, the joy it brings to a dinner table is a kind of nourishment in itself.
Conclusion
This honey garlic baked chicken has become my signature dish for a reason. It’s the recipe I turn to when I want to impress without stress, feed a crowd without fuss, and create those magical moments around the dinner table where everyone reaches for seconds. It started as a late-night experiment, born from a craving and a fridge full of basics, and it’s become the dish that people ask me to bring to every gathering.
What I love most about this recipe is how it proves that you don’t need complicated techniques or exotic ingredients to create something truly memorable. With just a handful of pantry staples and a little bit of time, you can make a meal that looks and tastes like it came from a fancy restaurant. It’s the kind of dish that makes you look like a hero in the kitchen, even when you’re just following a simple recipe.
I encourage you to make this your own—adjust the sweetness, add some heat, or try it with chicken thighs. The beauty of this recipe is its flexibility. And when you serve it at your next dinner party or family gathering, watch the faces of your guests light up. That’s the real magic of cooking, isn’t it?
If you try this recipe, I’d love to hear how it turned out. Leave a comment below and let me know your favorite variation, or share a photo of your beautiful glazed chicken. And if you’re looking for more crowd-pleasing recipes, check out my garlic butter roasted potatoes—they’re the perfect side dish for this chicken. Happy cooking, friends!
Frequently Asked Questions
Can I use chicken thighs instead of chicken breasts?
Absolutely! Bone-in, skin-on chicken thighs work beautifully with this recipe. Just increase the baking time to 35-40 minutes and check for an internal temperature of 175°F (80°C) for the most tender results. The thighs will be even juicier than the breasts, and the skin gets wonderfully crispy.
How do I prevent the chicken from drying out?
The key is not to overcook it. Use a meat thermometer to check for an internal temperature of 165°F (74°C), and remove the chicken from the oven as soon as it reaches that temperature. Letting it rest for 5 minutes before slicing also helps retain moisture. And don’t skip the olive oil rub—it helps seal in the juices.
Can I make this recipe ahead of time?
Yes! You can assemble the dish up to 24 hours in advance. Simply place the seasoned chicken in the baking dish, pour the sauce over it, cover, and refrigerate. When you’re ready to cook, let it sit at room temperature for 20 minutes while the oven preheats, then bake as directed. The flavor will be even better because the chicken has had time to marinate.
What can I use instead of honey?
Maple syrup or agave nectar are excellent substitutes for honey. They’ll provide similar sweetness and a slightly different but equally delicious flavor profile. If you’re looking for a low-sugar option, you can use a sugar-free honey substitute or monk fruit sweetener mixed with a little water.
How do I thicken the sauce if it’s too thin?
If your sauce is thinner than you’d like, simply mix another teaspoon of cornstarch with a tablespoon of cold water to create a slurry, then whisk it into the simmering pan juices. Cook for another minute or two until it reaches your desired consistency. You can also let the sauce simmer a bit longer to reduce and concentrate the flavors naturally.
PrintEasy Honey Garlic Baked Chicken Breasts (Best Recipe)

This honey garlic baked chicken is incredibly easy to make with simple pantry ingredients, resulting in tender, juicy chicken with a sticky, sweet-savory glaze that’s perfect for impressing guests at any gathering.
- Prep Time: 15 minutes
- Cook Time: 35-40 minutes
- Total Time: 50-55 minutes
- Yield: 4 servings 1x
- Category: Main Course
- Cuisine: American
Ingredients
- 4 boneless, skinless chicken breasts (6–8 ounces each)
- Salt and black pepper, to taste
- 1 tablespoon olive oil
- 1/3 cup honey
- 1/4 cup low-sodium soy sauce
- 6 cloves garlic, minced
- 2 tablespoons rice vinegar
- 1 tablespoon sesame oil
- 1 tablespoon cornstarch
- 2 tablespoons cold water
- 1 teaspoon red pepper flakes (optional)
- 2 tablespoons chopped fresh parsley or cilantro (for garnish)
- 1 tablespoon sesame seeds (for garnish)
Instructions
- Preheat your oven to 400°F (200°C). Let chicken breasts sit at room temperature for about 15 minutes.
- Pat chicken breasts dry with paper towels. Season both sides generously with salt and black pepper. Drizzle with olive oil and rub to coat.
- In a medium mixing bowl, whisk together honey, low-sodium soy sauce, minced garlic, rice vinegar, and sesame oil. Add red pepper flakes if using.
- In a small bowl, mix cornstarch with 2 tablespoons cold water until smooth to create a slurry.
- Place seasoned chicken in a 9×13-inch baking dish in a single layer. Pour honey garlic sauce over chicken, flipping to coat. Let sit for 10 minutes.
- Bake for 20 minutes. Remove from oven, flip each chicken breast, and bake for another 15-20 minutes until internal temperature reaches 165°F (74°C).
- Pour pan juices into a small saucepan. Bring to a simmer over medium-high heat. Whisk in cornstarch slurry and cook for 1-2 minutes until thickened.
- Pour thickened sauce back over chicken. Garnish with parsley or cilantro and sesame seeds. Let rest for 5 minutes before serving.
Notes
For even cooking, pound chicken breasts to an even thickness. Don’t overcrowd the pan. Baste halfway through cooking. Let chicken rest before serving. Adjust sweetness to taste. For a gluten-free version, use tamari or coconut aminos instead of soy sauce.
Nutrition
- Serving Size: 1 chicken breast wit
- Calories: 380
- Sugar: 24
- Sodium: 680
- Fat: 12
- Saturated Fat: 2
- Carbohydrates: 28
- Protein: 42
Keywords: honey garlic chicken, baked chicken, easy chicken recipe, honey soy chicken, garlic chicken, chicken breast recipe, dinner party recipe


