I was elbow-deep in packing tape last October, wrestling a roll of it around a box of old Halloween decorations, when the smell hit me. It wasn’t pumpkin spice or cinnamon — it was the sharp, sweet-sugar scent of royal icing, drifting from somewhere in the kitchen. Except I wasn’t baking. The smell was just a ghost, a memory so strong I could practically taste the way that first bite of cookie crunched, then melted, under a hard shell of icing. And suddenly I was seven, standing on a step stool at my Aunt Lou’s counter, her flour-dusted hand guiding mine as I squeezed a wobbly ghost shape onto a sugar cookie. She’s been gone eight years now, and I haven’t made those cookies since. But standing there in a pile of orange tinsel, I knew I had to try. I had to figure out how to get that snap, that shine, that feeling back — without spending all night on it. Because honestly, Aunt Lou had patience I just don’t have anymore. So I spent a few weekends testing, failing, scraping icing off cookies and starting over, until I landed on a method that gives you that gorgeous, glossy royal icing finish in about half the time. These Easy Halloween Sugar Cookies with Quick Royal Icing are the result — and maybe you’ve been there, staring at a bag of powdered sugar wondering if it’s worth the mess. Let me tell you: it is. But only if you know the shortcuts.
Why You’ll Love This Recipe
Let’s be real — most royal icing recipes are a labor of love. They require precise mixing, careful consistency checks, and a whole lot of patience while things dry. But this version? It’s built for real life. I tested it on a Tuesday night after work, with a toddler asking for snacks and a sink full of dishes. And it worked. Here’s why this one’s different:
- Quick & Easy: From start to finish, you can have decorated cookies ready in under an hour. The icing sets in about 20 minutes, not hours.
- Simple Ingredients: You probably have everything in your pantry right now — powdered sugar, milk, vanilla, and a little corn syrup for shine.
- Perfect for Halloween: Whether you’re making a batch for a school party, a spooky movie night, or just to get in the seasonal spirit, these cookies deliver.
- Crowd-Pleaser: Kids love decorating them, adults love eating them, and everyone loves how they look. They’re genuinely fun to make together.
- Unbelievably Delicious: The cookie itself is soft in the middle with slightly crisp edges — the perfect base for that sweet, glossy icing on top.
What really sets this recipe apart is the technique. Instead of whipping egg whites or using meringue powder, I use a simple milk-based icing that dries shiny and hard without the fuss. It’s not just another version — it’s the version that actually fits into your life. The kind that makes you close your eyes after that first bite, because it tastes exactly like you hoped it would.
What Ingredients You Will Need
This recipe uses simple, pantry-friendly ingredients to deliver that classic sugar cookie taste and a glossy, hard-drying icing. No special trips to a baking supply store required.
For the Sugar Cookies
- Unsalted butter, softened — 1 cup (2 sticks, 226g). I use Land O’Lakes for consistent results. Make sure it’s truly soft, not melted.
- Granulated sugar — 1 cup (200g). Regular white sugar gives the cookies that classic sweetness and slight crunch on the edges.
- Large egg — 1, at room temperature. Cold eggs can make the dough seize up, so let it sit out for 15 minutes.
- Vanilla extract — 2 teaspoons. Pure vanilla makes a difference here. Imitation works, but the flavor is noticeably flatter.
- All-purpose flour — 2 ½ cups (315g). Spoon and level it — don’t scoop straight from the bag or you’ll end up with dry cookies.
- Baking powder — 1 teaspoon. This gives the cookies just a little lift without making them puffy.
- Salt — ½ teaspoon. Balances the sweetness and brings out the vanilla.
For the Quick Royal Icing
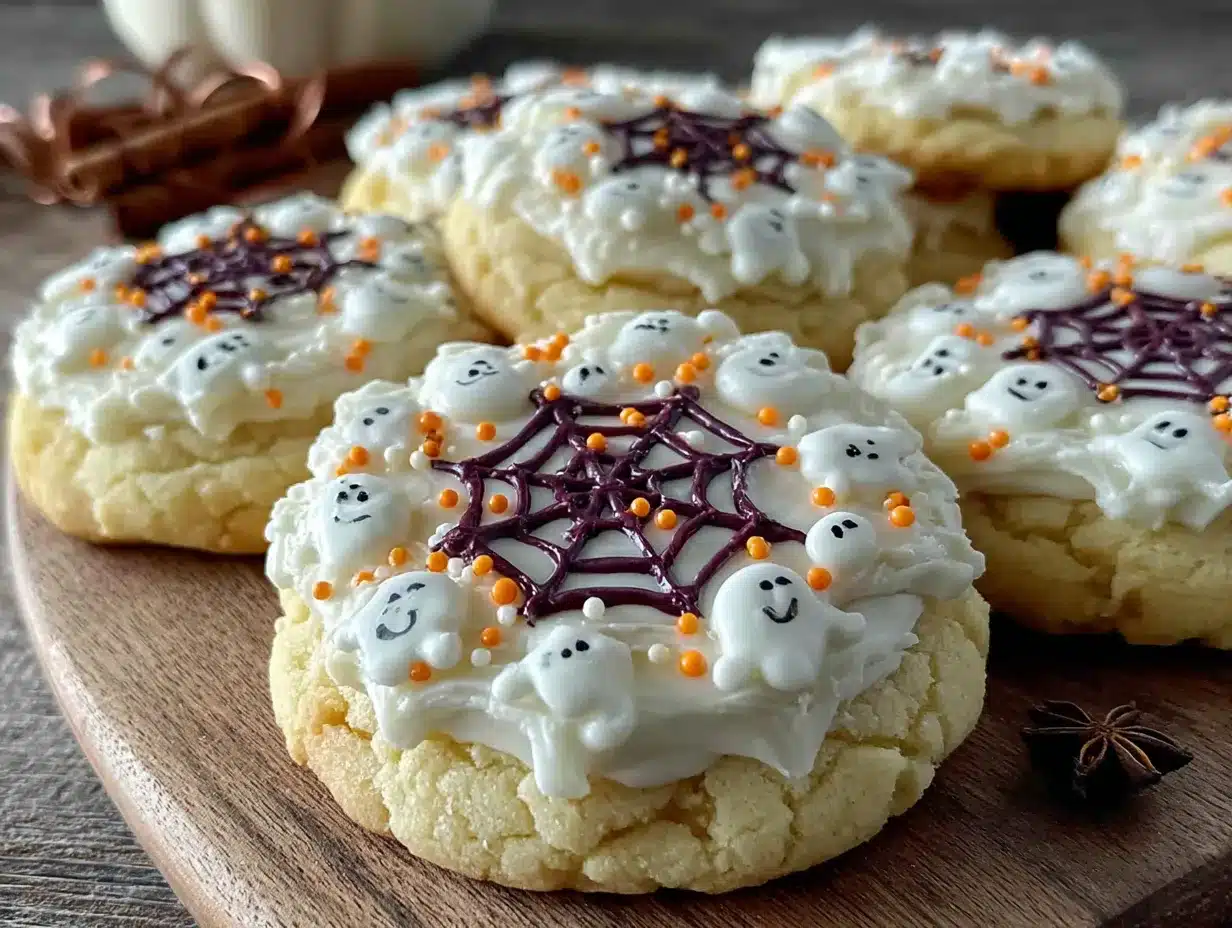
- Powdered sugar — 2 cups (240g), sifted. Sifting is non-negotiable here — lumps will ruin the smooth finish.
- Milk — 3 to 4 tablespoons. Whole milk gives the best texture, but 2% works fine. Start with 3 tablespoons and add more if needed.
- Light corn syrup — 2 tablespoons. This is the secret to that glossy, hard-drying shine. Don’t skip it.
- Vanilla extract — ½ teaspoon. For flavor. You can use clear vanilla if you want a pure white icing.
- Gel food coloring — in Halloween colors like orange, purple, black, and green. Liquid coloring can thin the icing too much.
If you need a dairy-free version, use oat milk or canned coconut milk (not the refrigerated kind) and a dairy-free butter substitute like Earth Balance. The texture will be slightly different, but it still works. For a gluten-free option, swap the all-purpose flour with a 1:1 gluten-free baking blend that contains xanthan gum. I’ve tested this with Bob’s Red Mill 1:1 and the cookies held their shape beautifully.
Equipment Needed
You don’t need a fancy bakery setup for these cookies, but a few key tools make the process much smoother. Here’s what I use:
- Electric mixer — A stand mixer with a paddle attachment is ideal, but a hand mixer works just fine. You just need to cream the butter and sugar until light and fluffy.
- Rolling pin — I prefer a French rolling pin (no handles) because it gives me more control over thickness. If you don’t have one, a regular rolling pin will do. Use ¼-inch guide rings if you have them.
- Halloween cookie cutters — Ghosts, pumpkins, bats, and cats are classics. A 2- to 3-inch size is perfect for decorating. Wilton and Ann Clark both make good sets.
- Parchment paper — Lining your baking sheets prevents sticking and makes cleanup a breeze. I buy the pre-cut sheets for convenience.
- Piping bags or squeeze bottles — For the icing. I actually prefer squeeze bottles for flooding (filling in large areas) because they’re easier to control. Wilton makes a good set. For detail work, use a piping bag with a #2 or #3 round tip.
- Cooling rack — A wire rack lets air circulate under the cookies so they cool evenly and the icing sets properly.
If you’re on a budget, you can use a sturdy zip-top bag with a tiny corner snipped off instead of a piping bag. Just be careful not to cut too much — start small and test on a plate first. I learned that the hard way, let me tell you. One batch of cookies ended up with icing everywhere except on the cookies themselves.
Preparation Method
This method breaks down into two parts: the cookies and the icing. I recommend making the cookie dough first, then preparing the icing while the cookies cool. It keeps the workflow smooth.
Make the Sugar Cookie Dough
- Cream the butter and sugar. In a large bowl, beat the softened butter and granulated sugar together on medium speed for 2-3 minutes, until light and fluffy. Scrape down the sides of the bowl once. You want the mixture to look pale and almost like whipped butter.
- Add the egg and vanilla. Beat in the egg and vanilla extract on low speed until just combined. Don’t overmix — you don’t want to incorporate too much air at this stage.
- Mix the dry ingredients. In a separate bowl, whisk together the flour, baking powder, and salt. Gradually add this to the wet mixture, mixing on low speed until a soft dough forms. It should come together cleanly and not be sticky. If it feels too sticky, add a tablespoon more flour.
- Chill the dough. Divide the dough in half, flatten each half into a disc, wrap in plastic wrap, and refrigerate for at least 30 minutes. This step is crucial — it prevents the cookies from spreading in the oven. You can chill it for up to 2 days.
- Preheat and prep. Preheat your oven to 350°F (175°C). Line two baking sheets with parchment paper.
- Roll and cut. On a lightly floured surface, roll one disc of dough to ¼-inch thickness. Cut out shapes with your Halloween cookie cutters and place them 1 inch apart on the prepared baking sheets. Gather the scraps, re-roll, and cut again. Don’t overwork the scraps or the cookies will get tough.
- Bake. Bake for 8-10 minutes, until the edges are just barely golden. The centers should look set but not brown. Let the cookies cool on the baking sheet for 5 minutes, then transfer to a wire rack to cool completely. Do not ice warm cookies — the icing will slide right off.
Make the Quick Royal Icing
- Sift the powdered sugar. This is the step that saves you from lumpy icing. Sift it into a medium bowl. Yes, it’s an extra step. Yes, it’s worth it.
- Add the milk and corn syrup. Pour in 3 tablespoons of milk and the corn syrup. Stir gently with a spoon until combined, then switch to a whisk and whisk until smooth. The consistency should be thick but flowable — like honey. If it’s too thick, add the remaining tablespoon of milk, a few drops at a time.
- Add vanilla and color. Stir in the vanilla. Divide the icing into separate bowls for each color. Add gel food coloring a tiny bit at a time — a toothpick’s worth goes a long way. Stir until the color is even.
- Transfer to piping tools. Spoon the icing into squeeze bottles or piping bags fitted with small round tips. If using a zip-top bag, snip a tiny corner off. Test the flow on a plate before piping on cookies.
Decorate the Cookies
- Outline and flood. For each cookie, pipe a thin outline around the edge with your piping bag. Then use the squeeze bottle to “flood” the inside — just squeeze gently and let the icing spread to the outline. Use a toothpick to guide it into corners if needed.
- Add details. While the base icing is still wet, pipe on dots, stripes, or faces in contrasting colors. Use a toothpick to drag through the icing for a marbled effect. Work quickly — the icing sets in about 5 minutes.
- Let them dry. Leave the decorated cookies on the counter, uncovered, for 20-30 minutes. The icing will harden to a glossy, non-sticky finish. If you’re stacking them, wait a full hour to be safe.
Cooking Tips & Techniques
I’ve made plenty of mistakes with sugar cookies, and I’m happy to save you from the same ones. Here are the things I wish someone had told me:
- Don’t skip chilling the dough. I know it’s tempting to skip this step when you’re in a hurry, but warm dough spreads into flat, shapeless blobs. Thirty minutes in the fridge is all it takes to get clean, sharp edges on your ghosts and pumpkins.
- Flour your cutters. Dip your cookie cutters in flour before each cut. It prevents the dough from sticking and tearing. Tap off the excess so you don’t leave flour marks on the cookies.
- Bake one sheet at a time. If you put two sheets in the oven at once, the heat doesn’t circulate evenly and your cookies will bake unevenly. I know it takes longer, but it’s worth it for consistent results.
- Test your icing consistency. The perfect flooding icing should spread slowly when you squeeze it, but hold its shape for a second before settling. If it runs like water, add more sifted powdered sugar a tablespoon at a time. If it won’t spread at all, add a few drops of milk.
- Work in an assembly line. Outline all the cookies first, then go back and flood them all. This keeps the process efficient and gives the outlines a moment to set slightly, which helps contain the flood icing.
I once forgot to sift my powdered sugar — just skipped it entirely because I was in a rush. The icing was lumpy, the squeeze bottle clogged, and I ended up with polka-dotted pumpkins that looked more like they had the measles than a cute Halloween design. So trust me on this one: sift your sugar.
Variations & Adaptations
One of the best things about this recipe is how flexible it is. Here are a few ways to make it your own:
- Dietary Swaps: For a dairy-free version, use oat milk in the icing and a plant-based butter in the dough. The cookies will be slightly less tender, but still delicious. For a gluten-free option, swap the all-purpose flour with a 1:1 gluten-free baking blend. I’ve used Bob’s Red Mill 1:1 with great results — just add an extra tablespoon of milk to the dough if it seems dry.
- Flavor Twists: Add ½ teaspoon of almond extract to the cookie dough for a subtle nutty flavor. Or mix a pinch of cinnamon and nutmeg into the icing for a warm, spiced finish that pairs perfectly with fall flavors.
- Different Holidays: These cookies aren’t just for Halloween. Use heart-shaped cutters for Valentine’s Day, snowflakes for winter, or flowers for spring. The quick royal icing works with any shape or color scheme.
- No-Cut-Out Version: If you don’t have cookie cutters, roll the dough into a log, chill it, and slice it into rounds. Decorate the rounds with simple polka dots or stripes for an easy, no-fuss option.
- Gluten-Free Note: The gluten-free version works best if you chill the dough for a full hour before rolling. It’s a bit more fragile, but rolling it between two sheets of parchment paper makes it much easier to handle.
I once made a batch with orange zest in the icing for a friend’s Halloween party — it added a bright, citrusy pop that cut through the sweetness. Totally unexpected, but everyone asked for the recipe.
Serving & Storage Suggestions
These cookies are best served at room temperature, with the icing fully set. The contrast between the soft, buttery cookie and the hard, glossy icing is what makes them so satisfying. Arrange them on a platter with some candy corn and mini pumpkins for a festive Halloween display.
For storage, place the decorated cookies in a single layer in an airtight container, with parchment paper between layers if you need to stack them. They’ll stay fresh at room temperature for up to 5 days. Do not refrigerate them — the moisture in the fridge can make the icing sticky and the cookies soft.
You can also freeze the undecorated cookies for up to 3 months. Just bake them, let them cool completely, and place them in a freezer-safe bag with parchment paper between layers. When you’re ready to decorate, thaw them at room temperature for about 30 minutes, then ice as directed. The icing itself doesn’t freeze well, so always make it fresh.
The flavors actually develop a bit over the first day — the vanilla becomes more pronounced and the cookie softens slightly. I honestly think they’re even better on day two, if you can wait that long.
Nutritional Information & Benefits
These are definitely a treat, not an everyday snack, but knowing what’s in them helps with mindful enjoyment. Here are the approximate values per cookie (based on a 2-inch pumpkin shape):
- Calories: 120
- Total Fat: 5g (3g saturated)
- Carbohydrates: 18g (12g sugar)
- Protein: 1g
- Sodium: 55mg
The butter provides a small amount of vitamin A, and the milk in the icing adds a touch of calcium. If you’re watching your sugar intake, you can reduce the icing sugar slightly — though it will affect the texture and shine. For a lower-sugar option, try using a sugar substitute like Swerve in the cookie dough, but note that the texture will be slightly different.
These cookies are not gluten-free, dairy-free, or vegan as written, but the substitutions I mentioned above work well for most dietary needs. Always check your ingredient labels if you’re cooking for someone with allergies.
Conclusion
These Easy Halloween Sugar Cookies with Quick Royal Icing are everything I hoped they’d be — beautiful, delicious, and actually doable on a weeknight. They bring back that feeling of standing at Aunt Lou’s counter, but without the stress and the mess I remember. The quick royal icing is a game-changer, giving you that professional bakery finish in a fraction of the time.
I’d love to see how yours turn out. Did you try a different color combo? Add sprinkles? Use a bat-shaped cutter for a spooky touch? Leave a comment below and share your creations — I read every single one. And if you’re looking for another easy treat to round out your Halloween spread, check out my recipe for spooky mummy pizza bites — they’re perfect for a savory counterpoint to all that sugar.
Happy baking, and don’t forget to save a cookie for yourself. You’ve earned it.
Frequently Asked Questions
Can I use this icing on other types of cookies?
Absolutely. This quick royal icing works on any firm, flat cookie — shortbread, gingerbread, or even graham crackers. Just make sure the cookies are completely cool before you start decorating.
How do I get the icing to dry faster?
If you’re in a hurry, you can use a fan on low speed to circulate air around the cookies. Just don’t point it directly at them or the icing can ripple. A dry, warm room also speeds up the process.
Can I make the cookie dough ahead of time?
Yes! You can refrigerate the dough discs for up to 3 days, or freeze them for up to 3 months. Thaw frozen dough in the refrigerator overnight before rolling and cutting.
Why did my icing crack after drying?
This usually happens if the icing was too thick when you applied it, or if the cookie underneath was still warm. Make sure your cookies are completely cool and your icing is the right honey-like consistency.
Can I use liquid food coloring instead of gel?
You can, but it will thin out the icing. If you use liquid coloring, reduce the milk by ½ teaspoon to compensate. Gel coloring is much more concentrated and won’t affect the consistency as much.
PrintEasy Halloween Sugar Cookies with Quick Royal Icing

These easy Halloween sugar cookies feature a soft, buttery cookie base and a glossy, quick-drying royal icing that sets in about 20 minutes. Perfect for spooky celebrations, this recipe uses simple pantry ingredients and a milk-based icing for a beautiful finish without the fuss.
- Prep Time: 30 minutes
- Cook Time: 10 minutes
- Total Time: 1 hour 10 minutes
- Yield: 24 servings 1x
- Category: Dessert
- Cuisine: American
Ingredients
- 1 cup (2 sticks, 226g) unsalted butter, softened
- 1 cup (200g) granulated sugar
- 1 large egg, at room temperature
- 2 teaspoons vanilla extract
- 2 ½ cups (315g) all-purpose flour
- 1 teaspoon baking powder
- ½ teaspoon salt
- 2 cups (240g) powdered sugar, sifted
- 3 to 4 tablespoons milk (whole milk preferred)
- 2 tablespoons light corn syrup
- ½ teaspoon vanilla extract
- Gel food coloring (orange, purple, black, green)
Instructions
- Cream the butter and sugar: In a large bowl, beat the softened butter and granulated sugar together on medium speed for 2-3 minutes until light and fluffy. Scrape down the sides of the bowl once.
- Add the egg and vanilla: Beat in the egg and vanilla extract on low speed until just combined. Do not overmix.
- Mix the dry ingredients: In a separate bowl, whisk together the flour, baking powder, and salt. Gradually add to the wet mixture, mixing on low speed until a soft dough forms. If too sticky, add a tablespoon more flour.
- Chill the dough: Divide the dough in half, flatten each half into a disc, wrap in plastic wrap, and refrigerate for at least 30 minutes (up to 2 days).
- Preheat and prep: Preheat oven to 350°F (175°C). Line two baking sheets with parchment paper.
- Roll and cut: On a lightly floured surface, roll one disc of dough to ¼-inch thickness. Cut out shapes with Halloween cookie cutters and place 1 inch apart on prepared baking sheets. Gather scraps, re-roll, and cut again.
- Bake: Bake for 8-10 minutes until edges are just barely golden. Let cool on baking sheet for 5 minutes, then transfer to a wire rack to cool completely.
- Make the icing: Sift the powdered sugar into a medium bowl. Add 3 tablespoons milk and corn syrup. Stir gently, then whisk until smooth. Add vanilla. Divide icing into bowls and add gel food coloring a tiny bit at a time.
- Transfer icing to squeeze bottles or piping bags fitted with small round tips. Test flow on a plate before piping.
- Decorate: For each cookie, pipe a thin outline around the edge, then flood the inside with icing. Add details while base is still wet. Let dry uncovered for 20-30 minutes (1 hour if stacking).
Notes
Do not skip chilling the dough—it prevents spreading. Sift powdered sugar to avoid lumps. For dairy-free, use oat milk and plant-based butter. For gluten-free, use a 1:1 gluten-free baking blend. Cookies stay fresh at room temperature for up to 5 days in an airtight container. Do not refrigerate.
Nutrition
- Serving Size: 1 cookie (2-inch pum
- Calories: 120
- Sugar: 12
- Sodium: 55
- Fat: 5
- Saturated Fat: 3
- Carbohydrates: 18
- Protein: 1
Keywords: Halloween cookies, sugar cookies, royal icing, easy cookies, decorated cookies, spooky cookies, quick icing


