By the third batch in as many days, I finally stopped measuring the turmeric with a shaking hand. The kitchen looked like a crime scene of green thumbprints and mustard-yellow countertops, and the smell—sharp, sweet, vinegary—had permanently settled into my hair. I was supposed to be cleaning out the garden before the first hard frost, pulling up those stubborn tomato vines that had spent all summer pretending they were done. Instead, I was standing over a bubbling pot, hypnotized by the way the green chunks softened and turned translucent around the edges. It wasn’t supposed to be this complicated. But every time I thought I had the balance right—the sugar, the vinegar, the pinch of celery seed—I’d taste it cold from the spoon and know it needed one more tweak. That last batch? It finally did what I wanted. It tasted like the end of summer, but in a jar.
This homemade green tomato relish is what happens when you look at a basket of unripe tomatoes and refuse to let them go to waste. It’s tangy, slightly sweet, and has just enough crunch to remind you it came from something real. And honestly? It’s the best thing you’ll make with those end-of-harvest leftovers.
Why You’ll Love This Recipe
I’ve tested this recipe more times than I care to admit, and here’s what I’ve learned: not all green tomato relishes are created equal. Some are too watery. Some are too sweet. Some taste like they’re trying too hard to be pickle relish. This one hits the sweet-sour balance perfectly, with a texture that stays chunky but spoonable.
- Simple Ingredients : You probably have most of these in your pantry right now. No hunting down obscure spices or specialty vinegars.
- Quick & Easy : From chopping to jarring, you’re looking at about an hour. Most of that is just letting the pot simmer.
- Perfect for End-of-Harvest : That basket of green tomatoes sitting on your counter finally has a purpose. It’s the ultimate garden-cleaning recipe.
- Crowd-Pleaser : I’ve brought this to summer cookouts and watched people slather it on hot dogs, burgers, and even grilled cheese sandwiches. It disappears fast.
- Unbelievably Delicious : There’s something about the combination of tart green tomatoes, warm spices, and a hint of sweetness that makes you go back for just one more spoonful.
This isn’t just another relish recipe. It’s the one I developed after ruining a perfectly good batch of tomatoes with too much sugar (twice) and learning that patience with the simmering step makes all the difference. It’s tested, it’s trusted, and it’s the kind of recipe you’ll make every year when the garden starts winding down.
What Ingredients You Will Need
This recipe uses simple, humble ingredients that pull together into something surprisingly complex. The green tomatoes are the star, but the supporting cast does a lot of heavy lifting here.
- Green tomatoes – About 4 pounds, cored and roughly chopped. You want firm, unripe tomatoes. If they’re starting to show a little pink, that’s fine—they’ll still work, but the color will be less vibrant. I’ve used both large slicing tomatoes and cherry tomatoes that never ripened, and both work great.
- Yellow onion – 1 large, diced. Sweet onions like Vidalia are nice, but any yellow onion works. The onion adds a savory backbone that keeps the relish from being one-note.
- Red bell pepper – 1 medium, seeded and diced. This adds color and a mild sweetness. You can use green bell pepper if that’s what you have, but the red is prettier in the final jar.
- Apple cider vinegar – 1 cup. I prefer Bragg or any unfiltered brand. The acidity is key for both flavor and preservation. Don’t substitute with white vinegar unless you’re in a pinch—the apple cider adds a fruity note that rounds everything out.
- Granulated sugar – 1 cup. This balances the tartness of the tomatoes and vinegar. You can reduce it to 3/4 cup if you prefer a tangier relish, but I wouldn’t go lower than that.
- Mustard seeds – 1 tablespoon. Yellow or brown both work. They add those little pops of texture and a mild heat.
- Celery seeds – 1 teaspoon. This is the secret ingredient. It adds a subtle savory note that makes the relish taste like it’s been simmering for hours.
- Turmeric – 1/2 teaspoon. This is mostly for color, but it also adds a warm, earthy undertone. Don’t skip it unless you want a pale, sad-looking relish.
- Ground ginger – 1/4 teaspoon. Just a hint. It brightens the flavor without screaming “ginger.”
- Salt – 1 teaspoon kosher salt, plus more to taste. I use Diamond Crystal. If you’re using table salt, cut back to 3/4 teaspoon.
- Optional: Red pepper flakes – 1/4 teaspoon for a little heat. I add this to half my batch because my husband likes it spicy and I don’t.
I recommend using a brand like McCormick for your spices—they’re consistent and widely available. For the vinegar, look for one that says “raw” or “unfiltered” on the label; it has more flavor.
Equipment Needed
You don’t need a lot of fancy tools for this. Here’s what I use every time:
- Large pot – A 6-quart Dutch oven or heavy-bottomed pot works best. You need something that distributes heat evenly so the relish doesn’t scorch on the bottom.
- Cutting board and sharp knife – A good chef’s knife makes chopping tomatoes much less frustrating. I use my Wusthof for everything.
- Wooden spoon – For stirring. Metal spoons can react with the vinegar over time, so stick with wood or silicone.
- Canning jars with lids – Four to five half-pint jars, depending on how much liquid cooks off. I reuse old pasta sauce jars for fridge storage, but if you’re planning to water-bath can, use proper Mason jars with new lids.
- Large bowl – For holding the chopped tomatoes and onions before they go into the pot.
- Measuring cups and spoons – Standard set. Nothing fancy.
If you don’t have a Dutch oven, any heavy-bottomed pot will do. Just keep an eye on the heat and stir more frequently. And if you’re new to canning, don’t stress—this relish keeps in the fridge for weeks without any special equipment.
Preparation Method

This recipe comes together in stages, but none of them are complicated. Here’s how I do it:
- Prep the vegetables. Wash and core your green tomatoes. Chop them into roughly 1/2-inch pieces. You don’t need to be precise, but try to keep them uniform so they cook evenly. Dice your onion and bell pepper to about the same size. Toss everything into a large bowl.
- Salt and rest. Sprinkle the kosher salt over the chopped vegetables and stir to combine. Let them sit for about 15 minutes. This draws out excess moisture, which means your relish won’t be watery later. You’ll notice liquid pooling at the bottom of the bowl—that’s good.
- Combine the cooking liquid. In your large pot, whisk together the apple cider vinegar, sugar, mustard seeds, celery seeds, turmeric, ground ginger, and red pepper flakes if using. Bring this to a gentle simmer over medium heat, stirring until the sugar dissolves completely.
- Add the vegetables. Drain the vegetables in a colander (don’t rinse them) and add them to the pot. Stir everything together. The liquid should just about cover the vegetables. If it doesn’t, add a splash more vinegar or water.
- Simmer, don’t boil. Bring the pot to a gentle simmer—you want small bubbles breaking the surface, not a rolling boil. Cook uncovered for 35 to 45 minutes, stirring every 5 minutes or so. The relish will thicken as the liquid reduces. You’ll know it’s done when the tomatoes are tender but still hold their shape, and the liquid has turned syrupy.
- Taste and adjust. This is the most important step. Let a spoonful cool for a minute (don’t burn your tongue) and taste it. Does it need more salt? A pinch more sugar? A splash of vinegar? Adjust now, because once it’s jarred, it’s harder to fix. I usually add a tiny bit more salt at this stage.
- Cool slightly. Remove the pot from the heat and let the relish sit for 5 minutes. It will continue to thicken as it cools.
- Jar it up. Ladle the hot relish into clean jars, leaving about 1/2 inch of headspace. Wipe the rims with a clean, damp cloth, then screw on the lids. If you’re storing it in the fridge, let the jars cool to room temperature first. If you’re water-bath canning, process for 10 minutes.
One thing I learned the hard way: don’t skip the resting step with the salt. The first time I made this, I was impatient and tossed everything straight into the pot. The relish was fine, but it was definitely watery. That extra 15 minutes makes a noticeable difference.
Cooking Tips & Techniques
I’ve made this recipe enough times to have a few strong opinions about what works and what doesn’t. Here’s what I’ve learned:
Don’t rush the simmer. The 35 to 45 minutes is non-negotiable. I once tried to speed things up by cranking the heat, and the bottom scorched before the tomatoes had softened. Low and slow is the way to go. If you’re in a hurry, you can chop the vegetables smaller, but honestly, the texture is better when they’re a little chunkier.
Watch for the “plate test.” Here’s a trick I picked up from my grandmother: put a small plate in the freezer before you start cooking. When you think the relish is done, drop a spoonful onto the cold plate and let it sit for 30 seconds. If it holds its shape and doesn’t release a puddle of liquid, it’s ready. If it runs, give it another 5 to 10 minutes.
Don’t over-stir. I know, I just said to stir every 5 minutes. But there’s a difference between stirring and beating. You want to gently fold the vegetables, not mash them. Over-stirring breaks down the tomatoes into mush, and you lose that lovely chunky texture.
Use a heavy-bottomed pot. This is one of those recipes where the pot really matters. A thin pot will create hot spots, and you’ll end up with burnt bits on the bottom. I use my Le Creuset Dutch oven, but any heavy stainless steel or enameled pot works.
Season in layers. Don’t dump all the salt in at the beginning. Add the first teaspoon with the vegetables, then adjust at the end. Acid and salt both change as the relish cooks, so tasting at the end is the only way to get it right.
I once forgot to add the mustard seeds until the last 10 minutes. The relish was fine, but the seeds didn’t soften enough, and they had a weird crunchy texture. Add them early so they have time to plump up.
Variations & Adaptations
This recipe is forgiving, and I’ve played around with it more than I’d like to admit. Here are a few versions I’ve tried:
- Spicy Green Tomato Relish : Add 1 finely chopped jalapeño (seeds and all) along with the bell pepper. Or stir in 1 teaspoon of red pepper flakes for a more even heat. I made this version for a summer barbecue, and it was incredible on top of a BBQ pulled chicken nachos—the tangy relish cut through the richness perfectly.
- Sweet Apple Relish : Swap one cup of the green tomatoes for one finely diced Granny Smith apple. The apple adds sweetness and a slightly different texture. This version is amazing on BBQ pulled pork sliders.
- Low-Sugar Version : Reduce the sugar to 1/2 cup and add 1/4 cup of honey or maple syrup instead. The flavor will be a little more complex, but it won’t be as shelf-stable. Keep this version in the fridge.
- Herb-Infused Relish : Add 2 tablespoons of fresh dill or 1 tablespoon of fresh oregano in the last 5 minutes of cooking. The herbs brighten everything up and make it taste more garden-fresh.
- Smoky Variation : Stir in 1/2 teaspoon of smoked paprika along with the turmeric. It adds a subtle smokiness that’s perfect for fall.
If you’re avoiding nightshades, this isn’t the recipe for you. But if you’re just looking to use up green tomatoes, any of these variations will treat you well.
Serving & Storage Suggestions
This relish is incredibly versatile. Here’s how I use it:
Serving temperature: I prefer it chilled or at room temperature. Straight from the fridge, it has a nice firm texture. If you let it sit out for 15 minutes, the flavors open up more.
Ways to use it: Slather it on hot dogs, burgers, or bratwurst. Spoon it over grilled fish or chicken. Use it as a topping for baked beans or mac and cheese. Mix it into tuna salad for a tangy twist. I’ve even stirred a spoonful into a vinaigrette for a quick salad dressing. Honestly, it’s good on almost anything savory.
Storage: This relish keeps in the refrigerator for up to 3 weeks in an airtight jar. The flavors actually get better after a day or two as everything melds together. If you want to keep it longer, you can water-bath can it—process half-pint jars for 10 minutes, and they’ll keep in a cool, dark pantry for up to a year.
Reheating: You don’t need to reheat it. But if you want it warm, a quick 30 seconds in the microwave or a few minutes in a small saucepan over low heat will do the trick. Just don’t boil it, or the texture will get mushy.
Flavor development: The first day, the relish tastes bright and sharp. By day three, it’s mellowed and the spices have settled into the background. By day seven, it’s perfect. If you can wait that long, do it.
Nutritional Information & Benefits
This relish is surprisingly healthy for something that tastes so indulgent. Here’s a rough estimate per 2-tablespoon serving:
- Calories: 35
- Fat: 0g
- Carbohydrates: 8g
- Fiber: 1g
- Sugar: 6g
- Protein: 0.5g
- Sodium: 95mg
Health benefits: Green tomatoes are a good source of vitamin C and vitamin K. They also contain a compound called tomatine, which some studies suggest may have anti-inflammatory properties. The apple cider vinegar in this recipe is known for its potential digestive benefits. And the turmeric? That’s a solid dose of anti-inflammatory curcumin.
Dietary considerations: This recipe is naturally gluten-free, dairy-free, and vegan. It’s also low in fat and relatively low in calories. If you’re watching your sugar intake, the low-sugar variation above works great.
Potential allergens: None of the common allergens are present, but always check your spice labels if you have sensitivities.
I’m not a nutritionist, but I do believe in eating food that makes you feel good. This relish is proof that you can have something delicious without a laundry list of processed ingredients.
Conclusion
This homemade green tomato relish is the kind of recipe that turns a garden problem into a pantry treasure. It’s tangy, sweet, and just a little bit spicy—exactly what you want when the weather turns cold and you’re craving something that tastes like summer. I’ve made it three times this week, and I’m already planning my next batch. It’s that good.
Don’t be afraid to tweak it. Add more heat. Cut back on the sugar. Throw in some dill. The best recipes are the ones you make your own. And if you end up with a jar in your fridge, you’ll find yourself putting it on everything—eggs, sandwiches, roasted vegetables, you name it.
I’d love to hear how yours turns out. Drop a comment below and tell me what you put it on. And if you have a garden full of green tomatoes, send me a photo—I want to see your end-of-harvest haul!
Frequently Asked Questions
Can I use red tomatoes instead of green?
Technically yes, but the texture and flavor will be completely different. Red tomatoes are much softer and sweeter, so you’d end up with more of a jam than a relish. Stick with green for the best results.
Do I need to peel the green tomatoes?
Nope. The skins soften during cooking and add a nice texture. Peeling them would be a huge pain and not worth the effort.
Why is my relish too watery?
You probably didn’t cook it long enough, or you skipped the salting step. Next time, let the chopped vegetables rest with salt for at least 15 minutes, and don’t rush the simmer. If your batch is already watery, pour off the excess liquid and simmer it a bit longer to reduce.
Can I freeze this relish?
Yes. Let it cool completely, then transfer to a freezer-safe container. It will keep for up to 3 months. Thaw in the fridge overnight before using. The texture might be slightly softer, but the flavor will still be great.
How long does this relish last in the fridge?
Up to 3 weeks in an airtight jar. If you see any mold or off smells, toss it. But honestly, I’ve never had it last that long—it always gets eaten first.
Pin This Recipe!
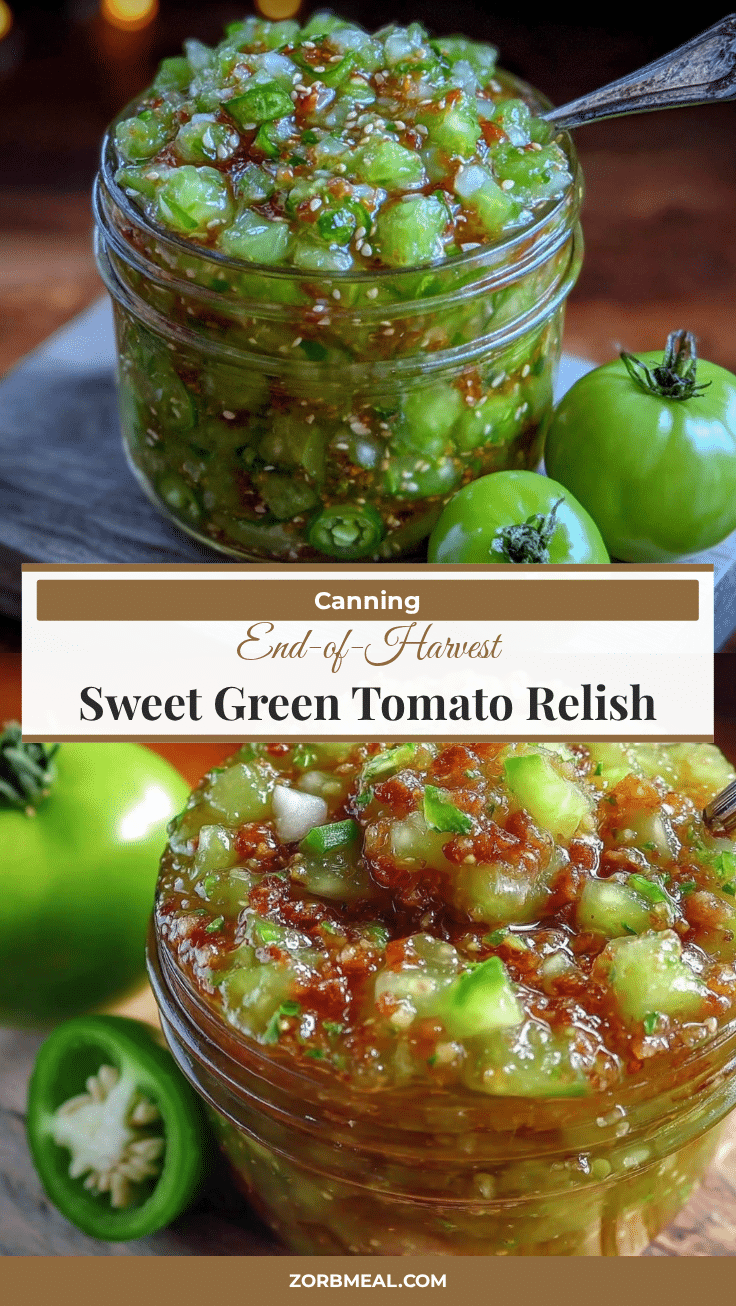
Best Easy Homemade Green Tomato Relish Recipe

This tangy, slightly sweet green tomato relish is the perfect way to use up end-of-harvest green tomatoes. With a chunky texture and balanced flavor, it’s great on hot dogs, burgers, and more.
- Prep Time: 15 minutes
- Cook Time: 45 minutes
- Total Time: 1 hour
- Yield: 4 servings 1x
- Category: Condiment
- Cuisine: American
Ingredients
- 4 pounds green tomatoes, cored and roughly chopped
- 1 large yellow onion, diced
- 1 medium red bell pepper, seeded and diced
- 1 cup apple cider vinegar
- 1 cup granulated sugar
- 1 tablespoon mustard seeds
- 1 teaspoon celery seeds
- 1/2 teaspoon turmeric
- 1/4 teaspoon ground ginger
- 1 teaspoon kosher salt (plus more to taste)
- 1/4 teaspoon red pepper flakes (optional)
Instructions
- Wash and core green tomatoes. Chop into 1/2-inch pieces. Dice onion and bell pepper to similar size. Toss in a large bowl.
- Sprinkle kosher salt over vegetables, stir, and let rest for 15 minutes to draw out moisture.
- In a large pot, whisk together apple cider vinegar, sugar, mustard seeds, celery seeds, turmeric, ground ginger, and red pepper flakes (if using). Bring to a gentle simmer over medium heat, stirring until sugar dissolves.
- Drain vegetables in a colander (do not rinse) and add to the pot. Stir to combine.
- Simmer uncovered for 35 to 45 minutes, stirring every 5 minutes, until tomatoes are tender and liquid is syrupy.
- Taste and adjust seasoning with more salt, sugar, or vinegar as needed.
- Remove from heat and let cool for 5 minutes.
- Ladle hot relish into clean jars, leaving 1/2 inch headspace. Wipe rims, screw on lids, and let cool to room temperature for fridge storage, or process in a water bath for 10 minutes for long-term storage.
Notes
Don’t skip the salting step to avoid watery relish. Use the ‘plate test’ to check doneness: drop a spoonful on a cold plate; if it holds its shape without releasing liquid, it’s ready. Stir gently to maintain chunky texture. Season in layers, tasting at the end.
Nutrition
- Serving Size: 2 tablespoons
- Calories: 35
- Sugar: 6
- Sodium: 95
- Carbohydrates: 8
- Fiber: 1
- Protein: 0.5
Keywords: green tomato relish, homemade relish, end-of-harvest, canning recipe, tangy relish


