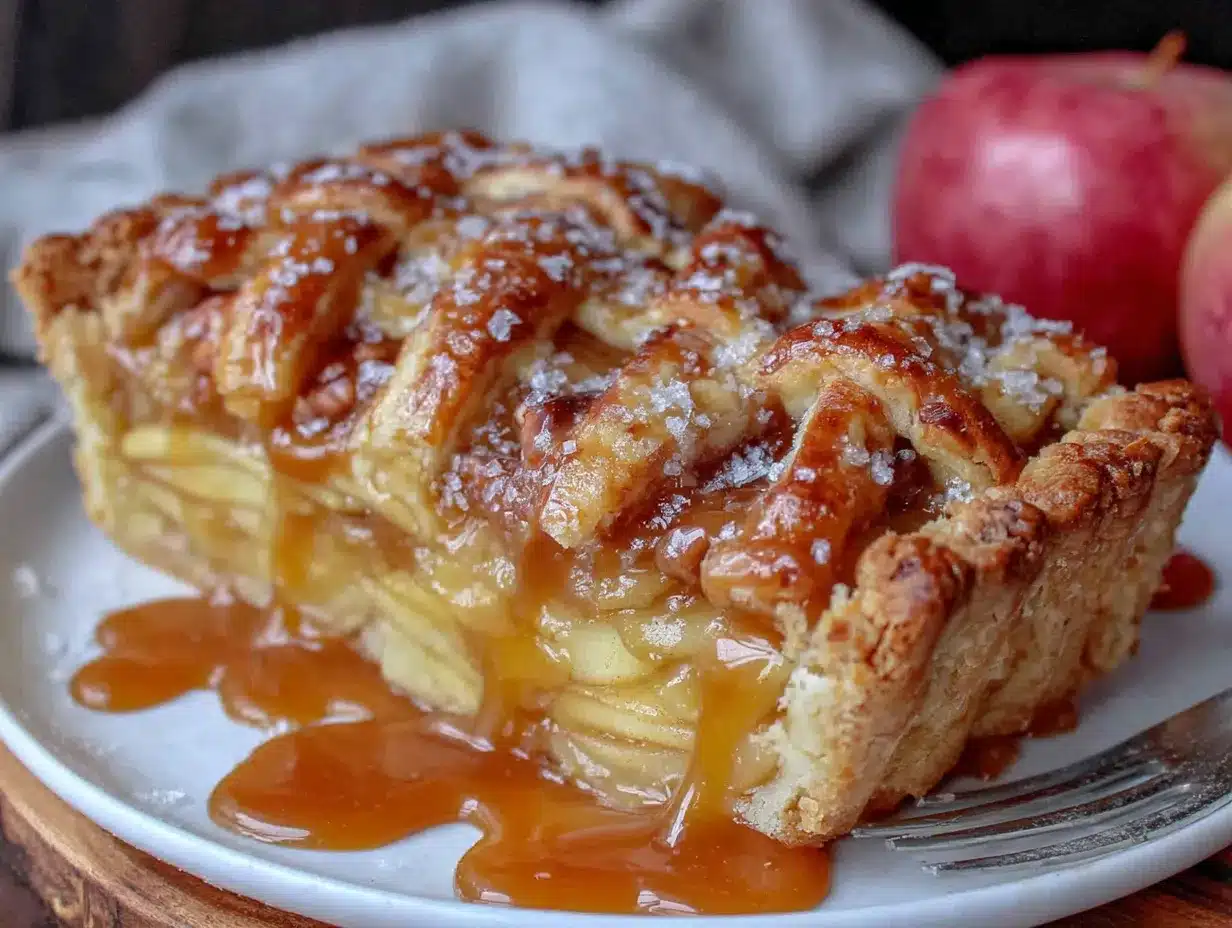
“You know, this is the pie that made my cousin stop talking mid-sentence.” My sister said that last Thanksgiving, pointing at the half-eaten slab pie on the counter. And honestly? She wasn’t wrong. I’d brought it over as an afterthought—something to plop on the dessert table next to the fancy French tarts my aunt always makes. But within twenty minutes, there was nothing left but crumbs and a few sticky caramel fingerprints on the serving platter. That’s the thing about this Ultimate Caramel Apple Slab Pie—it doesn’t try to be fancy. It just shows up and does the work.
I developed this recipe after one too many disasters with traditional round apple pies. You know the ones—where the filling bubbles over, the crust shrinks down, and you’re left with a sad, sunken mess that tastes fine but looks like it lost a fight. I wanted something more forgiving. Something you could make for a crowd without needing a pastry degree or a therapy session afterward. A slab pie is basically the lazy genius of the dessert world—all the flavor of a classic apple pie, but made in a jelly roll pan so you get more crunchy edges and less fuss.
The caramel here isn’t an afterthought. It’s woven into every layer—drizzled over the apples before baking, brushed on the crust for that sticky-sweet finish, and then drizzled again right before serving because why wouldn’t you? The apples soften into this jammy, cinnamon-spiced filling while the edges of the crust get all buttery and crisp. It’s the kind of dessert that makes people close their eyes after the first bite. And the best part? You don’t need to be a pie expert to pull it off. This recipe meets you where you are.
Why You’ll Love This Recipe
Let’s be real for a second—most apple pies are high-maintenance. Between rolling out a perfect crust, crimping edges, and praying the filling doesn’t bubble over, it’s enough to make you reach for a store-bought version. This slab pie throws all that stress out the window. Here’s why it’s become my go-to fall dessert:
- Feeds a Crowd with Zero Drama : This isn’t a dainty 9-inch pie that serves eight if you cut tiny slices. We’re talking a full sheet pan of pie that easily serves 15 to 20 people. Perfect for potlucks, Thanksgiving, or when you just want leftovers for days.
- No Pie Weights or Blind Baking : The crust gets par-baked briefly, but there’s no messing around with beans or weights. Just dock it, bake it, and move on with your life.
- That Crust-to-Filling Ratio is Everything : Because it’s baked in a shallow pan, every single piece gets a generous edge of buttery, flaky crust. No more fighting over the corner pieces—everyone wins.
- The Caramel Situation : We’re using a simple homemade caramel sauce that doubles as both a filling component and a finishing drizzle. It’s rich without being cloying, and it seeps into the apples as they bake.
- Forgiving for Beginners : The dough is pressed into the pan instead of carefully rolled and transferred. If it tears? Just patch it. Nobody will ever know.
This recipe came together after I’d had one too many dry, bland apple pies at holiday gatherings. I wanted something that tasted like the best parts of fall—crisp apples, warm spices, and that deep, buttery caramel flavor—without the intimidation factor. It’s the dessert equivalent of a warm hug from someone who really means it.
What Ingredients You Will Need
This recipe uses simple, wholesome ingredients that come together to create something truly special. Most of these are pantry staples, but a few key players make all the difference in texture and flavor. Let’s break it down.
For the Crust
- 2 ½ cups all-purpose flour (spooned and leveled—don’t scoop straight from the bag or you’ll end up with a tough crust)
- 1 teaspoon salt (I use fine sea salt; table salt works too, just reduce to ¾ teaspoon)
- 1 tablespoon granulated sugar (just a touch to help with browning and flavor)
- 1 cup cold unsalted butter, cut into small cubes (this needs to be really cold—pop it in the freezer for 15 minutes if your kitchen is warm)
- 6 to 8 tablespoons ice water (have a bowl of ice water ready and use a spoon to measure it out)
For the Apple Filling
- 6 to 7 large apples, peeled, cored, and sliced ¼-inch thick (I like a mix of Granny Smith for tartness and Honeycrisp or Fuji for sweetness—about 3 pounds total)
- ¾ cup granulated sugar
- ¼ cup light brown sugar, packed
- 2 tablespoons all-purpose flour (helps thicken the juices so the filling isn’t watery)
- 1 tablespoon cornstarch
- 2 teaspoons ground cinnamon
- ½ teaspoon ground nutmeg (freshly grated if you have it—it makes a difference)
- ¼ teaspoon ground allspice
- Pinch of salt
- 2 tablespoons lemon juice (keeps the apples from browning and brightens the flavor)
- 1 teaspoon vanilla extract
For the Caramel Sauce
- 1 cup granulated sugar
- 6 tablespoons unsalted butter, cut into pieces (room temperature helps it incorporate smoothly)
- ½ cup heavy cream, at room temperature (cold cream will seize the caramel—trust me on this one)
- 1 teaspoon vanilla extract
- ½ teaspoon flaky sea salt (like Maldon—skip if you only have table salt, or use just ¼ teaspoon)
For the Egg Wash & Topping
- 1 large egg, beaten with 1 tablespoon water
- 1 tablespoon coarse sugar (turbinado or demerara for that nice crunch)
I prefer Granny Smith apples here because they hold their shape during baking and provide that necessary tartness to balance the sweet caramel. If you only have sweeter apples like Gala or Red Delicious, reduce the granulated sugar by 2 tablespoons. Also, make sure your heavy cream is at room temperature before adding it to the caramel—I learned this the hard way when my first batch turned into a grainy, lumpy mess. Just let it sit on the counter for 20 minutes while you prep the apples.
Equipment Needed
You don’t need a bakery-level kitchen for this recipe, but a few specific tools will make your life easier:
- Jelly roll pan (10×15-inch) — This is non-negotiable. A standard half-sheet pan works too, but the slightly smaller jelly roll pan gives you a thicker crust and filling layer. I use my trusty Nordic Ware pan and it’s never let me down.
- Rolling pin — For rolling out the dough. If you don’t have one, a wine bottle works in a pinch (I’ve been there).
- Large skillet or saucepan — For making the caramel sauce. A light-colored pan helps you monitor the color change as the sugar melts.
- Pastry cutter or food processor — For cutting butter into the flour. A pastry cutter gives you more control, but a food processor is faster. Both work fine.
- Parchment paper — Absolutely essential for easy removal and cleanup.
- Sharp knife or apple peeler — A good peeler saves so much time. I use a Y-shaped peeler and it’s a game-changer.
- Pastry brush — For the egg wash. A silicone one is easier to clean.
If you don’t have a jelly roll pan, a 9×13-inch baking dish works in a pinch, but you’ll need to adjust the baking time by about 10 minutes and the crust-to-filling ratio will be different. The slab pie is really the way to go for that perfect balance.
Preparation Method
Alright, let’s get to the good part. I’ve broken this down into manageable steps so you don’t feel overwhelmed. Take your time, and remember—this is a forgiving recipe. Even if something goes slightly wrong, it’ll still taste amazing.
Step 1: Make the Caramel Sauce
Start with the caramel because it needs to cool slightly before you use it. In a medium saucepan over medium heat, spread the 1 cup of granulated sugar in an even layer. Don’t stir it at first—just let it melt, swirling the pan occasionally once the edges start to liquefy. This takes about 6 to 8 minutes. Watch it carefully; sugar can go from golden to burnt in seconds. Once it’s a deep amber color (think the color of a penny), remove it from the heat and immediately whisk in the butter pieces. The mixture will bubble up violently—don’t panic, that’s normal. Keep whisking until the butter is fully melted and incorporated. Slowly drizzle in the heavy cream while whisking constantly. The caramel will bubble up again, so be careful. Whisk until smooth, then stir in the vanilla and flaky salt. Set aside to cool while you prepare the rest.
Step 2: Make the Pie Dough
In a large bowl, whisk together the flour, salt, and sugar. Add the cold butter cubes and use a pastry cutter (or your fingertips) to work the butter into the flour until the mixture resembles coarse meal with some pea-sized butter pieces remaining. Drizzle 6 tablespoons of ice water over the mixture and stir with a fork until the dough starts to come together. Squeeze a handful—if it holds together without crumbling, you’re good. If not, add another tablespoon of water. Divide the dough into two portions, one slightly larger than the other. Flatten each into a disk, wrap in plastic wrap, and refrigerate for at least 30 minutes. This rest is crucial—it relaxes the gluten and keeps the crust tender.
Step 3: Prepare the Apple Filling
While the dough chills, peel, core, and slice your apples. I like them about ¼-inch thick—not paper thin, but not chunky either. Toss the slices with lemon juice first to prevent browning, then add the sugars, flour, cornstarch, cinnamon, nutmeg, allspice, salt, and vanilla. Use your hands to mix everything together—it’s the most efficient way. Let the mixture sit for about 15 minutes. You’ll notice some liquid pooling at the bottom; that’s okay, the flour and cornstarch will thicken it during baking.
Step 4: Roll Out the Dough and Assemble
Preheat your oven to 400°F (200°C). On a lightly floured surface, roll out the larger disk of dough into a rectangle about 14×19 inches. Carefully transfer it to your jelly roll pan, letting the excess dough hang over the edges. Don’t stretch the dough—just gently press it into the corners and up the sides. Pour the apple filling into the crust and spread it into an even layer. Drizzle about ⅓ cup of the caramel sauce over the apples (save the rest for serving). Roll out the second disk of dough into a rectangle slightly smaller than the pan. Place it over the filling, then fold the overhanging bottom crust up and over the top crust, crimping the edges with your fingers or a fork. Cut several slits in the top crust to allow steam to escape. Brush the entire surface with the egg wash and sprinkle with coarse sugar.
Step 5: Bake to Golden Perfection
Place the pan on the middle rack and bake for 20 minutes at 400°F. Then reduce the oven temperature to 375°F (190°C) and continue baking for another 25 to 30 minutes, until the crust is deep golden brown and the filling is bubbling up through the slits. If the edges start browning too quickly, tent them with foil. Let the pie cool on a wire rack for at least 30 minutes before drizzling with the remaining caramel sauce. The filling needs this time to set up—if you cut into it too soon, it’ll be a runny mess.
Cooking Tips & Techniques
After making this pie more times than I can count (including a few spectacular failures), I’ve picked up some tricks that make a real difference:
- Keep everything cold — Warm butter melts into the flour instead of creating those flaky layers we’re after. If your kitchen is warm, pop the flour and bowl in the fridge for 10 minutes before starting the dough.
- Don’t overwork the dough — Mix just until it comes together. Overworking develops gluten and gives you a tough, bread-like crust instead of a tender, flaky one.
- Use a mix of apple varieties — All Granny Smith can be too tart, while all Honeycrisp can turn into applesauce. A 50/50 mix gives you the perfect balance of flavor and texture.
- Slice apples uniformly — This ensures even cooking. If some slices are thick and others are thin, you’ll end up with undercooked chunks next to mushy bits.
- Let the pie cool completely — I know it’s tempting to dig in while it’s warm, but the filling needs time to set. Give it at least 2 hours if you can. The caramel will also thicken as it cools.
- Reheat the caramel gently — If your caramel stiffens up while the pie cools, just microwave it in 10-second bursts, stirring between each, until it’s drizzle-able again.
I once made the mistake of using cold cream in the caramel and ended up with a grainy, separated mess. Don’t be like me—let that cream come to room temperature. Also, if you’re short on time, you can use a good quality store-bought caramel sauce, but honestly, homemade is so much better and takes only 15 minutes.
Variations & Adaptations
One of the best things about this slab pie is how adaptable it is. Here are some variations I’ve tried and loved:
- Gluten-Free Version — Substitute the all-purpose flour with a 1:1 gluten-free baking blend that contains xanthan gum. Cup4Cup and King Arthur both work well. The crust will be slightly more delicate, so handle it gently.
- Dairy-Free Adaptation — Use cold vegan butter (like Miyoko’s) in the crust and coconut cream in place of heavy cream for the caramel. The flavor will be slightly different but still delicious.
- Nutty Addition — Sprinkle ½ cup of toasted pecans or walnuts over the apples before adding the top crust. The crunch is a lovely contrast to the soft fruit.
- Spiced Caramel — Add a cinnamon stick and a star anise to the sugar as it melts for the caramel, then remove them before adding the butter. It infuses the caramel with warm, aromatic notes.
- Pear-Apple Combo — Swap half the apples for firm, ripe pears (Bosc or Anjou work great). Reduce the sugar by 2 tablespoons since pears are sweeter.
My personal favorite variation is adding a handful of fresh cranberries to the apple filling. The tartness cuts through the sweetness beautifully, and the red berries look gorgeous peeking through the crust slits. I tried this for a Friendsgiving potluck and it was gone in twenty minutes flat.
Serving & Storage Suggestions
This pie is at its absolute best served warm, with a scoop of vanilla bean ice cream melting into every crevice. The contrast between the warm, spiced filling and the cold, creamy ice cream is pure magic. If you’re feeling extra indulgent, a drizzle of the remaining caramel sauce and a sprinkle of flaky salt takes it over the top.
For a more sophisticated presentation, serve it with a dollop of lightly sweetened whipped cream and a dusting of cinnamon. It also pairs beautifully with a hot cup of coffee or a glass of cold milk—especially if you’re eating it for breakfast the next morning (no judgment here).
Storage: Cover the pan tightly with foil or plastic wrap and store at room temperature for up to 2 days, or in the refrigerator for up to 5 days. The crust will soften slightly in the fridge, but it’s still delicious.
Reheating: Pop individual slices in the microwave for 20 to 30 seconds, or reheat the whole pie in a 300°F oven for about 15 minutes. If the crust starts to brown too much, tent it with foil.
Freezing: You can freeze the unbaked assembled pie (without the egg wash) for up to 3 months. Wrap it tightly in plastic wrap and then foil. When ready to bake, brush with egg wash and bake directly from frozen, adding about 15 minutes to the baking time. Baked pie also freezes well for up to 2 months.
The flavors actually deepen after a day or two in the fridge, so don’t be afraid to make this ahead. I often bake it the day before a holiday and just reheat it before serving. It’s one less thing to worry about on the big day.
Nutritional Information & Benefits
Let’s be honest—this is not health food. But it is real food made with wholesome ingredients, and there’s something to be said for that. Here’s the approximate nutritional breakdown per serving (based on 16 servings):
| Nutrient | Amount Per Serving |
|---|---|
| Calories | 385 |
| Total Fat | 18g |
| Saturated Fat | 11g |
| Cholesterol | 55mg |
| Sodium | 220mg |
| Total Carbohydrates | 54g |
| Dietary Fiber | 3g |
| Sugars | 36g |
| Protein | 3g |
Apples are a good source of fiber and vitamin C, and cinnamon has anti-inflammatory properties. The butter and cream provide fat-soluble vitamins A and D. That said, this is a treat—something to enjoy in moderation and share with people you love. I don’t believe in guilt when it comes to dessert. Food is meant to bring joy, and this pie certainly does that.
If you’re watching your sugar intake, you can reduce the sugar in the filling by ¼ cup and use a sugar substitute in the crust. The caramel is harder to modify, but you could skip the drizzle and use a sugar-free version instead.
Conclusion
This Ultimate Caramel Apple Slab Pie has become my signature fall dessert for a reason. It’s reliable, crowd-pleasing, and somehow manages to feel both rustic and special at the same time. Every time I make it, I’m reminded that the best recipes aren’t always the most complicated—they’re the ones that bring people together around a table, forks in hand, reaching for just one more bite.
I’d love to hear how yours turns out. Did you add any fun variations? Did it disappear as fast as mine always does? Drop a comment below and let me know—I read every single one, and your feedback helps me create better recipes for you. And if you’re looking for more easy, crowd-friendly desserts, check out this fresh fruit pizza with sugar cookie crust or this moist lemon raspberry pound cake for more baking inspiration. Happy baking, friends!
Frequently Asked Questions
Can I use pre-made pie crust instead of making my own?
Absolutely. If you’re short on time, use two refrigerated pie crusts from the store. Just press them into the pan and proceed with the recipe. The texture won’t be quite as flaky, but it’ll still taste great.
Why did my caramel turn grainy?
That usually happens when sugar crystals get splashed onto the sides of the pan during cooking or when you add cold cream to hot caramel. To prevent this, use a clean pan and brush down the sides with a wet pastry brush if you see crystals forming. Always let your cream come to room temperature before adding it.
Can I make this pie ahead of time?
Yes! You can assemble the pie completely (minus the egg wash) and refrigerate it for up to 24 hours before baking. You can also bake it a day ahead and reheat it in a 300°F oven for 15 minutes before serving.
How do I prevent the bottom crust from getting soggy?
Par-baking the bottom crust for 10 minutes before adding the filling helps. Also, make sure your apples aren’t too watery—let them sit in the sugar mixture for 15 minutes, then drain off any excess liquid before adding them to the crust.
What’s the best way to slice a slab pie cleanly?
Use a long, sharp knife and wipe it clean between cuts. For the cleanest slices, refrigerate the pie for at least an hour before cutting. The filling will be more set and less likely to ooze out.
Pin This Recipe!
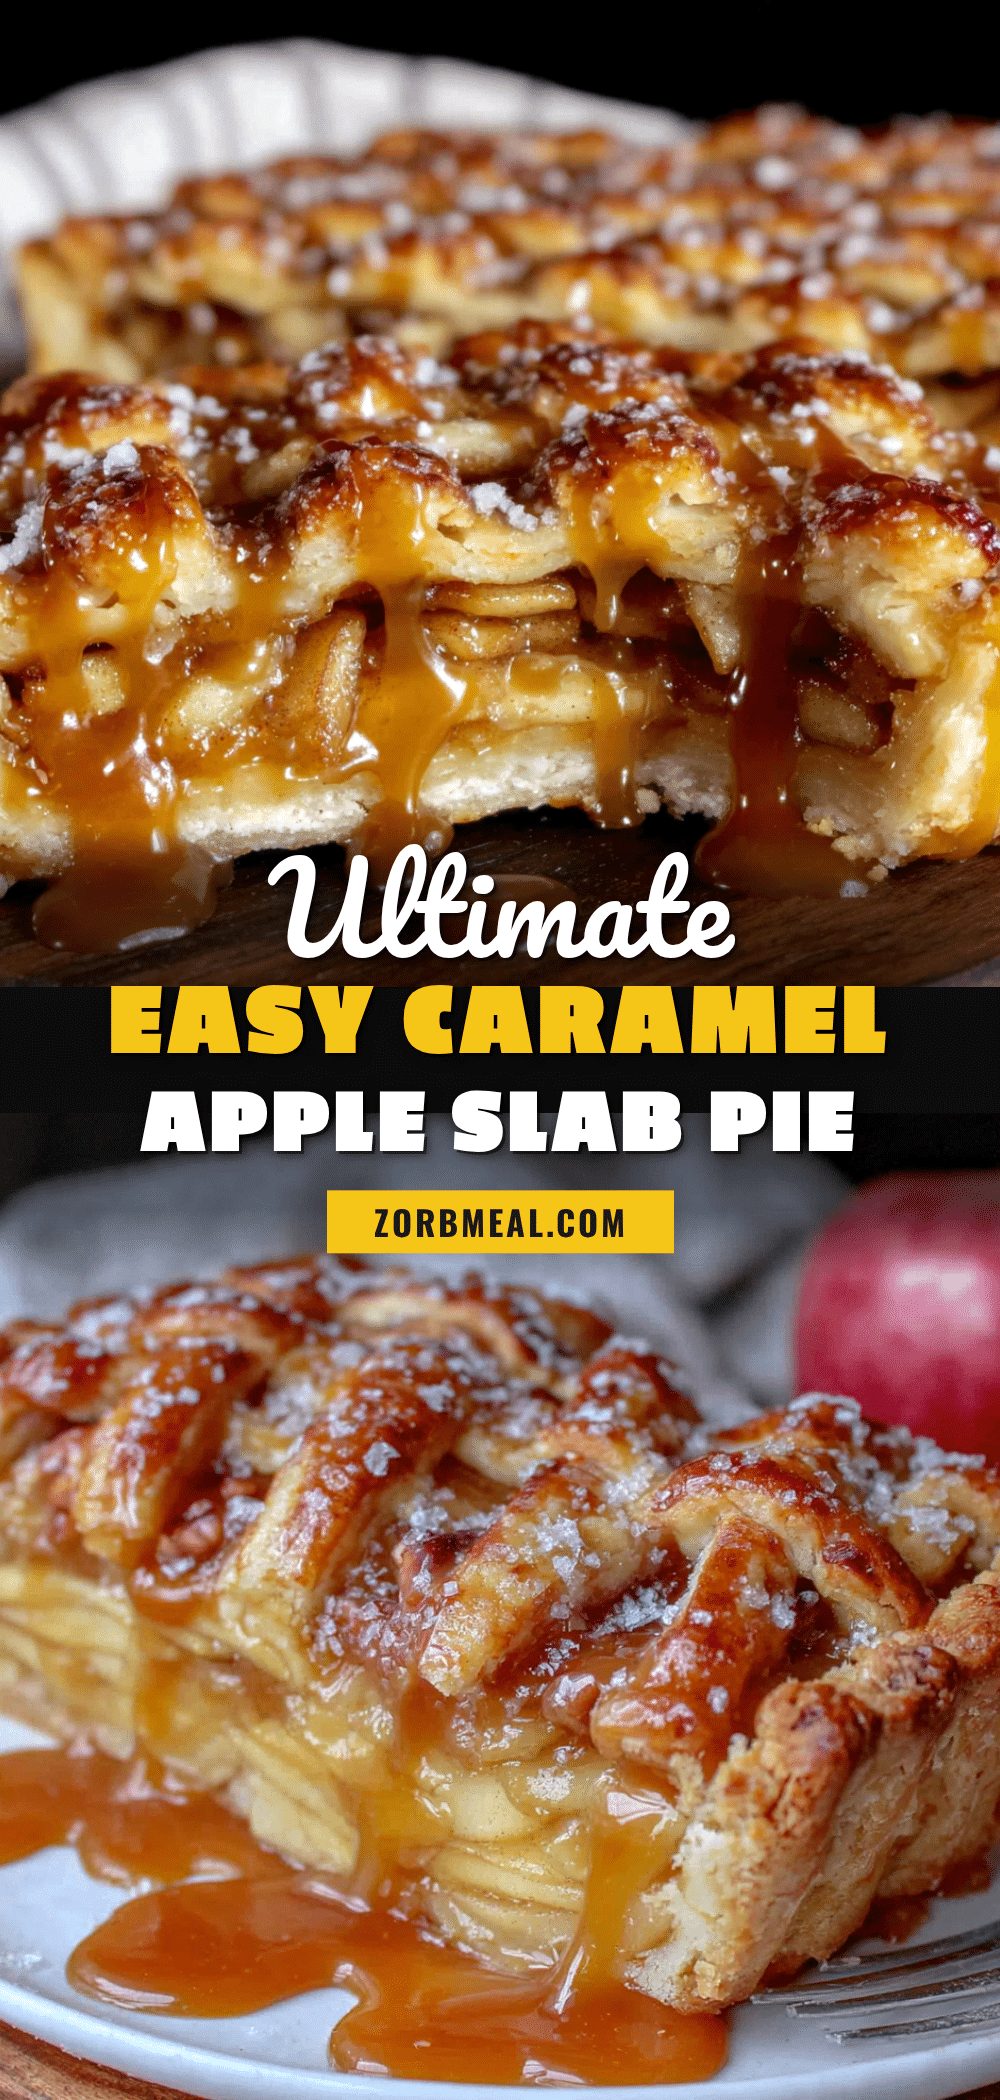
Ultimate Caramel Apple Slab Pie – Easy Fall Dessert
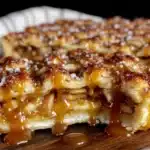
This Ultimate Caramel Apple Slab Pie is a forgiving, crowd-friendly dessert with a buttery crust, jammy cinnamon-spiced apple filling, and a rich homemade caramel sauce woven into every layer. Perfect for potlucks, Thanksgiving, or any fall gathering, it serves 15-20 people with minimal fuss.
- Prep Time: 30 minutes
- Cook Time: 45 minutes
- Total Time: 1 hour 15 minutes
- Yield: 16 servings 1x
- Category: Dessert
- Cuisine: American
Ingredients
- 2 ½ cups all-purpose flour
- 1 teaspoon fine sea salt
- 1 tablespoon granulated sugar
- 1 cup cold unsalted butter, cut into small cubes
- 6 to 8 tablespoons ice water
- 6 to 7 large apples (mix of Granny Smith and Honeycrisp or Fuji), peeled, cored, and sliced ¼-inch thick
- ¾ cup granulated sugar
- ¼ cup light brown sugar, packed
- 2 tablespoons all-purpose flour
- 1 tablespoon cornstarch
- 2 teaspoons ground cinnamon
- ½ teaspoon ground nutmeg
- ¼ teaspoon ground allspice
- Pinch of salt
- 2 tablespoons lemon juice
- 1 teaspoon vanilla extract
- 1 cup granulated sugar (for caramel)
- 6 tablespoons unsalted butter, cut into pieces (room temperature)
- ½ cup heavy cream, at room temperature
- 1 teaspoon vanilla extract (for caramel)
- ½ teaspoon flaky sea salt
- 1 large egg, beaten with 1 tablespoon water
- 1 tablespoon coarse sugar (turbinado or demerara)
Instructions
- Make the caramel sauce: In a medium saucepan over medium heat, spread 1 cup granulated sugar in an even layer. Let it melt without stirring, swirling occasionally, until deep amber (about 6-8 minutes). Remove from heat, whisk in 6 tablespoons butter pieces until melted. Slowly drizzle in ½ cup heavy cream while whisking constantly. Stir in 1 teaspoon vanilla and ½ teaspoon flaky sea salt. Set aside to cool.
- Make the pie dough: In a large bowl, whisk together 2 ½ cups flour, 1 teaspoon salt, and 1 tablespoon sugar. Add 1 cup cold butter cubes and cut in with a pastry cutter or fingertips until mixture resembles coarse meal with pea-sized butter pieces. Drizzle 6 tablespoons ice water over mixture and stir with a fork until dough comes together. Squeeze a handful—if it holds, it’s ready; if not, add another tablespoon of water. Divide dough into two portions (one slightly larger), flatten into disks,…
- Prepare the apple filling: While dough chills, peel, core, and slice apples ¼-inch thick. Toss with 2 tablespoons lemon juice, then add ¾ cup granulated sugar, ¼ cup brown sugar, 2 tablespoons flour, 1 tablespoon cornstarch, 2 teaspoons cinnamon, ½ teaspoon nutmeg, ¼ teaspoon allspice, pinch of salt, and 1 teaspoon vanilla. Mix with hands and let sit for 15 minutes.
- Roll out dough and assemble: Preheat oven to 400°F (200°C). On a lightly floured surface, roll larger dough disk into a 14×19-inch rectangle. Transfer to a jelly roll pan (10×15-inch), letting excess hang over edges. Press into corners and up sides. Pour apple filling into crust and spread evenly. Drizzle about ⅓ cup caramel sauce over apples. Roll out second dough disk into a slightly smaller rectangle and place over filling. Fold overhanging bottom crust over top crust, crimping edges. Cut sev…
- Bake: Place pan on middle rack and bake at 400°F for 20 minutes. Reduce oven temperature to 375°F (190°C) and continue baking for 25-30 minutes, until crust is deep golden brown and filling bubbles through slits. Tent edges with foil if browning too quickly. Let cool on a wire rack for at least 30 minutes before drizzling with remaining caramel sauce.
Notes
Keep all ingredients cold for flaky crust. Use a mix of apple varieties for best flavor. Let pie cool completely before slicing to allow filling to set. Reheat caramel gently if it stiffens. For gluten-free, use a 1:1 gluten-free baking blend. For dairy-free, use vegan butter and coconut cream.
Nutrition
- Serving Size: 1 slice (1/16 of pie
- Calories: 385
- Sugar: 36
- Sodium: 220
- Fat: 18
- Saturated Fat: 11
- Carbohydrates: 54
- Fiber: 3
- Protein: 3
Keywords: apple pie, slab pie, caramel apple, fall dessert, Thanksgiving dessert, easy pie recipe, crowd-friendly dessert