That first tiny shriek—the kind that escapes before you can stop it—still takes me straight back to my kitchen last October. I was staring at a block of mozzarella, a bag of pretzel sticks, and a handful of candy eyeballs, wondering if I had finally lost my mind. My niece was coming over for a Halloween movie marathon, and I wanted something fun, but honestly? I was exhausted. I didn’t have the energy for elaborate themed cupcakes or a multi-layer dip that required a diagram. I just needed a win.
I started slicing the cheese, almost on autopilot, when I noticed how the strips of mozzarella looked like bandages. And then it hit me—mummy cheese. I grabbed the pretzel sticks for bones, some olives for eyeballs, and started building. Twenty minutes later, I had a platter that looked like it belonged at a haunted banquet. My niece walked in, gasped, and said, “Auntie, this is the coolest thing ever!” And honestly? That moment of pure, delighted surprise is exactly why I keep coming back to this Spooky Easy Halloween Charcuterie Board with Mummy Cheese. It’s not fancy. It’s not complicated. But it has a little bit of magic—the kind that makes a simple snack feel like a celebration.
Why You’ll Love This Recipe
Let’s be real for a second. Halloween food can be a trap. You see those gorgeous, intricate boards on social media, and you think, “I could never.” But this board is different. It’s designed for the person who wants the wow factor without the stress. I’ve tested this with my own family, at a Halloween potluck, and even for a last-minute school party—and it never fails to get a reaction.
- Quick & Easy: It comes together in under 20 minutes. Seriously. No baking, no boiling, no complicated steps.
- Simple Ingredients: No fancy grocery trips needed. You likely already have most of these items in your kitchen or can grab them in a quick run.
- Perfect for Parties: Great for Halloween parties, movie nights, school events, or just a fun snack to surprise the kids.
- Crowd-Pleaser: Even picky eaters love it. It’s familiar foods presented in a fun, non-threatening way.
- Unbelievably Delicious: The combination of creamy cheese, salty meats, crunchy crackers, and sweet treats is just perfect.
What makes this board different from the rest is the “mummy cheese.” It’s not just a garnish—it’s the star of the show. Instead of a complicated cheese ball or a sculpted centerpiece, you get a clever, easy-to-execute trick that looks like you spent hours on it. It’s comfort food reimagined—fun, playful, and full of the same satisfying flavors you love. Perfect for impressing guests without stress, or turning a simple snack into something memorable.
What Ingredients You Will Need
This recipe uses simple, crowd-pleasing ingredients to create a visually striking board. The magic is in the arrangement, not the complexity. Here’s what you’ll need to gather.
- For the Mummy Cheese:
- 1 block (8 oz) mozzarella cheese (the firm block, not fresh mozzarella balls)
- 2 candy eyeballs (from a baking supply store or online)
- For the Charcuterie Board:
- 8 oz salami or pepperoni (for a savory, salty element)
- 8 oz prosciutto or ham (for a softer, delicate meat option)
- 1 cup assorted olives (green or black, for a briny pop)
- 1 cup cherry tomatoes (for color and freshness)
- 1 cup grapes (red or green, for sweetness)
- 1 cup pretzel sticks (for “bones” and crunch)
- 1 cup crackers (assorted shapes, like round or square)
- 1/2 cup nuts (almonds or cashews, for texture)
- 1/2 cup dried fruit (apricots or cranberries, for chewy sweetness)
- 1/2 cup dark chocolate pieces (for a sweet finish)
I recommend using a good quality block of mozzarella for the mummy—the kind you’d slice for a sandwich. It holds its shape perfectly and is easy to cut into thin strips. For the meats, I love using a mix of salami and prosciutto for variety, but feel free to use whatever you have on hand. If you’re looking for a similar appetizer that’s always a hit, you might also enjoy our Fresh Caprese Skewers with Sweet Balsamic Drizzle—they’re just as easy and perfect for any gathering.
Equipment Needed
You don’t need any special equipment for this board, which is part of its charm. Here’s what you’ll want to have ready:
- Large Serving Board or Platter: A wooden cutting board, a slate board, or even a large baking sheet will work. The bigger, the better for spreading everything out.
- Cheese Knife or Paring Knife: For slicing the mozzarella block into thin strips.
- Small Bowls or Ramekins: For olives, nuts, or any small items you want to keep contained. I like using little Halloween-themed bowls for extra flair.
- Toothpicks or Small Skewers: Optional, but helpful for picking up olives or tomatoes.
- Parchment Paper (Optional): If you’re using a board that might stain, a sheet of parchment paper underneath makes cleanup a breeze.
I’ve made this board on everything from a fancy marble slab to a simple plastic platter, and it always looks great. Don’t overthink the equipment—just use what you have.
Preparation Method
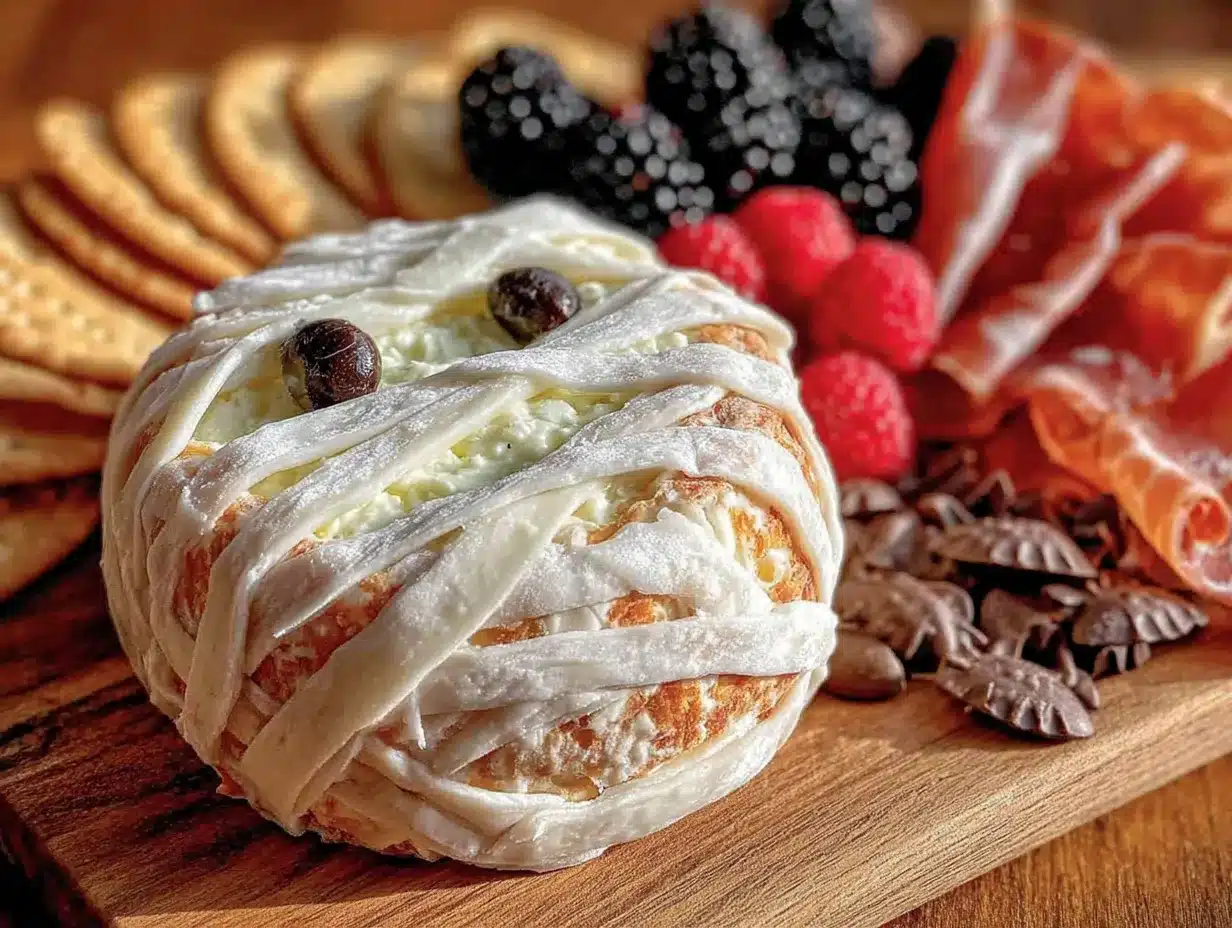
This is the fun part. Follow these steps, and you’ll have a spooky, snackable board in no time.
- Make the Mummy Cheese (5 minutes): Take your block of mozzarella and slice it lengthwise into thin strips, about 1/4-inch thick. You’ll need about 6-8 strips. Lay them out on a cutting board. Take two of the strips and place them side-by-side to form the body of the mummy. Then, take another strip and wrap it around the top to create the head. Leave a small gap in the middle of the head for the eyes. Gently press two candy eyeballs into the gap. Use the remaining strips to wrap around the body, creating the “bandaged” look. Don’t worry about perfection—a messy mummy is a spooky mummy!
- Prepare the Meats (2 minutes): Fold your salami slices into quarters or roll them into small cones. For the prosciutto, you can leave it in loose, wavy folds. Arrange them in small clusters on the board.
- Arrange the Cheeses and Crackers (3 minutes): Place your mummy cheese in the center of the board—it’s the star of the show. Arrange your crackers in small stacks or fans around the mummy. If you have other cheeses like cheddar or gouda, cube them and place them in small piles.
- Add the “Bones” and Veggies (3 minutes): Pretzel sticks are your “bones.” Arrange them in small bundles or scatter them around the board. Add the olives, cherry tomatoes, and grapes in small clusters, using the small bowls for olives if you prefer.
- Fill in the Gaps (2 minutes): Use the nuts, dried fruit, and dark chocolate pieces to fill in any empty spaces on the board. This creates a full, abundant look. Don’t leave any bare spots on the board.
- Final Touches (1 minute): Step back and look at your board. Add any extra candy eyeballs or fun Halloween sprinkles for a pop of color. You can also add a small sign or a spooky decoration nearby.
And that’s it! You have a Spooky Easy Halloween Charcuterie Board with Mummy Cheese that looks like it took hours. The best part? It’s ready to serve immediately.
Cooking Tips & Techniques
I’ve made this board more times than I can count, and I’ve learned a few tricks along the way. Here’s how to make sure yours turns out perfectly.
Don’t Overthink the Mummy. The first time I made the mummy cheese, I tried to make it perfectly symmetrical. It looked terrible. Now I know that the charm is in the messiness. Let the strips of cheese overlap unevenly. Let the candy eyes be slightly crooked. It gives the mummy character. Honestly, the more imperfect it is, the more it looks like a real mummy that’s been wrapped in a hurry.
Balance Your Flavors. A good charcuterie board is all about balance. You want salty (meats, olives), sweet (grapes, chocolate), tangy (pickles, if you add them), and creamy (cheese). Make sure you have a little bit of everything spread across the board. If you’re looking for another crowd-pleasing appetizer with great flavor balance, try our Creamy Whipped Feta Dip with Hot Honey—it’s a perfect complement to this board.
Prep Ahead of Time. You can slice the mozzarella and arrange the mummy a few hours ahead of time. Just cover it loosely with plastic wrap and keep it in the fridge. Add the candy eyes right before serving so they don’t get soggy. You can also wash and dry your grapes and tomatoes the night before.
Use a Variety of Textures. The best boards have a mix of crunchy (pretzels, crackers), soft (cheese, prosciutto), and chewy (dried fruit, nuts). This keeps every bite interesting. Don’t be afraid to add something unexpected, like pickled vegetables or a spicy mustard.
Make It Your Own. This is a template, not a strict recipe. If you don’t like olives, leave them out. If you love strawberries, add them. The key is to use what you and your guests will actually eat. I once made a version with ghost-shaped cheese slices and it was a huge hit.
Variations & Adaptations
This board is endlessly adaptable. Here are a few ways to make it your own.
- Dietary Variations: For a vegetarian version, skip the meats and add extra cheese cubes, marinated artichoke hearts, and roasted red peppers. For a gluten-free version, use gluten-free crackers and pretzels. For a dairy-free version, use vegan cheese slices for the mummy and skip the other cheeses.
- Seasonal Adaptations: In the fall, add sliced apples, pears, and a small bowl of pumpkin seeds. In the summer, swap the grapes for fresh berries and add a drizzle of honey over the cheese.
- Flavor Twists: Spice things up by adding a small bowl of spicy honey or a jalapeño jam. For a sweeter board, add more chocolate, some marshmallows, and a bowl of caramel dip. You can also make a “mummy” out of brie or goat cheese for a different flavor profile.
- Different “Mummy” Themes: Instead of a cheese mummy, try a “mummy meatball” by wrapping a cooked meatball in strips of provolone cheese. Or make a “mummy deviled egg” by piping the filling on top and adding olive slices for eyes. Speaking of which, our Creamy Classic Deviled Eggs with Crispy Bacon Crumbles are another fantastic Halloween option.
I once made a “mummy” out of a log of goat cheese rolled in herbs. It was delicious and looked like a little moss-covered monster. Don’t be afraid to experiment!
Serving & Storage Suggestions
This board is best served at room temperature, so take it out of the fridge about 15-20 minutes before your guests arrive. The flavors are more pronounced and the cheese is softer and more enjoyable.
Presentation Tips: Place the board in the center of your table or counter. Add a few small Halloween-themed decorations around it, like plastic spiders or mini pumpkins. Provide small plates, napkins, and a few toothpicks for easy grabbing. You can also add a small sign that says “Eat if you dare!” for a fun touch.
Storage: If you have leftovers (which is rare in my house!), you can store the components separately. The mummy cheese will keep in an airtight container in the fridge for 2-3 days. The meats and other cheeses should also be stored separately. The crackers and pretzels can be kept in a sealed bag at room temperature.
Reheating: You don’t need to reheat anything on this board. If you’ve added any warm items like meatballs, simply reheat them separately and add them to the board right before serving.
Flavor Development: The flavors of the board actually meld together nicely after sitting out for a bit. The cheese softens, the meats release a bit of their oils, and everything becomes more cohesive. Just don’t leave it out for more than 2 hours at room temperature.
Nutritional Information & Benefits
While this is definitely a treat-yourself kind of board, it does offer some nutritional benefits. The cheese provides calcium and protein. The nuts and seeds offer healthy fats and fiber. The olives are a good source of healthy monounsaturated fats. And the fruits and vegetables add vitamins and antioxidants.
Here’s an approximate breakdown per serving (assuming 8 servings):
- Calories: 350-450
- Protein: 15-20g
- Fat: 20-25g
- Carbohydrates: 25-30g
- Fiber: 3-5g
- Sugar: 10-15g
Dietary Considerations: This board can be made gluten-free, vegetarian, or dairy-free with simple substitutions. It is not suitable for a low-fat or strict low-carb diet due to the crackers and dried fruit. Potential allergens include dairy (cheese), nuts, and gluten (crackers).
I love that this board feels indulgent but still has some redeeming qualities. It’s a balanced snack that satisfies every craving—salty, sweet, creamy, and crunchy. It’s the kind of food that makes you feel good about hosting, because you know everyone will find something they love.
Conclusion
This Spooky Easy Halloween Charcuterie Board with Mummy Cheese is more than just a snack—it’s a centerpiece, a conversation starter, and a little bit of Halloween magic all rolled into one. It’s proof that you don’t need hours in the kitchen or a culinary degree to create something that truly impresses. All you need is a block of cheese, a few candy eyes, and a little bit of imagination.
I love this recipe because it brings people together. It’s the board that gets the kids excited, the adults smiling, and everyone reaching for just one more pretzel stick. It’s the kind of food that makes a party feel special without making the host feel stressed. And honestly? That’s the best kind of recipe there is.
So go ahead—grab your ingredients, get a little messy, and make your own spooky masterpiece. And when you do, I’d love to hear about it. Leave a comment below, share a photo on social media, or tag me in your creation. Let’s make this Halloween the most delicious one yet!
Frequently Asked Questions
Can I make the mummy cheese ahead of time?
Yes! You can assemble the mummy cheese a few hours ahead. Just wrap it loosely in plastic wrap and keep it in the fridge. Add the candy eyes right before serving so they stay fresh and don’t get soggy.
What if I can’t find candy eyeballs?
No problem! You can use small slices of black olives for the eyes, or even dots of black gel icing. You can also skip the eyes entirely and just have a “bandaged” cheese block—it still looks great.
How many people does this board serve?
This board is perfect for a party of 6-8 people as a snack or appetizer. If it’s the main attraction for a movie night, it might serve 4-6. You can easily double the ingredients for a larger crowd.
Can I use a different type of cheese for the mummy?
Absolutely! You can use a block of cheddar, gouda, or even a soft cheese like brie (though it will be harder to slice into strips). Just make sure it’s a firm cheese that holds its shape when sliced.
What other Halloween snacks can I add to the board?
The options are endless! Try adding Savory Bacon-Wrapped Smokies with Easy Brown Sugar Glaze, ghost-shaped cheese slices, spider-shaped crackers, or even a small bowl of candy corn. Get creative and have fun with it!
Pin This Recipe!
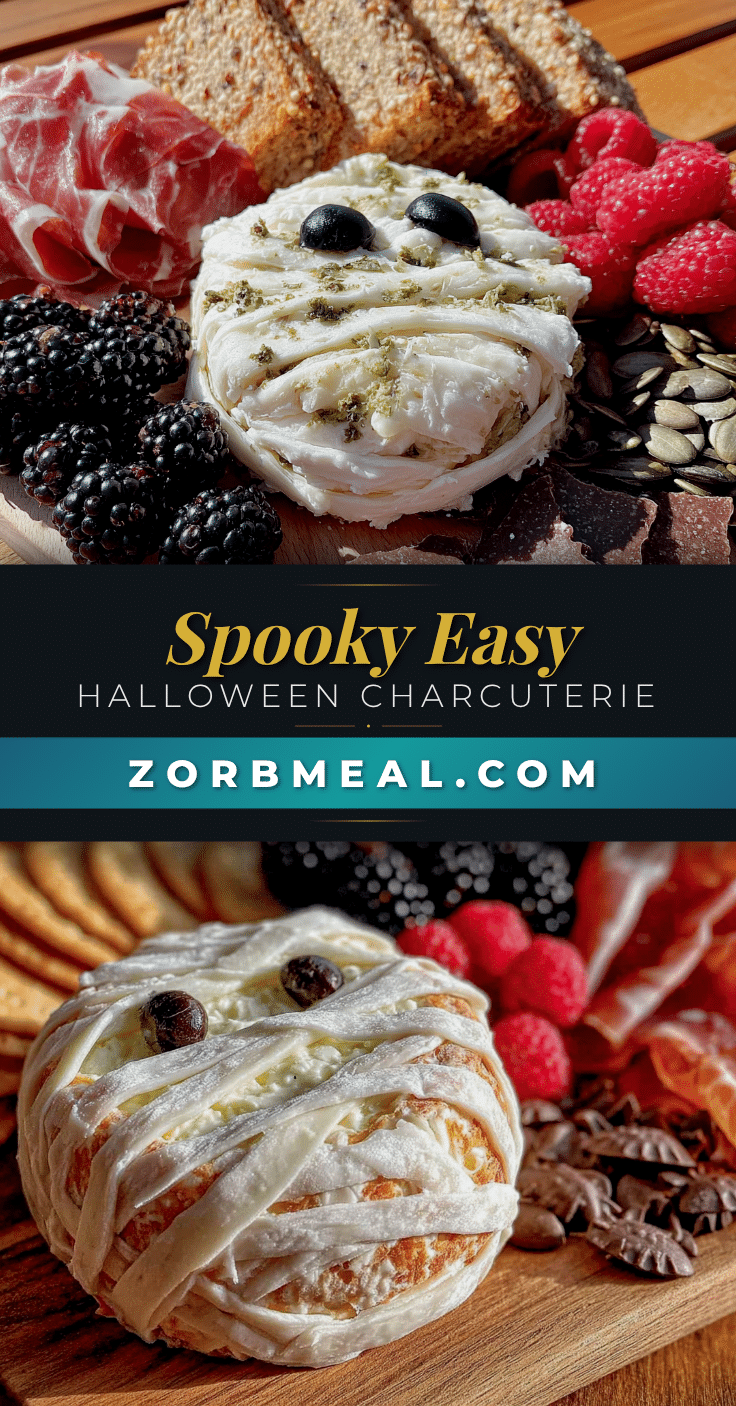
Spooky Easy Halloween Charcuterie Board with Mummy Cheese
A fun and easy Halloween charcuterie board featuring a clever mummy-shaped cheese centerpiece. Perfect for parties, movie nights, or any spooky gathering, this board comes together in under 20 minutes with simple ingredients.
- Prep Time: 15 minutes
- Cook Time: 0 minutes
- Total Time: 15 minutes
- Yield: 6-8 servings 1x
- Category: Appetizer
- Cuisine: American
Ingredients
- 1 block (8 oz) mozzarella cheese (firm block, not fresh mozzarella balls)
- 2 candy eyeballs
- 8 oz salami or pepperoni
- 8 oz prosciutto or ham
- 1 cup assorted olives (green or black)
- 1 cup cherry tomatoes
- 1 cup grapes (red or green)
- 1 cup pretzel sticks
- 1 cup crackers (assorted shapes)
- 1/2 cup nuts (almonds or cashews)
- 1/2 cup dried fruit (apricots or cranberries)
- 1/2 cup dark chocolate pieces
Instructions
- Make the Mummy Cheese (5 minutes): Take your block of mozzarella and slice it lengthwise into thin strips, about 1/4-inch thick. You’ll need about 6-8 strips. Lay them out on a cutting board. Take two of the strips and place them side-by-side to form the body of the mummy. Then, take another strip and wrap it around the top to create the head. Leave a small gap in the middle of the head for the eyes. Gently press two candy eyeballs into the gap. Use the remaining strips to wrap around the body, …
- Prepare the Meats (2 minutes): Fold your salami slices into quarters or roll them into small cones. For the prosciutto, you can leave it in loose, wavy folds. Arrange them in small clusters on the board.
- Arrange the Cheeses and Crackers (3 minutes): Place your mummy cheese in the center of the board—it’s the star of the show. Arrange your crackers in small stacks or fans around the mummy. If you have other cheeses like cheddar or gouda, cube them and place them in small piles.
- Add the ‘Bones’ and Veggies (3 minutes): Pretzel sticks are your ‘bones.’ Arrange them in small bundles or scatter them around the board. Add the olives, cherry tomatoes, and grapes in small clusters, using the small bowls for olives if you prefer.
- Fill in the Gaps (2 minutes): Use the nuts, dried fruit, and dark chocolate pieces to fill in any empty spaces on the board. This creates a full, abundant look. Don’t leave any bare spots on the board.
- Final Touches (1 minute): Step back and look at your board. Add any extra candy eyeballs or fun Halloween sprinkles for a pop of color. You can also add a small sign or a spooky decoration nearby.
Notes
Don’t overthink the mummy—the charm is in the messiness. Prep the mummy cheese a few hours ahead and add candy eyes just before serving. Balance flavors with salty, sweet, tangy, and creamy elements. Use a variety of textures for the best experience.
Nutrition
- Serving Size: 1 serving (based on
- Calories: 350450
- Sugar: 1015
- Sodium: 600800
- Fat: 2025
- Saturated Fat: 810
- Carbohydrates: 2530
- Fiber: 35
- Protein: 1520
Keywords: Halloween charcuterie board, mummy cheese, easy Halloween appetizer, spooky snack board, Halloween party food