Crushed Oreos flying everywhere, a bag of chocolate pudding mix in my hand, and three kids staring at me like I’d lost my mind. It was 4 PM on a rainy October Tuesday, and I had promised their classroom Halloween party I’d bring a “fun fall dessert.” What was I thinking? I’d forgotten about the party entirely until the group text pinged. No oven time. No fancy piping bags. Just a pantry full of odds and ends and a rapidly ticking clock.
I grabbed the instant pudding, not even sure if it was the right flavor. I spotted the cream cheese in the fridge, leftover from a batch of deviled eggs I’d made the weekend before. Then my eyes landed on the package of chocolate sandwich cookies. The gummy worms were a last-minute impulse buy at the checkout counter. Honestly, I was just throwing things together and hoping for the best.
And then, something clicked. The layers started stacking — dark, creamy, crumbly, and sweet. The kids gathered around the counter, their little fingers itching to help crush the cookies. By the time we added the little pumpkin candies and gummy worms on top, they were already calling it the “dirt cup.” It wasn’t fancy. It wasn’t planned. But that’s exactly why it became our favorite fall tradition. These no-bake pumpkin dirt pudding cups are proof that the best recipes come from necessity, not perfection.
Why You’ll Love This Recipe
Let me tell you why this one’s a keeper. I’ve made these no-bake pumpkin dirt pudding cups for everything from classroom parties to Friendsgiving dinners, and they never fail to disappear. Here’s what makes them special:
- No Oven Required: Seriously. Zero baking. If you can stir and layer, you can make this dessert. Perfect for those days when you just don’t want to heat up the kitchen.
- Simple Ingredients: Most of what you need is probably in your pantry right now. Pudding mix, cream cheese, milk, cookies, and your favorite fall candies. No fancy grocery store runs.
- Perfect for Fall Gatherings: These little cups are the star of any Halloween party, Thanksgiving dessert table, or cozy family movie night. They look adorable and taste even better.
- Crowd-Pleaser: Kids go crazy for the gummy worms and pumpkin candies. Adults love the creamy, pumpkin-spiced layers. It’s a win-win for everyone.
- Unbelievably Delicious: The combination of velvety pumpkin pudding, tangy cream cheese, and crunchy chocolate cookie crumbs is pure comfort. It’s like eating a pumpkin pie and a chocolate truffle at the same time.
What sets this recipe apart from other dirt cups is the pumpkin layer. Instead of just using chocolate pudding, I blend in real pumpkin puree and warm fall spices. It gives the dessert a richer, more complex flavor that feels like autumn in a cup. Plus, the cream cheese layer adds a tangy surprise that cuts through the sweetness. It’s not just another version of dirt cups — it’s the best version.
Honestly, this recipe is the kind that makes you close your eyes after the first bite. It’s comfort food reimagined — faster, easier, but with the same soul-soothing satisfaction. Perfect for impressing guests without any stress, or turning a simple Tuesday into something memorable.
What Ingredients You Will Need
This recipe uses simple, wholesome ingredients to deliver bold fall flavor and satisfying texture without any fuss. Most of these are pantry staples, especially if you love fall baking.
- For the Pumpkin Pudding Layer:
- 1 package (3.4 oz) instant vanilla pudding mix
- 1 cup cold milk (whole milk works best for creaminess)
- 1/2 cup pumpkin puree (not pumpkin pie filling)
- 1 teaspoon pumpkin pie spice
- 1/2 teaspoon vanilla extract
- For the Cream Cheese Layer:
- 4 oz cream cheese, softened to room temperature
- 1/4 cup powdered sugar
- 1/2 cup heavy whipping cream
- 1/2 teaspoon vanilla extract
- For the “Dirt” and Topping:
- 1 package (14 oz) chocolate sandwich cookies (like Oreos)
- 3 tablespoons unsalted butter, melted
- Gummy worms (for the “patch” effect)
- Pumpkin-shaped candies (like candy corn pumpkins or mellowcreme pumpkins)
- Optional: crushed graham crackers for extra texture
A few notes on ingredients. I recommend using Philadelphia cream cheese for the smoothest, creamiest texture. For the pumpkin puree, look for 100% pure pumpkin — Libby’s is my go-to brand. The pumpkin pie spice adds that warm, cozy flavor, but you can make your own by mixing cinnamon, nutmeg, ginger, and cloves. If you’re short on time, store-bought is totally fine. For the cookies, regular Oreos work perfectly, but you can use gluten-free chocolate sandwich cookies if needed.
Speaking of substitutions, you can swap the heavy cream for coconut cream if you’re dairy-free. Use a dairy-free cream cheese alternative too. The texture will be slightly different, but still delicious. If you can’t find pumpkin pie spice, just use 1/2 teaspoon cinnamon, 1/4 teaspoon nutmeg, and a pinch of ginger. And if gummy worms aren’t your thing, try using candy corn or even chocolate shavings for the “dirt” effect.
Equipment Needed
You don’t need much for this recipe, which is part of its charm. Here’s what you’ll need:
- Mixing Bowls: At least two medium-sized bowls. One for the pudding, one for the cream cheese layer.
- Electric Hand Mixer or Stand Mixer: Makes whipping the cream cheese layer a breeze. You can do it by hand, but your arm will thank you for using a mixer.
- Food Processor or Rolling Pin: For crushing the cookies into fine crumbs. A food processor gives you the most consistent texture, but a rolling pin and a zip-top bag work just as well. It’s a great way to let the kids help!
- Measuring Cups and Spoons: For accuracy, especially with the spices.
- Spatula: For scraping every last bit of that creamy goodness.
- Small Cups or Jars: I use 8-ounce plastic cups or small mason jars. Clear cups let you see the beautiful layers. You’ll need about 6 to 8 cups, depending on size.
- Piping Bags or Zip-Top Bags: Optional, but they make layering much neater. Just snip off the corner.
If you don’t have a food processor, don’t sweat it. Place the cookies in a sturdy zip-top bag, seal it, and let the kids go to town with a rolling pin. It’s messy, but it’s fun. Plus, the imperfections in the crumb size add to the “dirt” look. I’ve also used a plastic cup to crush cookies in a pinch — just press down firmly.
Preparation Method
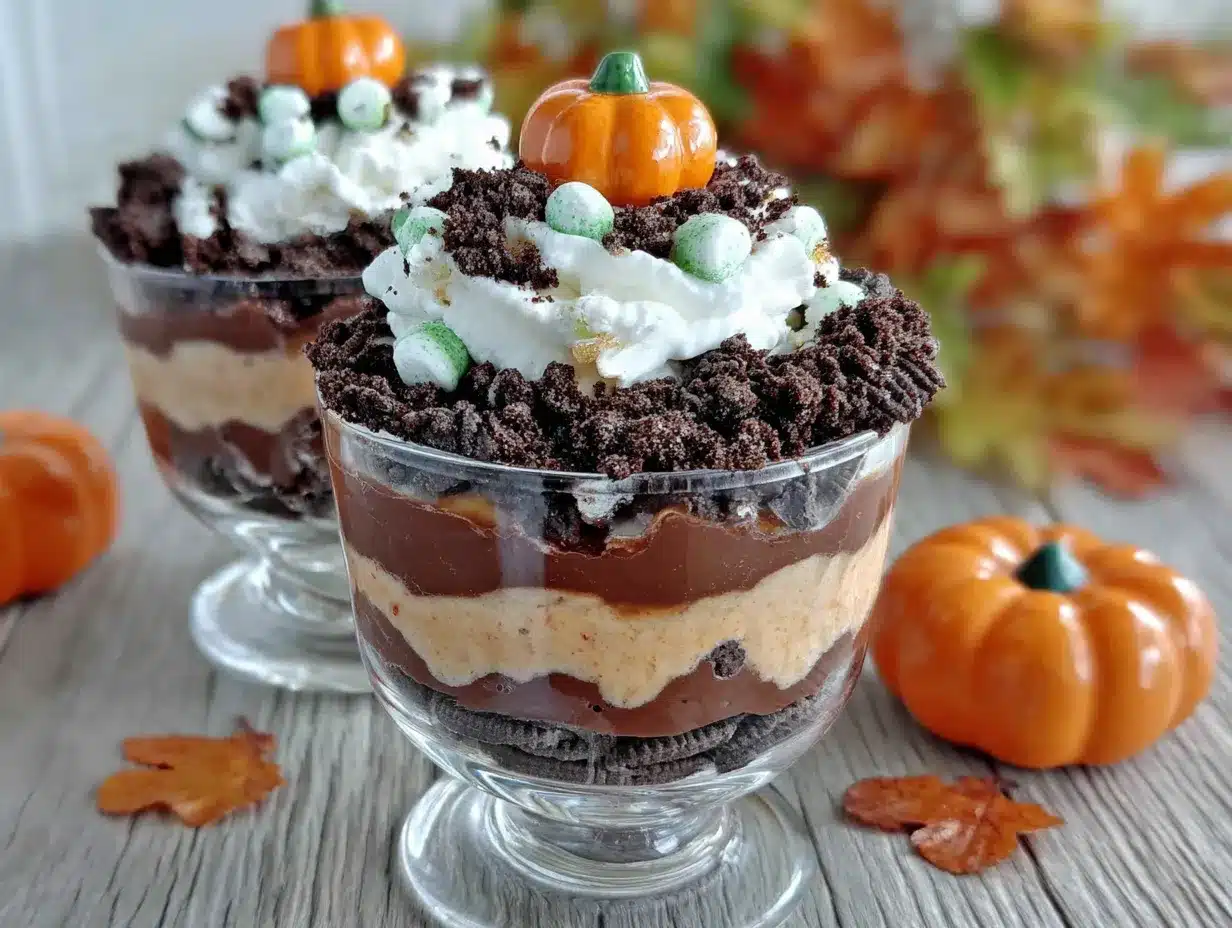
Alright, let’s get to the fun part. Here’s how to make these no-bake pumpkin dirt pudding cups step by step. Trust me, it’s easier than you think.
- Make the Pumpkin Pudding (5 minutes): In a medium bowl, whisk together the instant vanilla pudding mix and cold milk. Whisk for about 2 minutes until it starts to thicken. Then, fold in the pumpkin puree, pumpkin pie spice, and vanilla extract. Mix until smooth and fully combined. The mixture will be thick and creamy. Set it aside to set for about 5 minutes while you work on the next layer.
- Prepare the Cream Cheese Layer (10 minutes): In a separate bowl, beat the softened cream cheese with an electric mixer until smooth and fluffy. Add the powdered sugar and vanilla extract, and beat until combined. In another small bowl, whip the heavy cream until stiff peaks form — this takes about 3-4 minutes with a mixer. Gently fold the whipped cream into the cream cheese mixture until smooth. Be careful not to overmix; you want it light and airy. This layer adds that tangy, creamy surprise that makes every bite interesting.
- Crush the Cookies (5 minutes): Place the chocolate sandwich cookies in a food processor and pulse until they become fine crumbs. If you’re using a rolling pin, place the cookies in a zip-top bag and crush them until you have a mix of fine crumbs and a few slightly larger pieces. The texture should resemble dark, crumbly soil. Stir in the melted butter until the crumbs are evenly moistened. This helps them hold together slightly, giving you that “dirt” texture.
- Layer the Cups (10 minutes): Now for the fun part — assembly! Grab your cups or jars. Start with a layer of the cookie crumbs at the bottom — about 2 tablespoons per cup. Press them down gently with the back of a spoon. Next, add a layer of the cream cheese mixture — about 2 tablespoons. Then, add a layer of the pumpkin pudding — another 2 to 3 tablespoons. Repeat the layers if your cups are tall enough. I usually do two rounds of each layer. End with a generous topping of cookie crumbs on top. Reserve a few crumbs for garnish later.
- Add the Decorations (5 minutes): This is where the magic happens. Stick a few gummy worms into the top layer of crumbs, letting them peek out as if they’re crawling out of the dirt. Place 2-3 pumpkin candies on top. If you’re feeling extra festive, add a small mint leaf or a tiny piece of green fondant to look like a pumpkin vine. The kids absolutely love this part. It’s like creating a tiny edible garden.
- Chill and Set (at least 2 hours): Place the assembled cups in the refrigerator for at least 2 hours, or overnight. This allows the layers to set and the flavors to meld together. The pudding will firm up, and the cream cheese layer will become perfectly chilled. Don’t skip this step — it’s crucial for the texture. The cups taste even better the next day, if you can wait that long.
One thing I learned the hard way — don’t overfill the cups. Leave about half an inch of space at the top for the crumb and candy topping. Otherwise, it gets messy when you try to eat them. Also, if you’re making these for a party, you can prep everything the night before and assemble them just before serving. The cookie crumbs stay crunchier that way.
Cooking Tips & Techniques
After making these no-bake pumpkin dirt pudding cups more times than I can count, I’ve picked up a few tricks. Let me share them so you can nail it on your first try.
Room Temperature Cream Cheese is Key: This is non-negotiable. If your cream cheese is cold, you’ll end up with lumps in the cream cheese layer. Let it sit on the counter for about 30 minutes before you start. If you’re in a rush, cut it into small cubes and microwave it for 10 seconds. Just don’t overheat it or it will melt.
Don’t Overmix the Whipped Cream: When you’re folding the whipped cream into the cream cheese, use a gentle hand. Overmixing will deflate the air bubbles and make the layer dense instead of light and fluffy. Fold until just combined — a few streaks are okay.
Crush Cookies to the Right Texture: You want a mix of fine crumbs and slightly larger pieces. If you pulverize them into dust, the “dirt” won’t have any texture. If you leave them too chunky, it won’t look like soil. Aim for a consistency similar to coarse sand. I like to leave a few small chunks for that authentic dirt look.
Chill Thoroughly: I know it’s tempting to dig in right away, but patience pays off. The layers need time to set. If you serve them too soon, the pudding will be runny and the layers will blend together. Two hours is the minimum, but overnight is best. The flavors deepen and the texture becomes almost mousse-like.
Make It Ahead: This is my favorite tip. You can prepare the individual components — the pudding, the cream cheese mixture, and the cookie crumbs — up to two days in advance. Store them in separate containers in the fridge. When you’re ready to serve, just layer and decorate. It takes less than 15 minutes. Perfect for busy holiday schedules.
One Mistake I Made: The first time I made these, I used pumpkin pie filling instead of pure pumpkin puree. The pudding was way too sweet and had a weird gelatinous texture. Learn from my mistake — always use 100% pure pumpkin puree. It gives you that earthy, autumnal flavor without the extra sugar and spices.
Variations & Adaptations
This recipe is incredibly versatile. Here are some ways to make it your own:
- Gluten-Free Version: Use gluten-free chocolate sandwich cookies. Brands like Glutino or Kinnikinnick make great options. The rest of the ingredients are naturally gluten-free, so this is an easy swap.
- Dairy-Free Version: Substitute the cream cheese with a dairy-free alternative like Kite Hill or Violife. Use coconut cream instead of heavy whipping cream, and almond or oat milk for the pudding. The texture will be slightly less rich, but still delicious.
- Pumpkin Spice Lovers: Amp up the spice by adding an extra teaspoon of pumpkin pie spice to the cookie crumbs. You can also mix a pinch of cinnamon into the cream cheese layer for a warm, cozy flavor.
- Chocolate Lovers: Use chocolate pudding mix instead of vanilla for an extra chocolatey base. You can also add a layer of melted dark chocolate between the cream cheese and pudding layers. Trust me, it’s divine.
- Kid-Friendly Fun: Let the kids go wild with the decorations. Use candy eyes, spiders, or even small plastic toys for a Halloween-themed version. You can also use different colored gummy worms or add a drizzle of caramel sauce on top.
- Individual vs. Large Dish: Instead of individual cups, you can make this in a 9×13-inch baking dish. Just layer everything and top with cookie crumbs. It’s great for potlucks or large gatherings. Just scoop and serve.
I once tried a version with crushed ginger snaps instead of chocolate cookies. It gave the dessert a spicy, molasses-like flavor that paired beautifully with the pumpkin. It’s not for everyone, but if you’re a ginger snap fan, give it a shot. You can also swap the pumpkin candies for candied pecans or toasted coconut flakes for a different texture.
Serving & Storage Suggestions
These no-bake pumpkin dirt pudding cups are best served cold, straight from the fridge. The contrast between the chilled creamy layers and the crunchy cookie topping is pure magic. I like to serve them in clear plastic cups or small mason jars so everyone can see the pretty layers.
For a fall brunch or Halloween party, set up a “dirt cup bar” with different toppings. Offer extra gummy worms, pumpkin candies, crushed graham crackers, and even a bowl of whipped cream. Let guests customize their own cups. It’s interactive and always a hit. Pair these cups with a warm batch of honey bourbon baked beans for a sweet and savory party spread, or serve them alongside a fresh caprese skewer for a lighter appetizer balance.
Storage: Store any leftover cups in the refrigerator, covered with plastic wrap or a lid. They will keep for up to 4 days. The cookie crumbs may soften slightly over time, but the flavor actually improves. I actually prefer them on day two — the flavors meld together and the texture becomes even creamier.
Freezing: You can freeze these cups for up to a month. Wrap each cup tightly in plastic wrap and then in foil. Thaw them in the refrigerator overnight before serving. The texture might be slightly different after freezing, but they’re still delicious. I wouldn’t recommend freezing them with the gummy worms on top, as they can become hard and chewy. Add fresh decorations after thawing.
Reheating: These are meant to be served cold, so no reheating needed. If you’ve frozen them, just let them thaw in the fridge. If you want a slightly softer texture, let them sit at room temperature for 10 minutes before serving.
One more tip — if you’re making these for a party, assemble them no more than 24 hours in advance to keep the cookie crumbs as crunchy as possible. The gummy worms and pumpkin candies should be added just before serving to keep them looking fresh and vibrant.
Nutritional Information & Benefits
Here’s a rough estimate of the nutritional content per serving (based on 8 servings):
| Nutrient | Amount per Serving |
|---|---|
| Calories | 380 |
| Total Fat | 22g |
| Saturated Fat | 12g |
| Cholesterol | 45mg |
| Sodium | 350mg |
| Total Carbohydrates | 42g |
| Dietary Fiber | 2g |
| Sugars | 28g |
| Protein | 5g |
| Vitamin A | 45% DV |
| Calcium | 8% DV |
These numbers are estimates and will vary based on the specific brands and ingredients you use. The pumpkin puree is the star here — it’s packed with vitamin A, which supports eye health and immune function. The cream cheese and heavy cream provide calcium and protein, while the cookies add a touch of indulgence. If you’re watching your sugar intake, you can use sugar-free pudding mix and reduce the powdered sugar in the cream cheese layer.
This dessert is not exactly health food, but it’s a treat you can feel good about sharing. It’s a fun, festive way to enjoy the flavors of fall without spending hours in the kitchen. And honestly, a little bit of pumpkin and cream cheese never hurt anyone.
Conclusion
These no-bake pumpkin dirt pudding cups are everything I love about fall desserts. They’re easy, fun, and absolutely delicious. No oven required, no complicated techniques, and you can make them with the kids. The layers of creamy pumpkin pudding, tangy cream cheese, and crunchy chocolate cookie crumbs are pure comfort in a cup.
Whether you’re making them for a Halloween party, a Thanksgiving dessert table, or just a cozy night in, these little cups never disappoint. They’re the kind of recipe that makes you look like a hero with minimal effort. And honestly, that’s my favorite kind of recipe.
I’d love to hear how yours turn out! Did you add any fun toppings? Did the kids help crush the cookies? Drop a comment below and let me know. Share this recipe with your friends and family — they’ll thank you for it. And if you’re looking for more easy fall desserts, check out our no-bake firecracker cheesecake bars or our moist lemon raspberry pound cake for more sweet inspiration. Happy fall baking, friends!
Frequently Asked Questions
Can I make these pumpkin dirt pudding cups ahead of time?
Absolutely! You can assemble them up to 24 hours in advance. Just wait to add the gummy worms and pumpkin candies until right before serving to keep them looking fresh. The flavors actually get better overnight.
Can I use homemade pudding instead of instant?
Yes, you can use homemade vanilla pudding. Just make sure it’s completely cooled and thickened before layering. Instant pudding is quicker and sets faster, but homemade works beautifully too.
How do I make this recipe gluten-free?
Use gluten-free chocolate sandwich cookies. Most other ingredients are naturally gluten-free, but double-check your pudding mix and cream cheese labels to be safe. It’s an easy swap!
Can I use a different type of cookie for the “dirt”?
Definitely! Ginger snaps, chocolate wafer cookies, or even crushed graham crackers work well. Each gives a different flavor profile. Ginger snaps add a spicy kick, while graham crackers give a milder, sweeter taste.
How long do these pudding cups last in the fridge?
They’ll keep for up to 4 days in an airtight container in the refrigerator. The cookie crumbs will soften over time, but the flavor will still be delicious. I actually prefer them on day two!
Pin This Recipe!
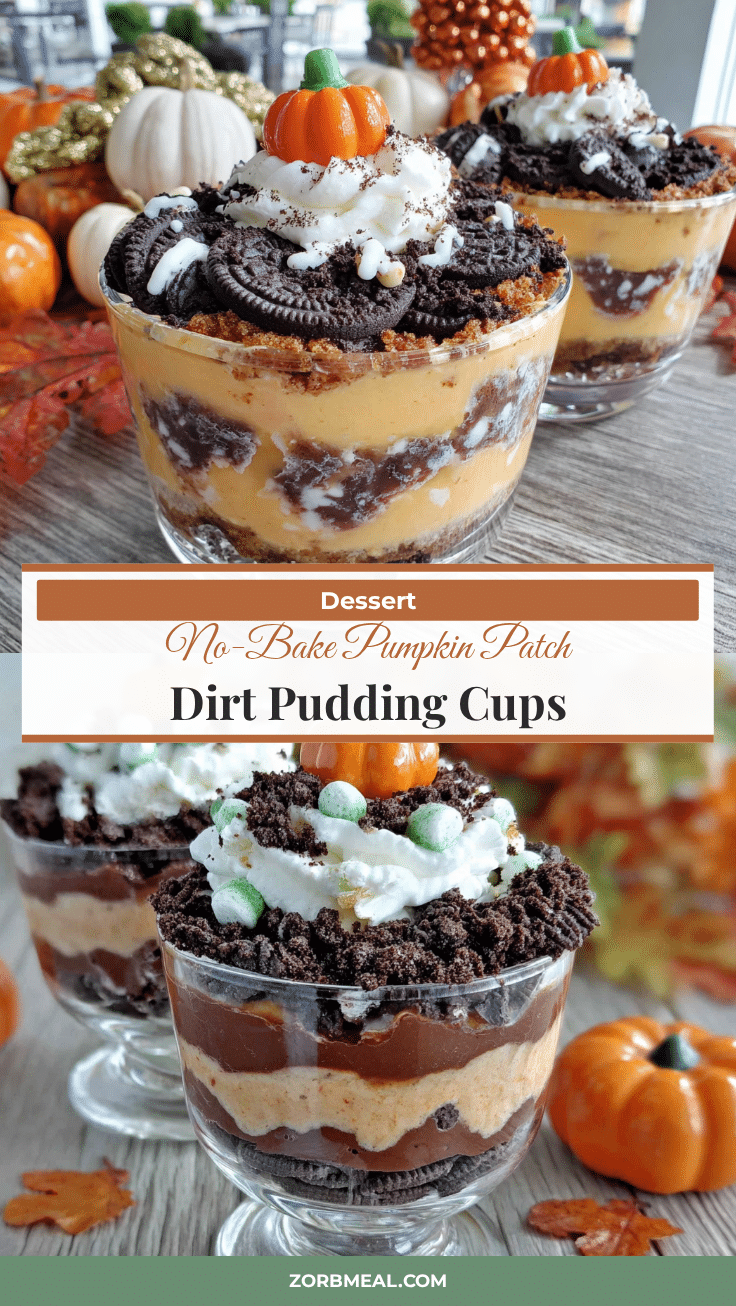
No-Bake Pumpkin Dirt Pudding Cups: Easy Fall Dessert
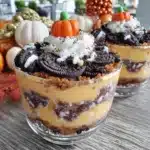
These no-bake pumpkin dirt pudding cups are a fun and easy fall dessert made with layers of creamy pumpkin pudding, tangy cream cheese, and crunchy chocolate cookie crumbs. Perfect for Halloween parties, Thanksgiving, or cozy family nights.
- Prep Time: 20 minutes
- Cook Time: 0 minutes
- Total Time: 2 hours 20 minutes (includes chilling)
- Yield: 8 servings 1x
- Category: Dessert
- Cuisine: American
Ingredients
- 1 package (3.4 oz) instant vanilla pudding mix
- 1 cup cold milk (whole milk works best)
- 1/2 cup pumpkin puree (not pumpkin pie filling)
- 1 teaspoon pumpkin pie spice
- 1/2 teaspoon vanilla extract
- 4 oz cream cheese, softened to room temperature
- 1/4 cup powdered sugar
- 1/2 cup heavy whipping cream
- 1/2 teaspoon vanilla extract
- 1 package (14 oz) chocolate sandwich cookies (like Oreos)
- 3 tablespoons unsalted butter, melted
- Gummy worms (for topping)
- Pumpkin-shaped candies (like candy corn pumpkins or mellowcreme pumpkins)
- Optional: crushed graham crackers for extra texture
Instructions
- Make the Pumpkin Pudding: In a medium bowl, whisk together the instant vanilla pudding mix and cold milk for about 2 minutes until it starts to thicken. Fold in the pumpkin puree, pumpkin pie spice, and vanilla extract. Mix until smooth. Set aside to set for about 5 minutes.
- Prepare the Cream Cheese Layer: In a separate bowl, beat the softened cream cheese with an electric mixer until smooth and fluffy. Add the powdered sugar and vanilla extract, and beat until combined. In another small bowl, whip the heavy cream until stiff peaks form (about 3-4 minutes). Gently fold the whipped cream into the cream cheese mixture until smooth and light.
- Crush the Cookies: Place the chocolate sandwich cookies in a food processor and pulse until they become fine crumbs. Alternatively, place cookies in a zip-top bag and crush with a rolling pin. Stir in the melted butter until the crumbs are evenly moistened.
- Layer the Cups: In small cups or jars (about 6-8), start with a layer of cookie crumbs (about 2 tablespoons). Press down gently. Add a layer of cream cheese mixture (about 2 tablespoons), then a layer of pumpkin pudding (about 2-3 tablespoons). Repeat layers if cups are tall enough. End with a generous topping of cookie crumbs.
- Add the Decorations: Stick a few gummy worms into the top layer of crumbs, letting them peek out. Place 2-3 pumpkin candies on top.
- Chill and Set: Refrigerate for at least 2 hours, or overnight, to allow the layers to set and flavors to meld.
Notes
Use room temperature cream cheese to avoid lumps. Don’t overmix the whipped cream; fold gently. Crush cookies to a mix of fine crumbs and slightly larger pieces for texture. Chill for at least 2 hours; overnight is best. For make-ahead, prepare components separately up to 2 days in advance and assemble just before serving. Use 100% pure pumpkin puree, not pumpkin pie filling.
Nutrition
- Serving Size: 1 cup
- Calories: 380
- Sugar: 28
- Sodium: 350
- Fat: 22
- Saturated Fat: 12
- Carbohydrates: 42
- Fiber: 2
- Protein: 5
Keywords: no-bake pumpkin dirt pudding cups, easy fall dessert, pumpkin pudding cups, Halloween dessert, no-bake dessert