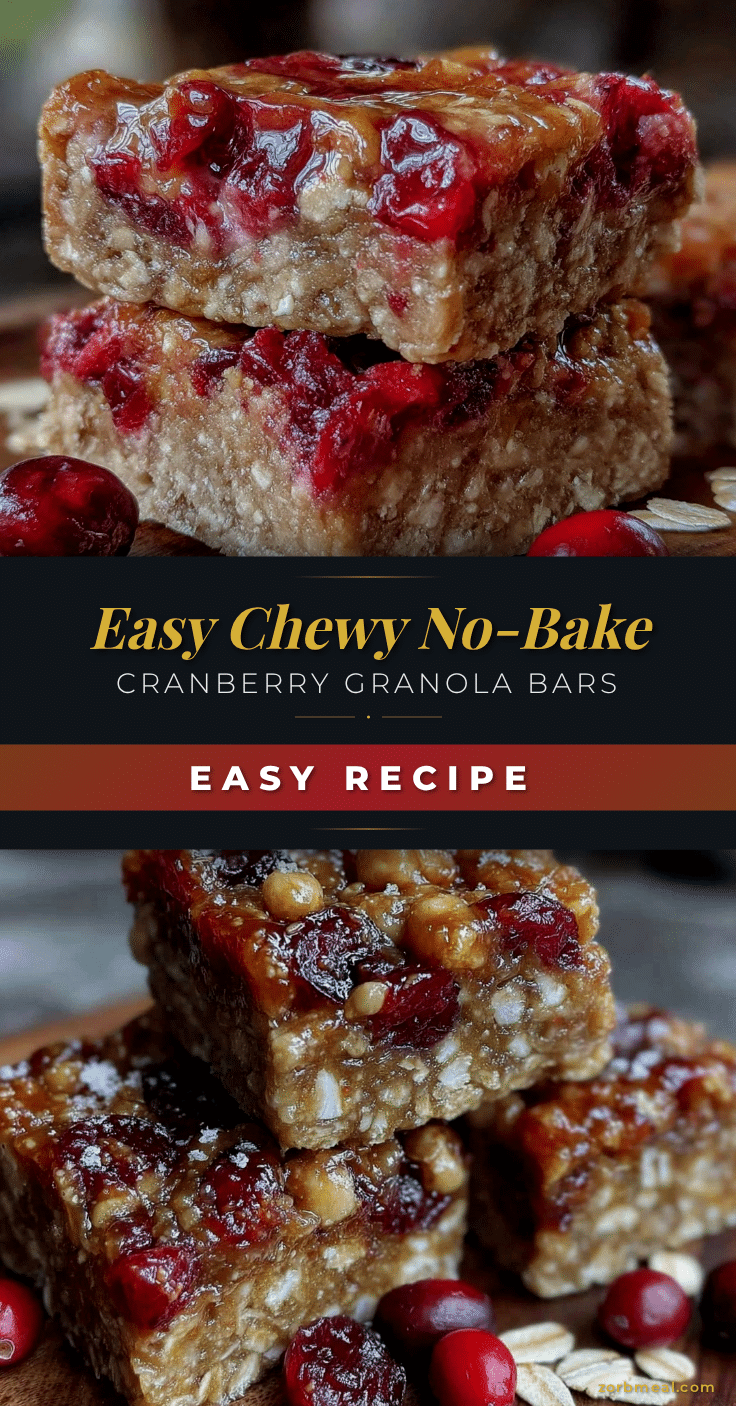
“Hey, you gotta try these!” my coworker said, sliding a homemade granola bar across the break room table. I was skeptical—homemade granola bars? Usually, they’re either crumbly disasters or so sweet they could double as candy. But these bars were different. They had this chewy texture, a little tang from the dried cranberries, and just the right hint of sweetness without any baking fuss. Honestly, I didn’t think an easy no-bake granola bar recipe could taste that good.
That day, I tucked the bar into my bag, planning it as a quick snack for the afternoon slump. By mid-afternoon, I was eyeing it like a prized treasure. The dried cranberries gave a burst of tartness that cut through the natural sweetness of honey and oats—something I never expected from such a simple combination. I ended up making a batch myself that weekend, tweaking the sweetness and adding a touch more cinnamon to suit my taste. Since then, these easy no-bake granola bars with dried cranberries became my go-to snack, especially when I’m rushing out the door or need a quick bite between meetings.
What really sold me was how effortless the process was—no oven, no long wait, just mixing and chilling. It feels like a little kitchen magic that anyone can pull off even on the busiest days. And you know what? They hold up surprisingly well, which means I can pack a couple for my kid’s lunch or stash some in my desk drawer for those emergency snack attacks.
Now, whenever I smell that hint of cinnamon and honey mixing with oats, it takes me back to that moment of discovery. These bars aren’t just snacks—they’re little moments of calm in the chaos, a simple pleasure that’s easy to trust.
Why You’ll Love This Recipe
After trying countless granola bar recipes, I can honestly say this easy no-bake granola bar with dried cranberries stands out for a bunch of reasons that make it a staple in my kitchen.
- Quick & Easy: You can whip these bars together in under 15 minutes, no baking required. Perfect for busy mornings or last-minute snack preps.
- Simple Ingredients: No need to hunt for fancy items. Pantry staples like rolled oats, honey, and dried cranberries do all the heavy lifting.
- Perfect for On-The-Go: Whether it’s a hiking trip, school lunch, or just a mid-afternoon pick-me-up, these bars travel well without crumbling.
- Crowd-Pleaser: I’ve shared these at potlucks and casual gatherings, and they’re always snapped up quickly—kids and adults alike seem to love the chewy, tangy flavor combo.
- Unbelievably Delicious: The chewy texture combined with bursts of tart dried cranberries and a touch of cinnamon makes these bars feel like a treat but without the sugar overload.
What sets this recipe apart is the balance of flavors and textures—no greasy or overly sweet bars here. The secret’s in the binding mixture: a little peanut butter and honey combo that holds everything together without turning the bars rock-hard or too sticky. I’m also a fan of using small-curd cottage cheese in some versions to sneak in extra protein without messing with the taste. If you want to tweak things, swapping in almond butter or adding chia seeds amps up the nutrition without sacrificing the chewiness.
Honestly, these bars became my favorite snack because they satisfy that craving for something wholesome but still a little indulgent. They’re the kind of recipe that lets you enjoy a quick bite and actually feel good about it.
What Ingredients You Will Need
This recipe uses simple, wholesome ingredients to deliver bold flavor and satisfying texture without the fuss. Most are pantry staples, so you might already have them on hand.
- Rolled oats (2 cups / 180g) – the base of the bars, providing that classic granola chew. Quick oats can work but might make the bars less textured.
- Dried cranberries (1/2 cup / 70g) – for bursts of tartness and color; look for unsweetened if you want to cut back on sugar.
- Natural peanut butter (1/2 cup / 125g) – creamy and lightly salted; I prefer Smucker’s Natural for texture and flavor.
- Honey (1/3 cup / 113g) – acts as the sweetener and binder; raw honey adds a floral note.
- Vanilla extract (1 tsp) – adds depth and aroma.
- Ground cinnamon (1/2 tsp) – a warm spice that complements the cranberries beautifully.
- Chia seeds (optional, 2 tbsp) – for extra fiber and crunch.
- Salt (a pinch) – enhances all the flavors.
If you want to swap peanut butter, almond or cashew butter works great too and gives a slightly different nutty flavor. For a gluten-free option, make sure to use certified gluten-free oats. In summer, I sometimes swap dried cranberries for a mix of dried cherries and apricots for a fruitier twist.
Equipment Needed
- Mixing bowl: A large bowl to combine the ingredients comfortably.
- Measuring cups and spoons: For precise ingredient amounts, especially for honey and peanut butter.
- Wooden spoon or spatula: To mix sticky ingredients without much mess.
- 8×8-inch baking pan (20×20 cm): For shaping the bars. If you don’t have one, a loaf pan or even a rimmed baking sheet works.
- Parchment paper: To line the pan for easy removal of the bars.
- Plastic wrap or cling film: To cover the bars while chilling.
I started making these bars with just a bowl and spatula and found parchment paper essential for peeling the bars out cleanly. If you want to get fancy, a silicone baking mat also does the job well and is reusable. I don’t bother with a food processor for this recipe; mixing by hand is easier and keeps the oats from turning to dust.
Preparation Method
- Line your baking pan: Use parchment paper to cover an 8×8-inch (20×20 cm) pan, letting some overhang on the sides for easy lifting later. This step saves you from sticky fingers and scrambling to get the bars out.
- Mix the wet ingredients: In a large bowl, combine 1/2 cup (125g) natural peanut butter and 1/3 cup (113g) honey. Microwave for about 20 seconds to soften and make mixing easier. Stir in 1 tsp vanilla extract and 1/2 tsp ground cinnamon. This warm mixture smells irresistible already—like cozy mornings!
- Add the dry ingredients: Stir in 2 cups (180g) rolled oats, 1/2 cup (70g) dried cranberries, a pinch of salt, and optional 2 tbsp chia seeds. Mix thoroughly until every oat is coated. If the mixture feels too dry, add a teaspoon of water or a bit more honey. The consistency should be sticky but hold together when pressed.
- Press into the pan: Transfer the mixture into your lined pan. Using a spatula or your hands (lightly wet to prevent sticking), press the mixture firmly and evenly. The firmer you pack it, the better the bars will hold.
- Chill: Cover with plastic wrap and refrigerate for at least 2 hours, or until firm. Overnight chilling is even better if you have time—it helps the flavors meld and makes cutting cleaner.
- Cut into bars: Lift the chilled block from the pan using the parchment overhang. Place on a cutting board and slice into 8 or 10 bars with a sharp knife. If the knife sticks, warm it under hot water and dry before slicing again.
- Store and enjoy: Keep bars in an airtight container at room temperature for up to 3 days or refrigerate for up to a week. They’re perfect for grabbing on busy mornings or packing in lunchboxes.
Pro tip: If you want clean edges, trim the bars slightly before cutting individual pieces. Also, don’t skip microwaving the peanut butter and honey—it makes mixing and pressing much easier.
Cooking Tips & Techniques
Making no-bake granola bars sounds simple, but a few tricks can make the difference between crumbly clumps and perfect bars.
- Warm the binder: Heating the peanut butter and honey softens them, making the mixture easier to combine and helping the bars hold their shape.
- Press firmly: Don’t be shy with packing the mixture into the pan. The tighter, the better—loose pressing leads to crumbly bars.
- Use parchment paper: This is a lifesaver for removing bars cleanly without breaking them.
- Cut when cold: Bars are easier to slice once thoroughly chilled. If you cut too soon, they might crumble or stick.
- Don’t skip salt: A pinch enhances all the flavors and balances the sweetness.
One time, I forgot to microwave the peanut butter and honey and ended up with a dry, crumbly mess that took forever to press. Lesson learned! Also, mixing by hand feels more natural here—you can tell when the oats are evenly coated and adjust the texture as you go. Multitasking tip: prep the bars while your morning coffee brews or while catching up on emails—the whole process fits nicely into a short break.
Variations & Adaptations
This recipe is flexible and welcoming to all sorts of tweaks depending on your taste or dietary needs.
- Nut-free option: Swap peanut butter for sunflower seed butter or tahini to keep it allergy-friendly without losing creaminess.
- Seasonal fruit twist: Replace dried cranberries with chopped dried apricots, cherries, or even freeze-dried strawberries for a pop of seasonal flavor.
- Chocolate lover’s version: Stir in 1/4 cup dark chocolate chips or drizzle melted chocolate on top after chilling. Just don’t add too early or the bars won’t set properly.
- Boost the protein: Mix in 2 tbsp of your favorite protein powder or swap peanut butter for a higher-protein nut butter.
- Spice it up: Add a pinch of ground ginger or nutmeg for a warm, spicy undertone that pairs beautifully with cranberries.
Personally, I once made a batch using almond butter and added toasted coconut flakes—my family loved the tropical vibe. You can even experiment with cooking methods by freezing the bars instead of refrigerating for a firmer bite, especially great in summer months.
Serving & Storage Suggestions
These easy no-bake granola bars are best served chilled or at room temperature. They hold their shape well, making them perfect for packing in lunchboxes or taking on hikes.
- Serving ideas: Pair with a glass of cold milk, a cup of coffee, or your favorite tea for a balanced snack.
- Complementary dishes: For a wholesome breakfast spread, add alongside fresh fruit and yogurt or with a savory dip like the creamy spinach artichoke dip for a fun contrast of flavors.
- Storage: Store bars in an airtight container in the refrigerator for up to a week. For longer storage, freeze bars wrapped individually in parchment paper and sealed in a zip-top bag for up to 3 months.
- Reheating: These bars are best enjoyed cold or at room temp, but if you prefer them slightly warm, microwave for 10-15 seconds—just don’t overdo it or they’ll get too soft.
- Flavor development: Letting the bars sit overnight allows the oats and cranberries to soak up the honey and peanut butter flavors, making them even tastier.
Nutritional Information & Benefits
Each granola bar (makes about 8 bars) contains roughly:
| Calories | 190-210 |
|---|---|
| Protein | 5g |
| Fat | 8g (mostly healthy fats) |
| Carbohydrates | 26g |
| Fiber | 4g |
| Sugar | 10g (mostly natural from honey and cranberries) |
The oats provide whole grain fiber for sustained energy, while peanut butter adds heart-healthy fats and plant protein. Dried cranberries contribute antioxidants and a touch of tartness without excessive sugar. This recipe is naturally gluten-free if you choose certified oats and nut butter without additives.
For those watching sugar intake, you can reduce honey slightly or opt for unsweetened dried fruit. These bars are a wholesome snack that balances taste and nutrition, especially handy when you want a quick energy boost without processed junk.
Conclusion
Easy no-bake granola bars with dried cranberries have earned their place in my snack rotation because they’re simple, satisfying, and forgiving. Whether you’re a snack hoarder or just someone who needs quick bites between errands, this recipe adapts to your pace and pantry.
Feel free to tweak the mix-ins or nut butter to suit your cravings. I love that these bars let me control the sugar and texture, unlike store-bought versions that sometimes feel overly sweet or dry. They’ve saved me on hectic mornings and made me look like I put in way more effort than I actually did.
If you enjoy easy-to-make snacks, you might appreciate the creamy comfort of creamy cheesesteak dip or the fun crowd-pleasing vibes of a layered taco dip for your next gathering.
Give these bars a try—you might find yourself making them just as often as I do. And when you do, I’d love to hear how you customize them to your taste!
FAQs About Easy No-Bake Granola Bars with Dried Cranberries
Can I use quick oats instead of rolled oats?
Yes, but rolled oats provide a better chewy texture. Quick oats may make the bars softer and less structured.
How long do these bars last?
Stored in an airtight container in the fridge, they keep well for up to a week. You can freeze them for up to 3 months.
Can I substitute honey with maple syrup?
Absolutely! Maple syrup works well as a vegan alternative, though the flavor will be slightly different.
Is it possible to add nuts or seeds?
Yes, adding chopped almonds, walnuts, or sunflower seeds adds crunch and nutrition. Just keep the total dry ingredients balanced.
What’s the best way to prevent bars from sticking?
Line your pan with parchment paper and lightly grease it if needed. Also, pressing the mixture firmly and chilling thoroughly helps prevent sticking.
Pin This Recipe!
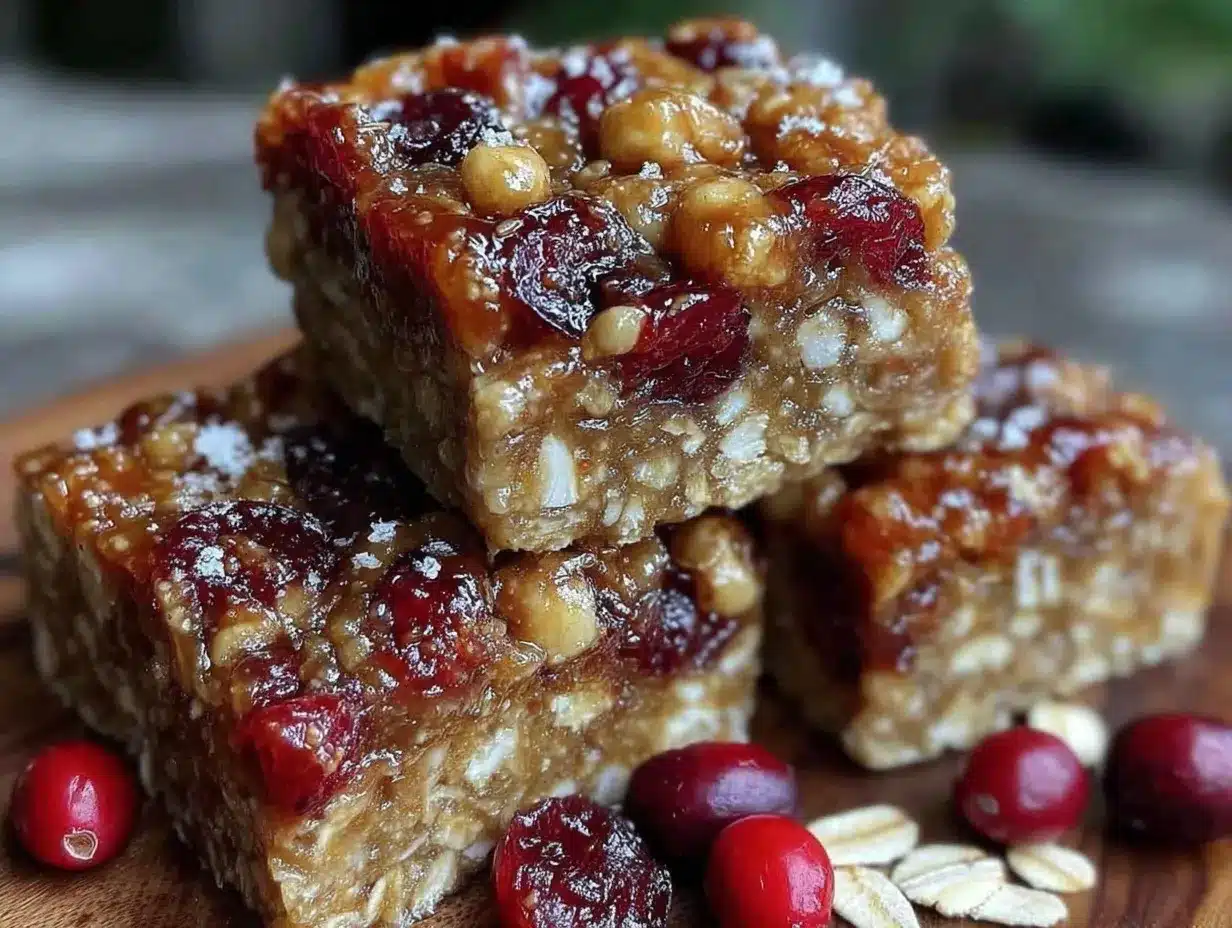
Easy No-Bake Granola Bars with Dried Cranberries
These chewy no-bake granola bars combine rolled oats, dried cranberries, peanut butter, and honey for a quick, healthy snack with a perfect balance of sweetness and tartness.
- Prep Time: 10 minutes
- Cook Time: 0 minutes
- Total Time: 2 hours 10 minutes
- Yield: 8-10 bars 1x
- Category: Snack
- Cuisine: American
Ingredients
- 2 cups (180g) rolled oats
- 1/2 cup (70g) dried cranberries
- 1/2 cup (125g) natural peanut butter
- 1/3 cup (113g) honey
- 1 tsp vanilla extract
- 1/2 tsp ground cinnamon
- 2 tbsp chia seeds (optional)
- Pinch of salt
Instructions
- Line an 8×8-inch (20×20 cm) baking pan with parchment paper, leaving some overhang for easy lifting.
- In a large bowl, combine 1/2 cup natural peanut butter and 1/3 cup honey. Microwave for about 20 seconds to soften.
- Stir in 1 tsp vanilla extract and 1/2 tsp ground cinnamon into the warm mixture.
- Add 2 cups rolled oats, 1/2 cup dried cranberries, a pinch of salt, and optional 2 tbsp chia seeds. Mix thoroughly until all oats are coated. If too dry, add a teaspoon of water or more honey.
- Transfer mixture to the lined pan and press firmly and evenly using a spatula or lightly wet hands.
- Cover with plastic wrap and refrigerate for at least 2 hours or overnight for best results.
- Lift the chilled block using parchment overhang and cut into 8 to 10 bars with a sharp knife. Warm the knife under hot water if it sticks.
- Store bars in an airtight container at room temperature for up to 3 days or refrigerate for up to a week.
Notes
Microwaving the peanut butter and honey softens them for easier mixing and pressing. Press the mixture firmly into the pan to avoid crumbly bars. Chill thoroughly before cutting for clean slices. Optional chia seeds add fiber and crunch. Substitute almond or cashew butter for peanut butter if desired. For nut-free, use sunflower seed butter or tahini.
Nutrition
- Serving Size: 1 bar (if 8 bars per
- Calories: 200
- Sugar: 10
- Sodium: 50
- Fat: 8
- Saturated Fat: 1.5
- Carbohydrates: 26
- Fiber: 4
- Protein: 5
Keywords: no-bake granola bars, healthy snack, dried cranberries, peanut butter bars, easy snack recipe, gluten-free granola bars